Having gridlines can be really helpful for making sure that all of your design elements are where you want them to be.
To use gridlines in Canva, click on the button to add guides within the File menu. If you have a specific grid you want to use, customize your gridlines to determine your number of columns and rows.
Let’s talk about how to do this, step-by-step:
How to Activate Guides in Canva
Canva has built in gridlines you can use for your design. These are called “guides” within the Canva platform. We’ll talk about an alternate way to add gridlines to your art as well, so be sure to stay tuned!
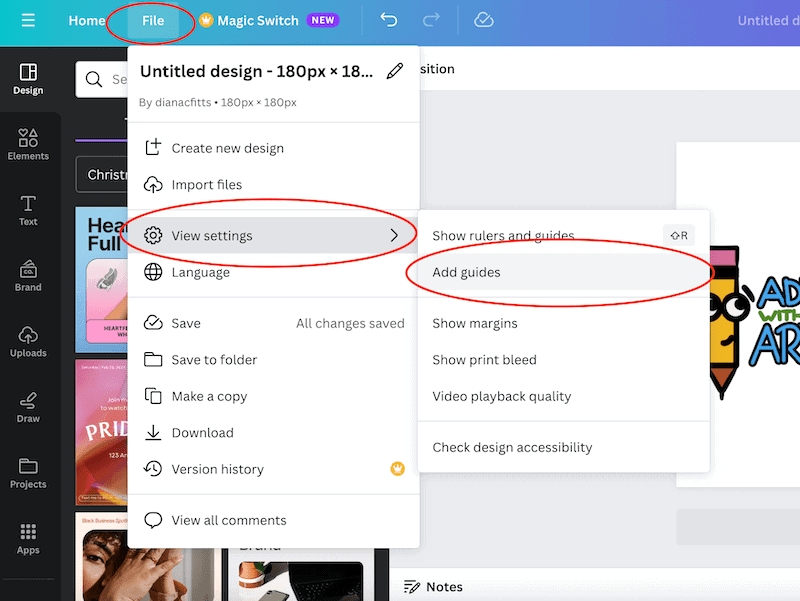
1. Open the File Menu, View Settings, and Add Guides

2. Choose your guides, or customize them
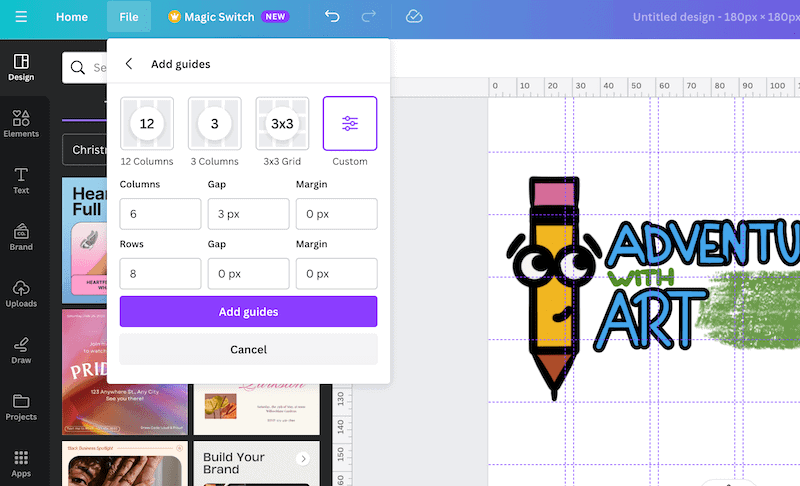

Go ahead and customize your guides as needed to create the perfect gridlines for your Canva project!
While this is the easiest way to add gridlines in Canva, there is another way as well. Depending on your project, you may prefer it, so let’s talk about it!
Another Way to Add Gridlines in Canva
If you want to add gridlines to Canva manually, here’s an alternative!
1. Upload transparent graph paper.
Do a Google search for transparent graph paper and download a free version. You’ll want to actually download a transparent png and not take a screenshot so that you keep the transparency. Here’s one that I have used: https://www.freeiconspng.com/images/grid-png
Once you’ve downloaded a transparent graph paper image, drag and drop it into your Canva work space.
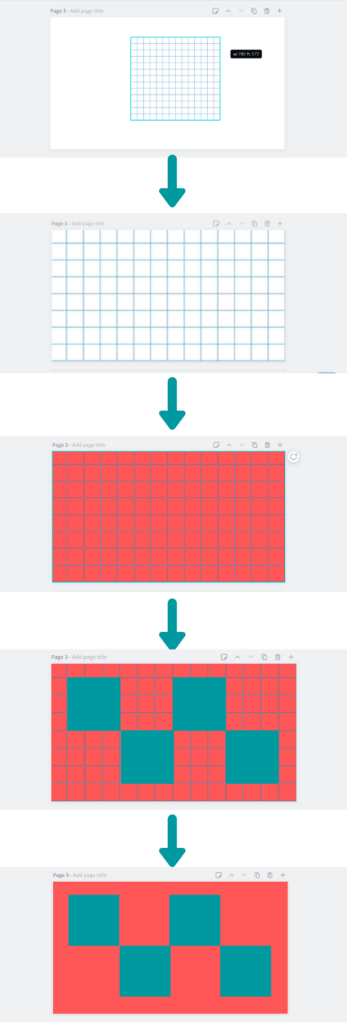
2. Stretch your grid across the background of your design.
Depending on when you add your graph paper image to your design, it might end up in front or behind your other elements.
3. Bring your grid in front of your background and behind your elements
You want to make sure that your grid image is in front of your background. Otherwise, your grid will be hidden by your background.
Make sure that your graph paper is behind all of your other elements though so that you can move them around on top of your grid. Basically, your layers will look like this: Background → Grid image → All Other Elements
4. Lock your grid image
Be sure to lock your grid image so that you’re not accidentally moving it all over the place and screwing up your lines.
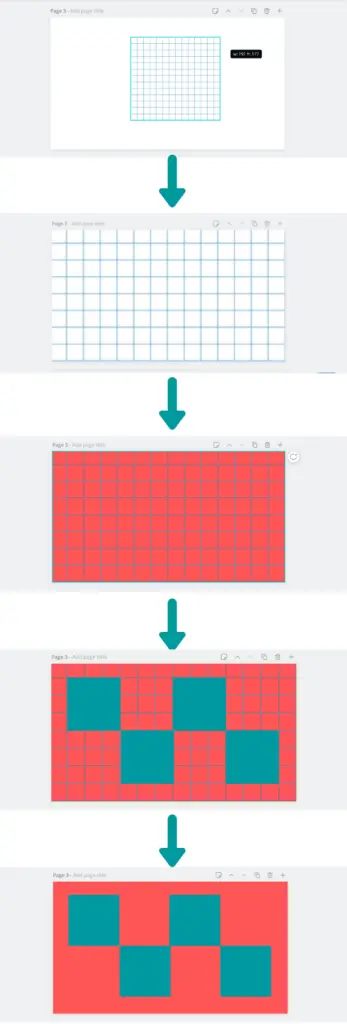
5. Move your elements around as needed
With your grid locked and behind your elements, you can now move things around with a static and stable grid to reference.
When you’re done aligning all of your objects, just delete the image of the graph paper and you’re all done!
A Few Things to Keep In Mind
This alternative isn’t foolproof. Here are a few things to keep in mind as you’re using this technique.
1. Your graph paper is a static image. You’ll want to look around for graph paper that has the size of boxes that you want. Even if you find graph paper that looks like it will work, consider that you’ll probably have to stretch across your whole design, which will enlarge it. To avoid this, you can line up a couple of copies of the graph paper.
2. Sometimes gridlines mess with how you view your design. The nice thing about Canva’s alignment features is that they’re invisible unless you’re using them.
This lets you see what your finished product is looking like before it’s done. Even though we consciously know that gridlines will be deleted, they put a lot of “stuff” into our work. When we delete them, you may feel like your design is emptier than it was before. To avoid this, try deleting and re-adding your gridlines every once in a while so that you can see what your actual finished product is looking like.


Diana has been an artist for over 27 years and has training in drawing, painting, digital drawing and graphic design. Diana’s latest obsession is digitally drawing with Procreate and Procreate Dreams. Diana has experience selling her art across a number of platforms and loves helping other artists learn how to make money from their art as well.