When designing your art in Procreate, there will be times when you want everything to be loosey goosey and wild. There will be other times when you will want more structure and order to your work. This is when alignment becomes really important. Luckily, it’s really easy to align objects in Procreate.
To align your objects in Procreate, click on the Transform tool and choose the Snapping option. Click the toggle to turn on the Snapping setting and make sure that the sliders for Distance and Velocity are used. Move your object around and it will align with the other objects in your Procreate art.
Aligning objects in Procreate is really simple and easy once you get the hang of it. It’s also EXTREMELY useful!
With traditional materials, you always need to have a ruler nearby to make sure that everything is aligned correctly. I don’t know about you, but this has always turned my art session into more of a math session than I usually would like.
With Procreate, you can perfectly align your objects in just a few seconds. No math involved. Simply move your objects around and see how Procreate will automatically align them with the other objects on your canvas.
Easy peasy! So, let’s dive into the process for aligning your objects in Procreate, step-by-step.
1. Select the layer with your desired elements on it
When you move objects around your Procreate canvas, it will only move the objects that are on whatever layer you have selected. So, before you get started, you need to make sure that you have the correct layer selected.
What if the objects you want to align are on multiple layers? That’s ok! You can select multiple layers at once and move the objects within them all at once.
I have a full guide on how to select multiple layers at once in Procreate that you can read for more info.
Important note: while it’s great to be able to move multiple objects all at once, it probably won’t be ideal if you’re trying to align everything.
For alignment purposes, it’s best to move one element at a time so that you can really see where the alignment lines are and get precise results. If you have multiple objects on one layer, we’ll talk about how to isolate your elements so that you can move them one at a time.
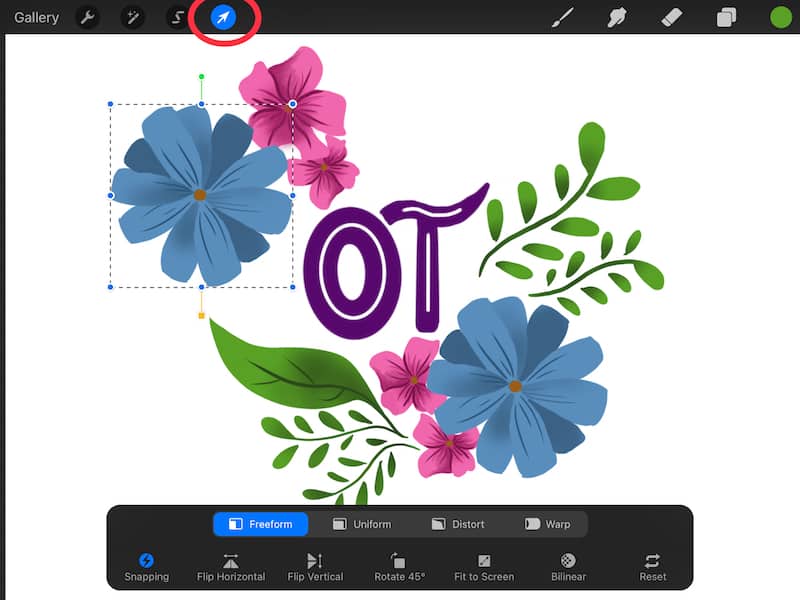
2. Click on the Transform tool in the top menu bar
Once you have your desired layer selected, click on the Transform tool in the top menu bar. The Transform tool is the one that has the arrow icon.

I have a full guide about how to use the Transform tool in Procreate if you want a deep dive into everything that the Transform tool can do. For the purposes of this article, we’ll only be talking about how it can be used to align your objects.
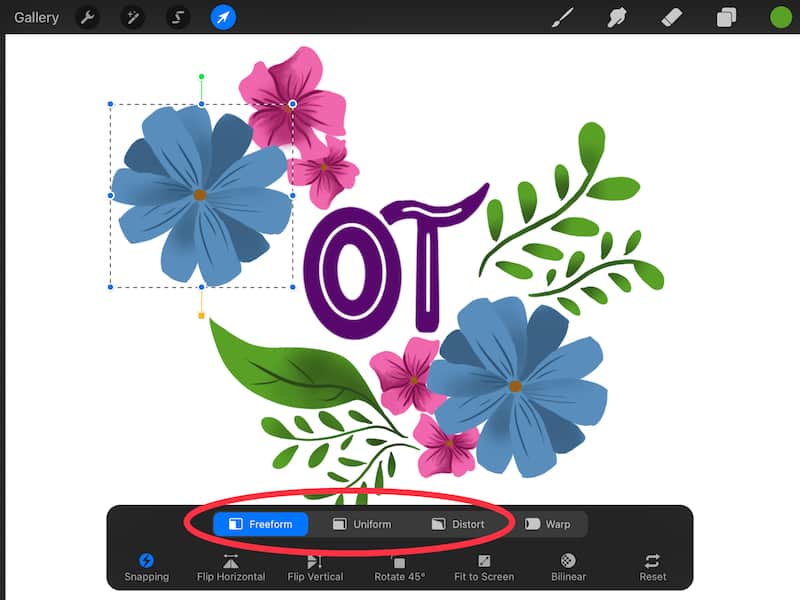
3. Select Freeform, Uniform, or Distort
When using the Transform tool to align your objects in Procreate, you can use 3 of the 4 settings – Freeform, Uniform, or Distort. As long as you have one of those 3 chosen, you’re good to go.
The Warp setting will not allow you to move your object around your canvas so, naturally, it won’t let you align it with anything. No movement=no alignment.


4. Select the Snapping button
As long as you’ve chosen Freeform, Uniform, or Distort, you’ll see the Snapping button on the bottom left of your Transform tool control panel. Click on it to open the Snapping settings.

5. Toggle on Snapping. Toggle on Magnetics, if needed.
You will need to toggle on the Snapping setting in order for any of your alignments to work. If you don’t, you won’t be able to align your objects, so this step is important.
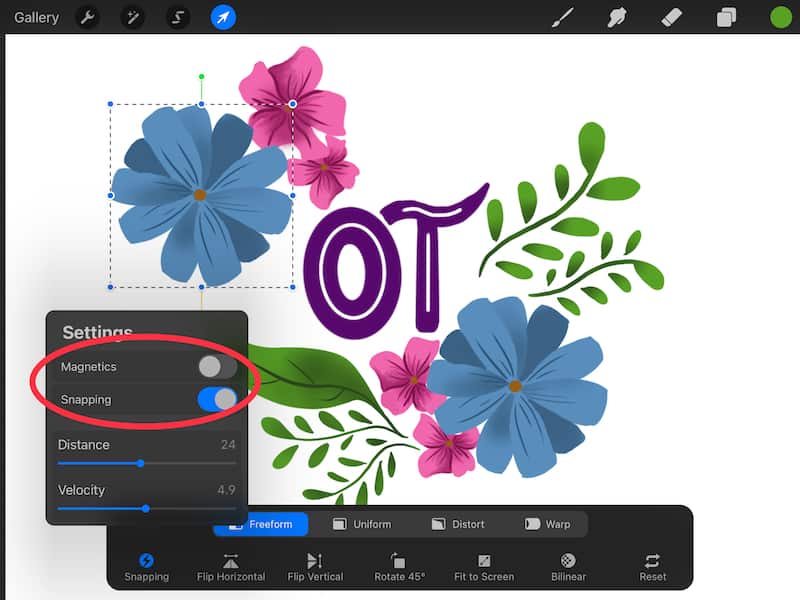

The Snapping setting will make sure that your objects “snap” into place. The way that they do this is dependent on the objects on your canvas. The object that you are moving around your canvas will snap into alignment with whatever else is on your canvas.
This is why it’s important to move one object at a time.
Depending on the Procreate project you’re working on, you may want to toggle on the Magnetics setting as well.
As you move your object around your canvas, Magnetics will show you various angles that you can place your object at. For example, 90 or 45 degrees. This can be important for cityscapes or anything that needs accurate perspective.
6. Enable the Distance and Velocity Sliders
The Distance and Velocity sliders are within the Snapping settings and are critical for the alignment of your objects as you move them around your canvas.
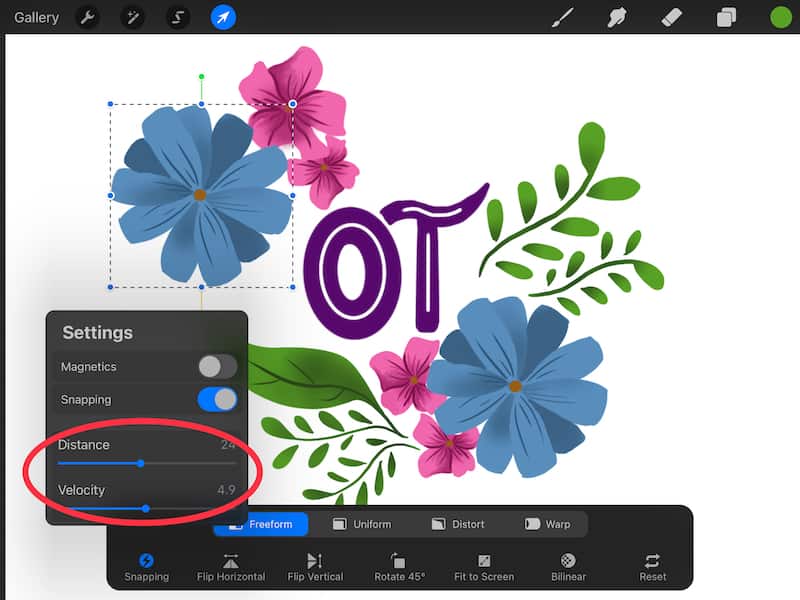

If you turn your Distance and Velocity completely off (slide them all the way to the left), you will not get any snapping, which means that you won’t get any alignment either. This is an inadvertent way to turn Snapping off.
You can learn more about how Distance and Velocity work in my in-depth guide about the Transform tool.
For now, just know that they need to be engaged in order for snapping and alignment to work. To make things simple, I generally keep them each in the middle so that they are each halfway to their maximum potentials. This seems to be a happy medium in most cases.
7. Start moving your object around your canvas
Once you have your snapping settings ready, you can start moving your objects around your canvas. You’ll notice that alignment lines will appear whenever you move your object close to another object.
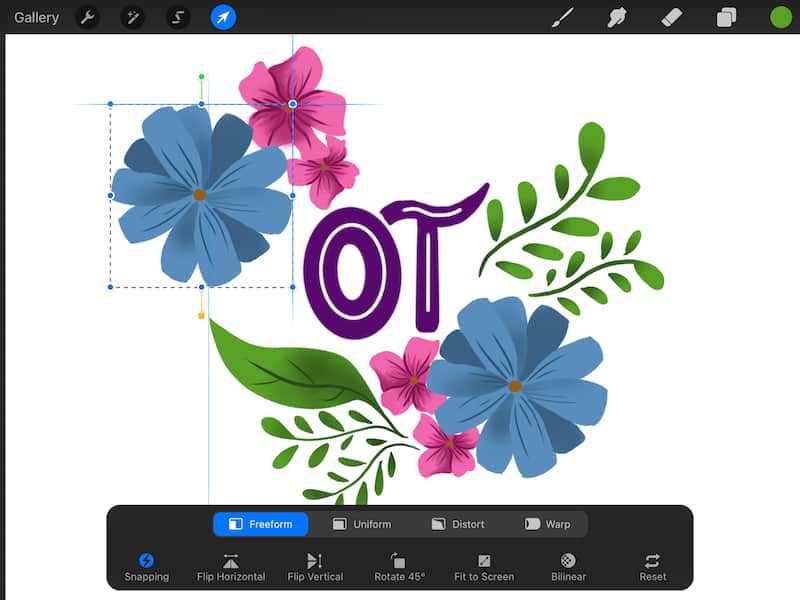

Important note: alignment is NOT layer specific. Even though moving objects IS layer specific, once you’ve started moving your object, it will align with anything on your Procreate canvas, whether it’s on your selected layer or not. This makes it easy to align your objects with everything else within your piece of art.
8. Adjust your Snapping settings to get the best alignment lines
Play around with the Distance and Velocity settings until the snapping to your alignment lines is flowing nicely and at a speed that works for you.
And that’s it! Simply turn on the Transform tool, adjust your snapping settings, and start moving your objects around your canvas.
Once you have that set up, Procreate does a great job of aligning your objects perfectly, which is great for any of my fellow perfectionists. It really is such a nice luxury in comparison to pulling out your ruler when you’re using traditional art materials.
Now that we’ve gone through the basic process, let’s talk about what you can do to isolate your objects and move them individually, even when you have multiple objects on one layer.
How to Isolate Individual Objects When Aligning Objects in Procreate
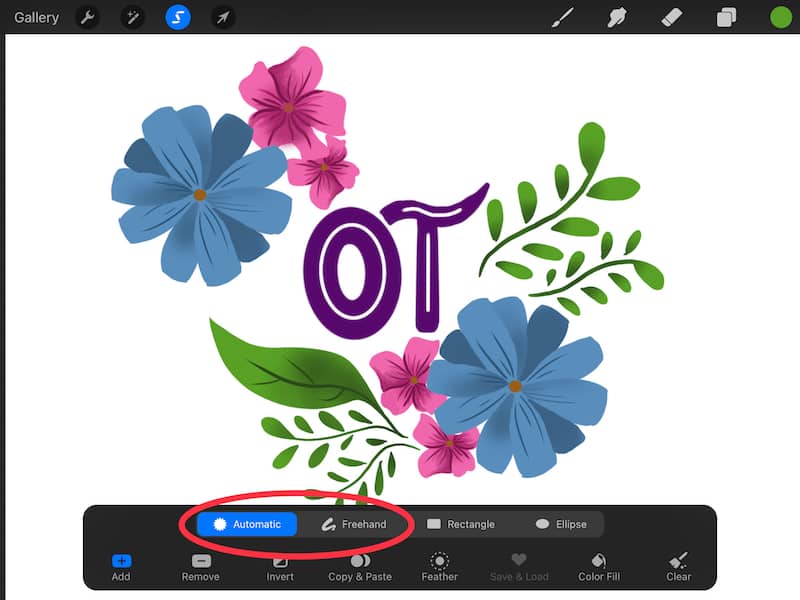
If you have multiple objects on one layer, but you only want to move one of them, click the Selection tool and choose the Freehand option. Outline your object and make sure the ends of your outline touch. Click the Transform tool and only the object you’ve outlined will be selected and movable.
Here is the step-by-step process of isolating and moving a single object:
1. Make sure you have the correct layer selected
2. Click on the Selection tool in your top menu
The Selection tool is the one in your top menu with the “S” icon.
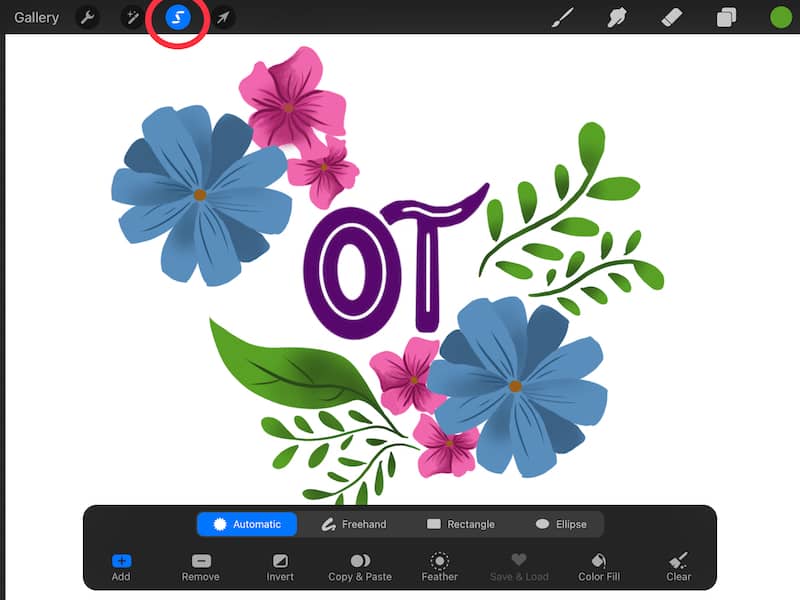

3. Choose the Freehand option or Automatic option.
I like to use the Freehand option to outline my object but, if your objects are really close together, this might not be practical. This is when the Automatic option comes into play.
Others prefer the Automatic option anyways given how quick it is.
Experiment with either the Freehand or the Automatic option depending on your preference.

4. Click on your object or outline it.
If you’re using the Automatic setting, you’ll want to click on your object. If you’re using the Freehand setting, you’ll want to outline it.
5. Click on the Transform tool
As we’ve talked about, the Transform tool is the one in your top menu with an arrow icon.

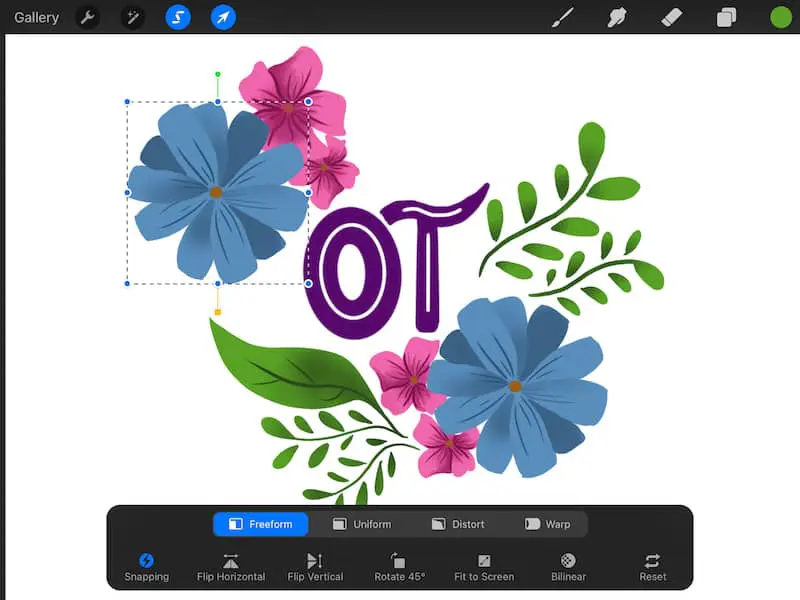
6. Make sure you’ve turned your Snapping on and adjusted your settings
Once you’ve isolated your object, you can move it around and align it with the other objects on your canvas in the same way as you normally would.
Don’t forget to turn on your Snapping and to adjust your settings.
Aligning objects in Procreate is quick and easy once you get the hang of it. With just a few clicks, you can make sure that all of your objects are perfectly aligned and in the positions that you need them to be in.


Diana has been an artist for over 27 years and has training in drawing, painting, digital drawing and graphic design. Diana’s latest obsession is digitally drawing with Procreate and Procreate Dreams. Diana has experience selling her art across a number of platforms and loves helping other artists learn how to make money from their art as well.