The blur feature in Procreate is useful for everything from lettering to landscapes. Blurring can be applied to small sections of your Procreate work, or entire layers across your whole canvas.
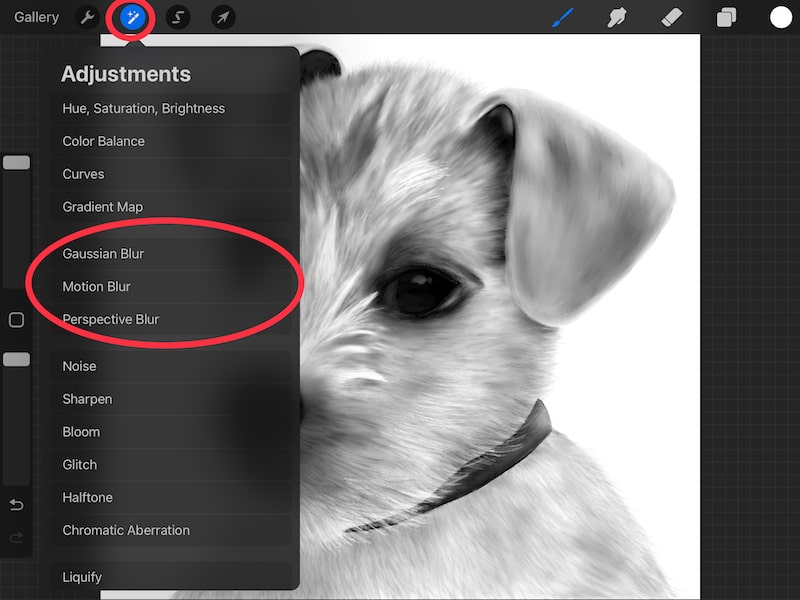
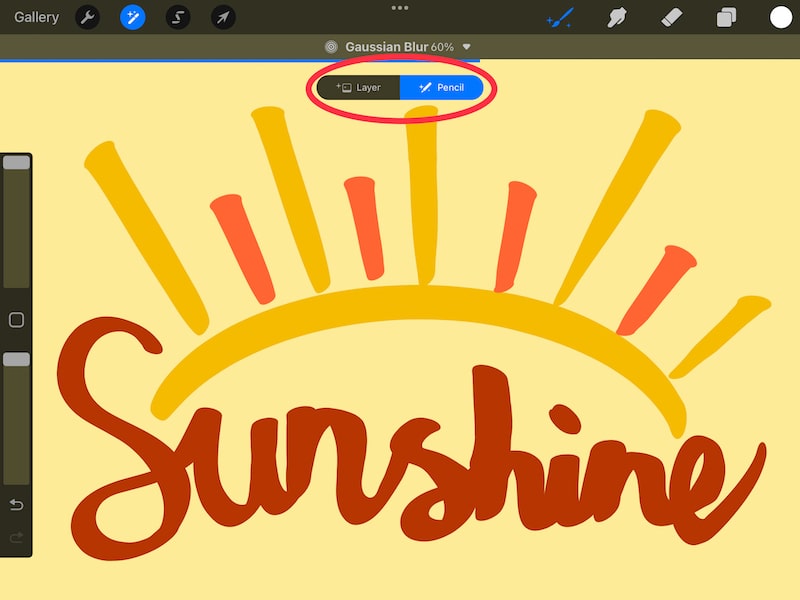
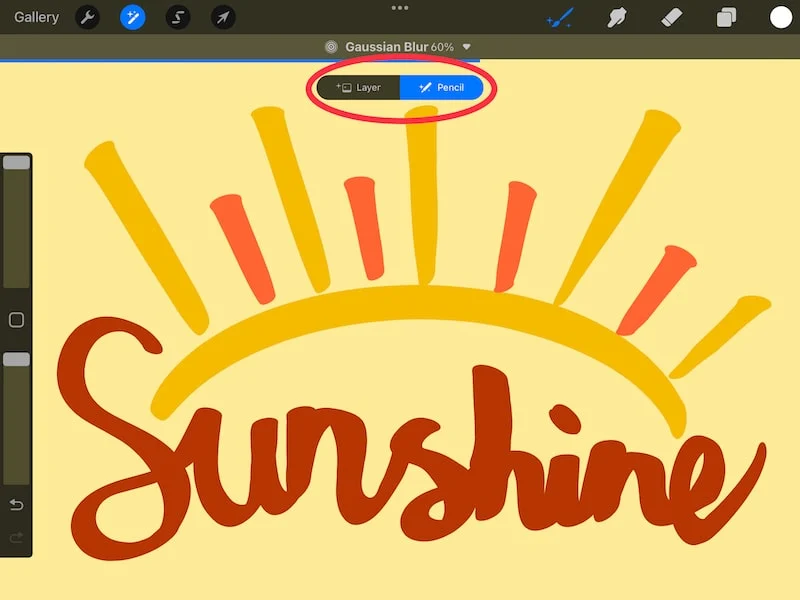
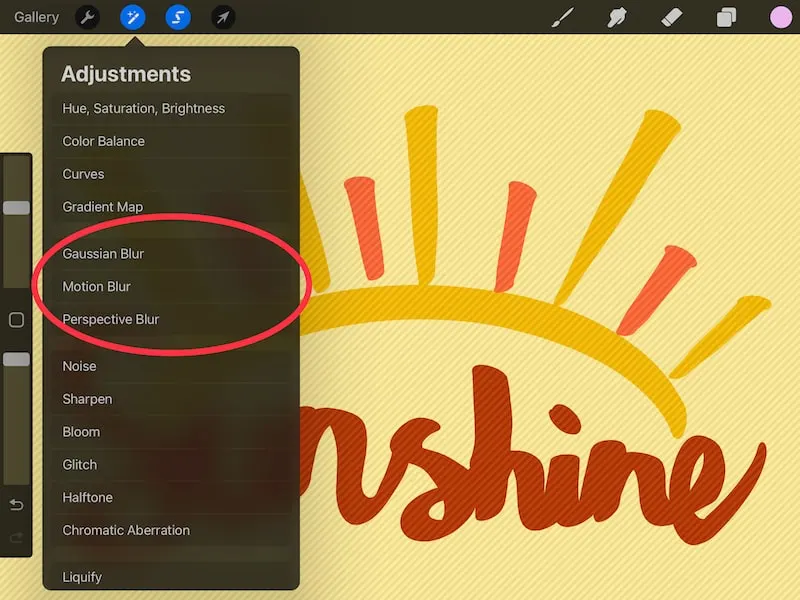
To blur on Procreate, click the Adjustments tab and choose Gaussian Blur, Motion Blur, or Perspective Blur. Choose the Layer option to apply your blur to the layer. Choose the Pencil option to apply your blur to smaller sections of your Procreate canvas by drawing over what you would like to blur.
Being able to blur on Procreate opens up a LOT of doors for your artwork. There’s SO much you can do with blurring that’s really easy to use and understand once you start playing around with it.
Let’s start off by talking about the different types of blurring you can choose from.
To get started, you’ll need to find the blur options in your Procreate toolbar. To do that, tap on the magic wand icon to open your Adjustments menu.

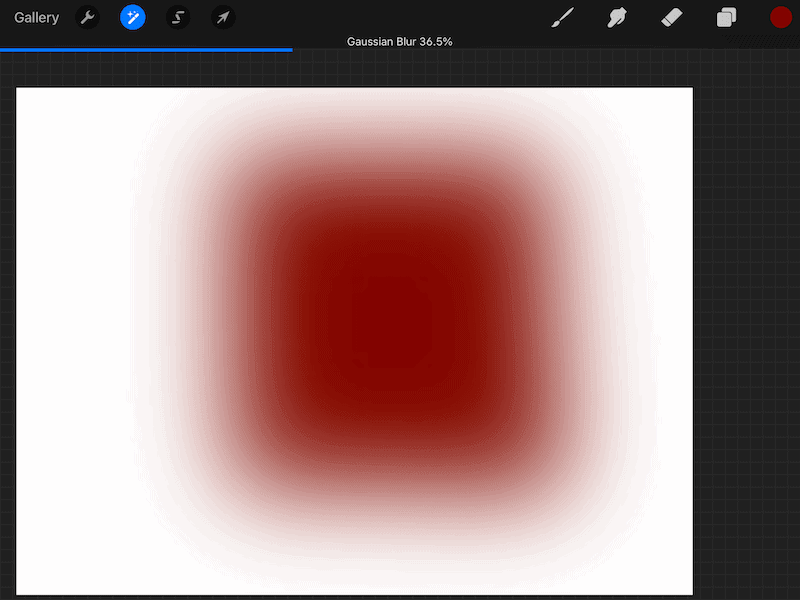
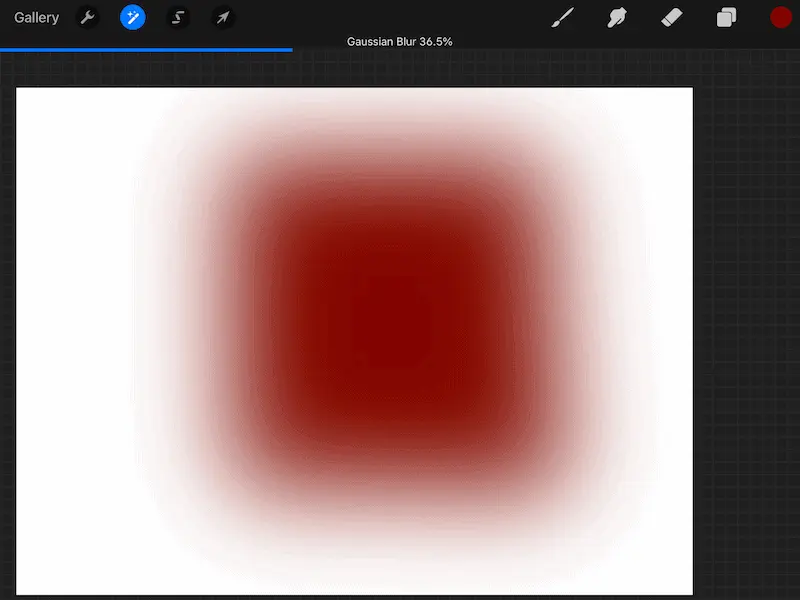
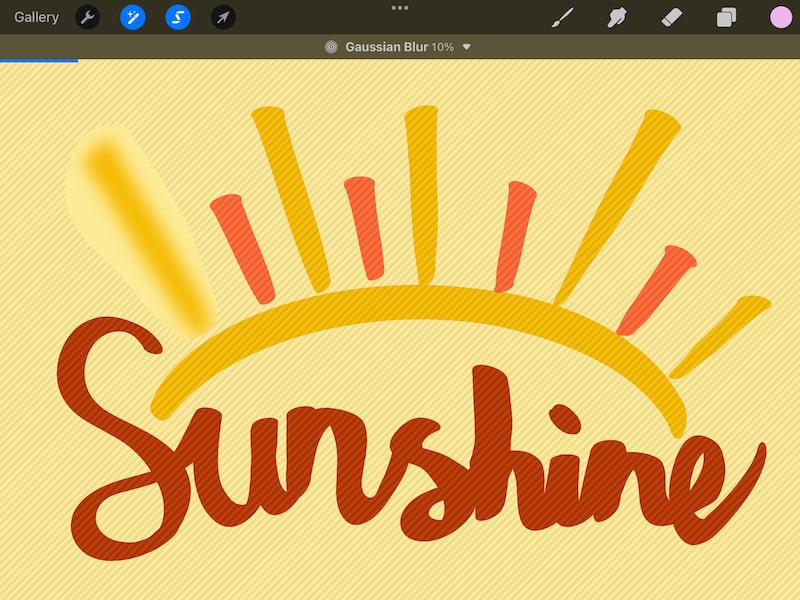
Procreate Gaussian Blur
Procreate’s gaussian blur setting will apply a soft blur to your art, which results in an out-of-focus look. Gaussian blur is the best choice for artwork of subjects and scenes that are standing still.
Gaussian blur is what you’d traditionally expect when you think about blurring. It’s an even, soft, and uniform blur that will be applied to your entire layer, or whatever you draw on with your Apple Pencil. We’ll talk about those different settings later.
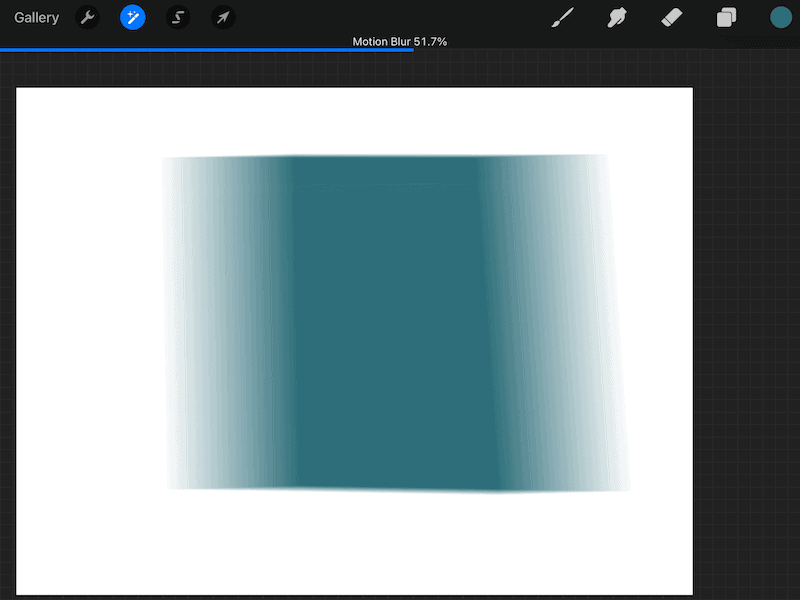
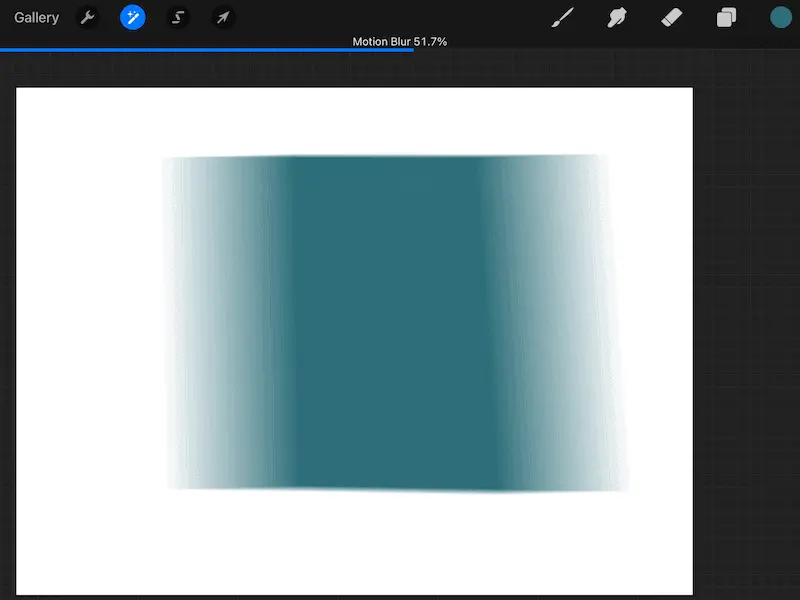
Procreate Motion Blur
Procreate’s motion blur setting will apply a streaky blur to your art, which results in an “in motion” look. Motion blur is the best choice for artwork that has elements that need to have an illusion of speed, movement, or momentum.
Motion blur is what you want to use if any of the elements in your piece of art need to appear to be in motion. This is great for cars, superheroes, birds, and any characters that are running, riding bikes, etc.
By using motion blur, you can create the illusion of speed in just a few seconds; something that could take quite a while by hand.
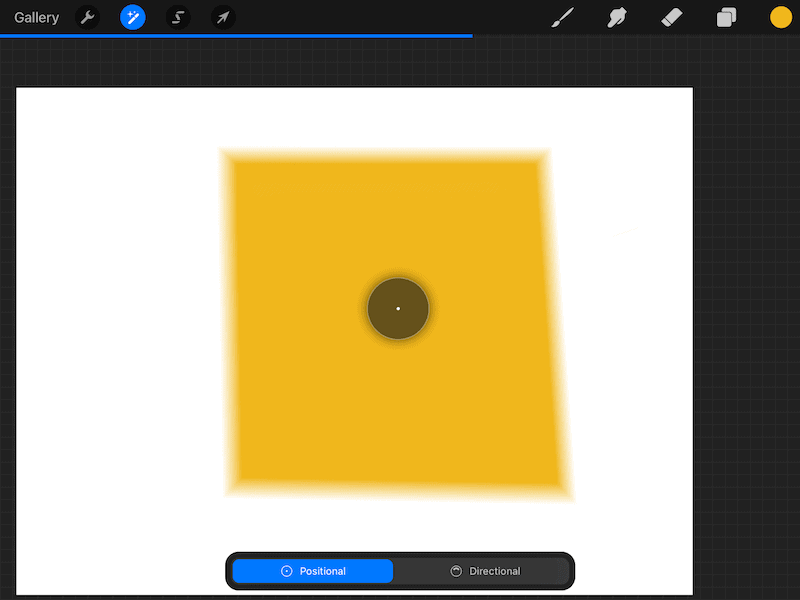
Procreate Perspective Blur
Procreate’s perspective blur creates a radial blur, which means that it starts at a center point and then increases as it moves outward in the shape of a circle. Perspective blur is the best choice for artwork that needs to focus on a particular object while having depth.
Perspective blur tends to force viewers to focus at the point where the radial blur begins. This means that perspective blur is a great choice if you need to apply a blur, while also drawing attention to a particular section of your work.
Procreate’s perspective blur gives you two choices: full or directional. Full perspective blur lets you choose a focus point and then applies your blur evenly in a circle from that point. Directional lets you choose a focus point, but will apply your blur unevenly in the direction that you choose.
Now that we’ve talked about the different types of blurs, let’s talk about different ways you can apply the blur. Make sure to read to the end where we’ll talk about my FAVORITE use for blurring – shading.

How to Blur Your Entire Layer with Procreate
To blur your entire layer with Procreate, open the Adjustments panel and click on your preferred type of blur. You will be given the choice between Layer and Pencil. Choose Layer. A slider will appear on your screen. Slide it until you get your desired blur.
Blurring an entire layer is a great way to apply a blur effect to your entire piece of art really quickly.
Remember though that the blur will only impact whatever is on your layer. If you only have a few small strokes on your layer, that’s what your blur will be applied to. It will NOT be applied to your entire piece of art as a whole.
Important note: you CAN’T apply a blur to multiple layers at once.
If the elements you want to blur are on multiple layers, you will either need to blur each layer separately, or merge them together into one layer before blurring.
Another important note: be VERY careful when merging your Procreate layers. You won’t be able to separate them later, so merge with caution.
With layer blurs, it’s a good idea to think ahead about what you will want to blur. That way, you can plan your layers accordingly. If you don’t want to blur your entire layer, here’s how you can blur specific areas of your art in Procreate.
How to Blur Specific Areas in Procreate
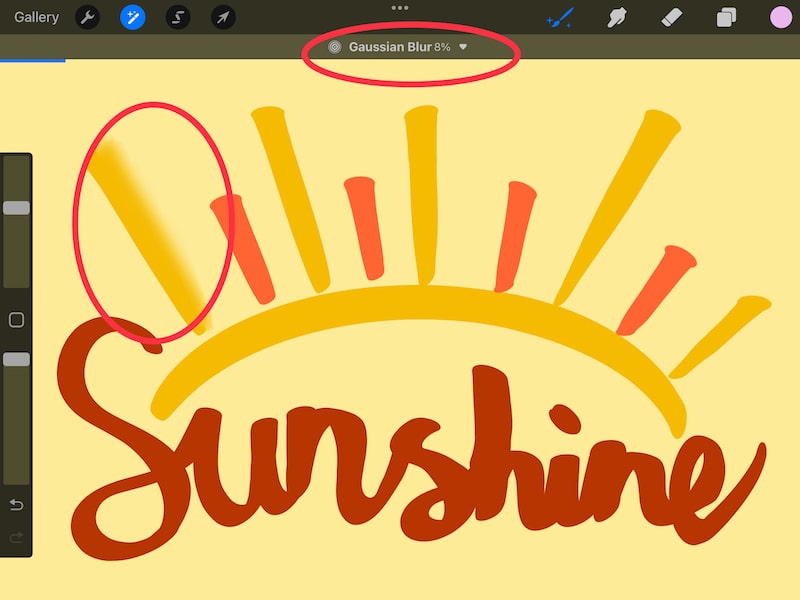
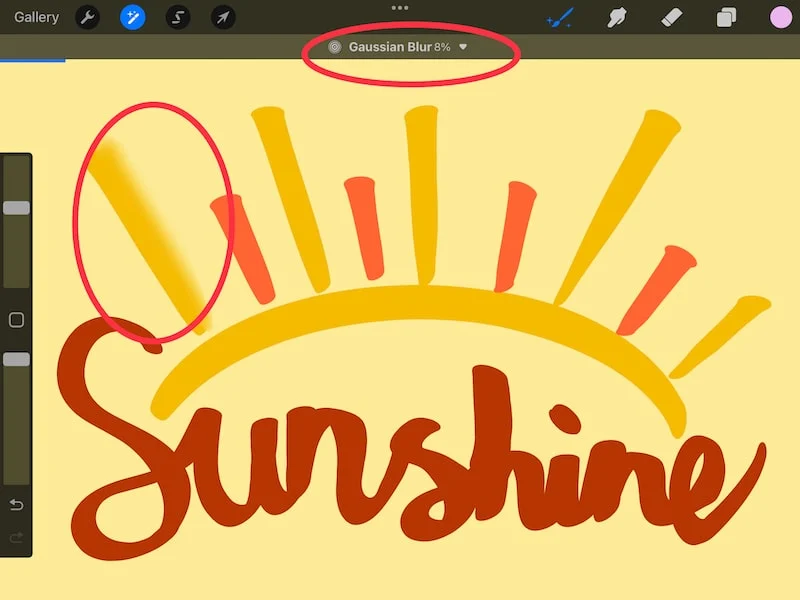
To blur specific areas in Procreate, choose the Pencil option within the blur settings. This will blur anything that you draw over with your stylus. You can also use the selection tool to outline the area you want to blur and use the Layer option to blur that specific section.
There are two ways to blur sections of your Procreate art. Let’s look at them individually.

Blur Sections of Your Procreate Art with the Pencil Setting
Open your Adjustments tab and choose your preferred blur. Instead of choosing the Layer setting, choose the Pencil setting. This will turn your stylus into a blurring tool.
Use your stylus to draw over everything that you want to blur. Instead of blurring your entire layer, it will blur what you draw, as you draw. It’s like having a blur pencil.
Important note: when using the pencil blur setting, keep your blur percentage LOW. If it’s too high, even 60%, it won’t work well.
Another Important note about how this works: whatever you draw will be linked. As in, if you adjust the opacity, it will adjust the opacity for everything you’ve drawn. UNLESS you close out the adjustments tab and reopen it.
Now you’ll be creating a new blur that won’t be linked to the previous one. You also won’t be able to adjust your previous blur anymore, so always be 100% sure you’re done tweaking your blur before you close the Adjustments tab.
Using the Pencil setting to selectively blur parts of your Procreate piece is a great way to have more control over what you’re doing with your blur effects.
Blur Sections of Your Procreate Art by Making Selections
1. Use the Selection tool and outline the area that you want to blur.
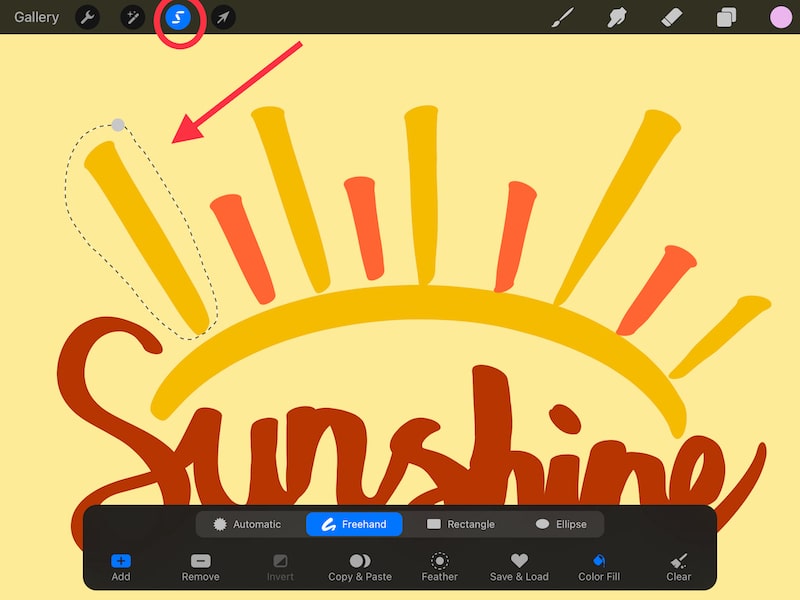
2. Open the Adjustments panel and pick your preferred blur. Choose the Layer option instead of the Pencil option.

3. Use the slider to adjust the opacity to your desired level.

One of the reasons why you might want to use this method instead of the one we talked about before with the Pencil settings is because there are multiple different Selection tool options. You can freehand your selection, or you can make a perfect rectangle or ellipse.
You can also make an automatic selection so that you don’t have to waste time outlining your objects. Efficiency is the best!
Now that we’ve talked about the various and wonderful ways that you can blur your Procreate art, let’s talk about my favorite use for blurring, which is shading.
How to Use Blurring in Procreate for Shading
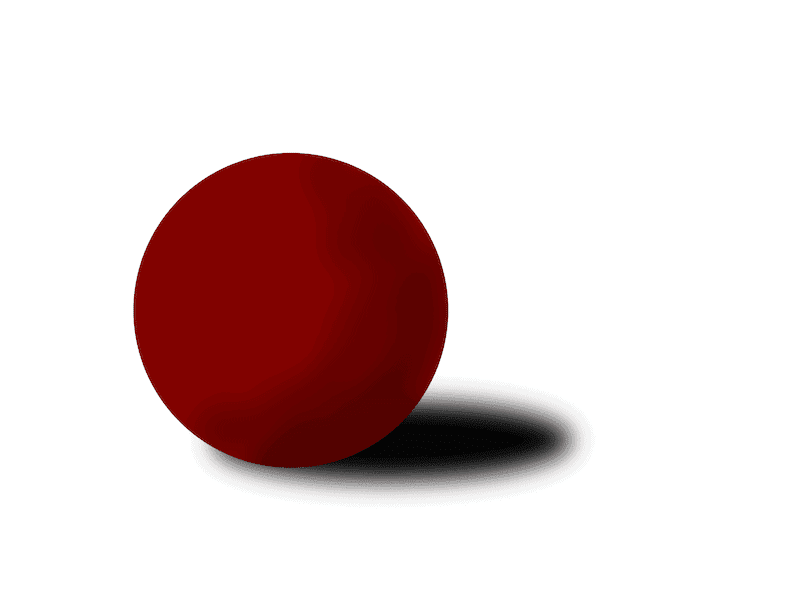
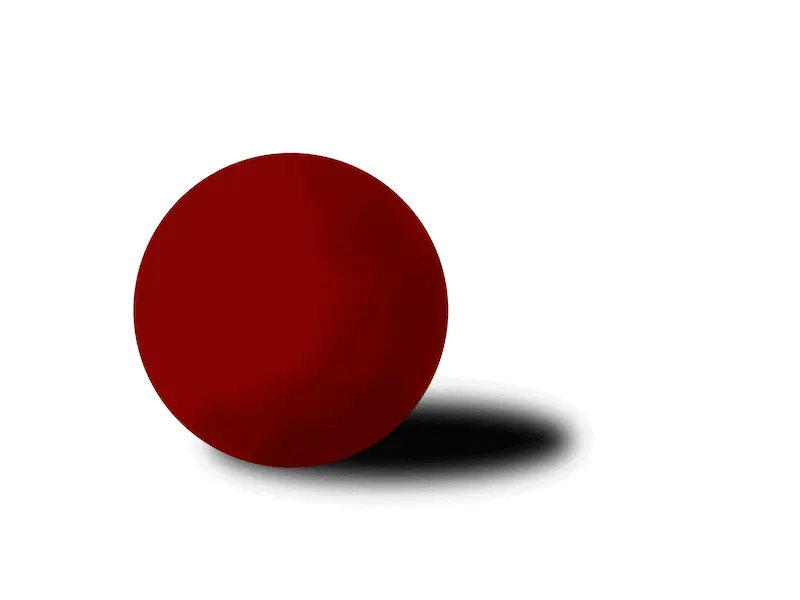
Procreate’s blur settings can be used to quickly add shading to your lettering, objects, and more. Simply make a solid shadow and apply a blur effect to soften the edges and have your shadows look like they are fading out.
If you are shading an object, I suggest using either Gaussian blur or Perspective blur. For Perspective blur, set the radius to the point where your shadow meets your object.
This will make sure that your shadow is strong at the base of your object, but will fade out as it gets farther away. Make sure to use the opacity slider to find a level where your shadow looks realistic.
If you are shading lettering, duplicate your letters and offset them in whatever direction you want your shadow to face. Use Gaussian blur to apply a soft shadow to all of the letters and create a neat shadow effect.
Using blurring in place of shading is a great Procreate hack. If you need more precise shading though, check out my ultimate guide to shading on Procreate.


Blurring in Procreate is such a fun and simple way to add dynamic elements to your artwork. Have fun experimenting with different types of blurs to see what types of effects you get.


Diana has been an artist for over 27 years and has training in drawing, painting, digital drawing and graphic design. Diana’s latest obsession is digitally drawing with Procreate and Procreate Dreams. Diana has experience selling her art across a number of platforms and loves helping other artists learn how to make money from their art as well.