Canva is a great design tool that can help you make many things from birthday cards to social media graphics. But, you’ve probably had that annoying experience where you download one of the designs you’ve worked so hard on and you realize it’s blurry, grainy, or just not the quality you’re looking for. It looks great on the screen. What’s going on? Inconsistent image quality can happen with Canva, but it has everything to do with your settings and is completely fixable.
Canva does not reduce image quality, but it’s easy to pick the wrong download setting and end up with a blurry design. It’s also important that your Canva canvas size is correct so that your design doesn’t end up stretched or squashed, which can also contribute to poor image quality.
It can be really frustrating to download the same image again and again and have it turn out blurry or grainy. With these simple tips, you can ditch the poor image quality for good and download beautiful Canva images every time.
Make Sure Your Canva Canvas is the Right Size
If you create a design that’s small, it will naturally have a smaller file size than a design that’s large. And if you then try to print that small design as though it were large, you’ll have a problem. In the context of printing large images, it’s for darn sure that your small image will have poor image quality. But it’s not your small image’s fault; it was set up for a task it was never meant to do.
Use Canva’s default canvas sizes if possible, or research the appropriate size if you’re doing something that needs custom dimensions.
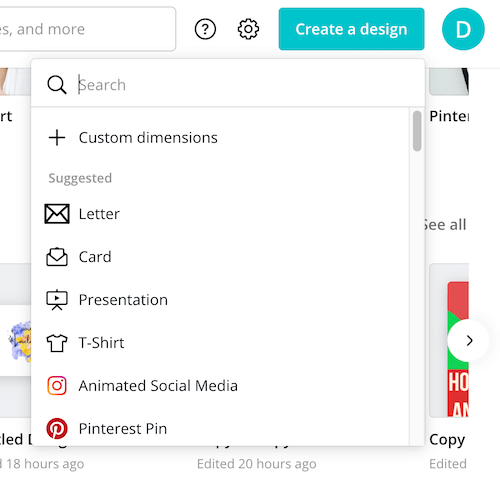

Your design dimensions need to match your printing or web size specifications.
Let’s talk about a real world example that happens all of the time. You design something that’s 4×6” in size, you’ll run into issues when printing it as a 8.5×11”. You need to think ahead about the dimensions of your end result and then design accordingly. If you try to stretch or squish your design, even a little bit, you could wind up image quality issues.
Can I Change my Canva Canvas Size?
Don’t worry if you change your mind about what size your canvas needs to be while you’re designing. If you have Canva Pro, changing the size of your canvas takes just a few clicks. If you’re using the free version, there are a few more steps, but it’s completely doable. Read my post about changing the size of your Canva canvas to learn more.

When you change your canvas mid-design, you’ll have to adjust your design elements to accommodate. That’s good though. The more adjustments that you need to make, the more of a sign it is that you would have ended up with a wonky design if you had kept the original size, but tried to use it as though it were a different size.
If you aren’t sure what size you need, check with the platform you’ll be publishing your design to or the place you’ll be printing with. They deal with image dimensions every day and can probably rattle off their specifications in their sleep.
Ok, so let’s say that you’ve picked the right canvas size, but you’re still winding up with funky images. Let’s dive into
Choose the Right Download Options in Canva
The only time that Canva reduces image quality is when you tell it to. This could be a complete accident and is actually one of the downsides of Canva’s super user friendly interface. Downloading an image is so quick and easy that it takes some awareness to go beyond their default download settings and make adjustments depending on the image quality we’re looking for.

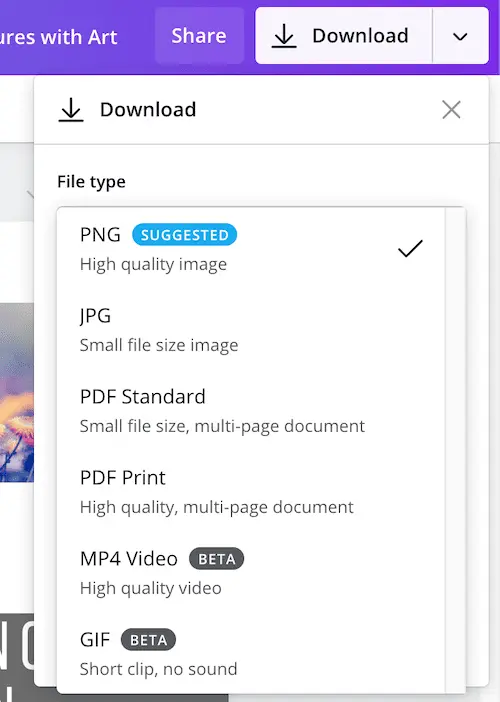
PNG: bigger files sizes, but higher quality. PNG files use lossless compression, which is great for preserving image quality. If you aren’t worried about file size, PNG is what you want to use for web images.
JPG: smaller file sizes with image quality that is often a bit less than a PNG. A JPG uses lossy compression, which results in image data being lost.
The reason why JPGs are so popular is because they are seen as a good middle ground between file size and image quality. JPGs don’t have horrible image quality by any means. We use and look at them every day.
Technically, JPGs have reduced image quality in comparison to PNGs so, if you’re really worried about image quality, PNG is the way to go.
Standard PDF: I only suggest using the standard PDF option if you’re making PDFs that will be viewed on a computer, or if you’re making basic forms that don’t have images.
PDF Print: Canva’s PDF Print option will spit out high quality PDFs that are great for, well, printing. In fact, the PDF Print option is the only way to consistently get results that are 300 DPI. This leads us to a really important hack.
Important PDF Print to JPG Conversion
If you’ve printed designs, you’ve probably heard about DPI. This means “dots per inch” and talks about how closely the ink dots are to each other when printing. The standard for printed work is 300 DPI.
Here’s the problem. You likely won’t get 300 DPI from Canva’s JPG or even PNG downloads, only from the PDF Print.

So, what do you do if you need a JPG or a PNG that’s 300 DPI?
Convert it. Download a PDF Print and run it through a PDF to JPG or PNG converter. When you’re done, you’ll end up with a 300 DPI image file.
Yes, the fact that we need a workaround for something like this when working with a design program is annoying. Creating 300 DPI image files should be the default. It’s not though, so this workaround will have to do for now.
If you’re finding that your images have reduced quality, it could be that the resolution or DPI isn’t what you thought it was. Try this hack and see if it fixes your problem.
Lastly, we need to talk about Canva’s colors, which can cause a double take if you’re not aware of it.
Canva Creates Images in RGB Color Mode Instead of CMYK
When you design an image in Canva, it is created in RGB color mode. The standard for most print documents is CMYK mode.
RGB is what’s used for web-based designs. That’s why your Canva images look so good on your computer screen. It relies on colors of light, specifically red, blue, and green.
CMYK is what is used for printing. It relies on colors of pigment, specifically cyan, magenta, yellow, and black (source).
Sadly, it’s not as simple as designing in RGB and having it print in CMYK. Designs need to be designed in either of these color modes from the get go.
So, what does this mean for you as a Canva designer? If you plan to print your Canva designs, be aware of how the colors could change. A great way to do this is to run your design through a RGB to CMYK converter.
To be clear, these converters don’t correct any of your colors. All they do is put your design in the CMYK format. In doing so, they’ll spit out an image that looks like how it will print. This will give you a good idea of how your RGB Canva design will look when it prints.
Here’s an example of an image designed with Canva in RGB mode and how it looks when converted to CMYK:


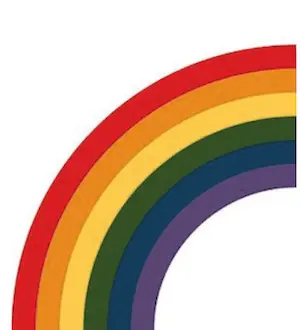
You’ll see that it doesn’t have a huge impact, but it is noticeable. Seeing the images side by side makes it pretty obvious, but remember that it’s rare to look at them like this. Honestly, I simply don’t print a lot of rainbows and not many people notice the color differences.
While Canva’s RGB color mode doesn’t impact the size and resolution of your images, it can easily be mistaken for an image quality issue. It can make your colors look dull and wonky upon printing, which can be concerning.
Practically, what this means is that you need to be careful about the colors you’re using with Canva if you’re planning on printing your designs. Run your designs through a converter and see what your end result will be. At least you can be prepared and try to adjust your colors so that the impact isn’t as great.
Honestly, once I knew about this issue and how to adjust my design style to accommodate for it, I haven’t had an issue. Yes, it’s annoying, but it’s manageable.
Reduced image quality in Canva is something that can be really frustrating as a designer. You’ve spent so much time on your design, why can’t the final step just work the way it should? I hope that these tips have given you some strategies you can use to produce high quality Canva images every single time.
Go forth and create great art!


Diana has been an artist for over 27 years and has training in drawing, painting, digital drawing and graphic design. Diana’s latest obsession is digitally drawing with Procreate and Procreate Dreams. Diana has experience selling her art across a number of platforms and loves helping other artists learn how to make money from their art as well.