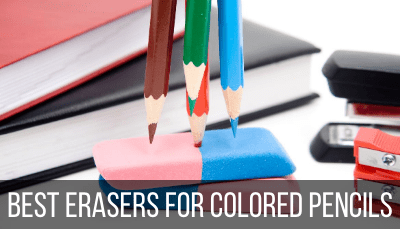
There’s nothing like opening up a new blending stump, tortillon, or kneaded eraser. Mainly because they are so clean! But, even if you have old blending tools and erasers, there’s still hope. You can clean them and get them back to new.
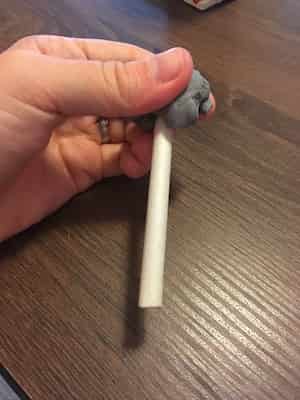
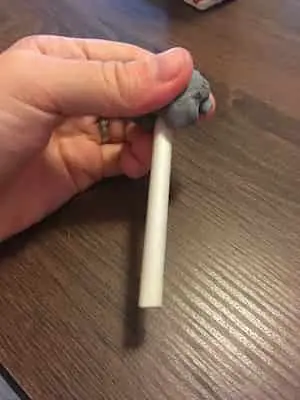
To clean a blending stump or tortillion, rub the tip of it with a kneaded eraser until it is clean again. You can also use sandpaper, which will both clean it and sharpen the tip. To clean a kneaded eraser, stretch it and knead it until the graphite disappears and the eraser is clean again.
Most of the time, you can clean your blending stump, tortillon, or kneaded eraser to the point of fresh, like new beauty. That said, there are times when they are past the point of no return. Let’s talk about the best strategies for cleaning these precious art tools, and how to know if it’s a lost cause.
Before we get started, it’s important to know the differences between a blending stump and a tortillon. The differences are subtle, but end up being important.
The Difference Between a Blending Stump and a Tortillon
A blending stump is more thick and tightly wound than a tortillon. A blending stump has two points, while a tortillon has one. The points on a blending stump are shorter and more squat so that they can cover wider areas, while the one point on a tortillon is more thin and narrow for detail work.
Blending stumps and tortillions are both made out of rolled paper, so they share more similarities than differences. That said, the subtle differences between them are things we want to look out for when we clean them.
Note: Some people use the words “tortillon” and “blending stump” interchangeably. In this post, I’ll be talking about them as two separate things, as described above. Blending stumps are also made in thin varieties, They aren’t always thick. To keep things simple, we’ll be talking about the thicker varieties.
How to Clean a Blending Stump
To clean a blending stump, start by rubbing a clean area of a kneaded eraser around the tip. This will help remove a lot, if not all of the graphite. If your blending stump is still dirty, use a piece of sandpaper to slowly sand away the paper at the tip.
It’s important to remember that your blending stump is made out of paper. Yes, it’s fairly sturdy and much more sturdy than your tortillon, but it’s still paper. Paper is fragile and you need to be careful with it.
The first step is rubbing your kneaded eraser over the tip of your blending stump.
To have the biggest impact, make sure that your kneaded eraser is clean. You won’t do any good by rubbing a dirty kneaded eraser all over your dirty blending stump.
If your kneaded eraser isn’t as clean as it should be, jump down to the section about cleaning your kneaded eraser before trying to clean your blending stump.

If you’ve tried using your kneaded eraser to clean your blending stump and it isn’t working, it’s time to grab the sandpaper.
Gently sand the tip of your blending stump, being careful to maintain the point and sand each side evenly.
Sanding the tips of your blending stump is also a great way to sharpen them. We all know how dull they can get after helping us with so much shading.
If you want a faster and more intense approach, you can use an x-acto knife to slowly and carefully carve away the dirty paper on the tip. As with sanding, make sure that you maintain the tip of the blending stump as you shave it away.
When is Your Blending Stump too Far Gone to Save?
If you’ve tried cleaning your blending stump with a kneaded eraser, sanded it down, and even shaved it away with an x-acto knife, but it’s still too dirty to use, it’s time to get a new blending stump.
Blending stumps are not meant to last forever and they aren’t all that expensive. You will need to replace them when they get too worn down or dirty.
It’s important to realize when your efforts to clean your blending stump are jeopardizing it. What’s the point of a clean blending stump if the tip gets damaged and you can’t use it as well as you did before?
It could also be that you’d rather buy a new blending stump instead of spending all that time trying to clean it. That’s ok too. Decide whether you want to have a couple blending stumps on hand so that you don’t have to interrupt an art session to run to the store, or be ready to take a few extra minutes to clean it.
Ok, now that we’ve covered blending stumps, let’s look at tortillons. They’re very similar to blending stumps, but because of their construction, there are some things you need to watch out for.
How to Clean a Tortillon
To clean a tortillon, gently rub a clean kneaded eraser on the tip until the graphite comes off. You can also use sandpaper to very gently sand the tip, while making sure that you don’t damage the sharp point.
You probably noticed that the suggestions for cleaning a blending stump and cleaning a tortillon are the same. But, what’s different is the amount of care you need to take with your tortillion versus your blending stump.
Tortillons are thinner and less tightly wound than blending stumps. They also don’t have as many layers of paper forming their structures. If you’re not gentle, it’s a lot easier to damage your tortillon than your blending stump.
A lot of this has to do with maintaining the purpose of your tortillon. Unlike a blending stump that can cover larger areas and doesn’t require as much precision, you want to make sure that the tip of your tortillon stays sharp.
Tortillons are meant for small spaces and precise work. If your cleaning efforts damage this pointy tip, it won’t be as effective.
Due to how narrow the tip of a tortillon is, I would avoid using an x-acto knife with it. As you shave away the paper, it’ll be easy to weaken the tip or change its shape in a way you might not want.
When is Your Tortillon too Far Gone to Save?
To be honest, I’m quick to throw out tortillons. They’re inexpensive and easy to make at home if you don’t want to spend any money. I like to purchase my tortillons because I don’t want the hassle of making one and I doubt I could get as tight and sharp of a point on my own.
It might be that you’re tossing your tortillon out more often because the point has become dull, not because it’s dirty. It depends on your artistic needs and the type of work you’re using your tortillion for.
Alright, let’s get to the one that’s the most fun, in my opinion – cleaning your kneaded eraser.
How to Clean a Kneaded Eraser
To clean your kneaded eraser, stretch it and reform it until the graphite disappears and it becomes a light gray color. They’re called “kneaded” erasers for a reason. Knead your eraser to clean it whenever the graphite starts to build up.
Cleaning your kneaded eraser is something that you’ll want to do constantly as you work. Rubbing a dirty section of your kneaded eraser across your drawing will only make things worse, so it’s important to always have a clean section of your kneaded eraser available to use.
Luckily, squishing your kneaded eraser around is fun. You can even keep it in your non-drawing hand so that you can knead it as you work.


When is Your Kneaded Eraser too Far Gone to Save?
There will come a point when you knead and knead and knead your kneaded eraser and it doesn’t return to that lovely light gray color that we’re used to seeing when it’s clean. Instead, it will stay as a dark gray lump.
You’ll also begin to notice that your kneaded eraser isn’t picking up graphite off of your paper as well. If your eraser is not eraser, well, it’s time to get a new one.
As we’ve talked about with all of the tools on this list, if it isn’t working as it should, it’s time to replace it. No amount of cleaning can bring it back to full functionality. Don’t hold onto your tools, even if they’re past the point of no return.
Luckily, kneaded erasers are cheap and it won’t break the bank to have a few of them stocked in your pencil box.
Cleaning your blending stumps, tortillons, and kneaded erasers is something you should make a part of your regular art routine. If you take care of your art tools, they’ll continue to work in the ways that you need them too, helping you to create beautiful art.


Diana has been an artist for over 27 years and has training in drawing, painting, digital drawing and graphic design. Diana’s latest obsession is digitally drawing with Procreate and Procreate Dreams. Diana has experience selling her art across a number of platforms and loves helping other artists learn how to make money from their art as well.