Learning how to crop, resize, and cut your art in Procreate is important for making sure that you end up with the dimensions that you ultimately need for your projects.
Firstly, let’s talk about cropping your Procreate work. You’ll notice that Procreate lumps cropping and resizing together, even though they aren’t the same thing.
Technically, cropping and resizing are two separate things. Cropping is about selecting one part of your image, while chopping out the rest of it. Resizing is about changing the dimensions of your art, while keeping the entire piece of artwork intact.
Important note: when you crop or resize your Procreate art, you risk quality loss. This means that you want to limit resizing your work as much as possible! Check out my post on Procreate resizing and quality loss and on pixelation to learn more.
Important note: make a copy of your piece of art before you crop or resize it. That way, if something goes wrong, you’ll have the original to revert to.
Important note AGAIN: remember that you always risk quality loss when resizing in Procreate, so limit it as much as possible.
How to Crop in Procreate
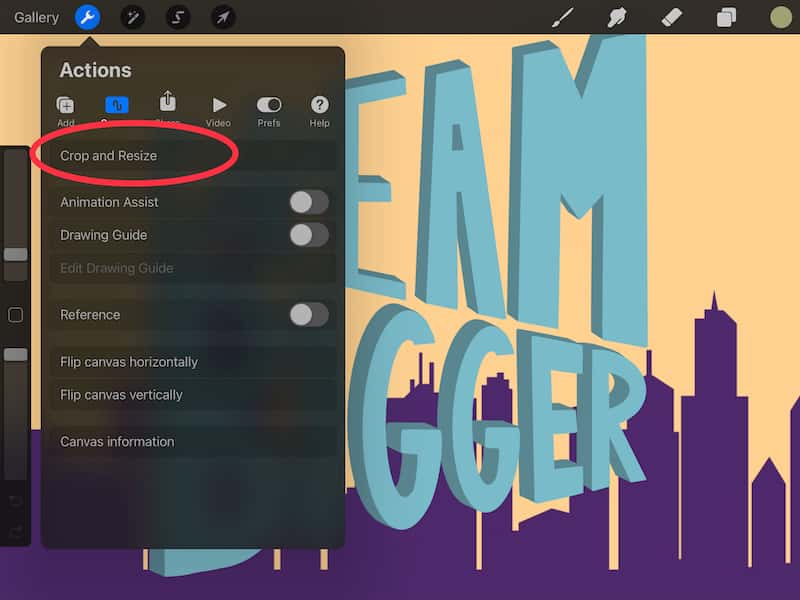
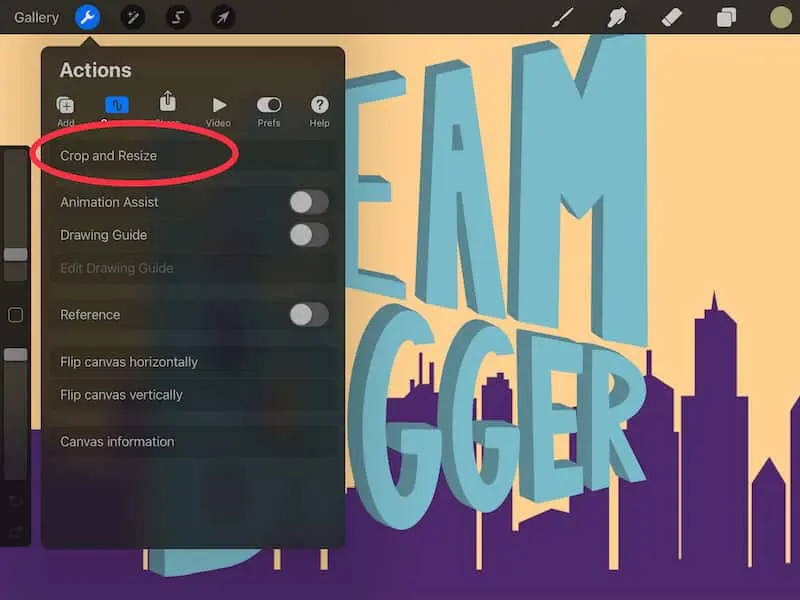
To crop in Procreate, click on the wrench to open the Actions tab. Make sure that the Canvas option is selected, and then click on the Crop and Resize button. Adjust your canvas either by dragging the crop box, or manually entering your desired dimensions in the Settings tab.
Let’s walk through that step by step.
1. Click the wrench in the top toolbar to open the Actions tab
2. Click on the Canvas option
3. Click on the Crop and Resize button
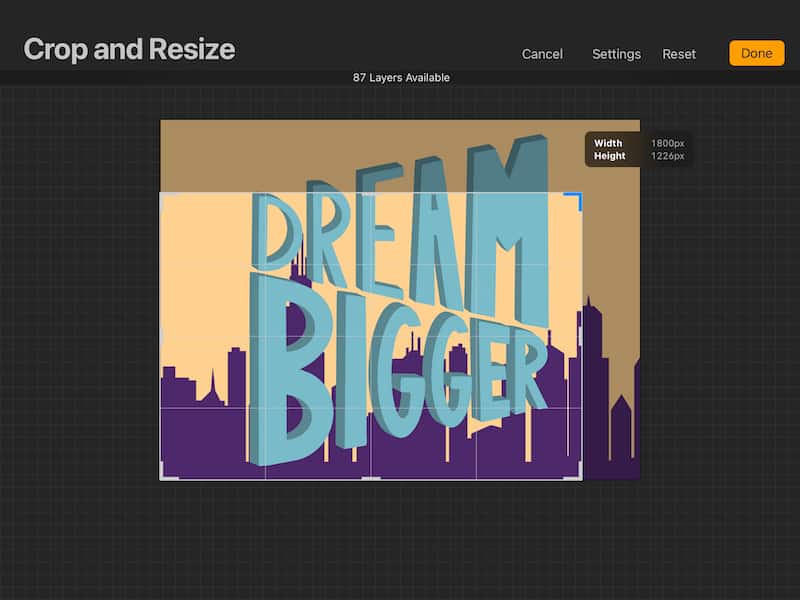
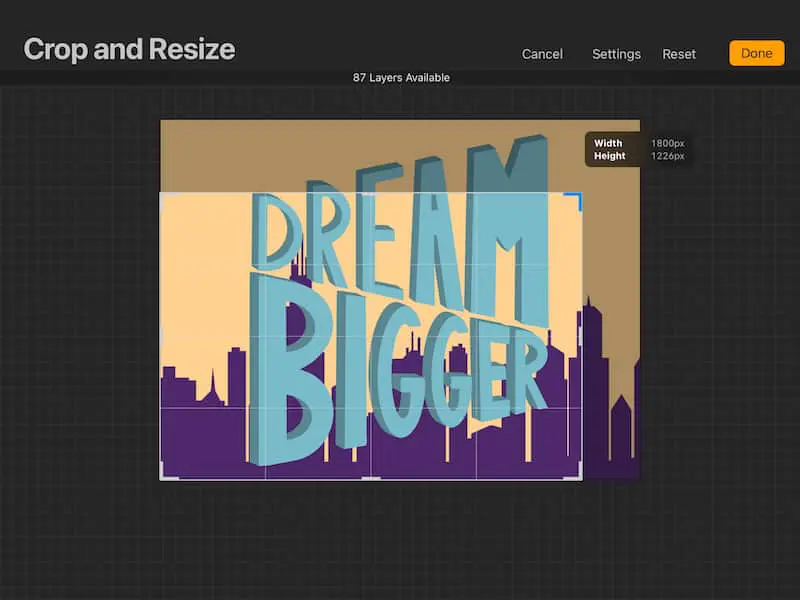
4. Drag any one of the 4 corners of the crop box until you’ve isolated the area of the canvas you’d like to have cropped. Or, click on the Settings button and manually enter the new dimensions for your piece of artwork.
5. Click done
As you’re dragging the corners of the crop box, you’ll notice that it will tell you the new size of your canvas on the right. At the top, it will also tell you the new maximum number of Procreate layers you’ll have available to you at that size.
The size and resolution of your artwork will determine how many layers you’ll be able to have. The smaller you crop your canvas, the more layers you’ll have access to.
This is why cropping your Procreate canvas can be a hack for increasing your amount of layers if you’ve reached your limit.
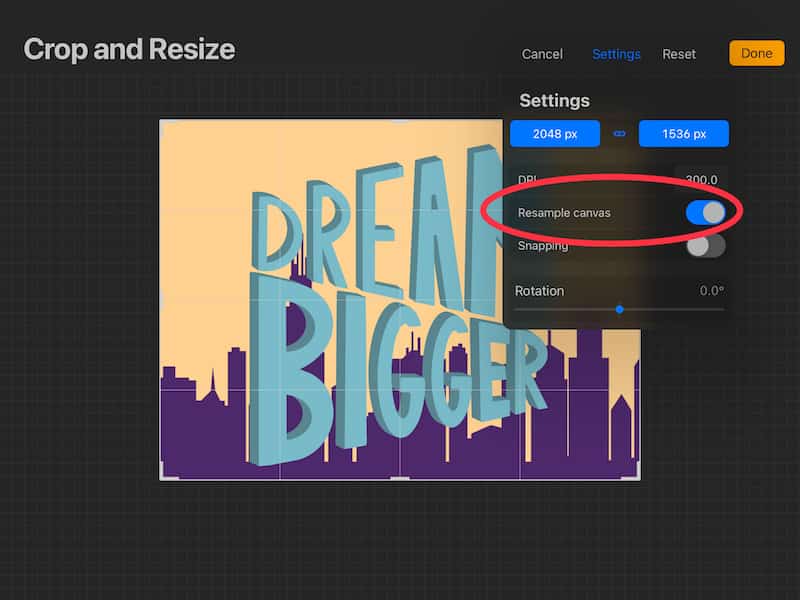
If you decided to crop your canvas by manually entering your new dimensions into the Settings tab, you’ll have noticed that there are additional options for you to take advantage of. Let’s dive into those.
-DPI: the higher your DPI, the higher resolution your artwork will be. The recommended DPI for print work is 300.
-Resample canvas: this is how you can resize your artwork without cropping anything out of it. It maintains your same aspect ratio. We’ll talk about how to do this down below.
-Snapping: this will force the crop box to snap to the edges of the elements on your canvas. This makes it easier to precisely and cleanly crop your artwork.
-Rotation: this will rotate your artwork for a more unique cropping job.
When you crop your canvas in Procreate using the Crop and Resize tool, you’ll be forced to crop the entire canvas. You can’t simply crop 1 layer, while leaving the rest of your canvas the same size and unaffected.
Luckily, there’s a great hack for this.
How to Crop a Single Layer in Procreate
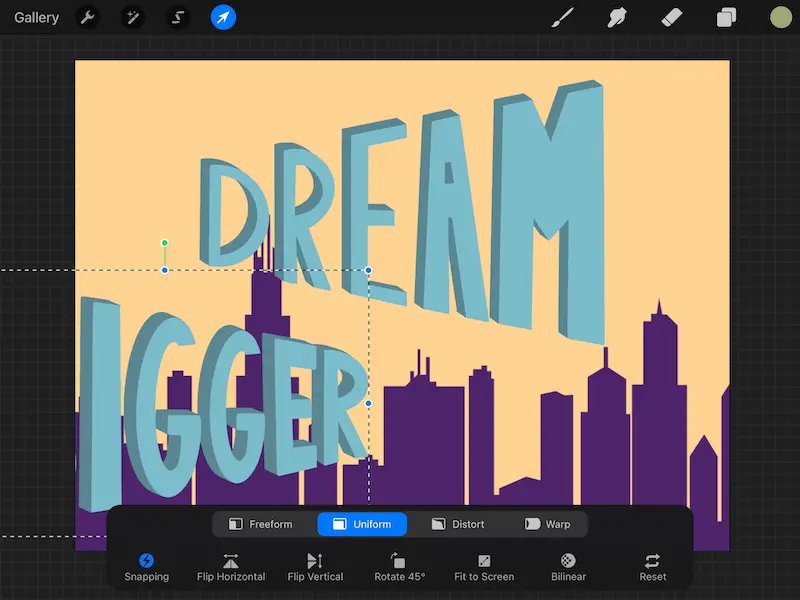
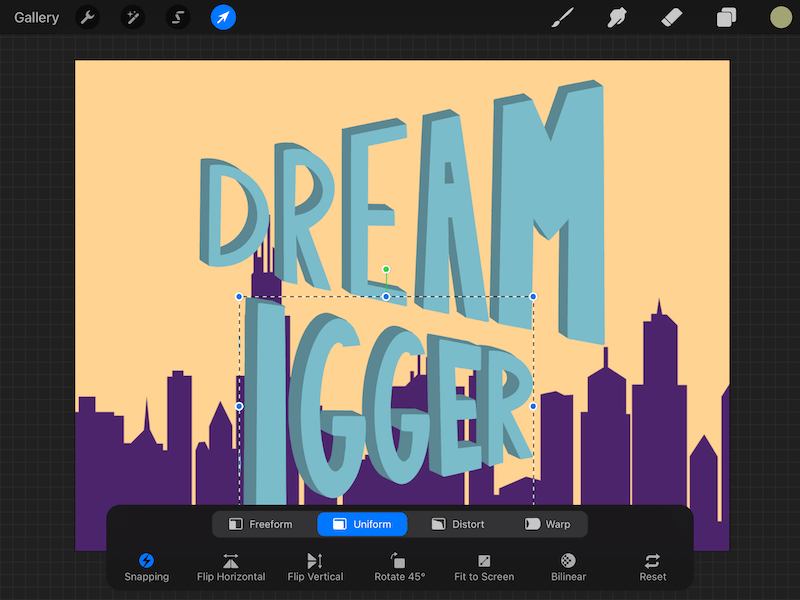
If you only want to crop one layer of your Procreate art, click on the arrow to activate the Transform tool. Drag your layer outside of your canvas until the area that you would like to crop disappears off the screen. Release the Transform tool and repeat for the other sides as needed.
I have a full guide on Procreate’s Transform tool if you want to dive into this awesome feature even more.
Let’s walk through that step by step.
1. Open your Layers panel and make sure that your desired layer is highlighted
2. Click the arrow icon in the top toolbar, which is the Transform tool
3. Drag your layer off of your canvas. For example, if I want to cut off the left side of my piece of art, I will drag my layer to the left until the area that I want to crop is out of view.

4. Deselect the Transform tool to deselect your element

4. Repeat for the other sides of your art, if needed

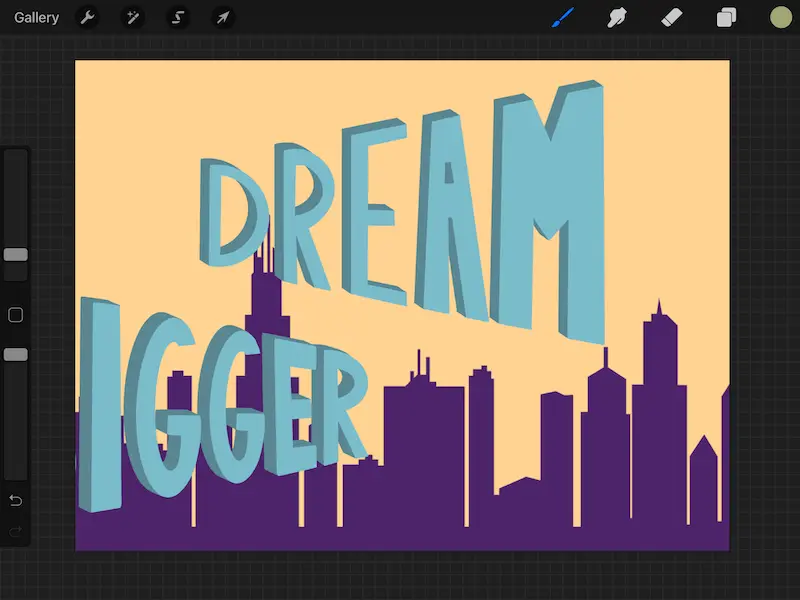
The reason why this cropping hack works is because anything you drag outside of your canvas area is essentially erased. This makes it easy to “crop” the sides of your artwork.
Important note: it can be easy to mess this up. Make sure to make a copy of your layer before you perform this cropping hack. Simply uncheck it to make it invisible and save it as a backup.
Now that we’ve covered cropping, let’s talk about how to resize your work without cutting out any portions of your artwork.

How to Resize in Procreate
To resize your artwork in Procreate, click on the wrench to open the Actions tab, and click on the Crop and Resize button. Open the settings and toggle on the Resample Canvas button. Enter one of your desired dimensions and Procreate will automatically adjust the other.
Once again, you can experience quality loss and pixelation when resizing, especially when resizing your canvas to be bigger. Limit your resizing as much as possible!
Let’s walk through resizing, step by step.
1. Click the wrench in the top toolbar to open the Actions tab
2. Click on the Canvas option
3. Clink on the Crop and Resize button
4. Click on Settings and toggle on the Resample Canvas button

5. Enter your desired dimensions
6. Click done
This is how you can change the size of your canvas without cropping anything out.
When you turn on the Resample canvas button, it will preserve your aspect ratio. You only need to enter 1 of the 2 desired dimensions, as Procreate will automatically adjust the other according to your aspect ratio.
If you don’t want to crop anything out of your artwork, do not adjust the crop box. Leave it as is with your entire artwork selected. Simply toggle on the Resample canvas button and select your dimensions.
If you do want to crop out part of your artwork, adjust the crop box prior to toggling on the Resample Canvas button.
With cropping and resizing covered, it’s time to move onto cutting.

How to Cut in Procreate
To cut in Procreate, make sure that your desired layer is highlighted, or you’ve used the select tool to select your desired elements. Swipe up with 3 fingers to access the copy and paste menu and click Cut. You can also click on the wrench to open the Actions tab and click the Cut button there.
Let’s walk through that step by step.
1. In the Layers panel, select the layer that contains the elements you want to cut. If there are a jumble of elements on your layer, check out my guide on selecting one element.
2. Click on the arrow icon in the top toolbar, which is the Transform tool
3. Click on the wrench to open the Actions menu, and choose the Add submenu. Or, use 3 fingers to swipe up on your canvas to open the Copy and Paste menu


4. Click cut
It’s a lot easier to cut an entire layer than trying to select individual elements and cut them all separately. Of course, it’s hard to plan ahead and know exactly what you’ll need to cut in the future, but if you have any foresight into that, plan your layers accordingly.
Once you’ve cut a layer or element, you can do whatever you’d like to with it. My favorite use of the cut feature in Procreate is to cut an object out of one piece of art and paste it into another. This is a great way to merge your Procreate drawings.
This is also my favorite use of copying, which leads us nicely into that great Procreate function.

How to Copy in Procreate
To copy in Procreate, make sure that your desired layer is highlighted, or you’ve used the select tool to select your desired elements. Swipe up with 3 fingers to access the copy and paste menu and click Copy or Copy & Paste. You can also click on the wrench to open the Actions tab and click the Copy button there.
Let’s walk through that step by step.
1. In the Layers panel, select the layer that contains the elements you want to cut. If there are a jumble of elements on your layer, check out my guide on selecting one element.
2. Click on the arrow icon in the top toolbar, which is the Transform tool
3. Click on the wrench to open the Actions menu, and choose the Add submenu. Or, use 3 fingers to swipe up on your canvas to open the Copy and Paste menu
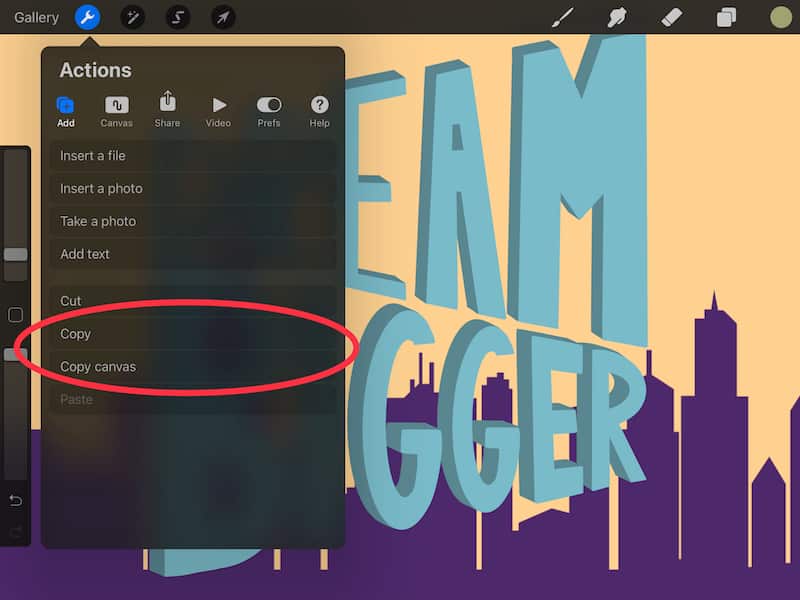

4. Click Copy or Copy and Paste
As you’ll notice, the process for copying is almost identical to cutting. The one difference is that you’ll notice a button in the Actions menu that says “Copy Layer.” This gives you a quicker and easier way to copy an entire canvas, instead of having to do it manually.
Copying and pasting within the same piece of artwork is a great way to create multiple versions of each element without having to draw them manually. This is great for clouds, for example.
This is also great for merging pieces of art together.
Cutting, resizing, cutting, and copying are all crucial aspects of using Procreate that will not only make your work process more efficient, but also give you the freedom to manipulate your art canvases as needed.


Diana has been an artist for over 27 years and has training in drawing, painting, digital drawing and graphic design. Diana’s latest obsession is digitally drawing with Procreate and Procreate Dreams. Diana has experience selling her art across a number of platforms and loves helping other artists learn how to make money from their art as well.