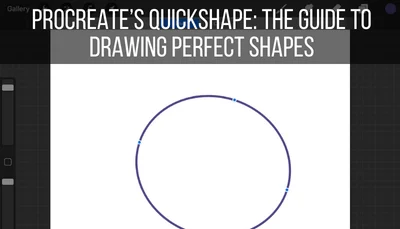
Drawing perfectly straight lines is something that Procreate can do easily. It’s almost like magic. No more rulers or shaky hands. Procreate’s auto straighten feature makes straight lines easy to create.
To draw a straight line in Procreate, simply draw a line and hold your stylus on your screen until you see the line straighten. Before lifting up, you can rotate or shorten the line until it’s in the position you want. This technique works for drawing other shapes in Procreate as well.
Procreate’s straight line feature is a game changer and a huge perk of this amazing drawing software. It can go wrong though. Some users complain of getting into situations where they can only draw straight lines.
Not good.
Let’s dive into the tips and tricks you need to know to draw straight lines in Procreate. And, what you need to know so that you don’t end up in a straight line trap. Here are the dos and don’ts of drawing straight lines in Procreate.
How to Draw Straight Lines in Procreate
1. Draw a line
To begin with, we need a line. BUT, do NOT lift your stylus up from your screen yet. If you’re drawing with your finger, do NOT lift your finger up yet.
2. When you reach the end of your line, hold down your finger or stylus
Again, do NOT lift your finger or stylus off of your iPad screen when you’re done drawing your line.
When you hold your stylus on your iPad screen, this will tell Procreate to create a straight line from it. Hold your stylus on your screen until you see your line snap into a straight line.
3. If you want to shorten or rotate your line, move your finger or stylus around the canvas until you get the length and angle you want
If you need to shorten, lengthen, or rotate your line, go ahead and do that before lifting your stylus up from your iPad screen.

Note: you will only be able to move the end point of your line. The starting point of your line will stay put. If you need to move the entire line, release it and use the Transform tool to move your line around your canvas.
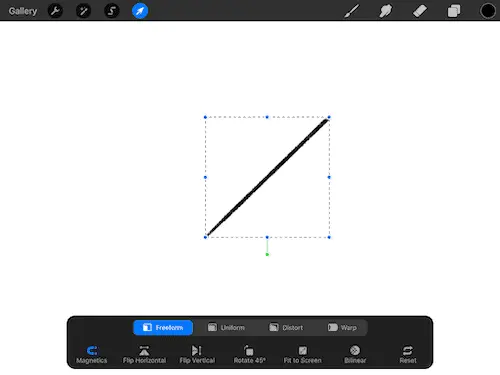
The Transform tool is the icon in the top menu bar that looks like a computer cursor.
How to Draw a Perfectly Horizontal or Vertical Line in Procreate
Drawing a straight line is great, but it’s hard to know if it’s crooked or not. How do you get it to be an exact 90 or 180 degrees? If you need a line that’s exactly parallel with the canvas, Procreate makes it easy to do.
The quickest way to create a perfectly straight horizontal or vertical line is to wait for your line to snap into a straight line, and then tap your finger on your iPad screen. This will make your line snap to whichever angle is closest to it.
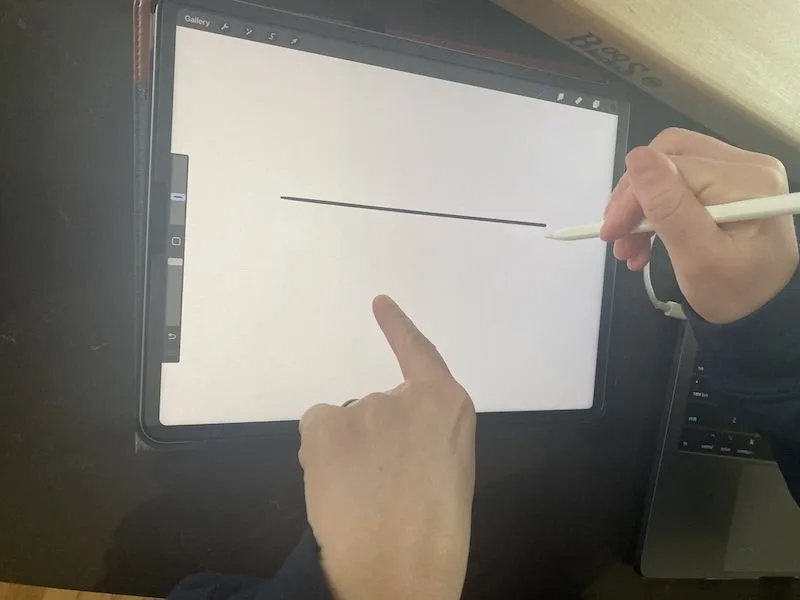
With your finger held down on your iPad screen, you can rotate your line and see it snap to various angles.
There are other methods too, which can be preferable depending on what you’re trying to accomplish with your art.
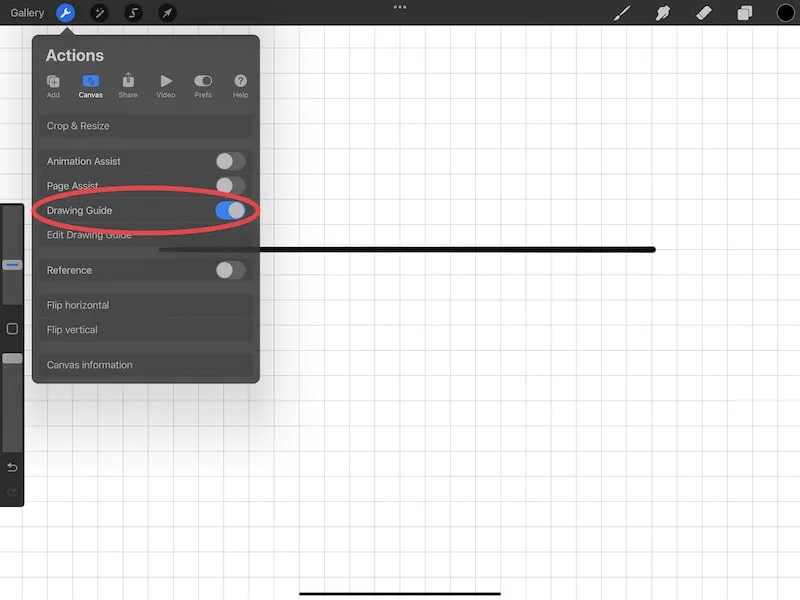
1. Click on the Actions tab in the main menu. It’s the icon that looks like a wrench
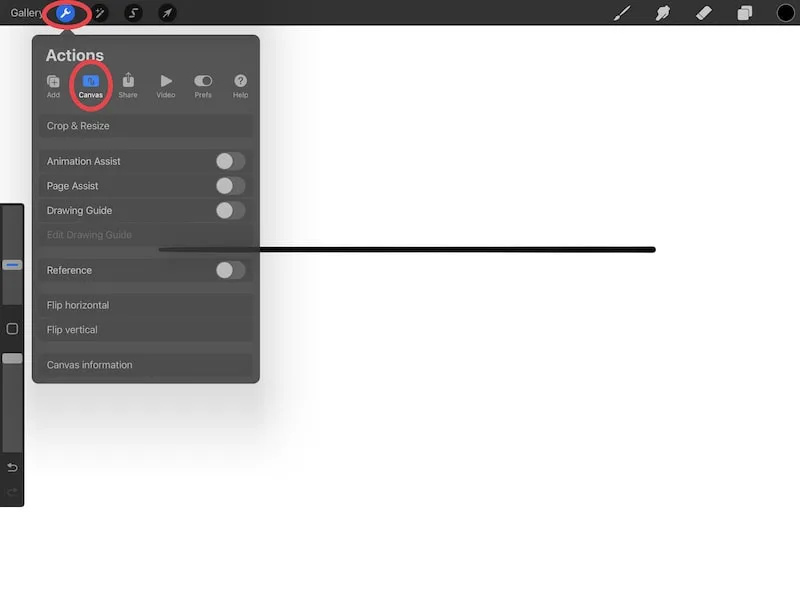
2. Toggle on the Drawing Guide and make sure it’s on the grid setting
If your drawing guide defaults to the grid when you toggle it on, hooray! You’re good to go. If it doesn’t, click on the button to edit your drawing guide and switch it to the grid.
I have a full guide on using grids in Procreate if you want to learn more about how to use them with your Procreate art.
I also have a full guide on using Procreate’s drawing guides and drawing assist if you want to learn more about drawing guides overall.
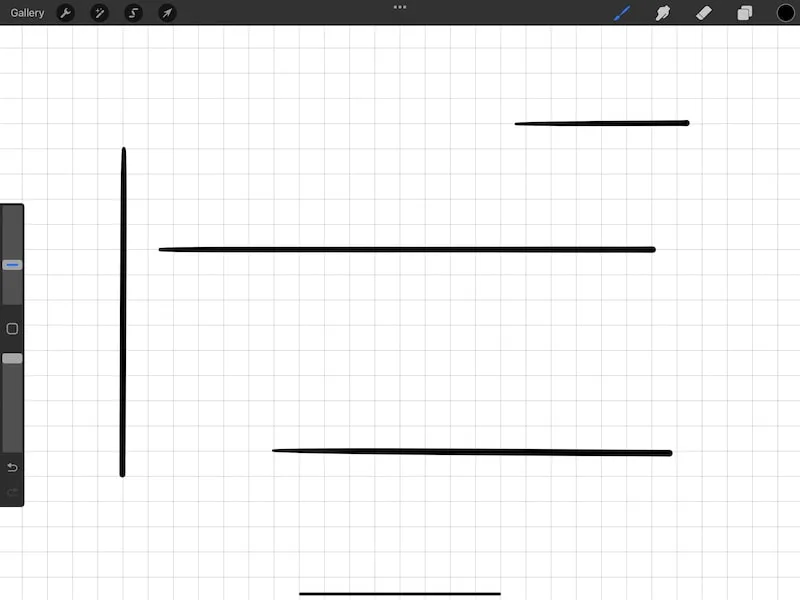
3. Drag and hold a line along your grid and wait for it to snap to a straight line
Do the same method of dragging and holding your line that we talked about earlier. This time though, do your best to follow one of the grid lines.
This gives you a better way to see where your lines are and plan where you want your future lines to be.
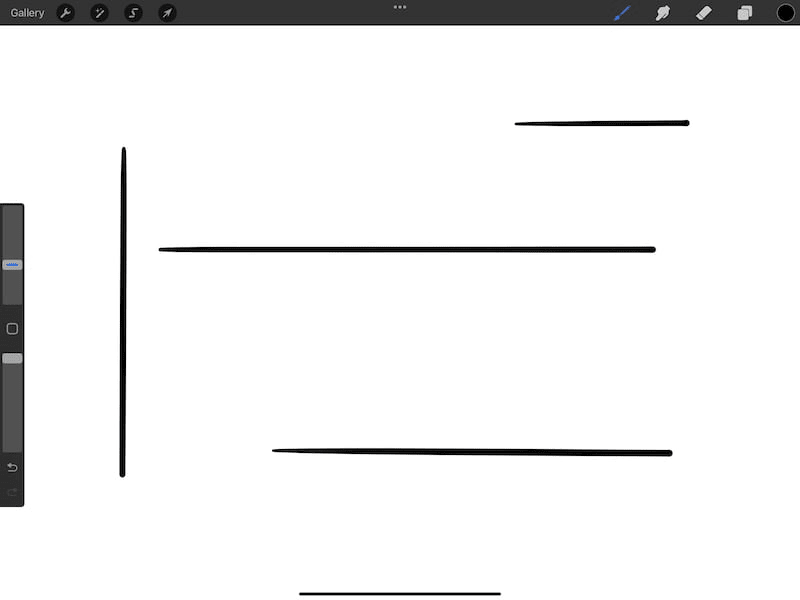
4. Turn off the Drawing Guide and you’ll have a perfectly straight and parallel line
How to Draw a Straight Line at an Angle with Procreate
If you’re drawing in perspective, it can be important to draw lines at specific angles. There are two methods of doing this with Procreate.
1. Draw a straight line
Drag and hold your stylus across your iPad screen to create a straight line. If you want it to be perfectly vertical or horizontal, hold your finger down or use the grid drawing guide like we’ve discussed.
2. Open the Transform tool (the icon that looks like a computer cursor in the top menu bar
With your line drawn, go ahead and activate the Transform tool. I have a full guide on using Procreate’s Transform tool if you want to learn more.
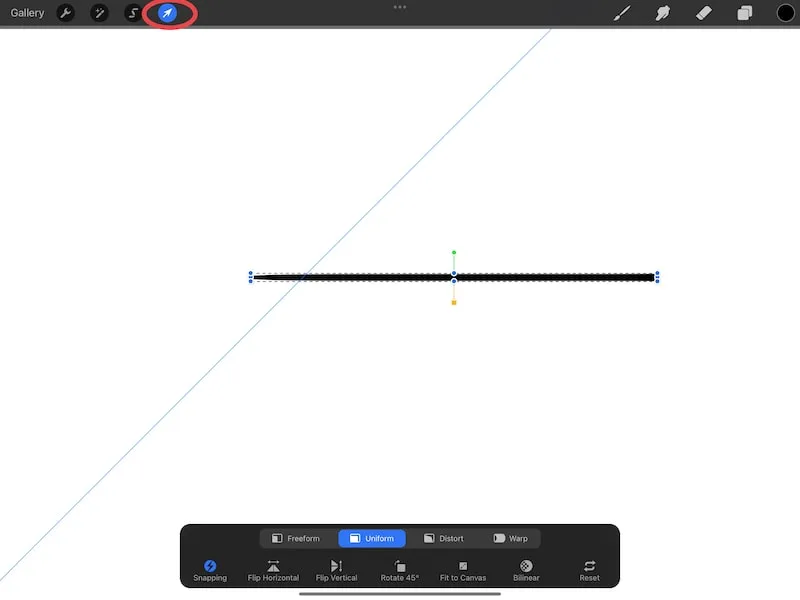
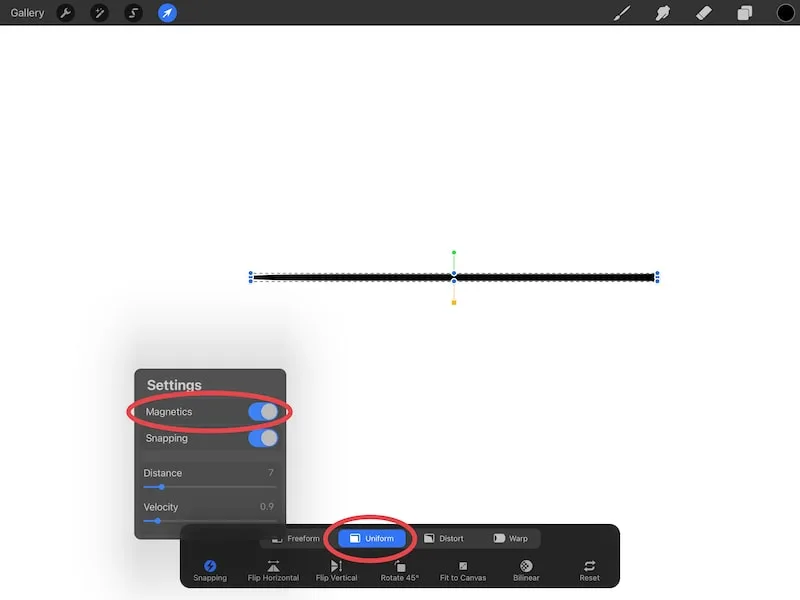
3. Make sure that you are using the Uniform setting and the Magnetics is on
You’ll find the Uniform setting within the Transform settings. To find Magnetics, tap on the Snapping button. This will show you the toggle for Snapping and Magnetics.
4. Rotate your line to your desired angle
As you rotate your line, you’ll see the angle it’s being rotated at.
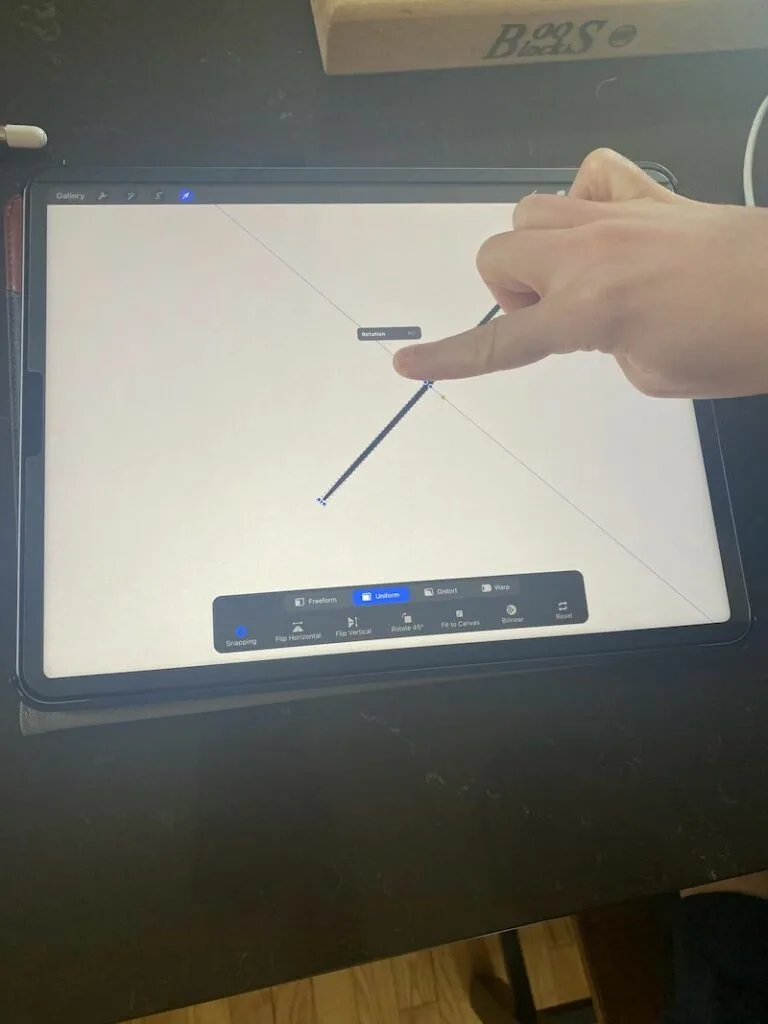
There’s another method for drawing angles though, which is especially great if your design relies heavily on perspective and you don’t want to worry too much about rotating your lines.
1. Click on the Actions tab, which is the icon that looks like a wrench in the main toolbar

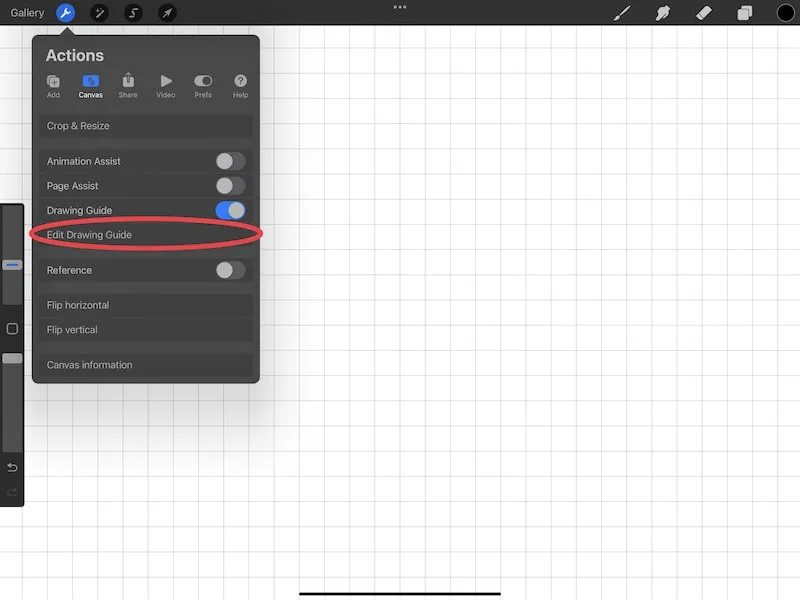
2. Turn on the Drawing Guide and click the button below it to Edit Drawing Guide
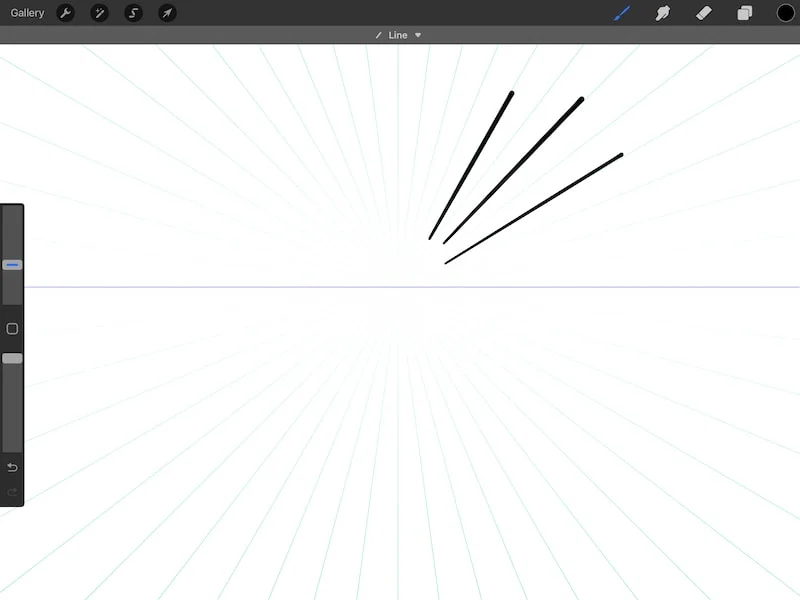
3. Click on the Perspective button and tap your finger on your canvas where you want your vanishing point to go
Once you choose the Perspective option, you’ll need to lay down at least one vanishing point. You can lay down more than one vanishing point if you need to. To do this, simply tap on your screen where you want your vanishing point to be.
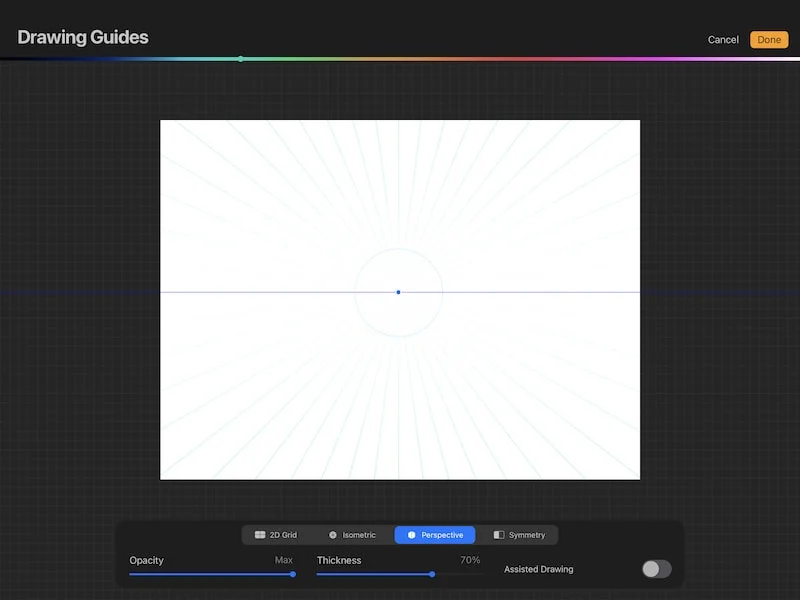
4. Click Done and you’ll have a series of angled lines that will give you perfect perspective from your vanishing point.
All of these lines will be drawn in perspective based on the vanishing point you laid down. Pretty neat!
How to Draw Perfect Shapes in Procreate
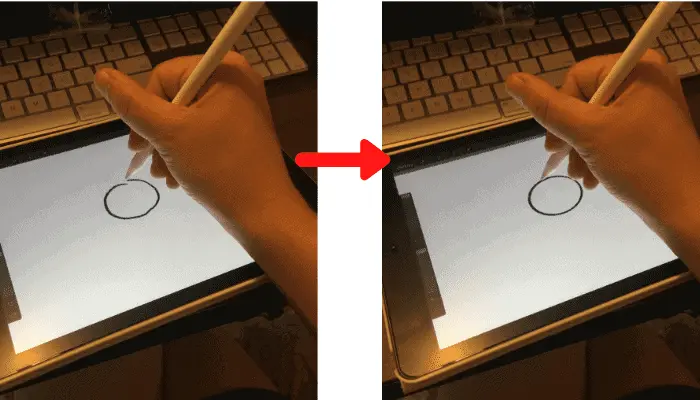
A circle is the farthest thing from a straight line but, it uses the same technique, so it’s worth mentioning. This can be used for squares and triangles as well.
1. Draw a circle
2. When you reach the end of your circle, hold down your finger or stylus
3. If you’re happy with your circle, release your finger or stylus
4. If you want to shorten or rotate your circle, move your finger or stylus around the canvas until your circle is the size you’re looking for
If you’re an artist with shaky hands like I am, the ability to draw perfectly straight lines and perfectly round circles is pretty incredible. I use these features SO often and really love how they increase the efficiency and cleanliness of my designs.
Sometimes, the straight line feature goes into overdrive. Line after line, no matter how hard you try to draw something crooked, curved, or squiggly, all you get is straight lines. What’s going on? Let’s find out.
Why is Procreate Only Drawing Straight Lines?
If Procreate will only draw straight lines, it’s likely that Drawing Assist has accidentally been triggered or left on.
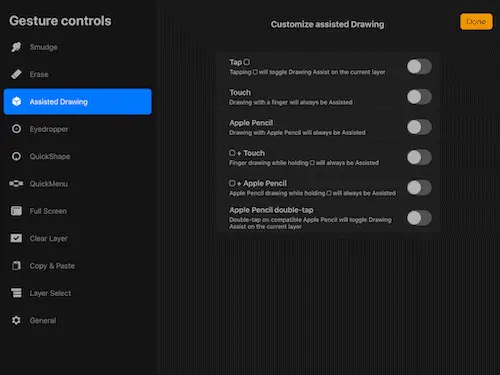
Navigate to the Actions tab and click on Preferences. Next, click on Gesture Controls and then Assisted Drawing. Either turn off all of the gestures relating to Drawing Assist, or know how you’re triggering it. That way, you won’t be as surprised when Drawing Assist turns on.
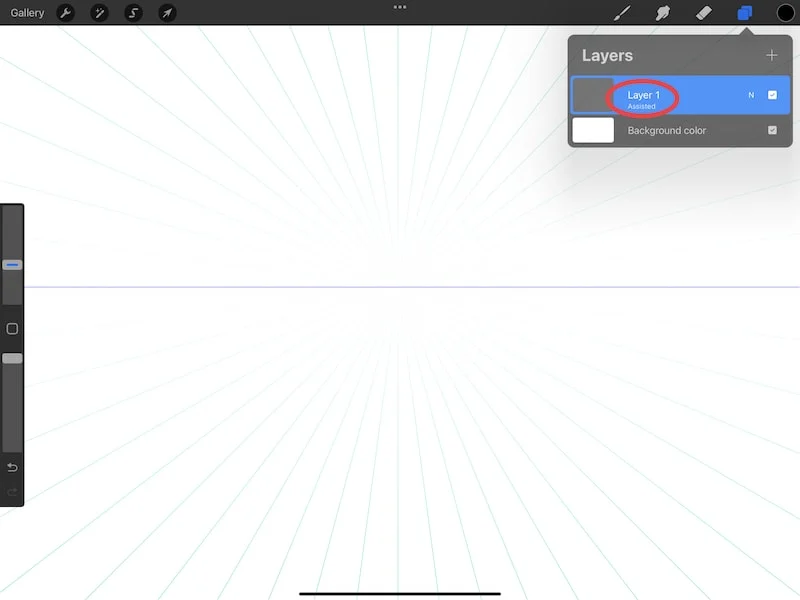
Also, look at your Layer’s panel and make sure that your layers don’t have Drawing Assist enabled if you don’t want it to be.
You can tell if Drawing Assist is enabled for a layer if you see the little “Assisted” label within it.
Procreate’s Assisted Drawing tool is designed to help artists with technical designs. When you draw a line, it will snap to the drawing guide you have selected (2D grid, isometric, perspective, or symmetry).
This is really great when you need it, but not so great when you don’t.
Part of the problem is that it’s easy to activate Assisted Drawing. If you look at the Assisted Drawing settings, there are a number of ways to turn it on without ever having to go into the actual settings for this feature. Tap your Apple Pencil in the wrong way and you could end up with straight lines for days.
It’s also easy to forget that Assisted Drawing is enabled within the Drawing Guide settings. You might turn on the Drawing Guide without actually going into the settings, which makes it easy to forget that Assisted Drawing is enabled.
If you’re struggling with Procreate drawing straight lines all of the time, 99% of the time, it’s an issue with the Assisted Drawing being turned on. Go through all of your settings and make sure that it’s turned off and can only be enabled if you consciously activate it.
How to Draw a Straight Line in Procreate Pocket
To daw a straight line in Procreate Pocket, follow the same steps you would use to draw a straight line in the iPad Procreate app. Draw a line in your canvas on Procreate Pocket and hold down your stylus at the end of your line until it snaps to a straight line.
Procreate is an amazing and powerful digital drawing software. The fact that it can make perfectly straight lines and perfectly round circles is something we start to take for granted. But, when you really think about it, these are features that artists have never had access to without clunky rulers or compasses.
As long as you don’t get caught up in an Assisted Drawing snag, Procreate will become your best friend as you draw straight lines.
Go forth and create great art!

Diana has been an artist for over 27 years and has training in drawing, painting, digital drawing and graphic design. Diana’s latest obsession is digitally drawing with Procreate and Procreate Dreams. Diana has experience selling her art across a number of platforms and loves helping other artists learn how to make money from their art as well.

