The great thing about iPads is that they are touch sensitive and we can use our fingers to operate them. Most of the time, our fingers are our styluses of choice! It gets a little bit murky though when we’re talking about drawing programs like Procreate. Can you actually use your finger to create amazing digital art with Procreate?
You do not need a stylus to use Procreate. You can use your finger to draw with Procreate because the brush weight is determined within the program and not by the size of the stylus.
The great thing about Procreate is that it gives you a lot of options. Use a stylus, use your finger, whatever you prefer. There are a few things you’ll want to keep in mind though if you want to be successful using your finger to draw with Procreate. Let’s dive into them.
1. Take Some Time to Get Used to It
Do you remember when touchscreens first came out and we were amazed that we could use our fingers to use our devices? For me, I was a bit clunky at first. I jabbed around with my index finger and tried not to accidentally push all of the wrong buttons. At this point, all of us are really good at using our fingers for touchscreens. We’re almost more used to touchscreens than we are to regular buttons.
No matter how comfortable we are using our fingers with our touchscreens, it suddenly seems like a strange choice when getting ready to draw or make a piece of art. What, are we going back to our finger painting days? Luckily, the art you can create with your finger on Procreate is well beyond what you made as a toddler.
Drawing with your finger will not come as intuitively as using a touchscreen. From the time we were kids, we learned how to draw with pens and pens aside from the occasional finger paint adventure. You might be a little bit clunky and awkward the first time you use your finger to draw. And that’s ok! Take some time to play around with it and refine your skills.
2. Consider Palm Rejection
When you draw with your Apple Pencil, palm rejection is built in. This means that touches made by large surfaces, such as your palm, won’t leave marks on your canvas.
Not having palm rejection can be an annoying feature of drawing with your finger. If you find this to be unbearable, you may want to use a screen guard or a stylus.
3. Remember that Your Stylus, or Finger, Doesn’t Impact Your Brush Strokes
Within Procreate, you can change the brush size using a slider within the dashboard. This means that whether your stylus is the size of a pinprick or the size of a can of soup, your brush stroke or pencil line will always be the same size. If you need to make it thicker or thinner, simply adjust it with the slider.
Thankfully, using your finger doesn’t mean that all of your brush strokes will be as thick as your fingertip.
It will take some time to get used to making accurate lines with your fingertip though. In comparison to a pencil point, our fingers are pretty big. This can make it hard to know exactly where the line is going.
Zooming is your friend with finger drawing.
Ideally, you want the size of your lines and brush strokes to be big enough that you can accurately place them on your canvas. The great thing about Procreate is that they make this really easy to do with the zoom feature. If you’re drawing thin lines or precise brush strokes, zoom in enough so that you feel like you have more control.
Overtime, you’ll understand how your finger works within Procreate and you won’t need the zooming feature as often. Until then, take advantage of this great feature that Procreate has to offer to make your life a bit easier.
4. Decide What You Want to Use Your Finger for and What You Don’t
Whether you’re using a stylus or your finger, you’ll want to give Procreate some guidance on how to respond to either of them. You see, Procreate is really amazing. I mean, we already knew that, but here’s the 2 millionth reason why it’s so cool. Procreate can tell the difference between a stylus and a finger. This means that you can tell Procreate that you want it to do certain things depending on which one you’re using. Here’s how:
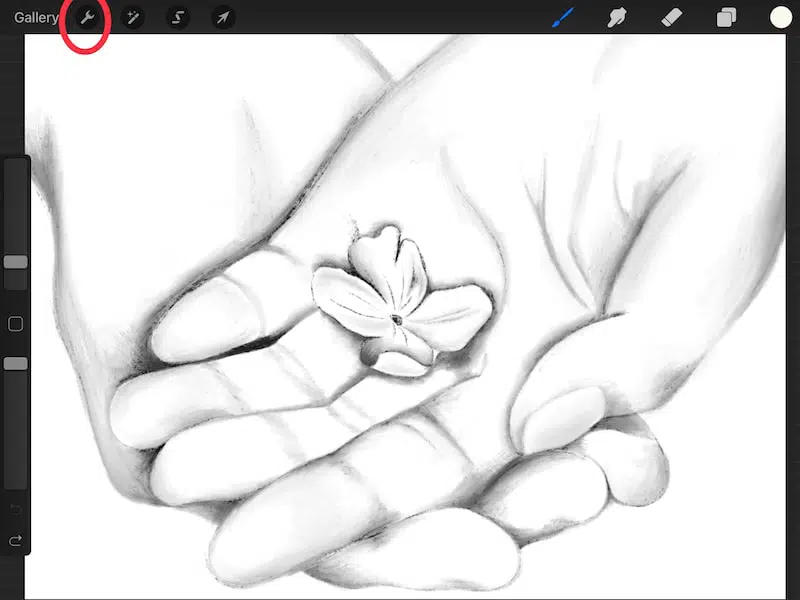
- Tap on the wrench in your top toolbar.
2. Choose “Prefs” and then tap on “Gesture controls.”
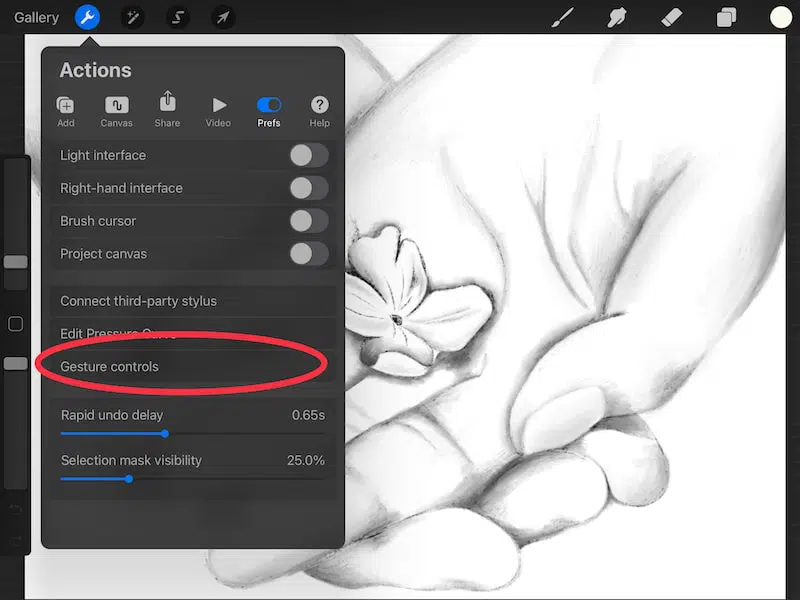
3. In the “General” section, toggle on the option to “Enable painting with finger”
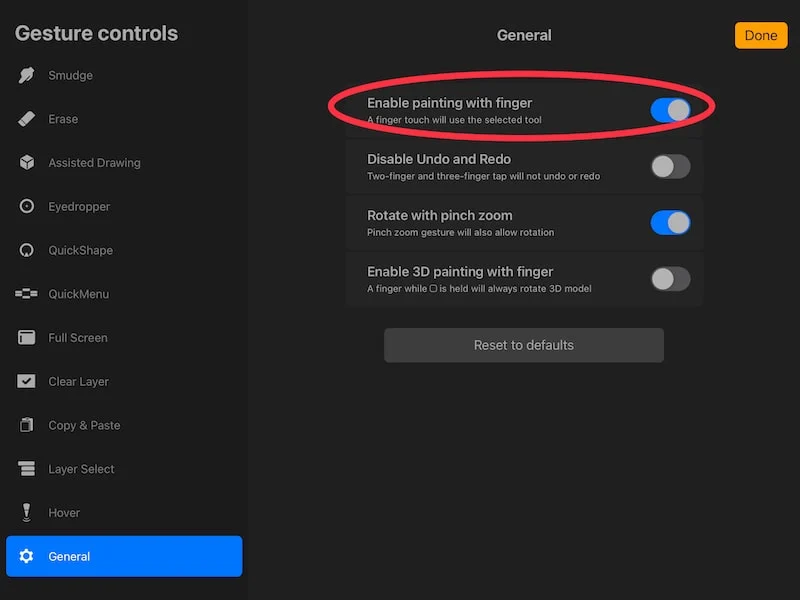
Your finger is the cheapest stylus that you’ll never lose. There’s a huge benefit for that. If you ever forget your Apple Pencil, you’ll still know how to make some amazing art.
5. Use Your Finger as a Way to Learn Procreate
As we talked about, your finger is the cheapest stylus you’ll never lose. You may not feel ready to spend the money on an Apple Pencil until you know that you like digital drawing and the Procreate platform. Learning how to use Procreate with your finger can be a great way to ease in the platform without a bigger financial investment into an Apple Pencil.
Using your finger first will also force you to learn some of the nuances of Procreate. Once you switch over to an Apple Pencil, you’ll already have a good understanding of how Procreate works. This can be a great way to learn Procreate if you’re not ready for an Apple Pencil yet.
How to Turn Off Finger Drawing in Procreate
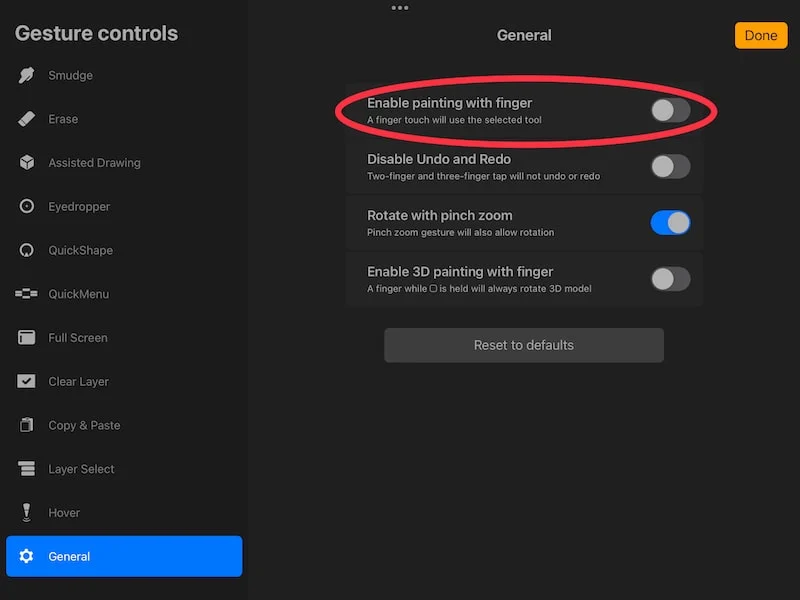
To turn off finger drawing, go to the Gesture Controls panel and click on the “General” button. Within these options, toggle off the “Enable painting with finger” option. When this is toggled off, you won’t be able to use your finger for drawing.
Procreate makes it really easy for artists to use their fingers to create masterpieces. With a little trial and error and adjustment of a few settings, you’ll be drawing with your finger as though it’s the finest pencil. Give it a try and just have fun with it!

Diana has been an artist for over 27 years and has training in drawing, painting, digital drawing and graphic design. Diana’s latest obsession is digitally drawing with Procreate and Procreate Dreams. Diana has experience selling her art across a number of platforms and loves helping other artists learn how to make money from their art as well.

