Procreate isn’t just for drawing. Did you know that you can add text to your art in Procreate?! Adding text is a really neat feature, whether you need to label anything in your art, add captions, or simply spice up your art with text.
To add text in Procreate, tap on the wrench to open the Actions menu. Tap on the Add menu and choose the Add Text button. Use the keyboard to type out the text you need. Choose the font, style, design, and attributes of your text and then position it on your canvas.
Let’s walk through what you need to know about adding text to your Procreate art, step-by-step.
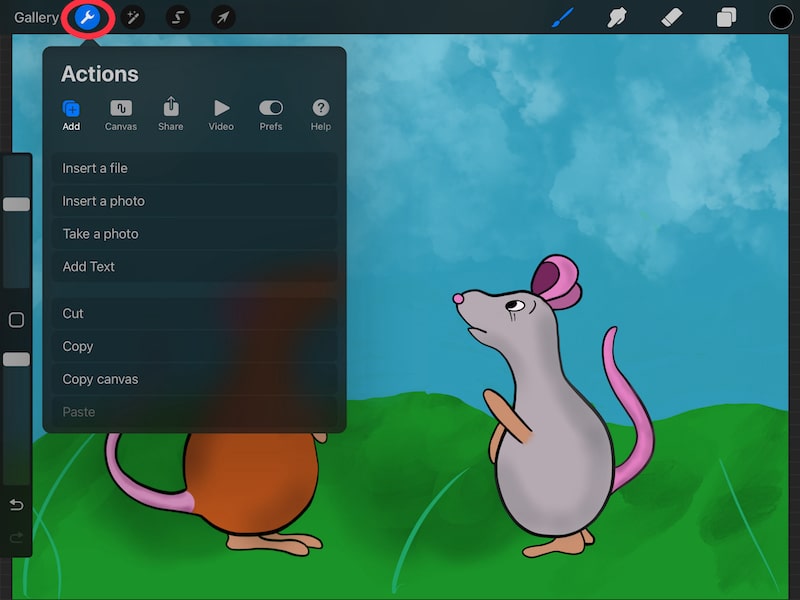
1. Open the Actions menu
Click on the wrench in your top Procreate toolbar to open the Actions menu.

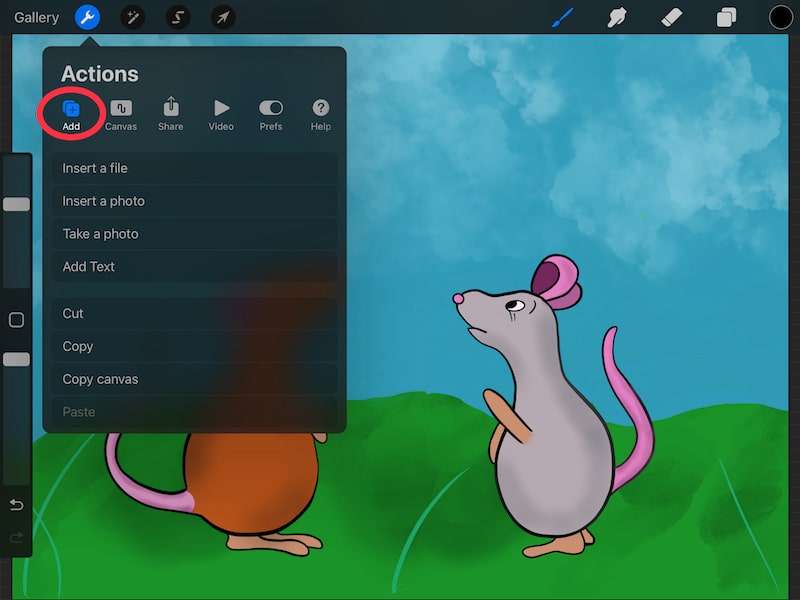
2. Choose the Add menu
Within the Actions menu, tap on the Add menu.

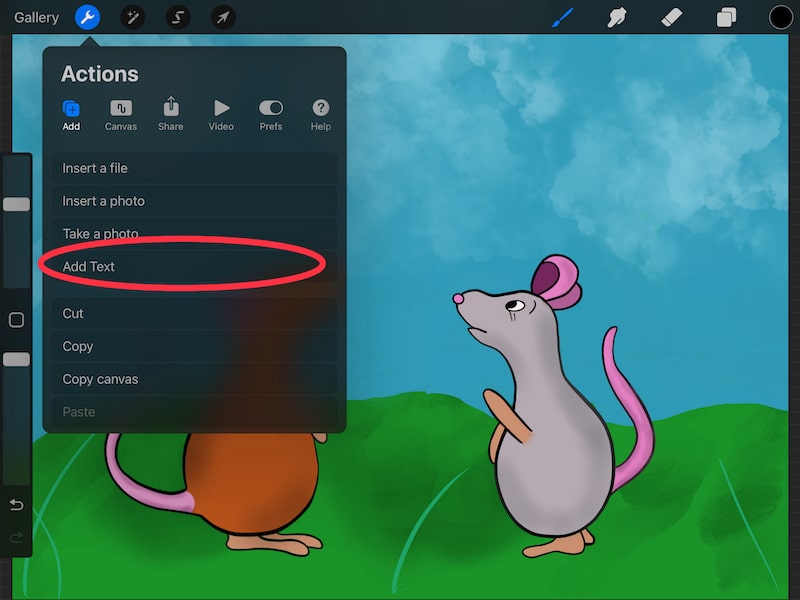
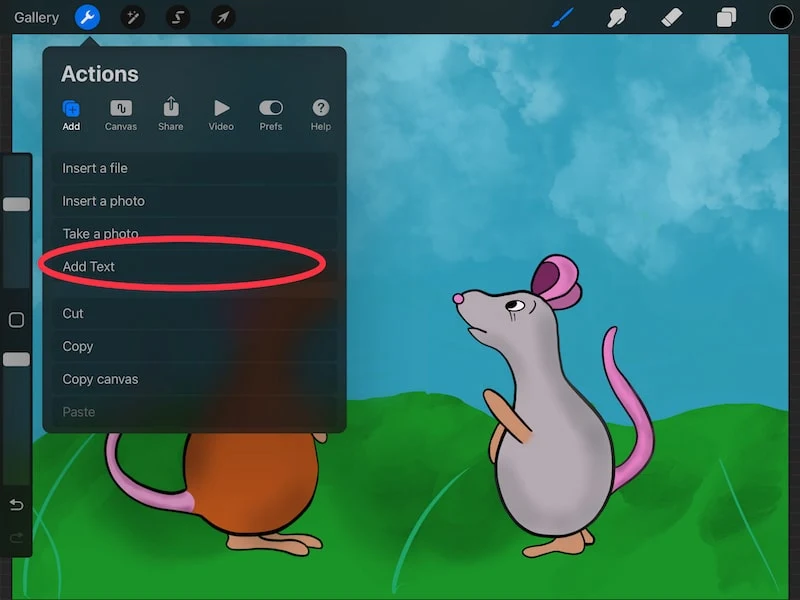
3. Tap on the Add Text button
Within the Add menu, you’ll see an Add Text button. This is the button we’ll need to add text to our art, so go ahead and tap on it.
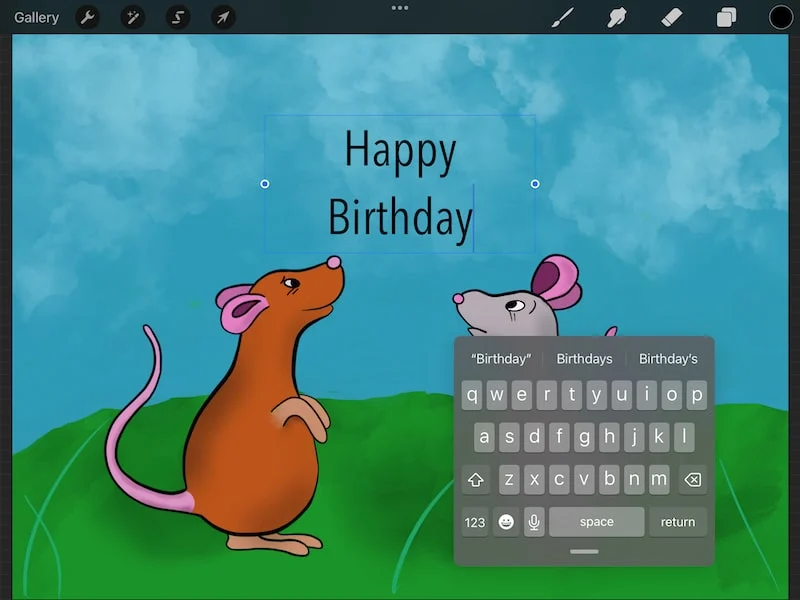
4. Use your keyboard to add your text
When you add text, your keyboard should automatically pop up. If it doesn’t, double tap on the text to open the text settings and choose the keyboard icon.
Important note: your text will be added in whatever color is currently active in your color wheel. You can easily change this, which we’ll talk about later.

5. Adjust the Font of your text
Once you’re done typing your text, double tap on it to open the text settings. Then, highlight the text you want to adjust.
Important note: your text has to be highlighted in order to make adjustments to it. This is awesome because it means you can highlight various parts of your text if you want them to have different effects.
But, it can be easy to forget. If you’re trying to change your text and wondering why nothing is happening, make sure it’s highlighted.

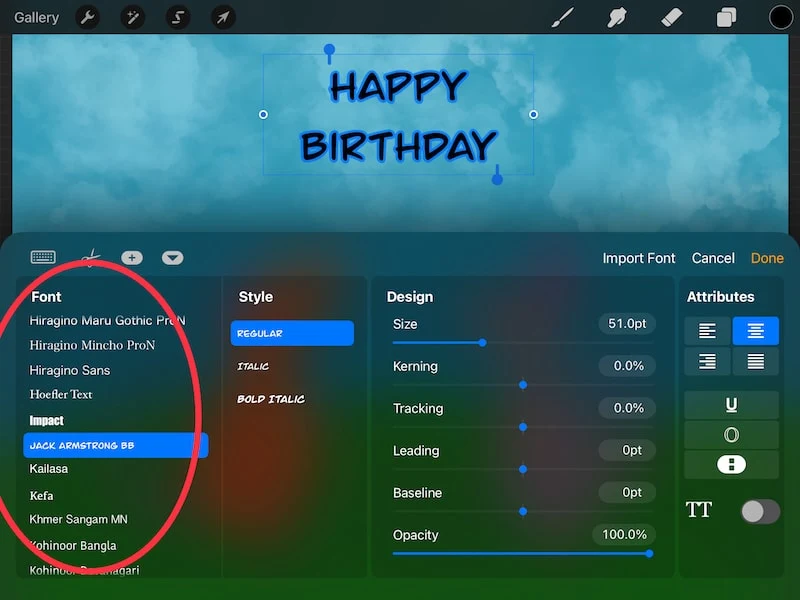
Once you’ve highlighted your text, tap on the font. When you do, the text settings will expand to show you the plethora of fonts, styles, designs, and attributes you can choose from.
Experiment with different fonts until you find the one you like. Have fun with it! You can also import fonts by using the Import Font button in the top right corner of your font settings. Procreate is compatible with TTC, TTF, and OTF font files.
6. Adjust the Style of your text
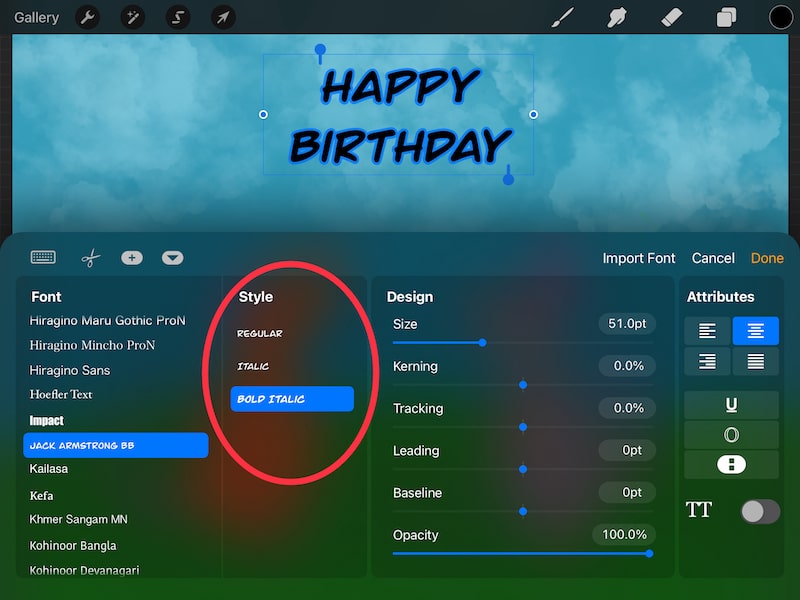
Once you’ve picked your font, choose the style of your text.
Important note: certain fonts have certain styles. You may not have every style available to you with every font.
Depending on the font you choose, you can have various style options like bold, light, italic, and more.

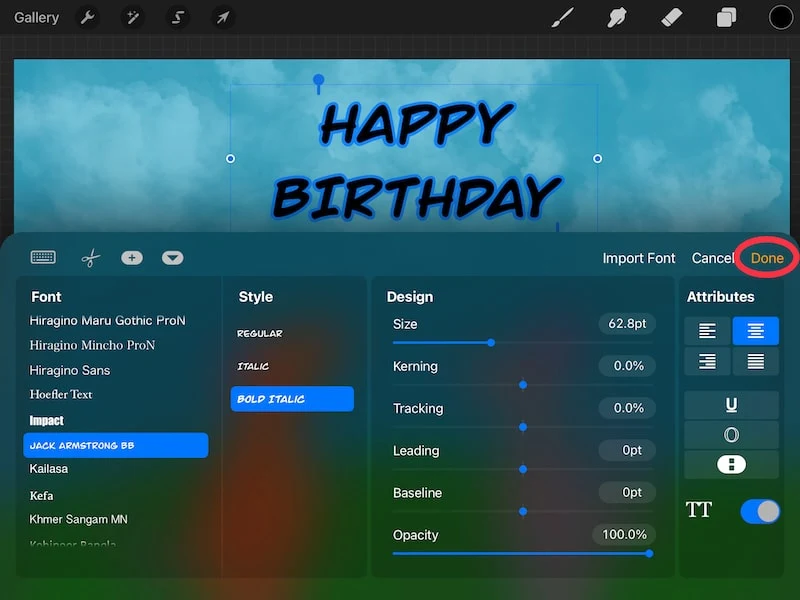
7. Adjust the Design of your text
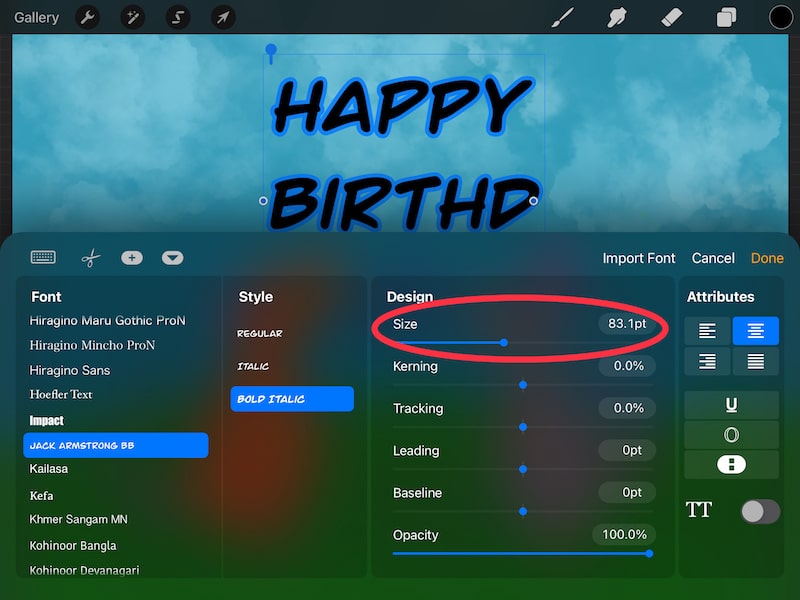
As we move along the text settings, we reach the Design section. There are quite a few options within this setting, so let’s talk about them one at a time.
Procreate’s undo and redo features work with the text effects so, if you make a change you don’t like, simply tap two fingers on your screen to undo it and three fingers to redo it again.
–Size: this will impact how big your text is. You can either use the slider, or tap on the number to enter the size of your text manually.

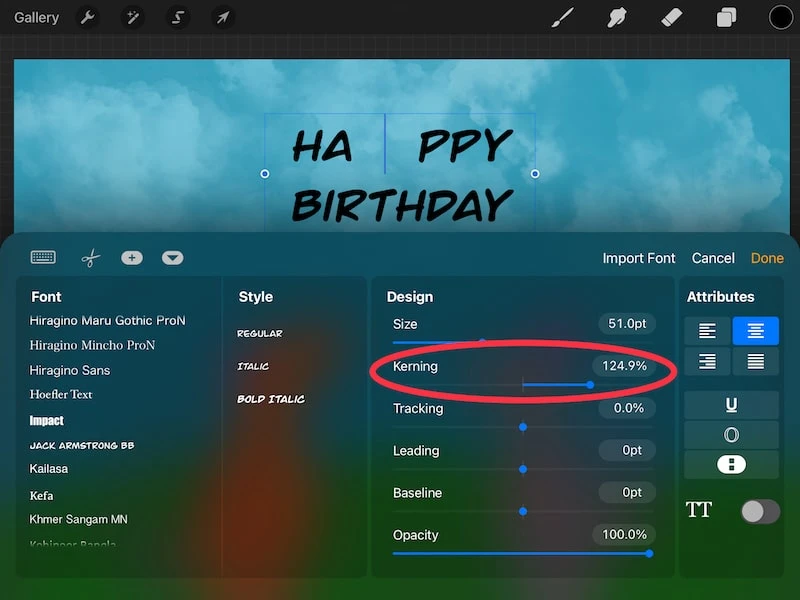
–Kerning: this will impact the spacing in between two individual letters. If you don’t have your text highlighted, kerning will only be applied to the two letters that your cursor is sitting between.
If you’ve highlighted part or all of your text, the kerning will be applied to whatever is highlighted.
You can either use the slider, or tap on the number to enter the kerning number of your text manually.

–Tracking: this will impact the spacing of your words. I know this seems similar to kerning. In practicality, they are similar, though they work in different ways.
Unlike kerning, tracking will NOT increase the spacing of two letters based on where your cursor is placed. You need to have part or all of your text to be highlighted for tracking to take effect.
You can either use the slider, or tap on the number to enter the tracking number of your text manually.
I know that the differences between kerning and tracking are confusing and can be hard to notice depending on what you’re doing with your text. Experiment with both to find the effects you need.
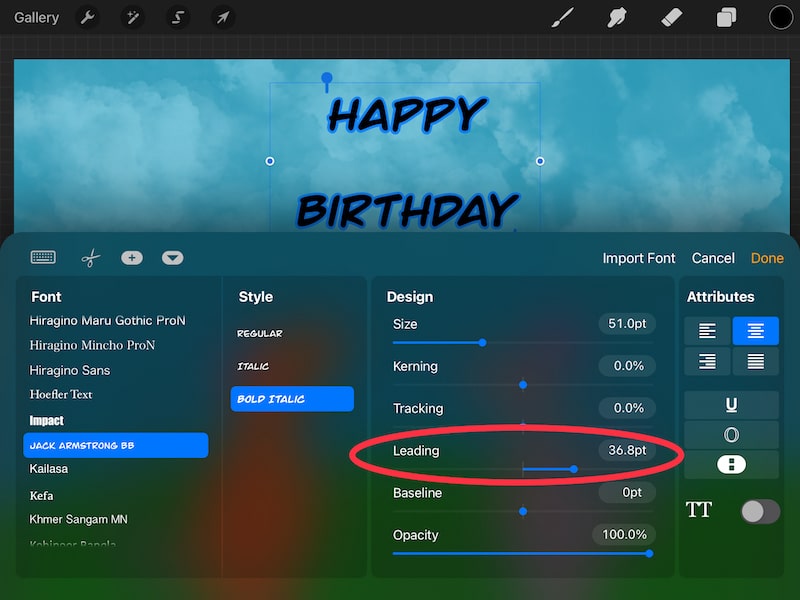
–Leading: this will impact the space between your lines of text. You can either use the slider, or tap on the number to enter the leading number for your text manually.

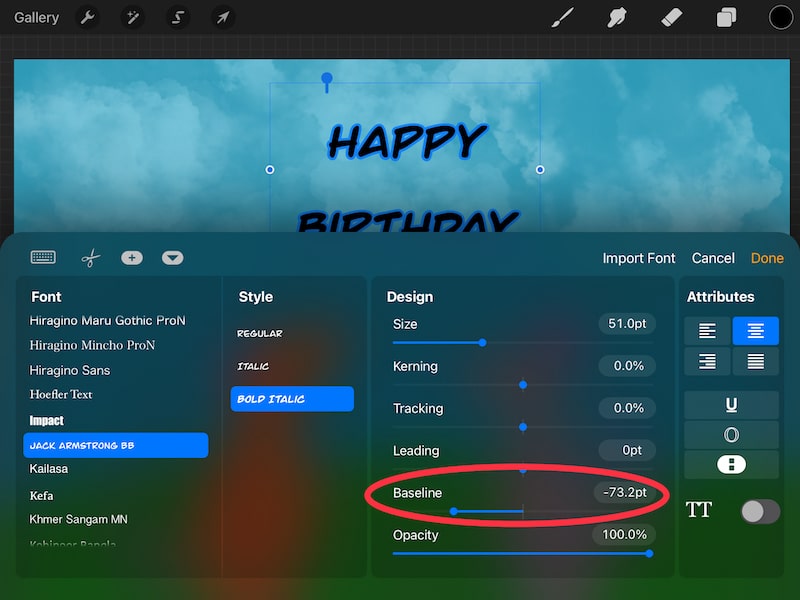
–Baseline: this will impact the positioning of your text. Think of your text sitting on a line. When you adjust the baseline setting, you adjust where the text sits on that line. You can either use the slider, or tap on the number to enter the baseline of your text manually.

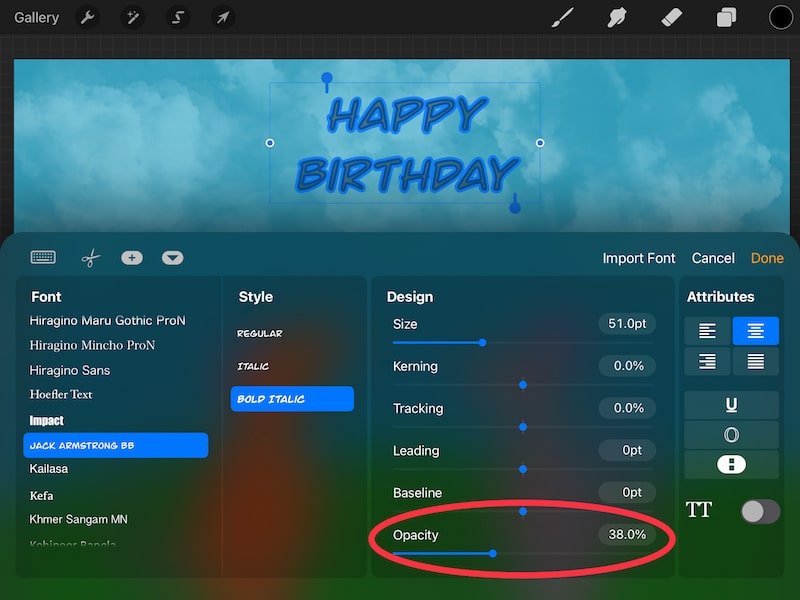
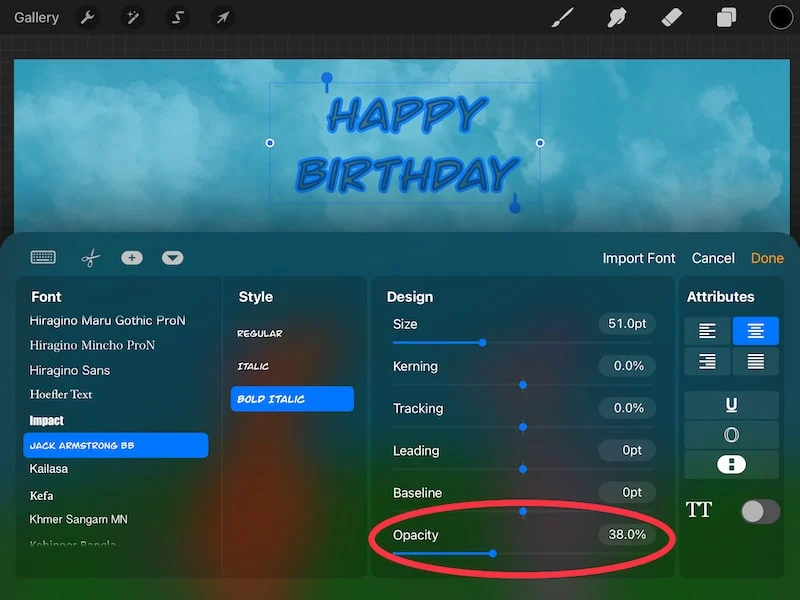
–Opacity: this will impact how opaque or transparent your text is. You can either use the slider, or tap on the number to enter the opacity percentage of your text manually.
8. Adjust the Attributes of your text
The last section in the text settings we’re going to look at is the Attributes section. Let’s walk through these one at a time.
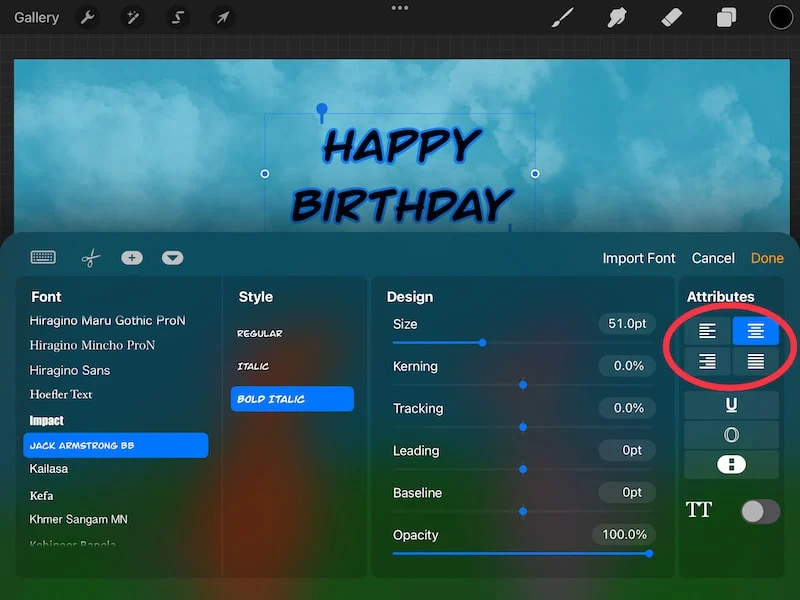
–Alignment: at the top of the Attributes section, you’ll see some squares with lines in them. These are your alignment options. You can choose to align your text to the left, right, center, or justified.

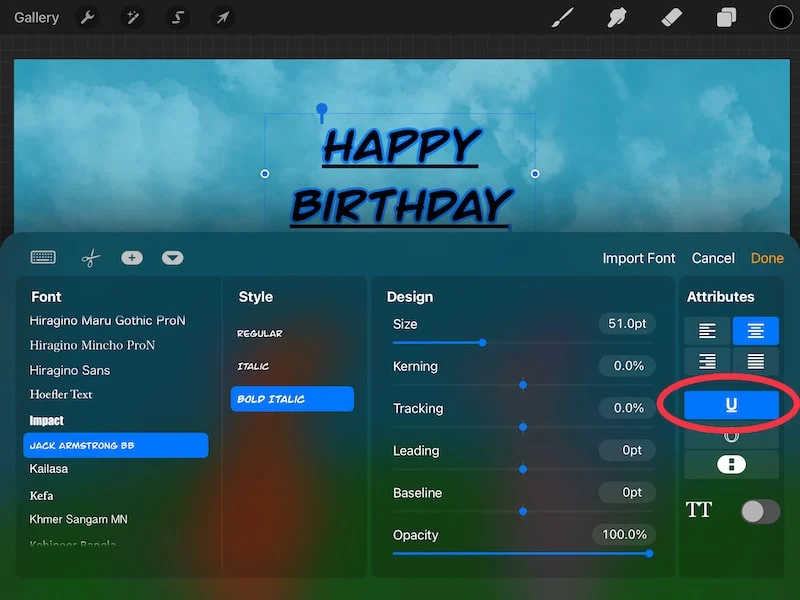
–Underline: the U icon will underline your text

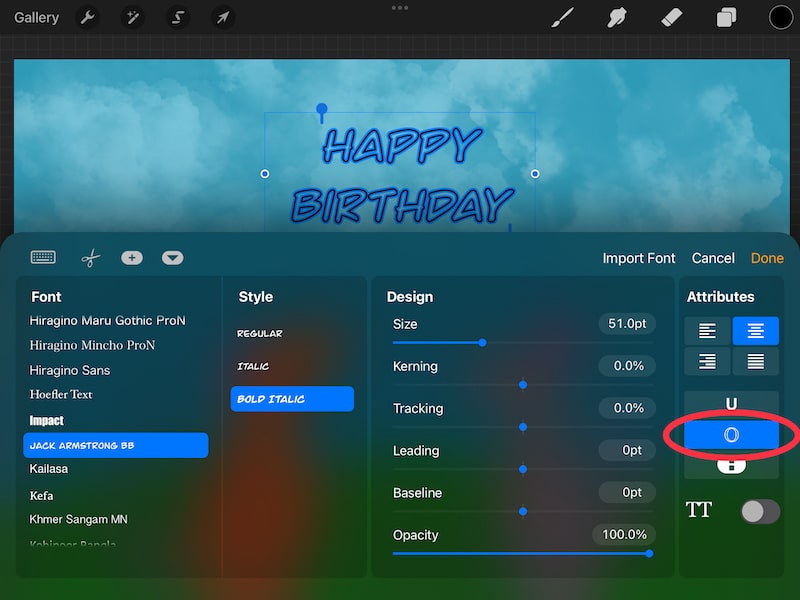
–Outline: the icon of the outlined O will outline your text. I have a full guide on outlining lettering and text in Procreate to check out if you want to learn more!

–Vertical vs. Horizontal: the icon with the two vertical dots will impact whether your text is lined up vertically or horizontally
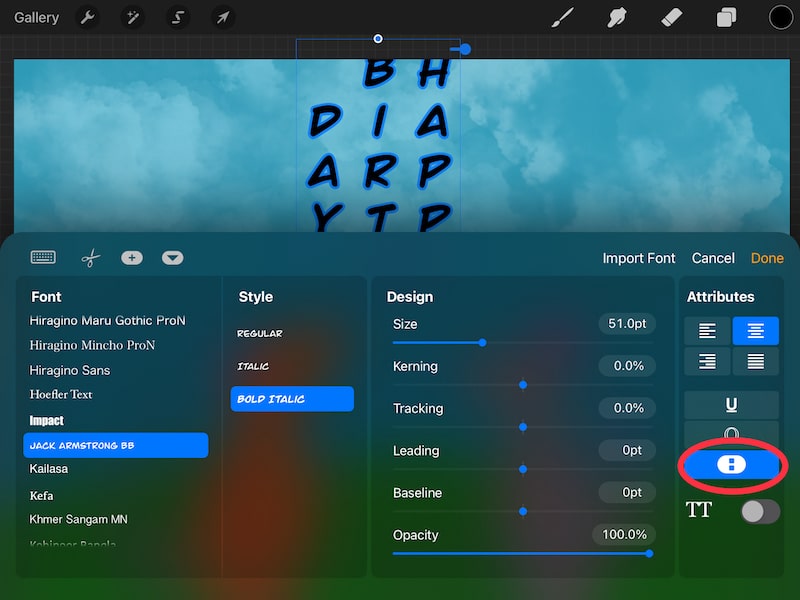

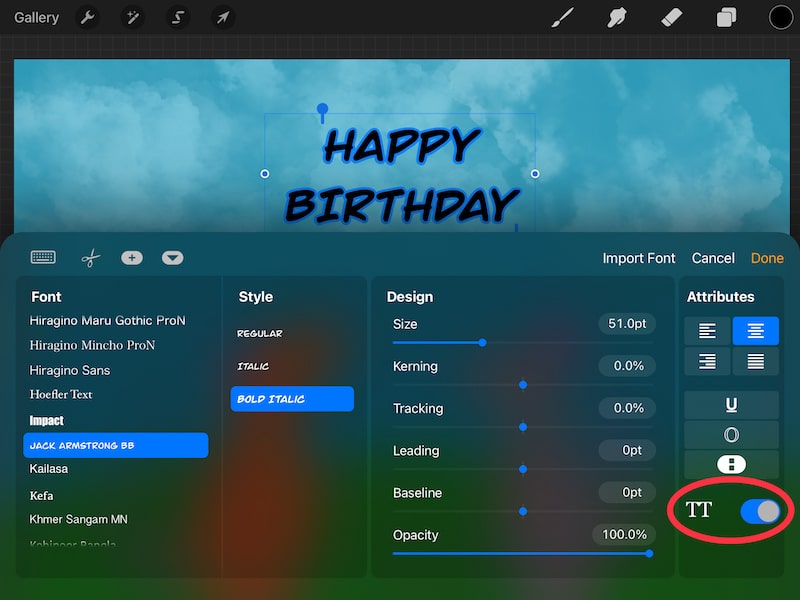
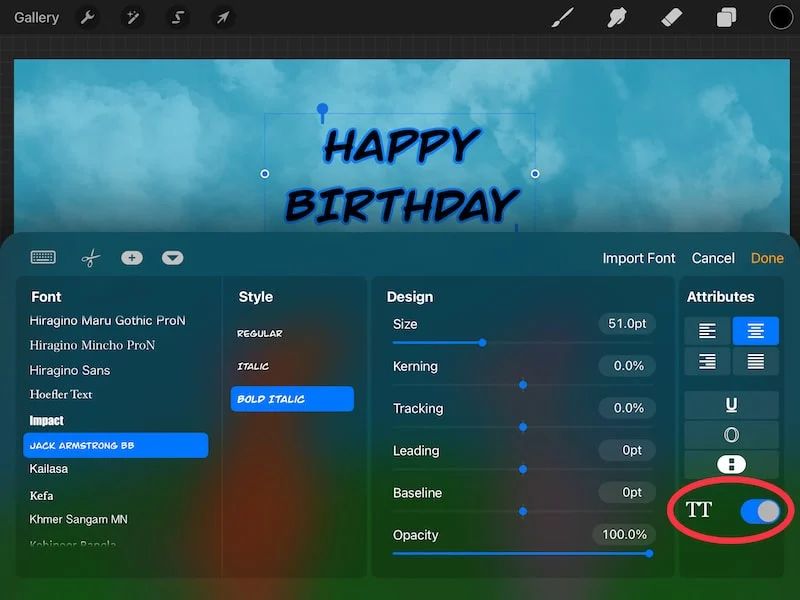
–Capitalization: the toggle next to the TT icon will capitalize your text if toggled on
9. Finalize your text
Review all of your text settings and make sure they’re what you want them to be.
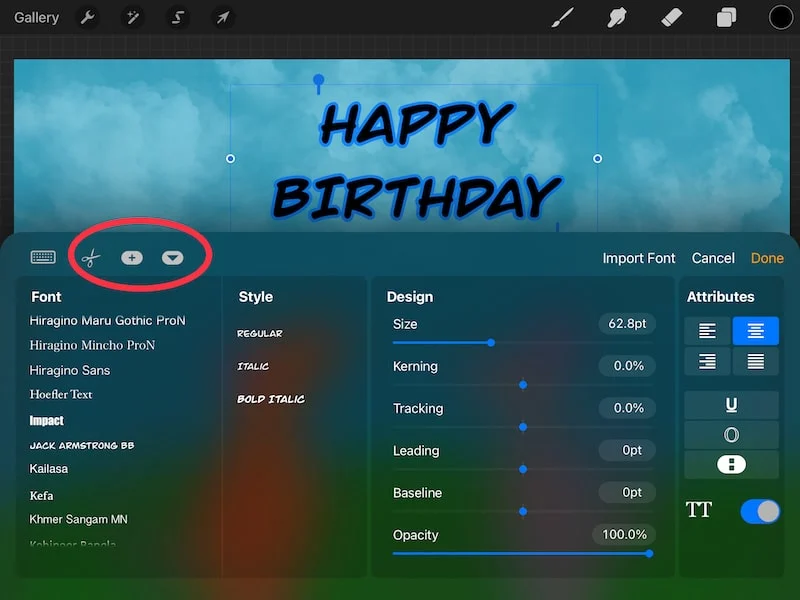
In addition to the settings we’ve talked about, there are also cut, copy, and paste options next to the keyboard icon in the top left corner of your text settings. You can use those if you need to make any adjustments to the content of your message.

Once you’re happy with your text, tap on the Done button to close the text settings.

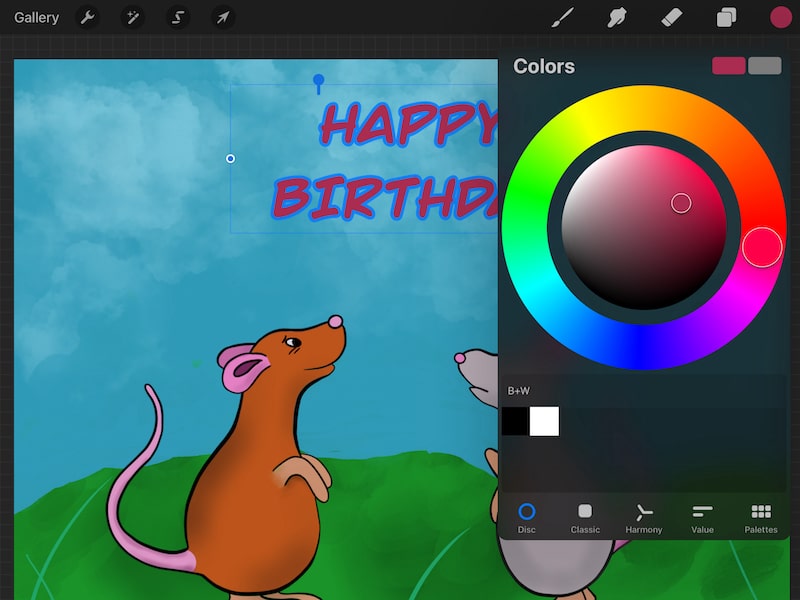
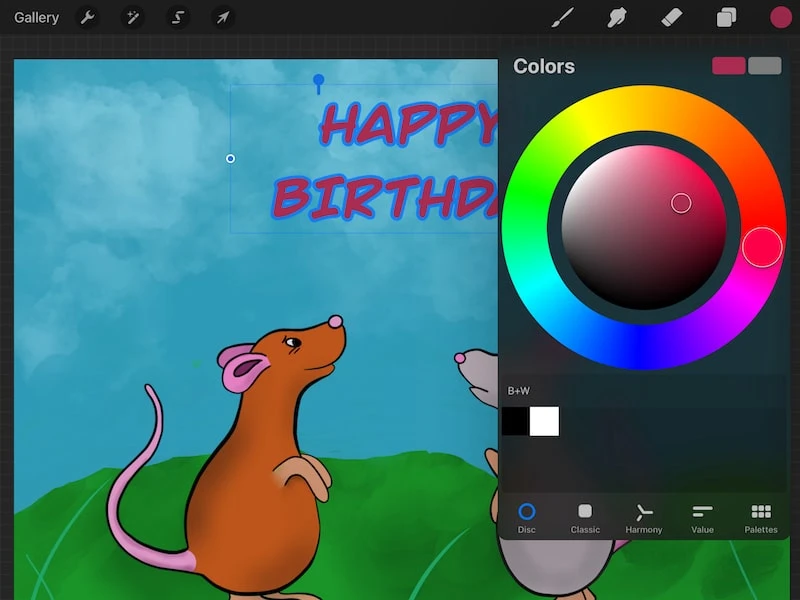
12. Change the color of your text, if needed
Text will be added in the same color that is currently active on your color wheel. If this isn’t the color you want it to be, that’s ok!
Simply highlight your text, open your color wheel or color palette, and choose the color you want your text to be. Any part of your text that is highlighted will change colors to the color you choose.
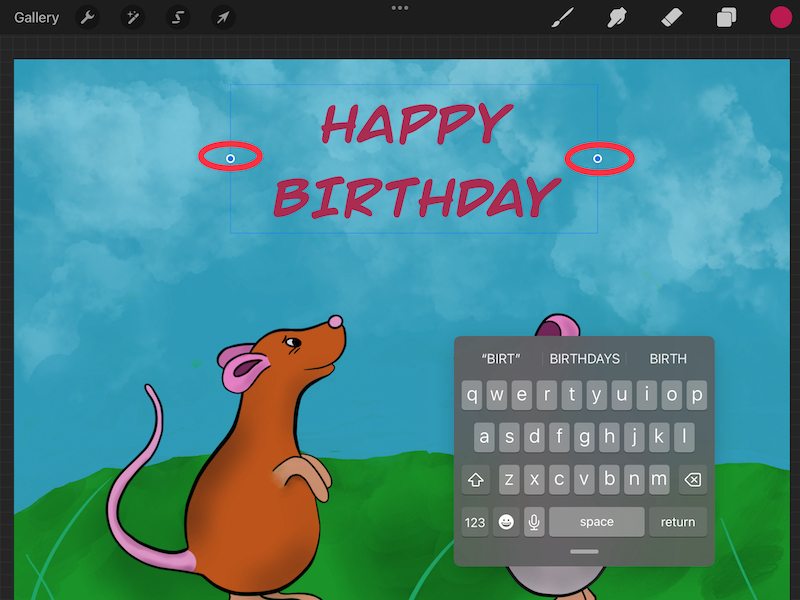
11. Position your text
Now it’s time to position your text where you want it to be on your Procreate canvas.
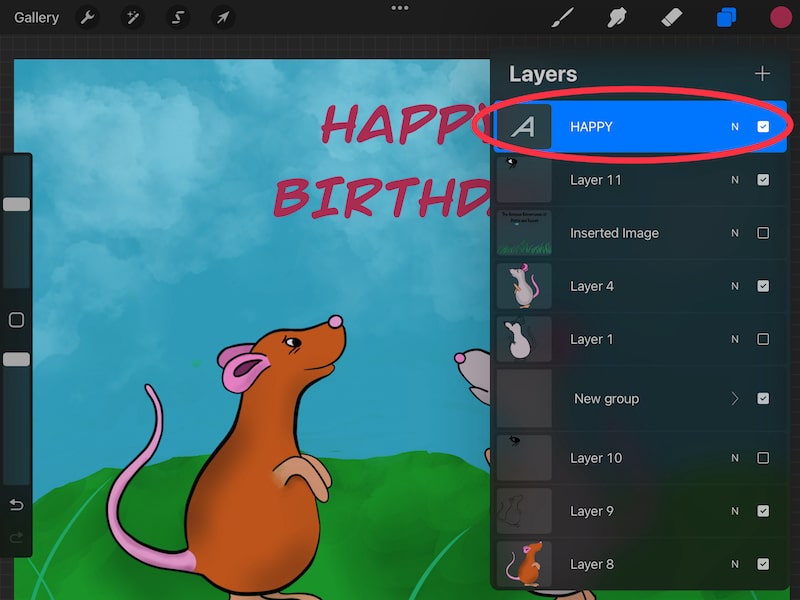
Important note: when you create text, it becomes a layer. Specifically, the layer gets added above the layer you currently have selected. Open your Layers panel to see it. You can drag and drop your text layer to rearrange it within your layers, as needed.

To reposition your text on your canvas, simply drag it where you need it to be.
Drag the dots on either side of your text box to make the boundaries of your text box bigger or smaller.

There you have it! Adding text in Procreate is such a fun and neat feature for making your art unique. I hope this tutorial gave you the confidence you need to get wordy with your art!


Diana has been an artist for over 27 years and has training in drawing, painting, digital drawing and graphic design. Diana’s latest obsession is digitally drawing with Procreate and Procreate Dreams. Diana has experience selling her art across a number of platforms and loves helping other artists learn how to make money from their art as well.