One of the biggest advantages of using digital drawing software like Procreate is that you have access to SO many colors. With so many colors, how can you make sure to pick the specific colors you need based on reference photos, your other pieces of art, and even the current piece of art you’re working on?
To color match on Procreate, use the eyedropper tool on the color you need. This will make it the active color in your color panel, allowing you to use it or save it to a color palette. Before starting, make sure you have a gesture assigned to the eyedropper tool within the Gestures Control panel.
Once you get the hang of it, color matching will be really quick and easy. And you’ll use it ALL the time! It’s an incredibly useful feature that makes your life as an artist so much more fun.
Let’s dive into everything you need to know to color match on Procreate so that the fun can begin!
Assign a Gesture to the Eyedropper Tool
To color match or select a color in Procreate, you’ll need to use the eyedropper tool. The easiest way to access the eyedropper tool is to assign a gesture to it within the Gesture Controls settings. Choose any gesture you prefer, as long as it doesn’t conflict with your other assigned gestures.
Here’s how to access your Gesture Controls panel and select a gesture for the Eyedropper tool:
1. Tap on the wrench to open the Actions tab
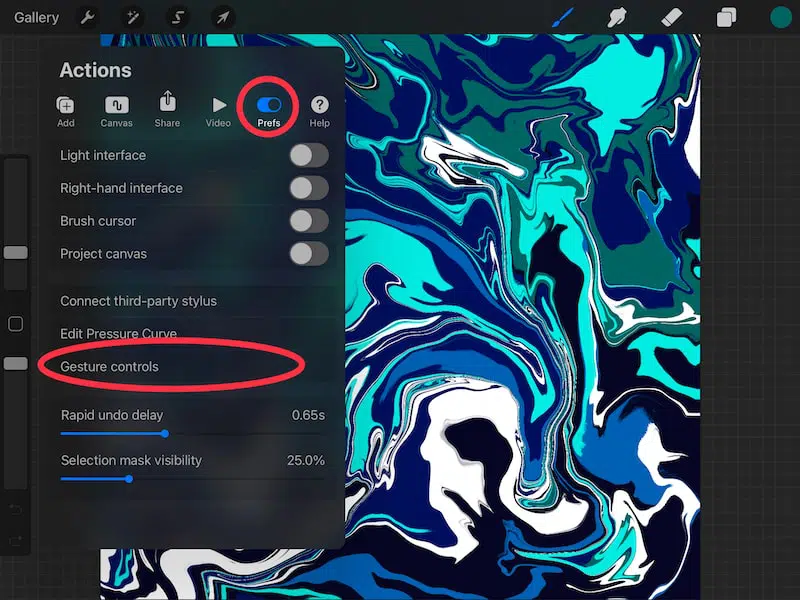
2. Tap on the Prefs menu and Gesture Controls

3. Tap on the Eyedropper button within the menu on the left-hand side


4. Toggle on the gesture you’d like to use for the Eyedropper tool
My preferred gesture for the Eyedropper tool is the “Touch and hold” gesture. When this is toggled on, this means that you can hold your finger down on your screen to activate the Eyedropper tool.
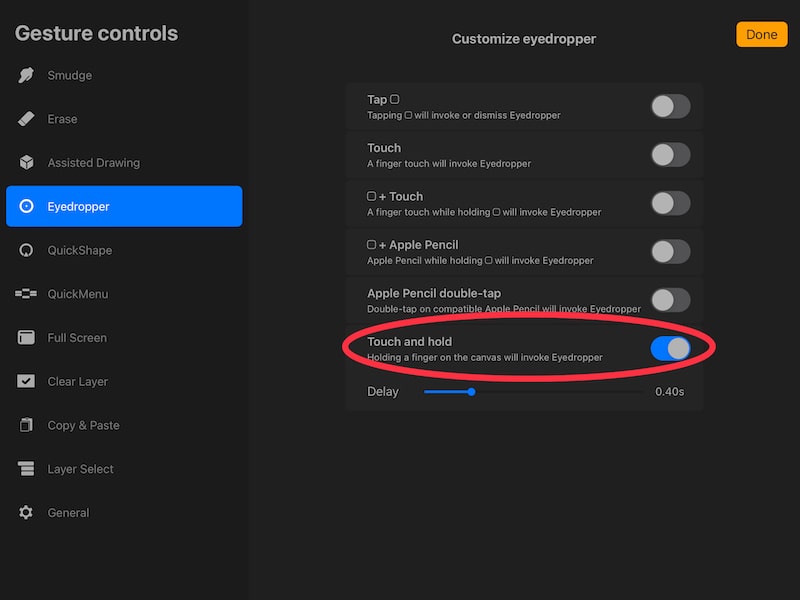
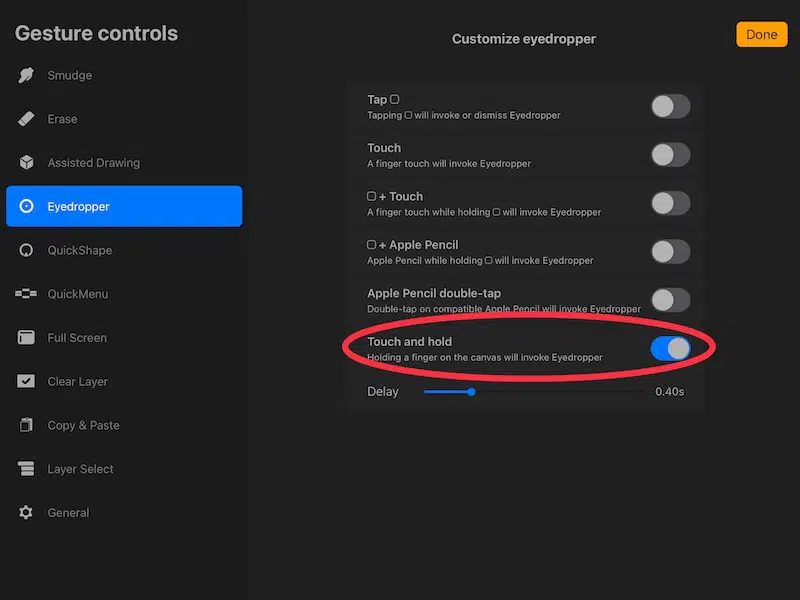
You can choose a different gesture, but this is the one that I have personally found to be the easiest to use.
If you see a hazard sign appear anywhere on your screen when you toggle on a gesture, this means that it’s already assigned to a different tool. The previous tool it was assigned to will be disabled.
Alright, so once you have the Eyedropper tool enabled, it’s time to start selecting colors and color matching.
I have a full guide on using the eyedropper tool that you can check out for more info.
How to Select a Color From Your Art
Use the Eyedropper tool in Procreate to select any color from your current piece of art, or past pieces of art from your gallery. Activate the Eyedropper tool and drag it across your canvas until you find your desired color. Let go to select the color. Save it in an empty slot in your palette.
Sometimes, you need to refind a color that you’re using in your current piece of art.
To do that, activate the Eyedropper and drag it across your canvas until you are on the color you need.
You can also select colors from other pieces of art in your Gallery.
Simply open the piece of art you want to grab a color from and activate your Eyedropper tool. Drop the tool on your desired color to select it.
Once you select a color with the Eyedropper tool, it will become your primary color option and you can use it right away. Even if you navigate back to the Gallery and to another piece of art, this color will remain as your primary color.
You can go ahead and use the color, or you can save it. That way, you won’t have to re-select it over and over again.
To save a color, find an empty slot in your preferred color palette, or create a new palette.
To create a new palette, open your color options, click on Palettes, and then click on the plus sign in the upper right hand corner.


Once you’ve created a new palette, or have an existing palette selected, click on an open slot within it. You’ll see that your new color will be plopped into that empty slot.
Ok, so that’s how you can color match with your own art, but what if you want to select colors from your own photos? Let’s talk about that.

How to Select a Color From a Photo on Procreate
To select a color from a photo on Procreate, import it onto your canvas or open it within Procreate’s reference feature. Use the eyedropper tool to select each color from your photo and add it to your color palette. Procreate can also create color palettes from photos automatically.
There are a few ways to select colors from photos on Procreate. The way you choose will depend on how many colors you want to choose and how particular you want to be.
Firstly, let’s talk about the most labor intensive option that will give you the most accurate results.
Select Your Colors From an Imported Photo on Procreate
Using this method, you’ll need to select your colors one-by-one. That said, it’s the most accurate and selective way of choosing colors, so it can be a great method to choose if you only have a handful of colors you need to color match.
Here’s how to do it:
1. Tap on the wrench to open the Actions tab
2. Tap on the Add menu and Insert a photo button

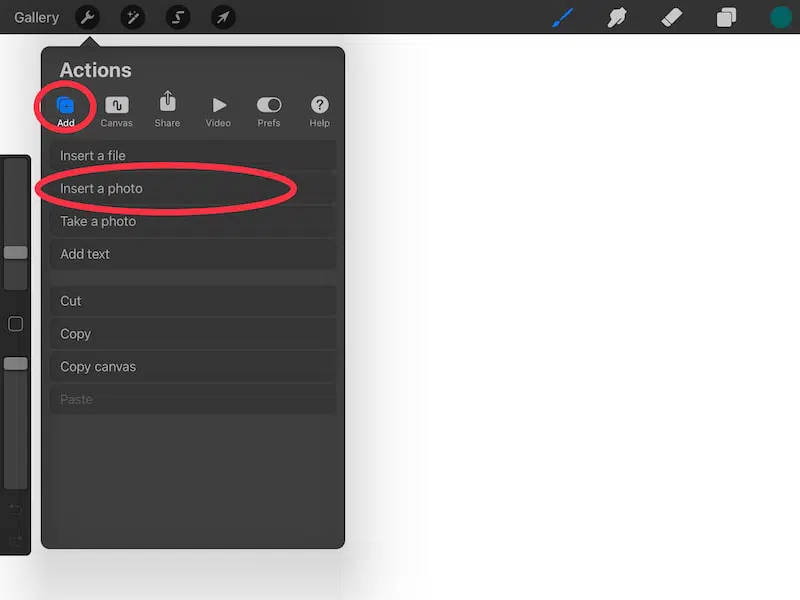
3. Choose the photo you want to select colors from
Find your photo wherever it may be within your photo library or files.
4. Enlarge your photo with the Transform tool, if needed
It can be helpful to enlarge your photo so that you can see smaller areas of color. You can also zoom in on your photo, if that’s easier.
I have a full guide on using Procreate’s Transform tool if you want a deep dive into this awesome tool.
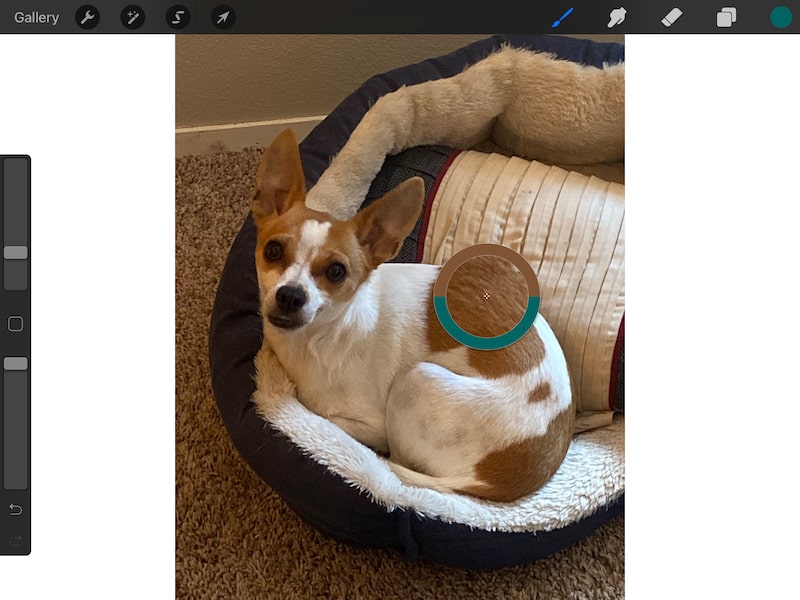
6. Use the Eyedropper tool and drag it across your photo until you land on the color you need. Let go.
Use whichever gesture you assigned to the Eyedropper tool to activate it. Drag your Eyedropper tool through your canvas until you find the color you’re looking for. Once you do, let go of the Eyedropper tool to select the color.
7. Save the color within your color palette
8. Repeat steps 1-7 for all of the colors you need.
There’s another way to select colors that is VERY similar to this but, this time, we’re going to use Procreate’s reference feature.
How to Select a Color From a Photo with Procreate’s Reference Feature
Similar to the method we just talked about, you’ll be selecting your colors one-by-one. This time though, we’ll be using Procreate’s Reference feature.
If you haven’t checked it out already, the Reference feature is amazing! It’s great for analyzing a reference image, getting another perspective of your work, and color matching.
Here’s how to select colors using Procreate’s Reference feature:
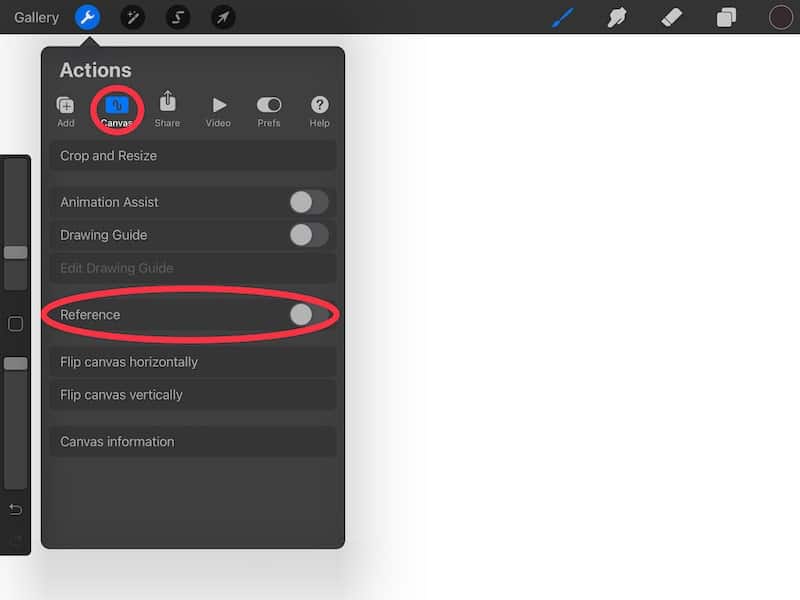
1. Tap on the wrench to open the Actions tab
2. Tap on the Canvas button
3. Toggle on the Reference feature

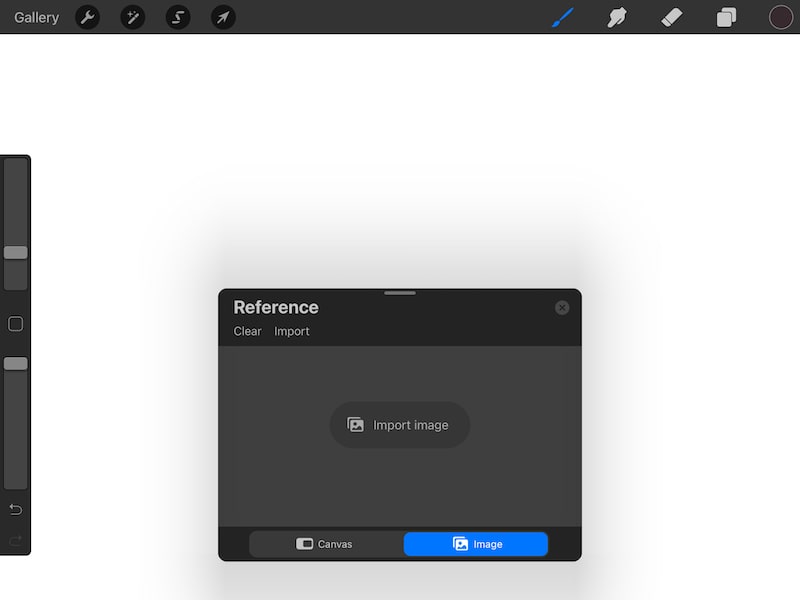
4. Import the photo you’d like to use
To do this, click on the Image button within the Reference box that appears. Click on the Import button and choose your desired image.

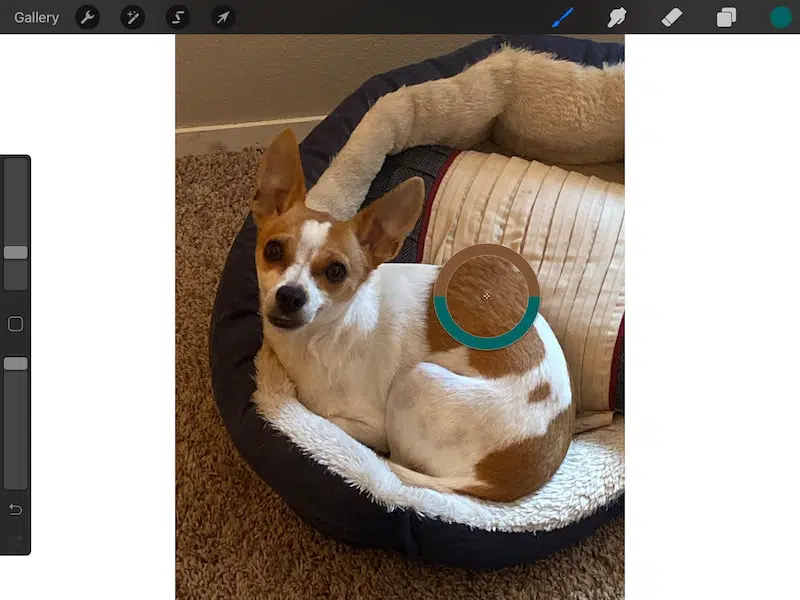
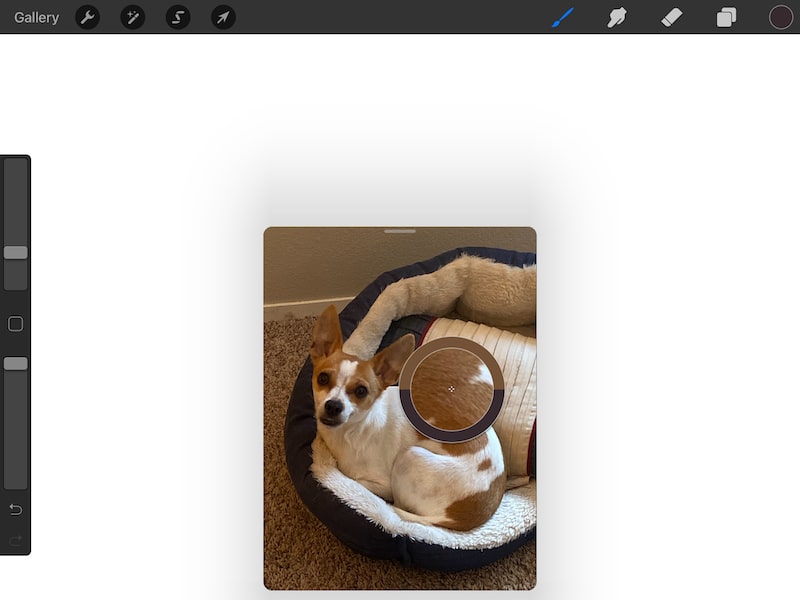
5. Use the Eyedropper tool and drag it across the photo in your Reference box until you land on the color you need. Let go.
The Eyedropper tool works the same way within the Reference box as it does on your canvas. Hooray! Just activate the tool as you normally would and choose any colors that you need from your reference photo.

6. Save the color within your color palette
7. Repeat steps 1-7 for all of the colors you need.
There is one last way to select colors from a photo.
Create a Color Palette From a Photo Automatically in Procreate
If you have a lot of colors to scrape from a photo, and you don’t mind ending up with some colors you don’t need, this is a great option for you.
Important note: this method isn’t perfect. It will definitely pull most of the colors from an image, especially the most prominent colors. It will miss some of your smaller and more subtle colors though.
So, you still may have to grab some colors manually using one of the methods above.
Also, it usually pulls way more colors than you need. You may need to delete some colors from your palette.
This method will get you most of the way there though, so it’s great when you have a lot of colors to pull from a photo.
Here’s how to create a color palette automatically from a photo in Procreate:
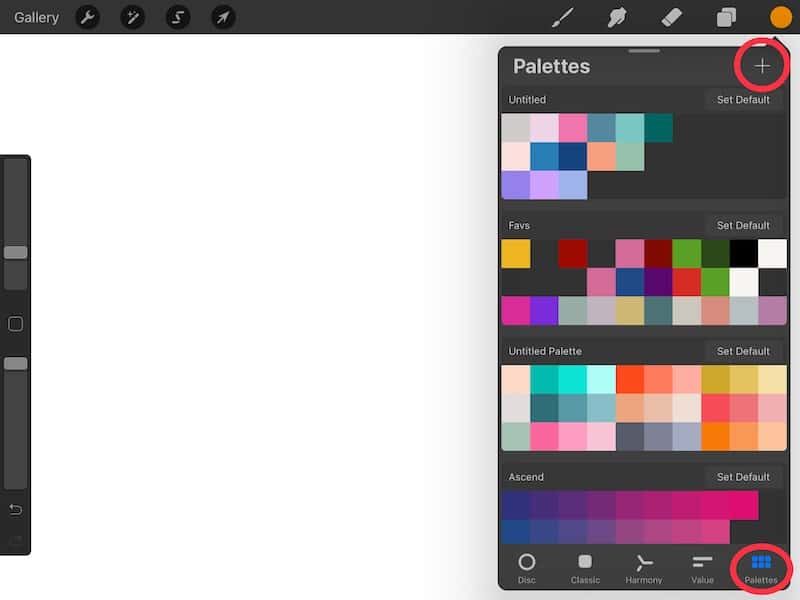
1. Open your color setting and click on Palettes
2. Tap on the Plus symbol in the right hand corner

3. Choose the New from photos button
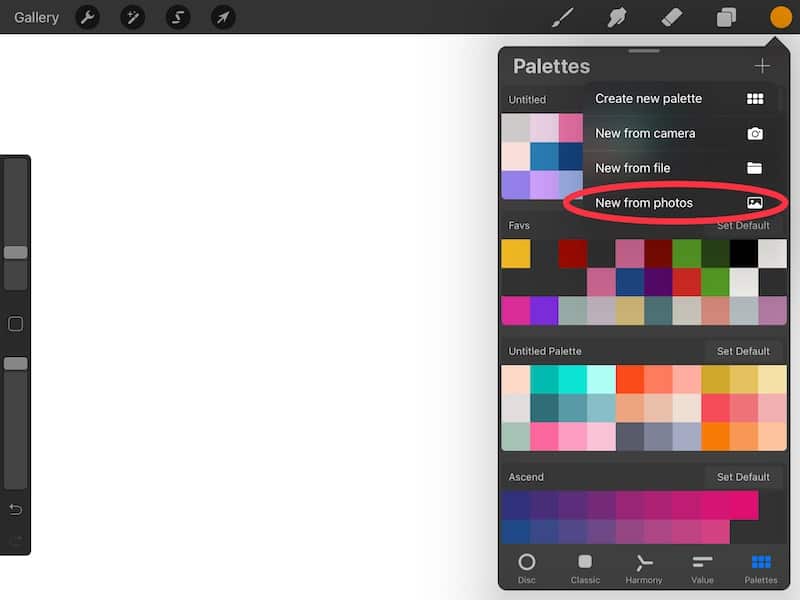
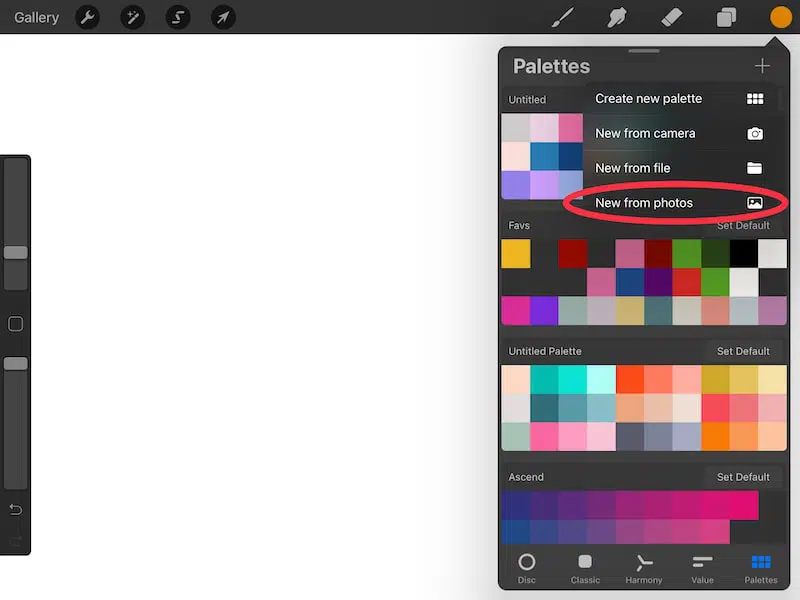
4. Choose the photo you’d like to create a palette from
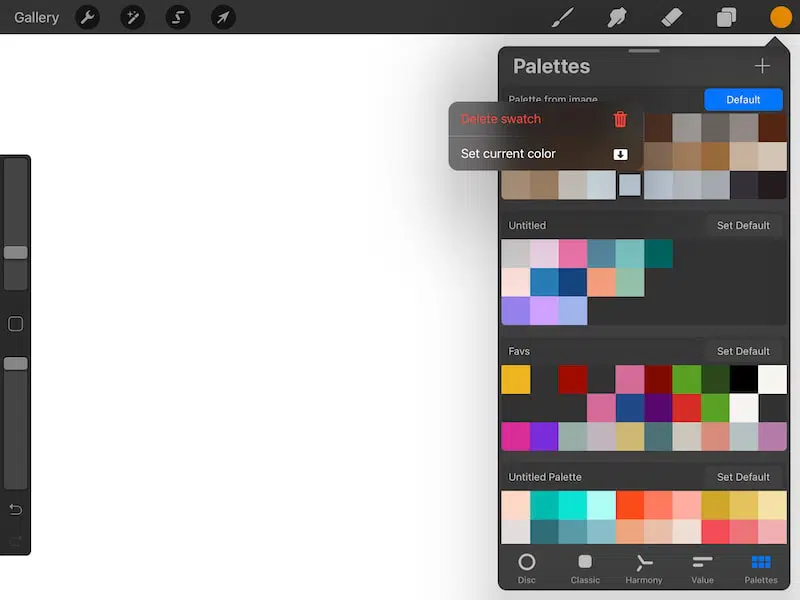
5. Delete any colors you don’t need
You can delete color swatches from a palette by holding down on a color until the Delete swatch button appears

6. Manually add any colors that are missing
Use one of the methods we’ve already talked about to manually add any colors that that this automatic process didn’t pick up.
Procreate gives you a lot of options for color matching and picking colors in general with the Eyedropper tool. With these tips, feel empowered to use every shade of color in the rainbow for your next piece of art!


Diana has been an artist for over 27 years and has training in drawing, painting, digital drawing and graphic design. Diana’s latest obsession is digitally drawing with Procreate and Procreate Dreams. Diana has experience selling her art across a number of platforms and loves helping other artists learn how to make money from their art as well.