Using Procreate’s eraser is like digital art magic. Stubborn lines that would be impossible to erase with traditional paper, pencils, and erasers suddenly disappear on a digital art canvas with Procreate’s eraser.
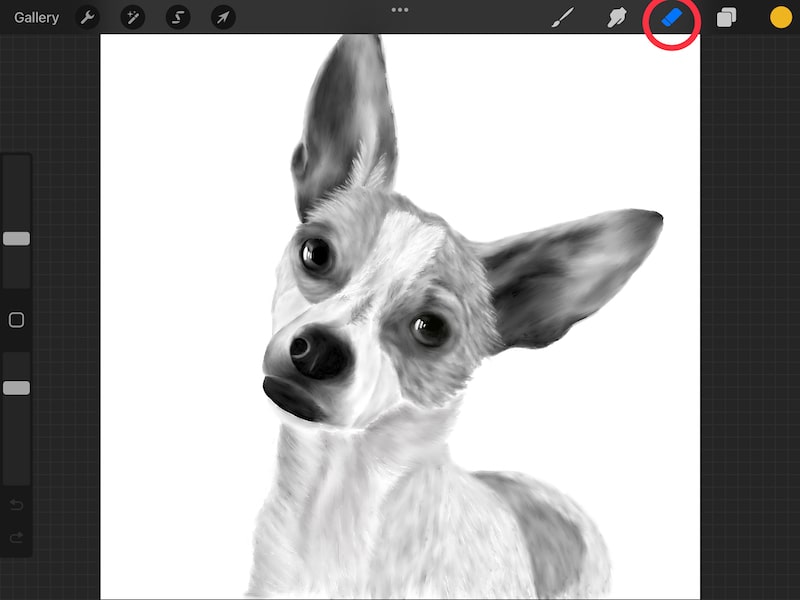
To activate Procreate’s eraser, tap on the eraser icon in the top right toolbar. Tap on the eraser icon again to open up your list of brushes to use with the eraser. You can use any of your Procreate brushes with the eraser, so choose one that matches the effect you’re looking for.
You may be tempted to tap the eraser icon, start erasing, and never think about it again. The great news is that you can do this. The eraser is perfect in its simplicity and ease of use.
That said, you’ll get the most out of Procreate’s eraser if you use it strategically.
We’re going to talk about the basics of using Procreate’s eraser. We’ll also dive into everything you need to know to use it strategically to make your art look exactly how you want it to.
This post may contain affiliate links, which means I may earn a commission if you decide to purchase through my links.
How to Activate Procreate’s Eraser
To activate Procreate’s eraser, tap the eraser icon in the top right toolbar. It’s between the smudge tool and the Layers panel. Once the eraser is selected, tap it again to open the brushes list and choose the brush you want to use with your eraser.
Simply tap the eraser icon and you’ll be ready to erase!

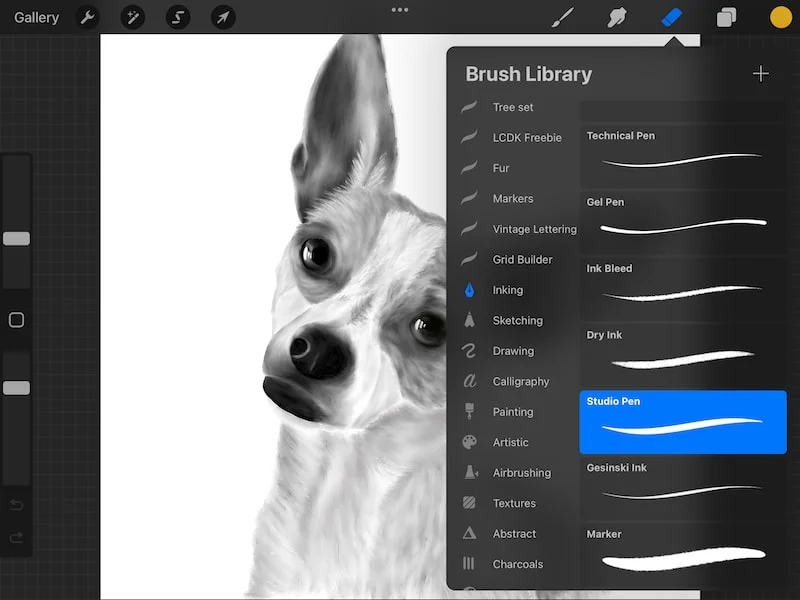
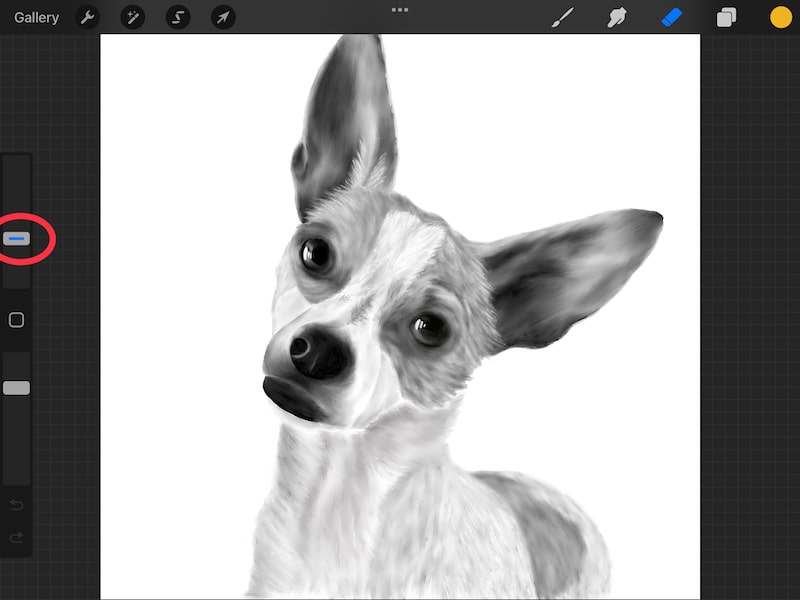
That said, you’ll want to check that you’re using the right brush with your eraser. Once your eraser is selected (you’ll it’s selected because it will turn blue), tap it again.
This will open up your list of brushes that you can use with your eraser. You can use any of your Procreate brushes with your eraser. Your drawing brush list and your eraser brush list will always look the same.

Being able to use SO many different brushes with your eraser gives you a lot of creative opportunities. We’ll dive into this more when we talk about using your Procreate eraser strategically.
Keep in mind that Procreate will remember what eraser you used last. This is true for your drawing brushes too.
If you’re working on a piece of art and know you already have the correct brush selected for your eraser, you don’t need to double check it every time you use your eraser. It will stay on that brush until you actively change it.
This is really nice if you’re erasing a lot because you don’t have to choose your brush every single time.
Even if you return to your Gallery and start working on another piece, it will stay on the eraser brush you had selected before. It’s not piece specific. This is true for your drawing brushes as well.
If you change to a new canvas that requires a different eraser brush, be mindful of changing it before you start erasing.
Another thing to keep in mind with the eraser is that the undo function works in the same way as it does with typical Procreate brush strokes. You can undo your eraser marks with a two-finger tap and redo them with a three-finger tap.


And, as with undoing your strokes, the undo history will NOT be saved if you close Procreate or return to your Gallery, so make sure that you’re happy with your erasing work before you make it permanent.
In addition to tapping the eraser icon, there’s another option for activating the eraser.
Activate Procreate’s Eraser with a Gesture Control
If you’d prefer to activate your eraser in a different way than tapping the eraser icon, assign a gesture control to it. Choose the action that feels most natural to your iPad use and workflow so that you can access the eraser as quickly and easily as possible.
Gesture controls are a really neat way to have more freedom with how you access Procreate’s features. This includes the eraser.
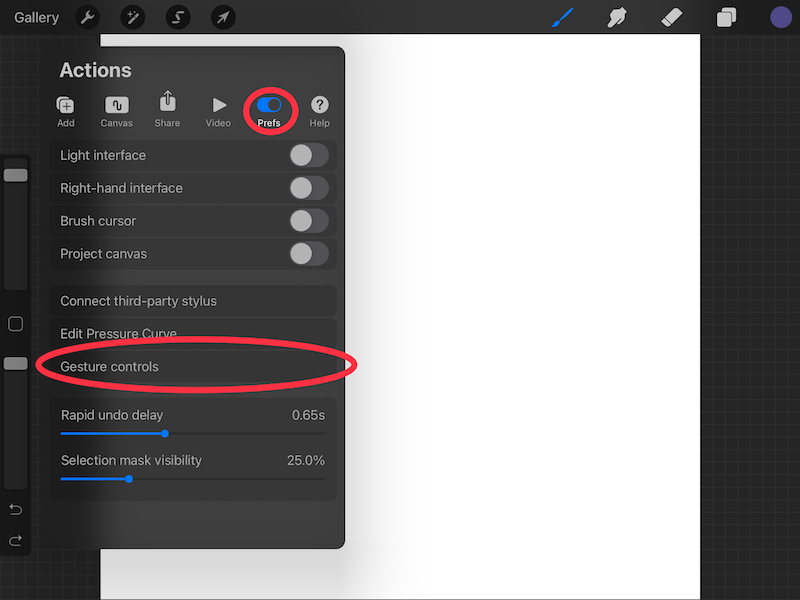
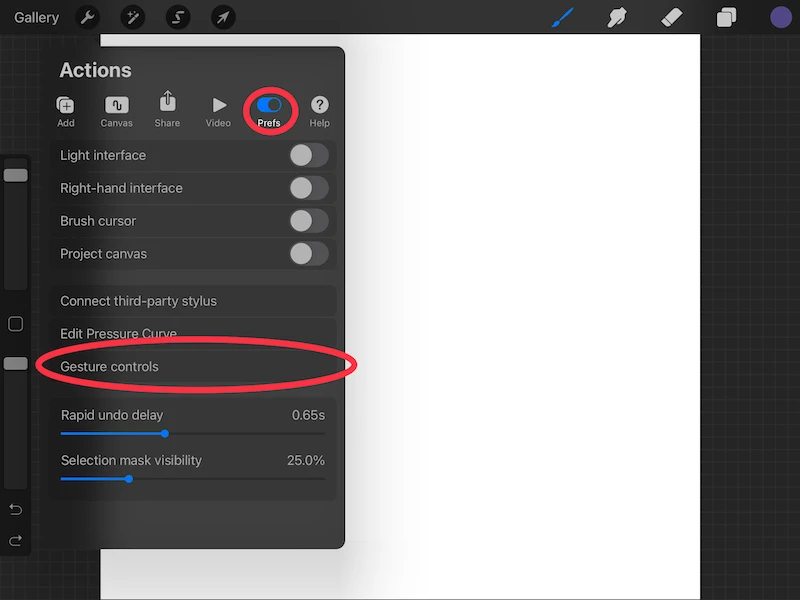
To access the gesture controls menu, click on the wrench to open the actions tab. Next, click on the preferences button. Near the bottom, you’ll see a “Gesture controls” button.
Within the gesture controls menu, choose the “Erase” menu. Look through the options to see if there’s one that appeals to you. If there is, toggle it on.
Keep in mind that you can’t have multiple features controlled by the same function. For example, a finger touch can’t activate the eraser and the copy and paste function at the same time. That would be chaotic and wouldn’t work too well.
If you end up activating a gesture that is already assigned to another function, you’ll see a hazard sign appear next to the function that has the conflict.

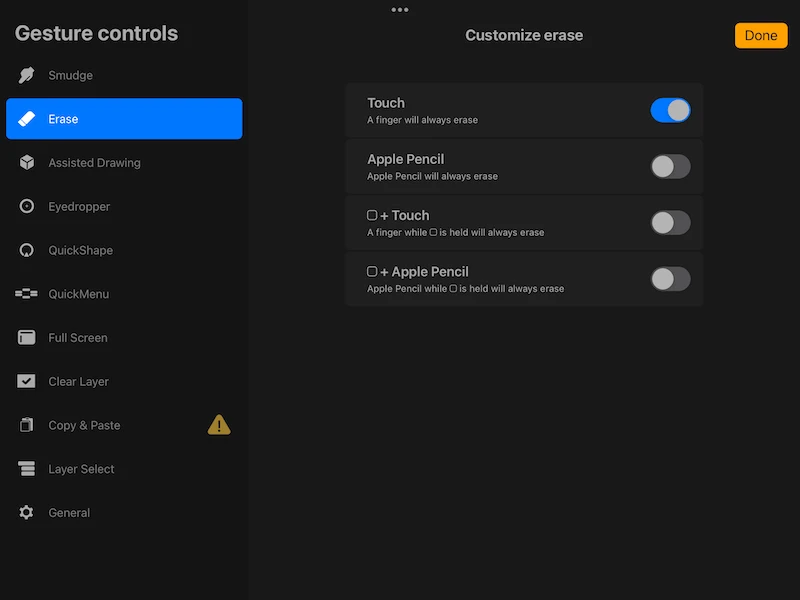
Procreate will keep the gesture you just implemented and deactivate the one that conflicts with it.
For example, if I have a finger touch assigned to the copy and paste function, but then I assign a finger touch to the eraser tool as well, Procreate will deactivate my finger touch gesture for the copy and paste menu.
I personally don’t have any gesture controls assigned to Procreate’s eraser. For my own workflow, I find it easy enough to tap the eraser icon that I don’t find the gesture controls convenient enough for this specific Procreate function.
Also, some of the gesture controls are easy to activate on accident, like touching your screen, for example. I don’t want Procreate to constantly switch to the eraser when I accidentally touch my screen.
That’s just me. The great thing about Procreate’s gesture controls gives every artist the freedom to set things up as they need to!
Alright, now that we’ve talked about activating the eraser in Procreate, let’s dive into the strategic ways you can use it to the best of your control and creative inspiration.
Adjust the Size and Opacity of Your Procreate Eraser Carefully
Once your eraser is activated, you’ll be able to adjust its size and opacity using the sliders on the left-hand side of your screen. The slider on the top will adjust the size of your eraser and the slider on the bottom will adjust its opacity.
Similar to choosing your eraser brush, Procreate will remember the size and opacity you set your eraser to. So, when you switch to the eraser, it will be equipped with the same brush, size, and opacity as it was when you used it last.
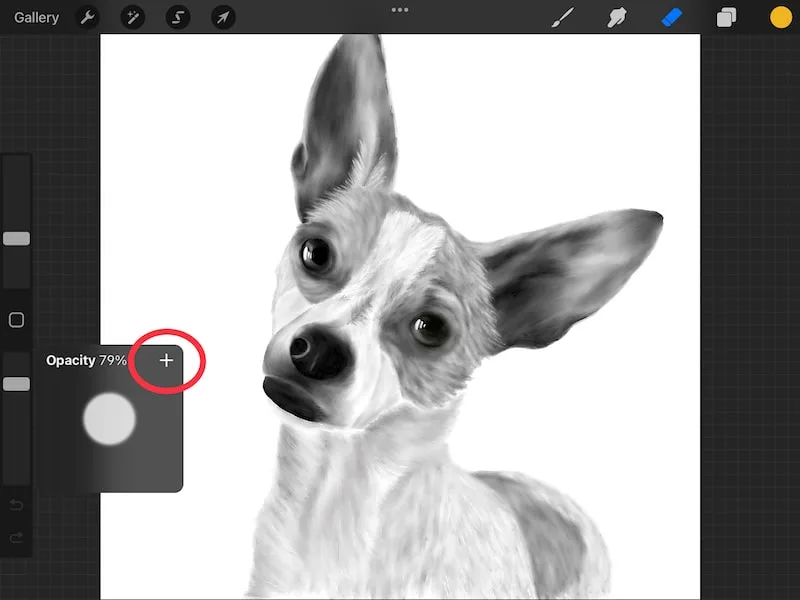
The size of your Procreate eraser can be adjusted from 1% to 100%. If there’s a size you want to save or be able to return to quickly, click the plus button that appears within the eraser sizing box.

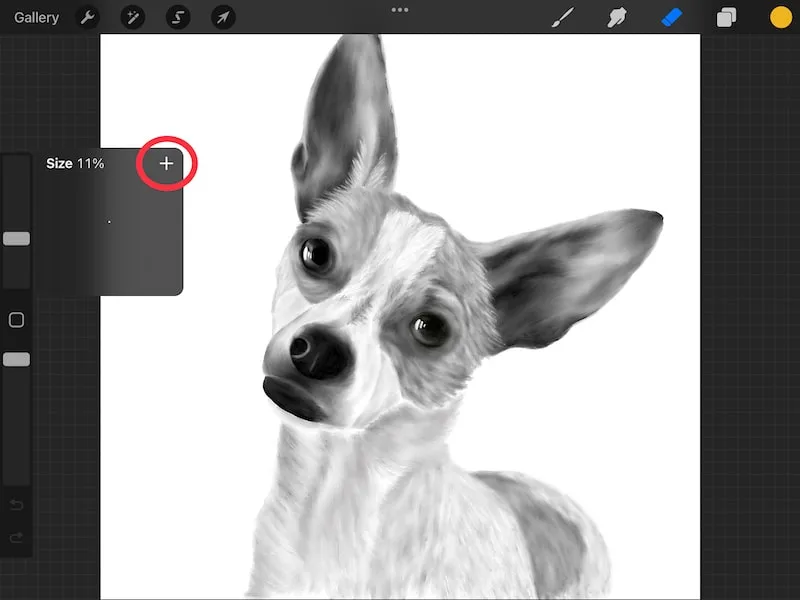
Once you’ve done this, a line will appear on your eraser size slider at the size that you chose. Simple tap on the line and your eraser will snap to it.

If you want to delete the line, click the minus button within the eraser sizing box.

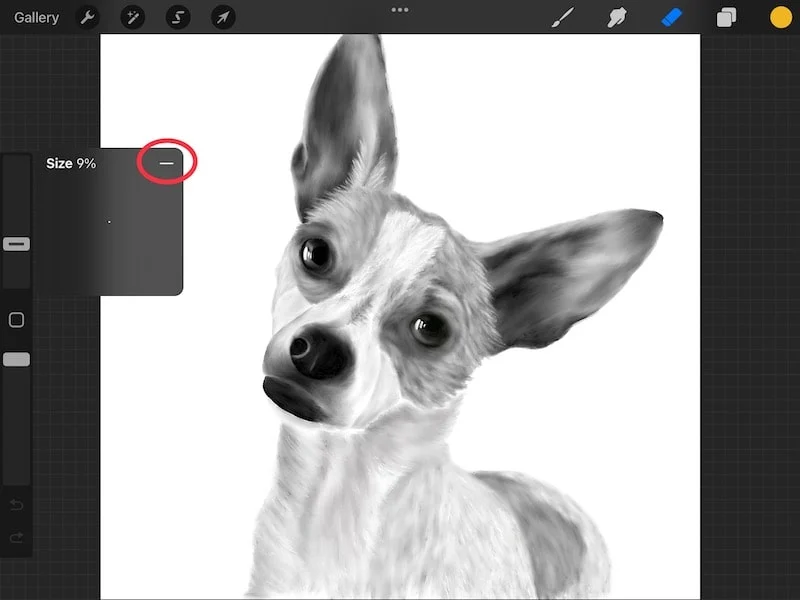
This function also works with the opacity slider. Click the plus button to set a desired opacity level that you can snap to. Click the minus button to delete it again.

Strategically choosing the size of your eraser can help you erase large swatches of your canvas in one stroke. Or, it can help you erase small, fine details.
I personally use a small eraser ALL the time to create fur and whiskers. It helps me give the fur dimension and lets me experiment with the shading.
I also love using the eraser with the zoom function. I will zoom in on an element of my work that requires minute detail and small eraser work. Zooming in allows me to do tiny work on a bigger surface.

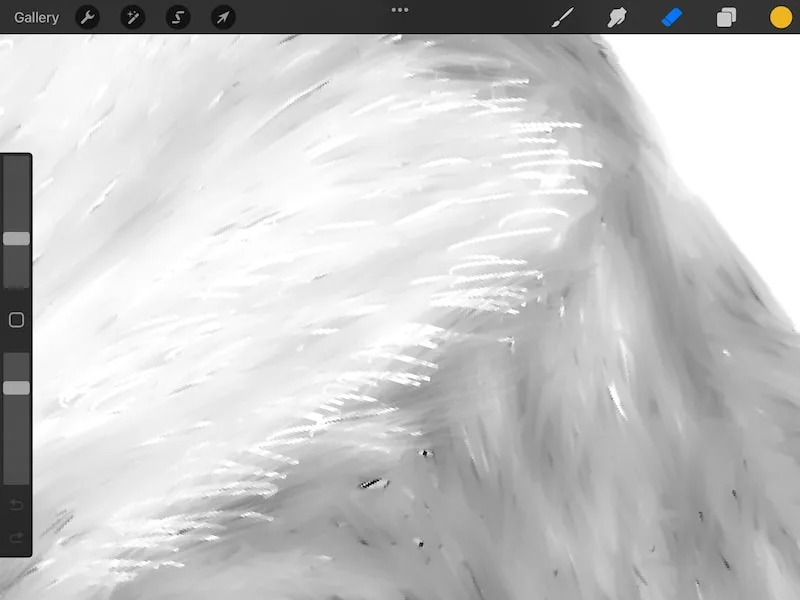
As for the opacity slider, I use it a lot if I don’t want harsh eraser lines. Again, I use this a lot with my fur and whisker work.
I will also lower the opacity of my eraser if I’ve made my shading too dark. I can remove some of the dark pigment from my shading without erasing it completely. Using the smudge tool, I can blend my eraser marks into my work and quickly achieve the lighter shadow I was looking for.
If you’re used to using traditional materials, it’s easy to think about the eraser in the way you always have.
Sure, erasers are extremely powerful tools in traditional art. But, they function so differently in the digital world that it’s almost beneficial to forget everything you know about traditional erasers and open yourself up to everything they have to offer for your Procreate art.
A lot of that has to do with using the sizing and opacity sliders to your advantage. Another factor to keep in mind is the brush you pair with your eraser. Let’s talk about that now.
Choose the Right Brush to Use with Procreate’s Eraser
Choose a brush to use with your Procreate eraser that compliments the type of art you’re creating. An eraser paired with a clean ink brush is great for larger areas and clean, crisp erasing. On the other hand, an eraser paired with an airbrush is great for shading and soft erasing.
One of the most powerful things you can do with your Procreate eraser is pair it with the right brush.
Remember that any brush you have in your brush library can be paired with the eraser, which gives you SO many opportunities.
Don’t just set it and forget it. For every part of your art, consider the type of eraser brush that would be best.
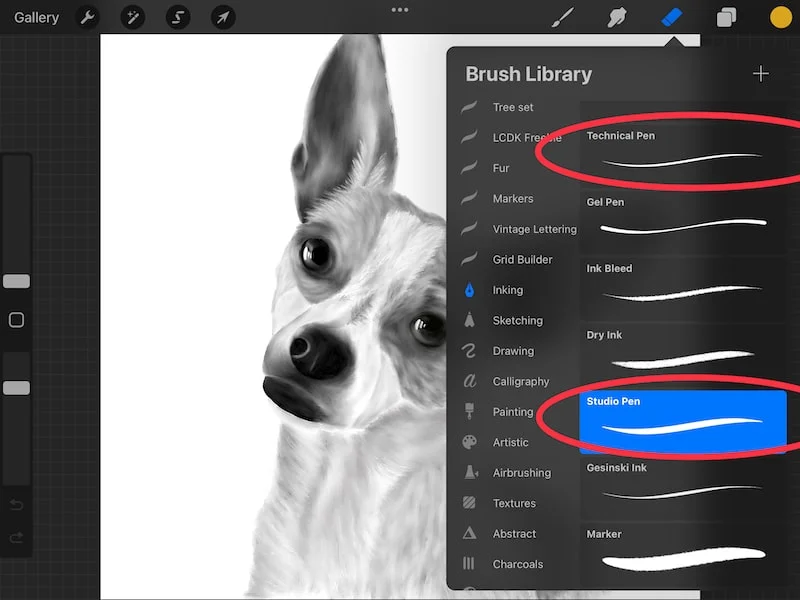
For example, when I’m creating whiskers and fur, I use the technical pen brush or studio pen brush with my eraser. This gives me clean and crisp lines. I also like how small the smallest 1% size of this brush is, which allows me to make fine details.

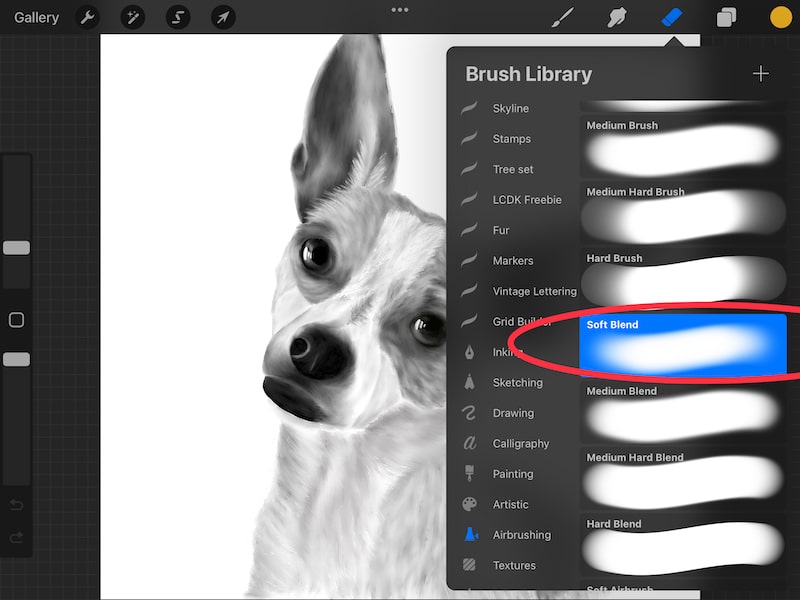
But, when I switch over to shading my work, I switch my eraser brush to the airbrush. This gives me a soft, wispy eraser that I can apply extremely lightly if I gently touch my screen with my Apple Pencil.

If you’re used to traditional materials, it might take some time and practice to get used to having so many erasers available to you. That trusty kneaded eraser or rubber eraser can become any number of shapes and types in the digital world of Procreate.
Take time to experiment and explore. The better you can understand the types of Procreate brushes you want to pair with your Procreate eraser, the more creative freedom you’ll have to create the artwork you’re dreaming of.
Find New Brushes to Use with Procreate’s Eraser
Given that Procreate’s eraser can be paired with any Procreate brush, it can give you more possibilities to seek out Procreate brushes that you specifically envision using with your eraser.
We often think of Procreate brushes in the context of the brush tool. Naturally, the brush tool is where brushes really shine and play a huge role, but by limiting our thinking of Procreate brushes to the territory of the brush tool, we’re really missing out on a lot of opportunities.
Any Procreate brush can be used with the eraser tool, so start looking at ALL Procreate brushes with an eye for their potential erasing prowess. That said, there are also Procreate brush bundles that are specifically designed for the eraser!
Here are some of those great choices:
The Collage Erasers for Procreate pack comes with 17 eraser-specific brushes. It also comes with bonus color palettes, color swatches, and golden ratio grids. It’s a value packed bundle that will give you a lot of erasing options.
Check out the Collage Erasers for Procreate pack here!
Another great brush pack to use with the eraser is the Procreate Smudge Brushes pack. I also list this pack in my top brush packs to use for blending in Procreate.
This smudge brush pack is optimized for the smudge tool, but it works nicely with the eraser as well if you’re looking for soft and textured eraser brushes.
Check out the Procreate Smudge Brushes pack here!
On the outset, using Procreate’s eraser seems straightforward. But, when you start diving deeper, the eraser tool requires more thought and strategy than it seems.
Understanding what eraser brush to use when is a big part of creating the effects you’re looking for in your art. It’s fun too! By having SO many options to choose from with your Procreate eraser, you can take more control over your work.


Diana has been an artist for over 27 years and has training in drawing, painting, digital drawing and graphic design. Diana’s latest obsession is digitally drawing with Procreate and Procreate Dreams. Diana has experience selling her art across a number of platforms and loves helping other artists learn how to make money from their art as well.