Being able to highlight text is one of those basic functions we need to know how to do with any graphic design software. Yet, with Canva, highlighting text isn’t as straightforward as I’d personally like it to be. If you’re like me, wondering where that highlight button is in Canva, you’ve come to the right place.
To highlight text in Canva, select your text box and click on “Effects” and “Background.” Define the size, shape, and color of your highlight. If you only want to highlight a portion of your text in a text box, add a square to your design, determine the color and sizing you need it to be, and place it behind your text.
There are two different ways to highlight text in Canva. The method you choose depends on what you’re trying to highlight and whether it’s isolated in its own text box.
Before we get started, we need to be clear on something: Canva text boxes.
When adding text to a Canva design, we start by clicking on a heading, subheading, or body text box on the left hand side of our screen. This is 1 text box.
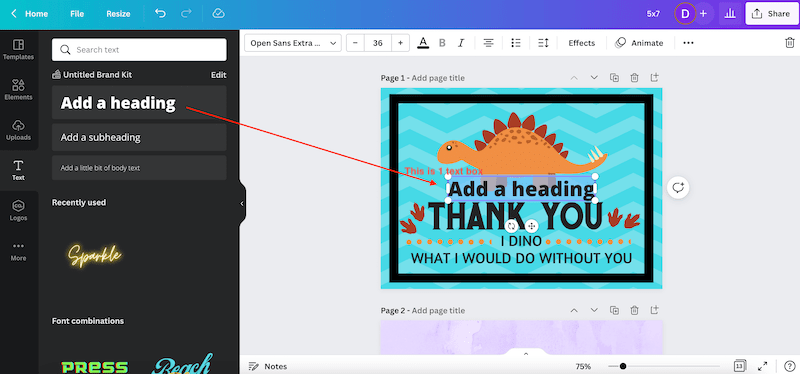

Anything you type into this box will be within this 1 text box. To create a new text box, you’d need to return to the left hand side of the screen and click on another heading, subheading, or body text box and add it to your design as a brand new text box.
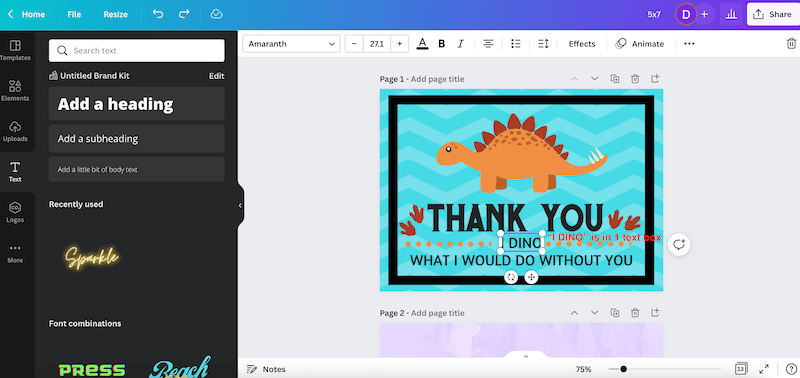
If you already have text in your design, you can tell whether text is contained within the same text box or a different text box by clicking on it. Whatever is within the square outline is contained within the same text box.

It might seem like I’m babbling on about this, but the contents of your text boxes become really important when considering the method you’re going to choose for highlighting your text.
Why? Well, there are certain functions in Canva, like highlighting, that get applied universally to your entire text box. If you want your entire text box highlighted, that’s great! We have a method for that.
On the other hand, if you only want one or two words of your text box highlighted, we’ll need to use a trick to only apply the highlight to these few words instead of the entire text box universally.
Alright, now that we’re all on the same page about text boxes, let’s jump into the juicy stuff: highlighting!
To begin with, we’re going to talk about how to highlight an entire text box.

How to Highlight an Entire Text Box in Canva
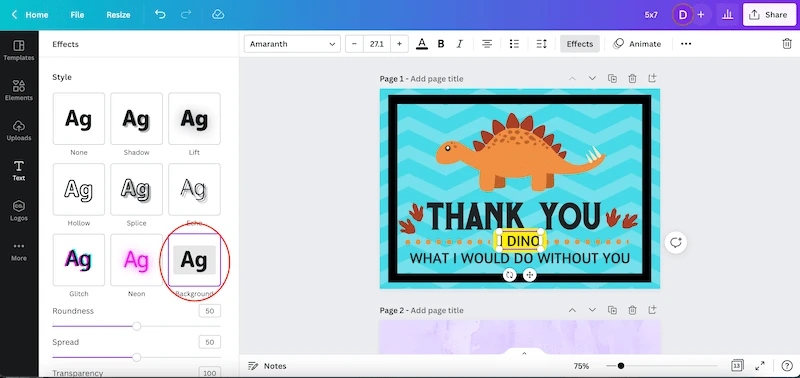
To highlight an entire text box in Canva, click on the text to select it. Next, click on the “Effects” button and the “Background” button. Adjust the roundness, spread, transparency, color, and shape of your highlight to your liking.
When using this method, your highlight will be applied to your entire text box. With this method, you’d need to break your text up into separate text boxes to avoid anything you don’t want to be highlighted from being highlighted.
That’s a pain so, if you don’t want to highlight your entire text box, read the next section for my trick for highlighting portions of your text box without having to create separate text boxes.
If you do want to highlight your entire text box, here’s what you need to do:
1. Click on the text to select it.
To begin with, you’ll need to select your text box. You can do that by clicking on any of the text within that text box.
2. Click on the “Effects” button.
The “Effects” button is in the top Canva toolbar.

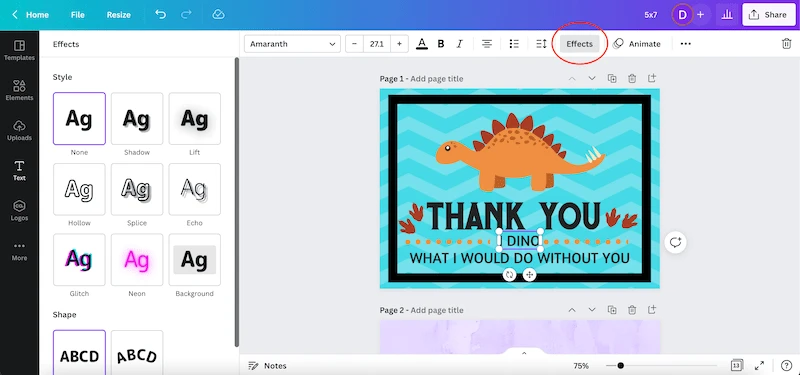
3. Click on the “Background” button.
Scan through the text effects until you see “Background.” If you’re like me, you’ll be tempted by the other text effects. Play around with some of the other text effects and, once you’ve had your fun, ultimately land on the “Background” one.
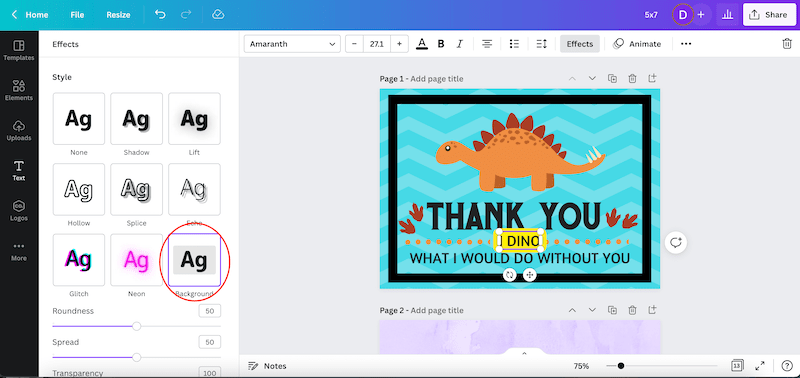
4. Adjust your text highlight.
You can customize your text highlight in a lot of ways, including its roundness, spread, transparency, color, and shape.


The neat thing about adjusting the shape of your text highlight to a curve is that it curves your text as well. That way, you don’t have to worry about curving the text in Canva separately.
There you have it! If you need to highlight an entire text box, use the method above to do so. On the other hand, if you only have a word or two that you need to highlight within a text box, follow the method we’ll talk about next.

How to Highlight a Portion of a Text Box in Canva
To highlight a portion of a text box in Canva, click on the “Elements” button and add a square shape to your design. Adjust the color, size, and shape of your square. Click on the “Backwards” button, if needed, to move your square behind your text and position it accordingly.
As we talked about, with the traditional method for highlighting text in Canva, your highlight will be applied to your entire text box. This isn’t ideal if you only have a word or two you need to highlight within your text box.
That’s where this trick comes in:
1. Click on the “Elements” button.
On the left hand side of your screen, click on the “Elements” button within your Canva toolbar.
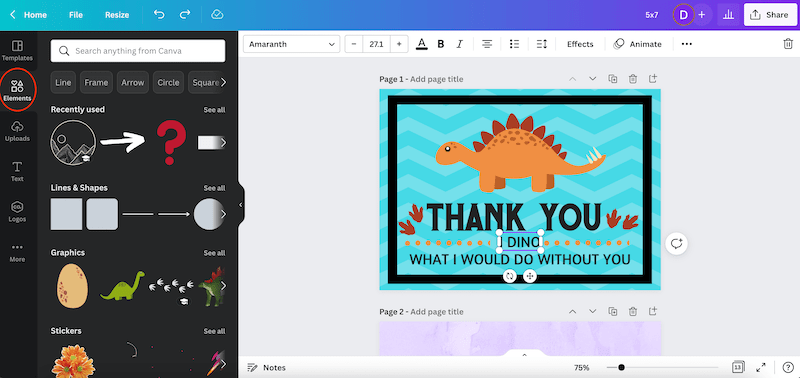

2. Find the square within the “Lines & Shapes” menu and add it to your design.
Find the shape you need for your highlight within Canva’s elements. While this is traditionally a square, you may prefer a rounded square, a circle, or whatever else suits your design. Basically, add whichever shape you will need for your highlight to your design.
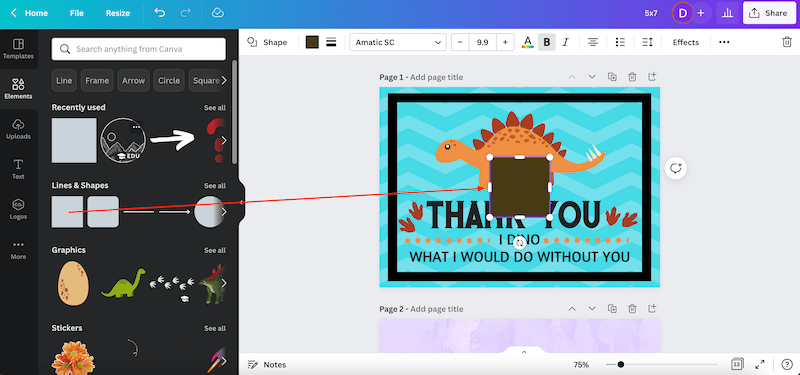

3. Adjust your shape.
Now’s the time to customize your shape so that it’s what you want it to be for your text highlight. Resize it, change the color of it, and do what you need to do to get it ready for your design.
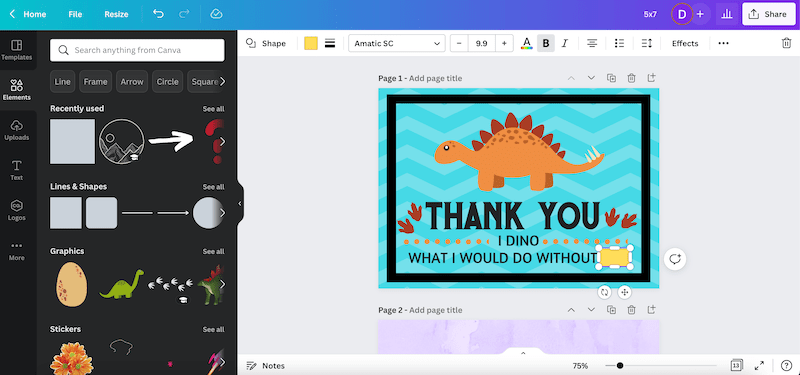

4. Position your text highlight and move it backwards.
Once you’re done customizing your text highlight, position it on the text you want to highlight. Most likely, the highlight will be covering your text. To fix that, with the highlight selected, simply click on the 3 dots to find the “Position” button. Click that and then the “Backwards” button. This will move your highlight behind your text.


There you go! If you have a portion of your text box you need to highlight, creating a highlight shape to place behind your text will do the trick.
Highlighting text in Canva is one of those important functions that all graphic artists need to know how to do. I hope these two highlighting methods have given you the creative inspiration you need to create some beautifully highlighted designs!


Diana has been an artist for over 27 years and has training in drawing, painting, digital drawing and graphic design. Diana’s latest obsession is digitally drawing with Procreate and Procreate Dreams. Diana has experience selling her art across a number of platforms and loves helping other artists learn how to make money from their art as well.