When you’re starting an online store, it can feel overwhelming. Build a website, design your products, connect your print on demand platform. Phew! It seems like the list goes on and on.
When I first started my online store, I felt exactly the same way. I was excited to start selling my art, but I didn’t know where to start.
But, here’s the good news! If you plan to use Squarespace and Printify, they have an awesome integration that makes it easier to dive into the ecommerce world.
We’re going to walk through everything you need to know about setting up the Squarespace and Printify integration, step-by-step. Hopefully this will turn your overwhelm of starting an ecommerce store into excitement.
I also have a tutorial on connecting Squarespace to Printful if you came here looking for that as well!
1. Create a “Store” page in your Squarespace site
If you don’t have one already, you will need to create a “Store” page within your Squarespace site.
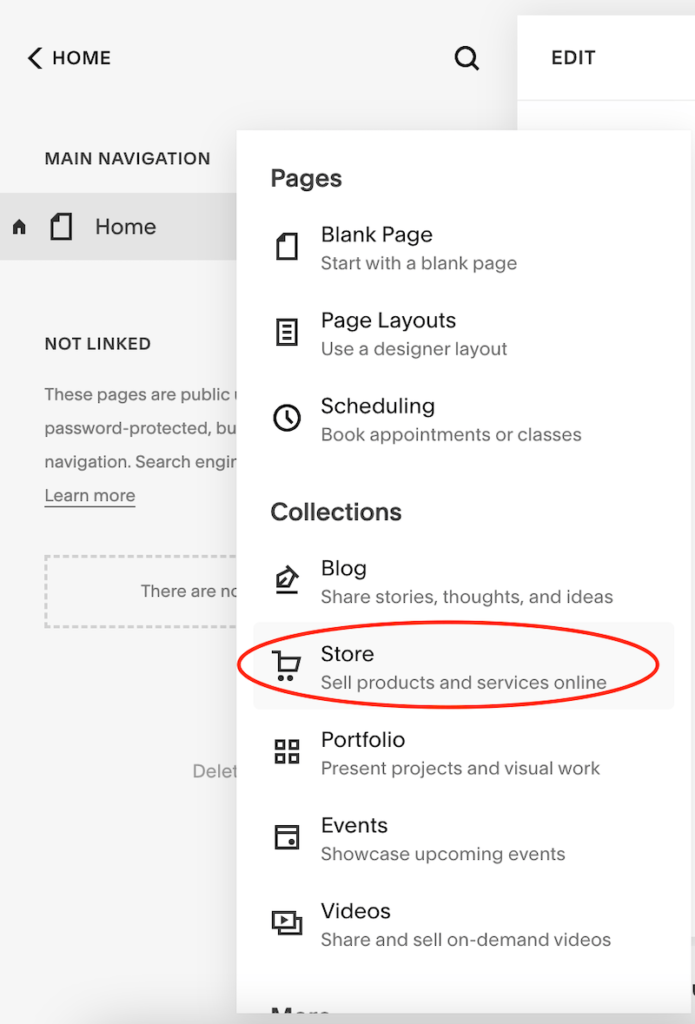
You can do this by clicking on the “+” button next to your main navigation to add a page. Scan through the options until you see the “Store” button.
This page is specifically designed for selling ecommerce products. That’s why it’s important to choose a store page and not a regular page for your ecommerce store.

2. Clean up and customize your Squarespace store
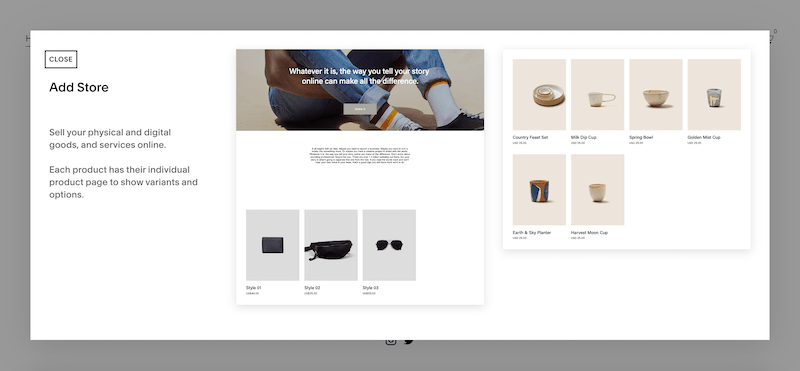
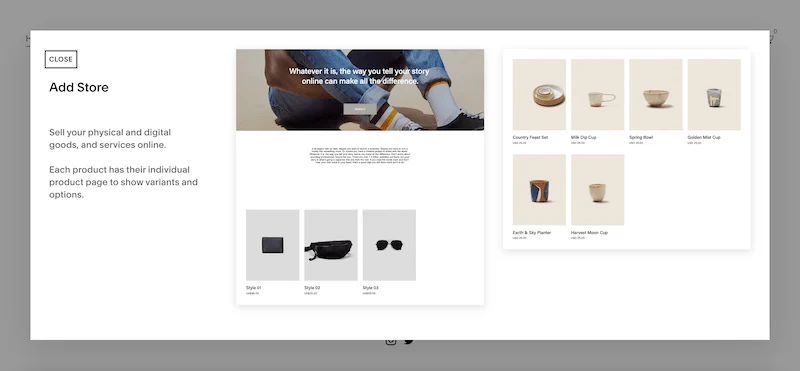
When you choose the “Store” page, you’ll see some design templates. Choose the one that’s most appealing to you to have this template added to your store.
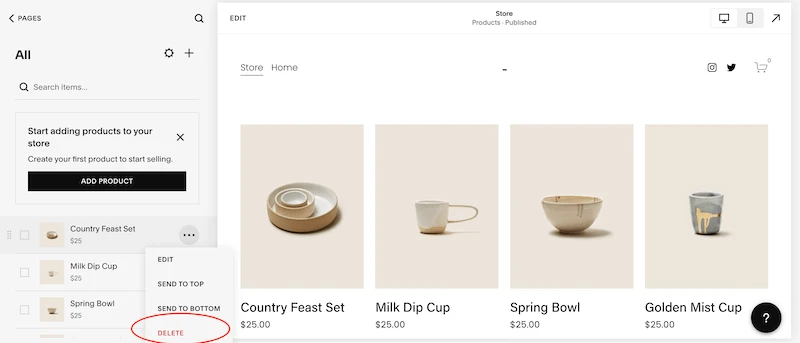
One of the first things you may notice is that some default products have been added to your store. You may have your own reasons to want to keep these around, but the first thing I do is delete them. I personally like to have a clean slate store.
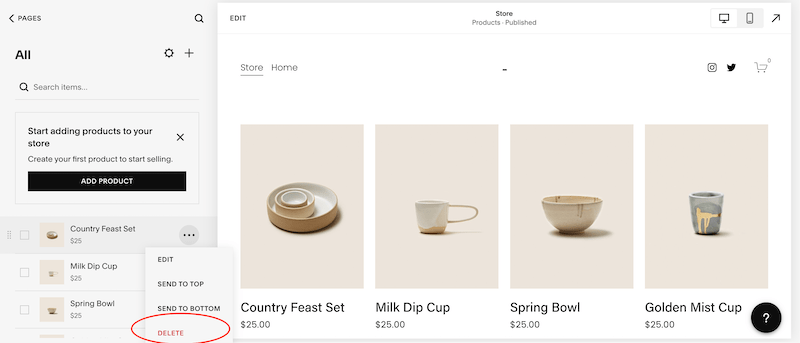
Next, click on the gear icon to edit the details of your page. Here you can customize the name of your store, the slug, and more.

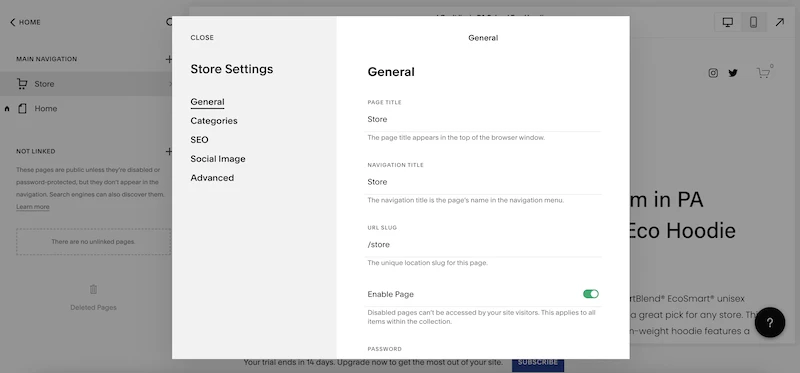
Take some time to adjust these details and, when you’re ready, let’s start integrating your new store page with Printify.
3. Navigate to your Prinitfy account
Once your Squarespace store page is ready, navigate to your Printify account. It’s within Printify that we’ll set up the connection to the Squarespace store page you just created.


4. Navigate to your stores page within Printify
Within your Printify account, navigate to your list of connected stores. There are two ways that I usually use to do this.
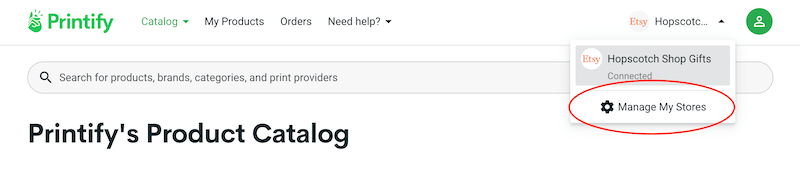
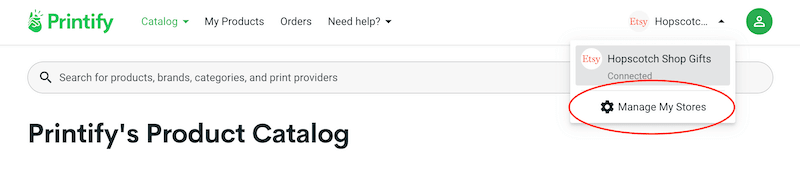
Firstly, find the dropdown in the top toolbar where your stores are listed. Underneath your list of stores, click on the “Manage My Stores” button.
Secondly, click on your profile image in the top right corner of your toolbar. Next, click on the “My Stores” button.
Here you’ll see all of the stores you currently have connected to your Printify account. You’ll also see a button that allows you to add a new store.
5. Add a new store to your Printify account
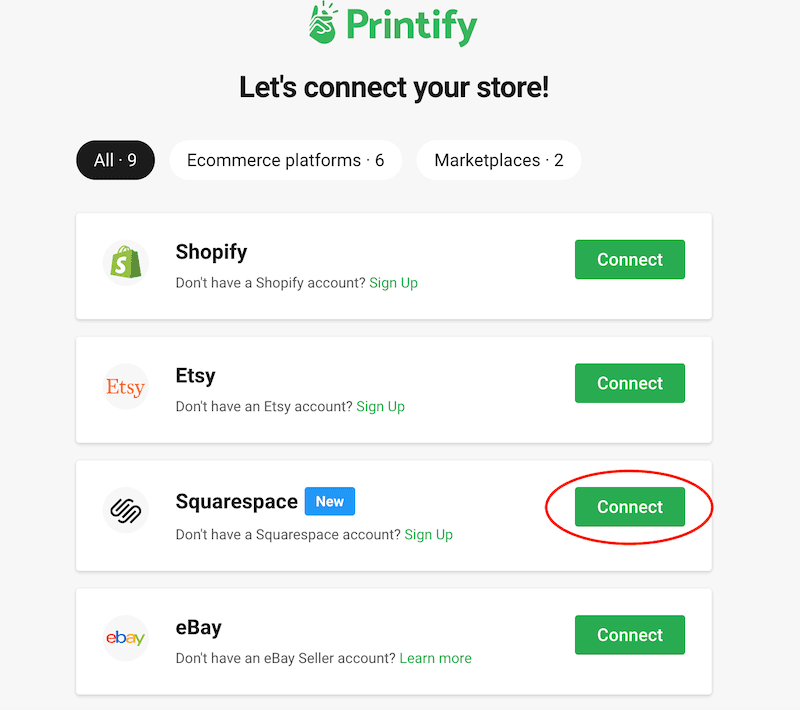
Within your stores page in Printify, click on the “Add new store” button. Next, you’ll see a list of Printify’s integrations.


If you’re like me, you’ll get shiny object syndrome at this point. Looking at all of the awesome integrations that Printify offers just makes me want to start more ecommerce stores.
Focus. Focus.
Save the other integrations for later and click on the “Connect” button next to the Squarespace option.

6. Connect your Squarespace store to your Printify account
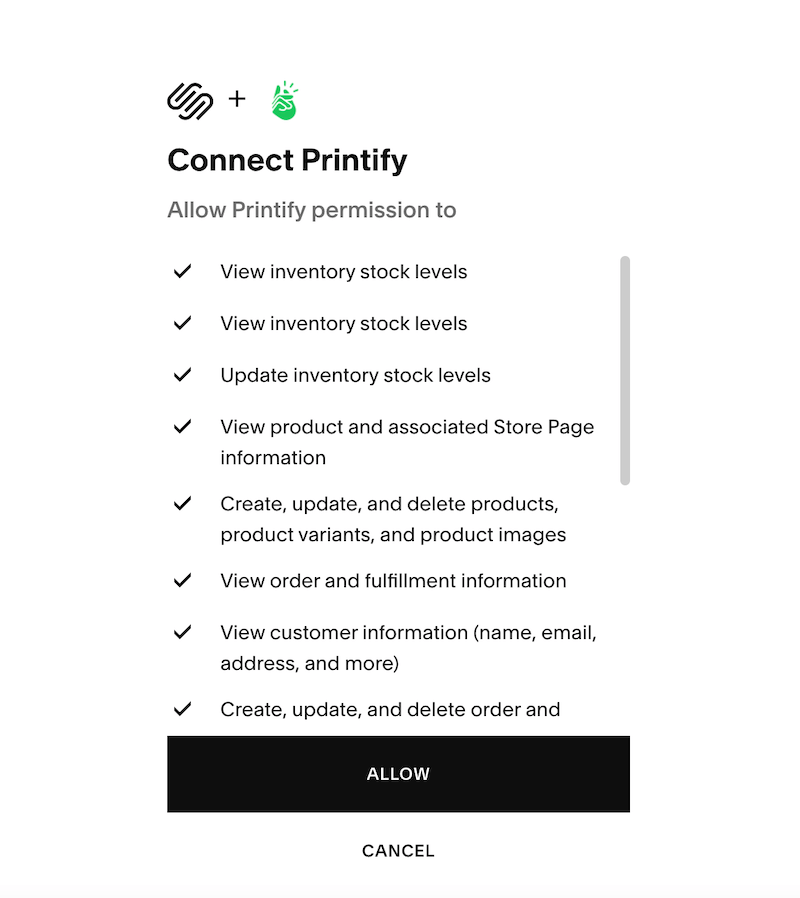
Once you click on the “Connect” button next to the Squarespace option, you’ll progress through a few screens before your integration is complete.
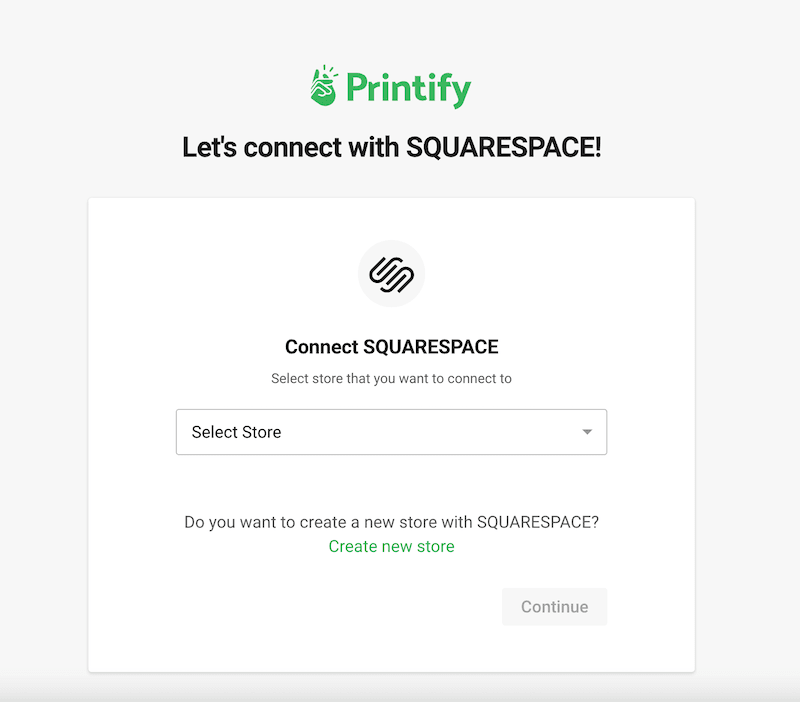
One of these screens asks you to allow access to the integration. Once you’ve done that, the next screen will prompt you to connect your store.

Since you’ve already created your store page within Squarespace, you should see it appear within the “Select Store” dropdown menu. Go ahead and choose the store page you created for your Squarespace site and click the “Continue” button.

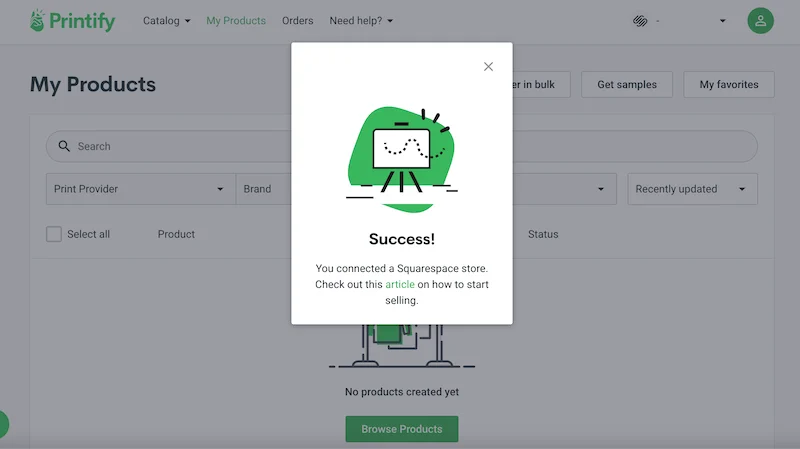
7. Do a happy dance when you see the success screen!
At this point, you should see a screen that says you’ve successfully set up your Squarespace and Printify integration. Woohoo!
Take a moment to celebrate, and then we’ll get started creating products.

8. Create your products within Printify, not Squarespace
This is REALLY important!
When you start creating Printify products for your Squarespace store, you need to create them within Printify – the store within Printify that’s connected to your Squarespace store.
Also, if you have multiple stores linked with your Printify account, make sure you have the correct Squarespace store selected so that you don’t accidentally create products for one of your different stores.
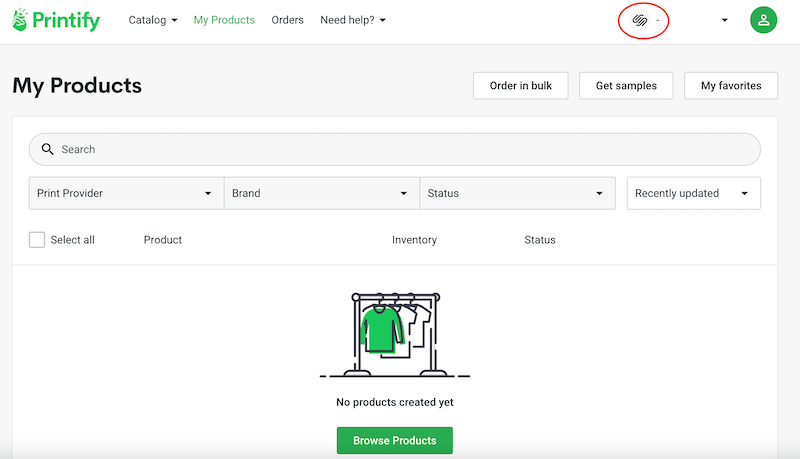
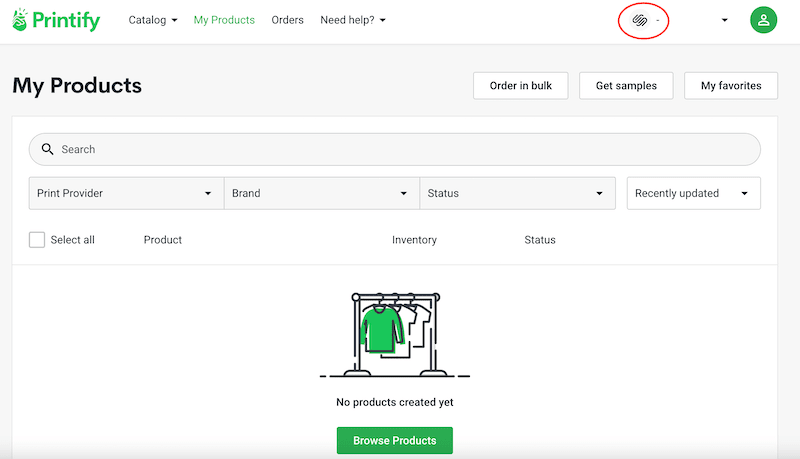
So, to verify before you start creating products, look at your Printify screen and make sure that your desired Squarespace store is showing in the top right. That’s where you want to be.
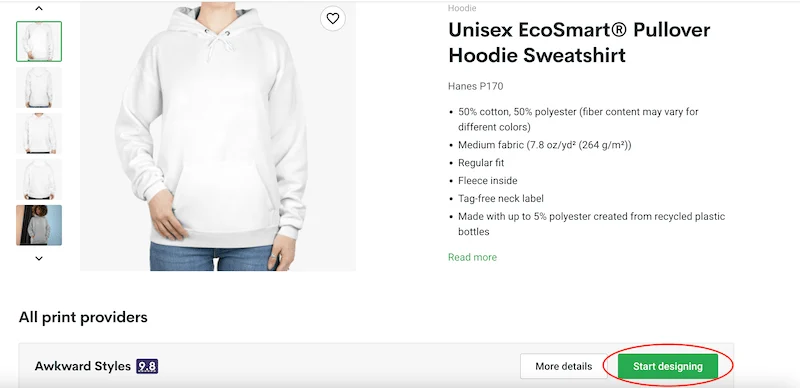
Let’s say that I want to add one of Printify’s awesome eco hoodie’s to my Squarespace store.
I go ahead and choose the “Browse Products” button within Printify and get distracted by all of the things that Printify has to offer. Eventually, I regain my focus and choose the eco hoodie.

I add my design, choose the colors and variants, and make sure that I’m happy with it.
Also, I always take a moment to enjoy my art on a product. Personally, I was so gleeful the first time I saw my own art on an actual product. And I’m still gleeful now, even after creating countless products at this point.

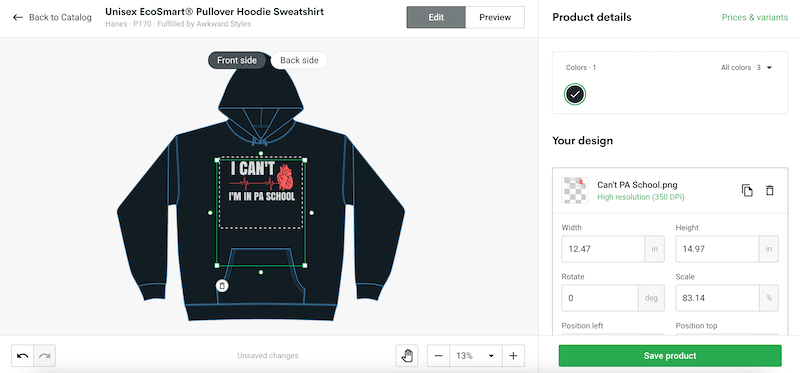
Whether you’re selling your Procreate art, or other type of art, step back and have fun seeing it come alive on one of Printify’s products!
Once I save it, I’m returned to my product dashboard.
My product has been saved, but it’s not published yet. This means that it won’t show up in my Squarespace store. That’s ok because I have some adjustments I want to make before I finalize it.
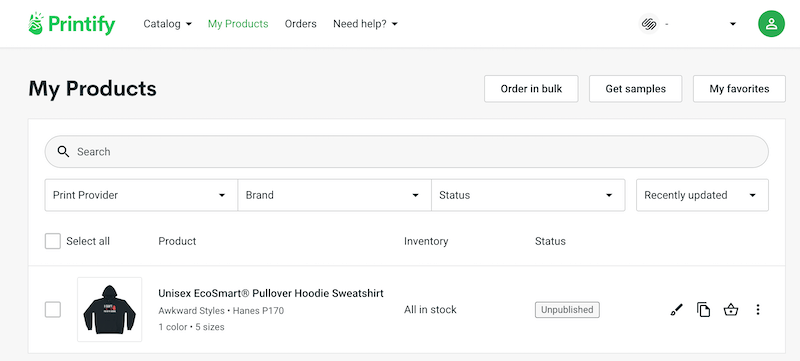

I click on the name of the sweatshirt to open the page that allows me to edit the details. I finalize my title, description, mockups, and review all of the details. Then, I scroll down and do an important verification.
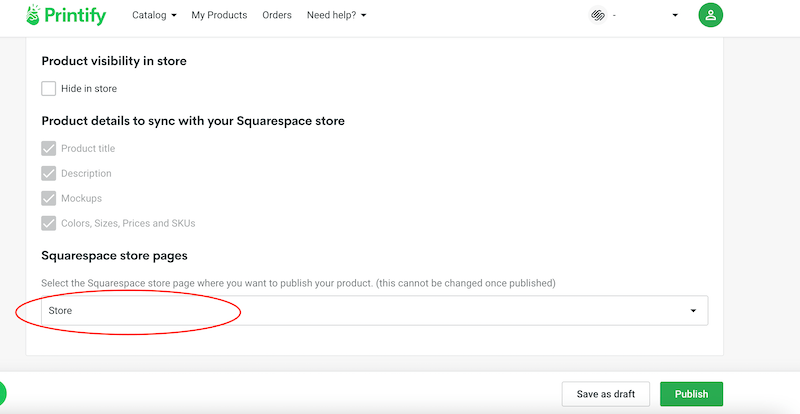

At the bottom of this page, you’ll see a section that has a dropdown for your Squarespace store pages. Verify that the correct Squarespace store page is selected. This is really important because whichever store page is listed here is the one that your product will be published to.
9. Publish your product!
Once you’ve nailed down your product details, confirmed that everything looks correct, and verified that you have the correct Squarespace store page selected, it’s time to publish it!
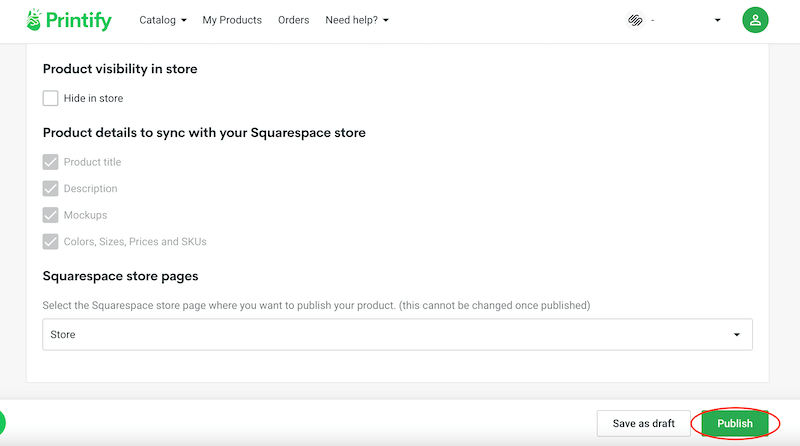
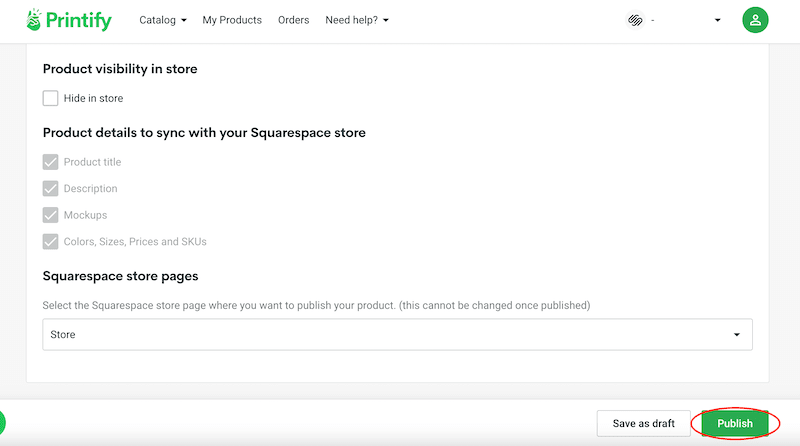
When you’re ready, click the “Publish” button and give yourself a high five.
10. Check that your product appears correctly in your Squarespace store
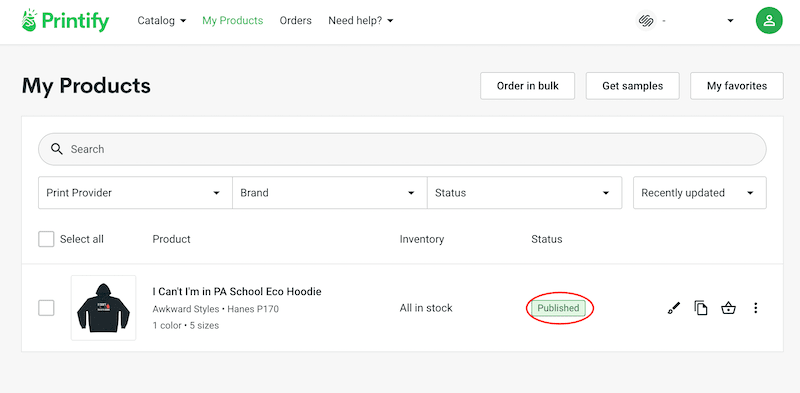
After you click on the “Publish” button, give Printify some time to work its magic. You’ll know that everything’s complete when you see the “Published” label next to your product in your Printify dashboard.

Next, head over to your Squarespace store to see your beautiful new product on display!

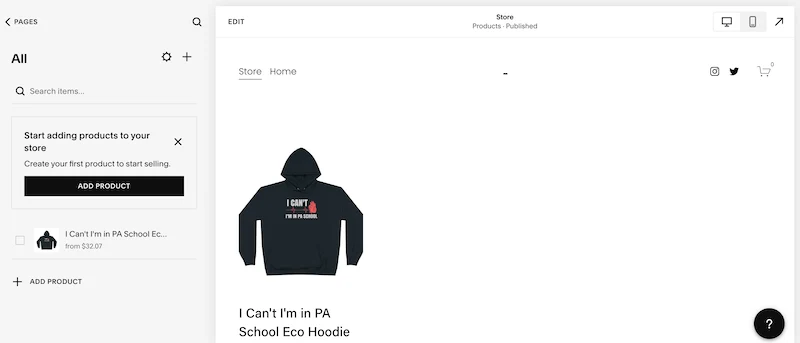
You’ve now successfully used the Squarespace and Printify integration 🙂
11. Make any product edits within Printify, not Squarespace
Things change! If you need to make any adjustments to your Printify products that are integrated with your Squarespace store, do it within Printify, not Squarespace.
Simply edit your product within Printify and republish it. The changes you make will be reflected on the Squarespace side of things.
There you have it! The Squarespace and Printify integration is a really neat way to seamlessly merge your website with the print on demand platform of your choice. Given all of Printify’s product options, this integration opens up a world of possibilities.
Have fun creating!


Diana has been an artist for over 27 years and has training in drawing, painting, digital drawing and graphic design. Diana’s latest obsession is digitally drawing with Procreate and Procreate Dreams. Diana has experience selling her art across a number of platforms and loves helping other artists learn how to make money from their art as well.