Once you get started making your own stamp brushes in Procreate, you’ll realize that you’ve unlocked a treasure trove of creative fun. Procreate stamp brushes help you make art more quickly, consistently, and creatively.
To make a stamp brush in Procreate, start by drawing the shape you want to use on a square Procreate canvas. Copy this shape and import it as the brush shape in a brand new brush in your brush library. Adjust the brushes settings to your desires, including the spacing, max size, jitter, and more.
If this sounds confusing, don’t worry! We’re going to walk through the process of making a stamp brush in Procreate, step-by-step.
1. Create a square canvas in Procreate
It’s REALLY important to create a square canvas in Procreate when starting to make your stamp brush. Make sure that the length and the width are the same size.
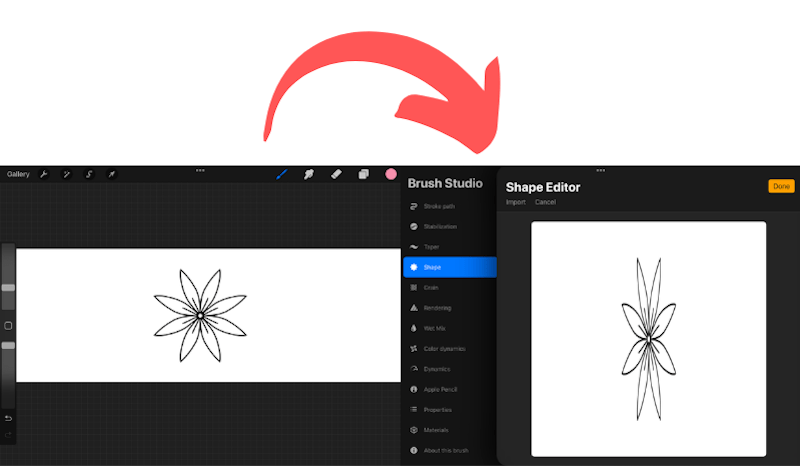
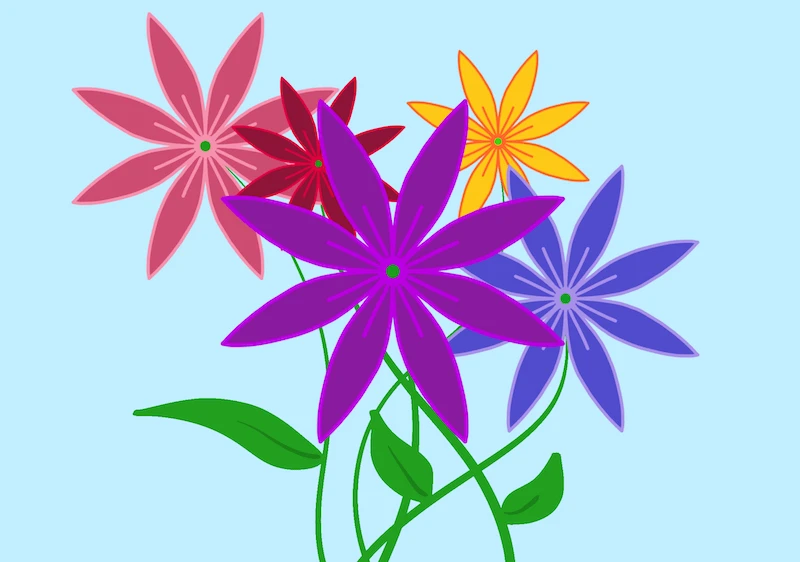
If you don’t, you’ll end up with a squashed or stretched stamp, like the one below.

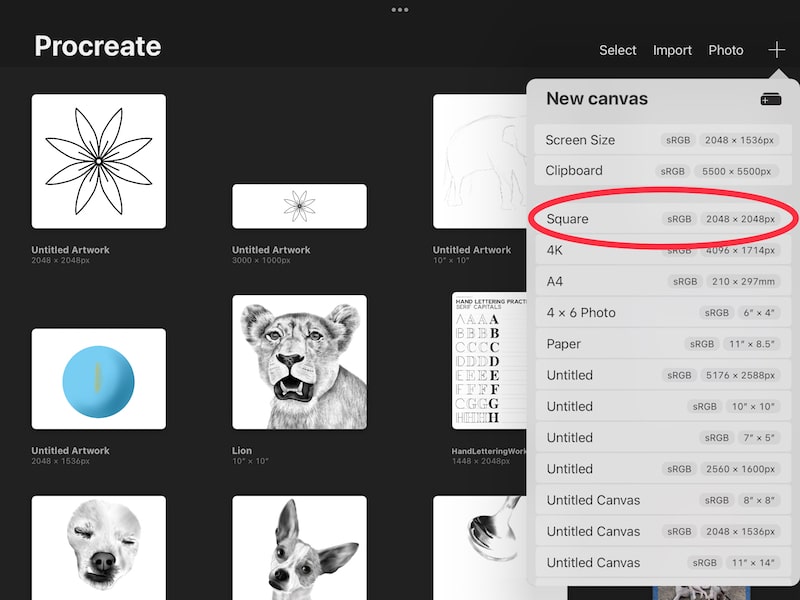
Procreate’s default Square option works well. You can find this option by clicking on the + button in the top right corner of your Procreate screen to create a new canvas. Look down the list of canvas options until you see the “Square” option.
Tap on it to create your square canvas.

2. Draw your stamp image
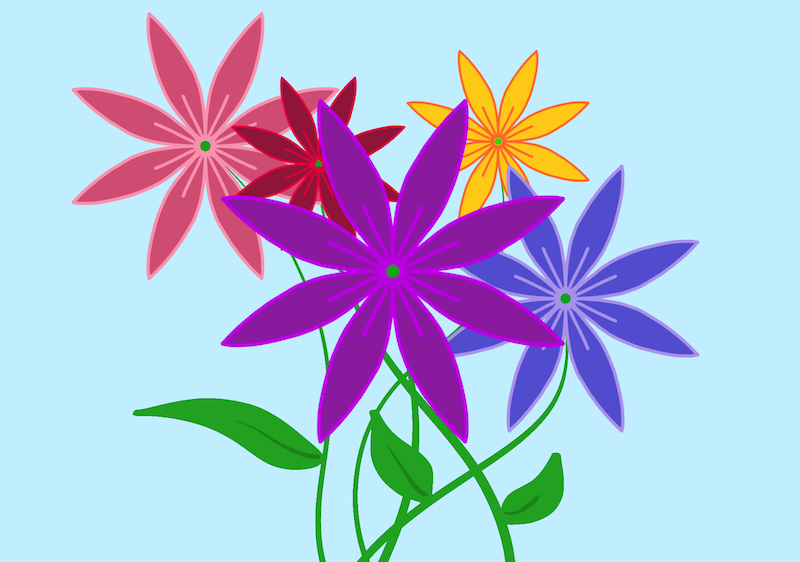
On your square Procreate canvas, draw the image that you want to use for your stamp. I drew this flower with Procreate’s symmetry tool.
I have a full guide on using Procreate’s symmetry tools if you want to learn more.

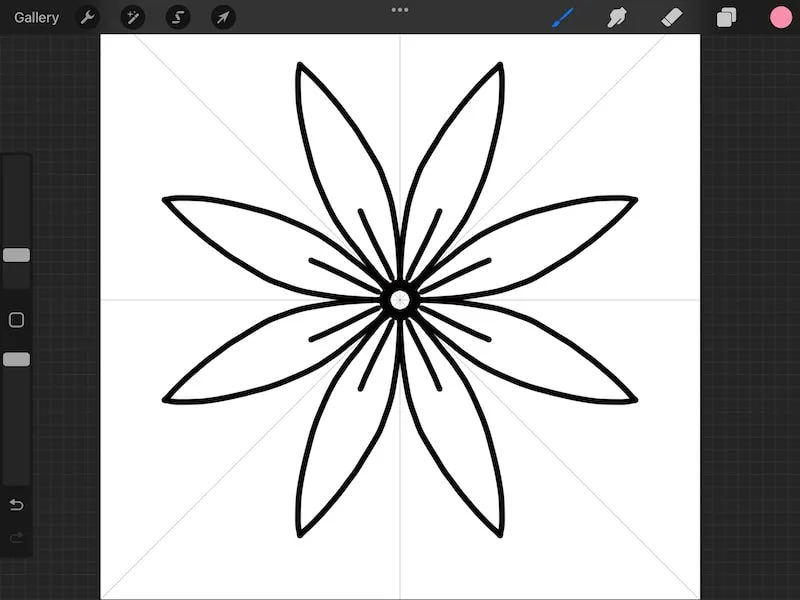
Important note: you can’t change your stamp image later on without redoing your stamp brush. Before moving on to the next step, make 100% sure that your stamp image is finalized and what you want it to be.
Another important note: you can ONLY have your stamp image on your canvas. Anything that’s visible on your canvas will be included in your stamp, so make sure you hide any layers and elements you don’t want in your stamp.
3. Copy your canvas within the Actions menu
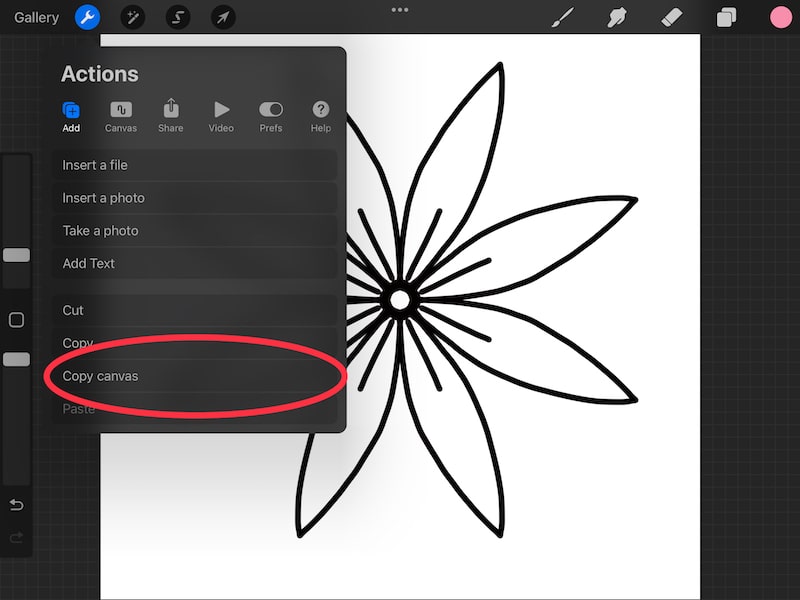
Once your stamp image is finished and finalized, it’s time to copy it. In fact, we’ll be copying your whole canvas.
To do this, open the Actions menu. This can be found in the top-left corner of your screen with the wrench icon.
Next, click on the Add sub-menu and look through the options until you see the Copy canvas button. Tap on it.

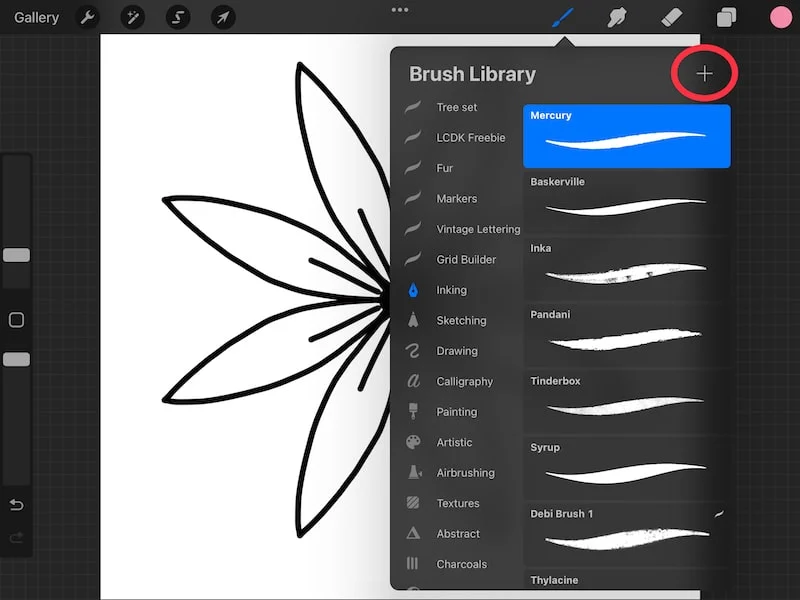
4. Open your brush library and create a new brush
Open your brush library by tapping on the brush icon in the top right of your Procreate screen.
Next, within your brush library, tap on the + button in the top left corner of it. This will create a brand new brush. A brush that will soon be your stamp brush!

5. Tap on the Shape button
When you click on the + button to create a new brush, you may be overwhelmed by the screen that pops up. There are a LOT of options that come with creating a brush. Don’t worry, we’re only going to worry about the ones you need for your new stamp brush.
To begin building your stamp brush, tap on the Shape button.


6. Tap on the Edit button within the Shape menu
Once you’ve tapped on the Shape button, you’ll see a section called Shape Source with an Edit button next to it. Tap on that Edit button.


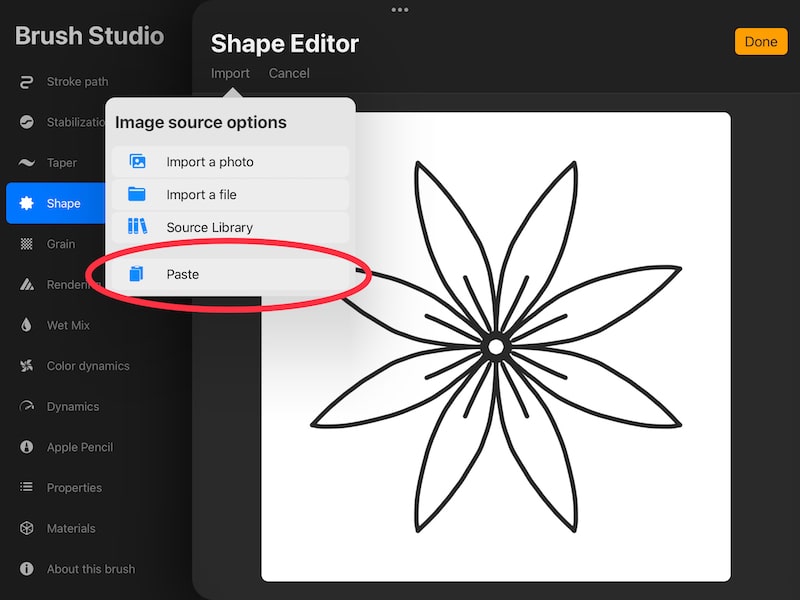
7. Within the Shape Editor, tap the Import button and Paste your shape in to
Here’s where your copied canvas comes back into play! Once you’re in the Shape Editor, tap on the Import button and then tap Paste.
This will paste your shape into your new brush.

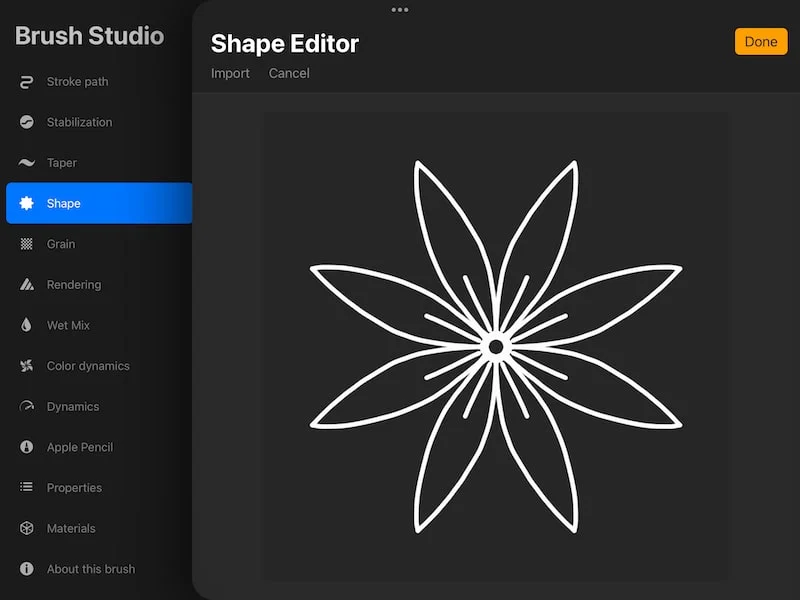
8. Invert the colors of your image by tapping on it with two fingers
You may have noticed that your entire canvas copied over into your stamp brush. Don’t worry, we did this on purpose.
Now that everything is copied and pasted, we want to get rid of the square, white background. To do this, use two fingers and tap on the image.
This will invert your colors. Turning your stamp image white and making your background disappear.

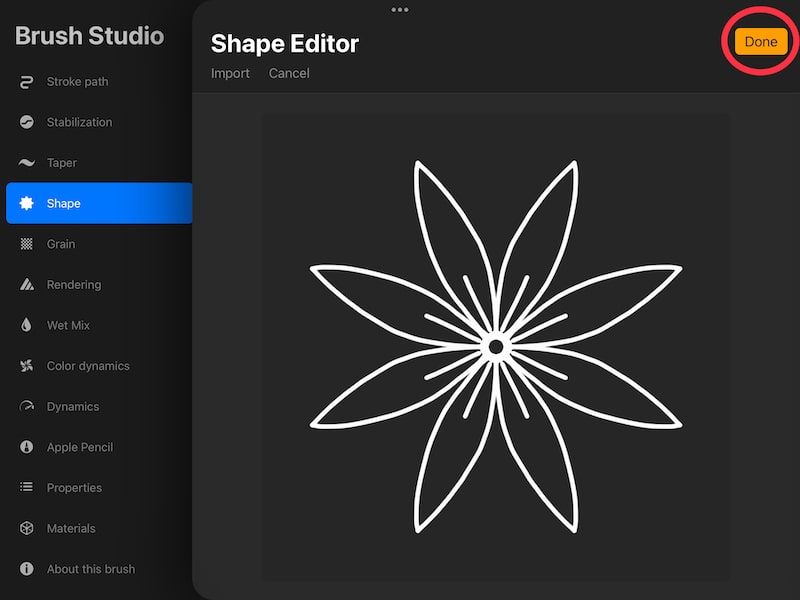
9. Tap the Done button to finalize your stamp shape.
Once you’ve inverted your stamp’s colors, tap the Done button to finalize it.

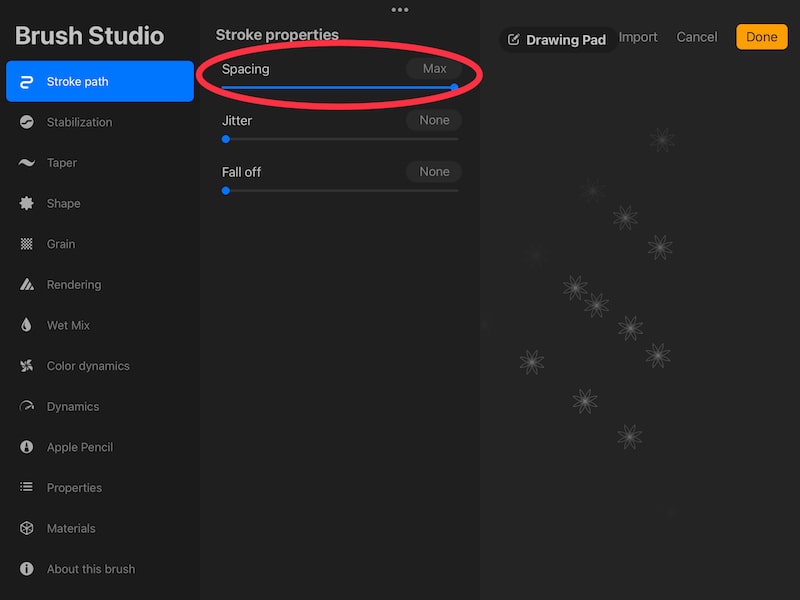
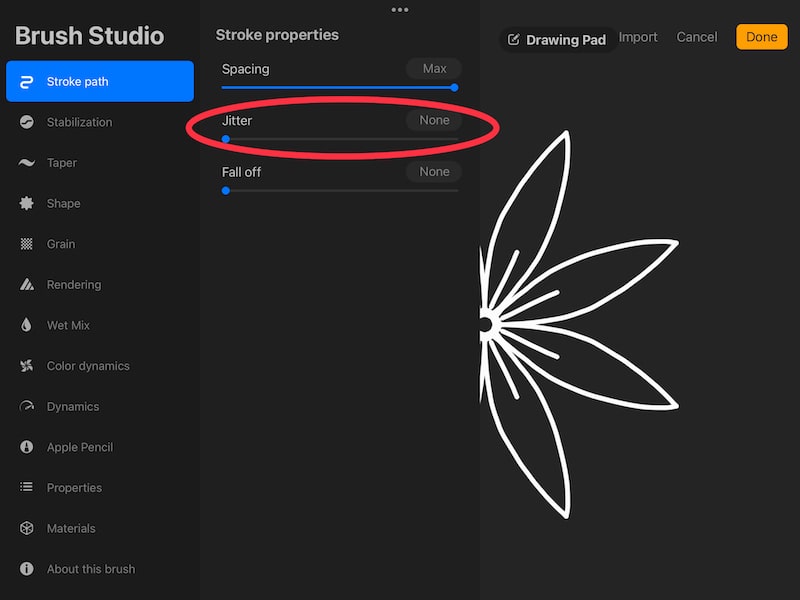
10. Adjust the Spacing with the Stroke Path menu
When you’re done with your shape, you’ll notice that they’re small and clumped together in your brush preview area. That’s not going to work! We need to space them out.
To do that, tap on the Stroke Path menu. Here you’ll see a Spacing slider.
Move that Spacing slider all the way to the right to max it out.

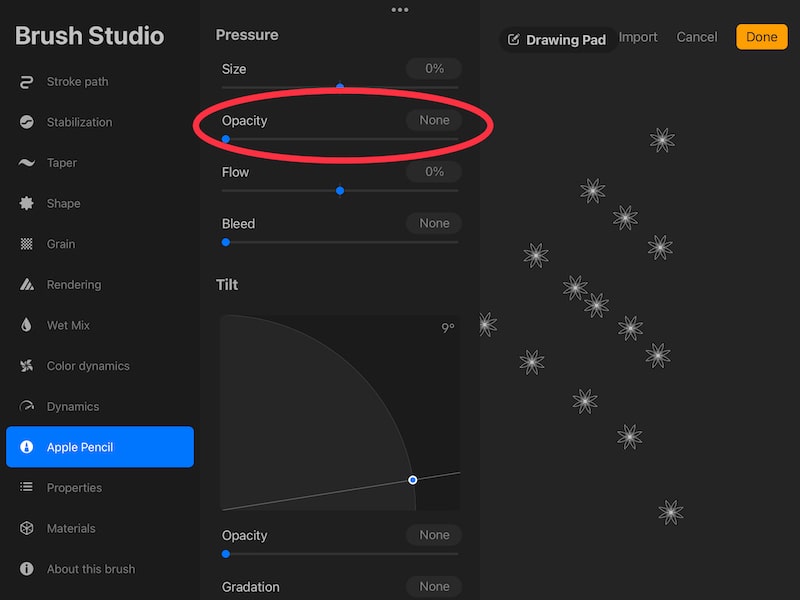
11. Adjust the Opacity in your Apple Pencil settings
Tap on the Apple Pencil menu. Here you’ll see an Opacity slider.
I personally like to slide the Opacity slider all the way to the left so that there’s no opacity. I can always adjust opacity within my Procreate canvas later on. I’m not a huge fan of dealing with opacity within the brush itself.
That decision is up to you though, so adjust your own Opacity slider to your needs.

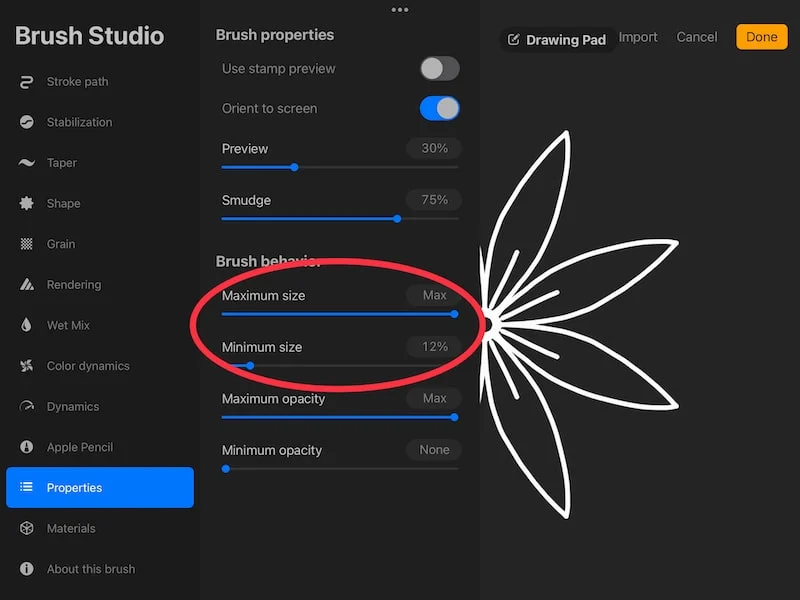
12. Adjust the minimum and maximum sizes of your stamp brush in your Properties settings
Tap on the Properties menu. Here you’ll see sliders for minimum and maximum sizes. This will determine how small and big you can adjust your stamp brush to be. Adjust each of these sliders according to your desires.

13. Adjust any other settings, as desired
Now you have a stamp brush! If you stopped right now, you would have a functional, beautiful stamp brush.
The settings we’ve already talked about are my go-to stamp brush settings. The rest of the brush settings are optional depending on the effects you’re looking for.
Here are some to play around with that work nicely with stamp brushes:
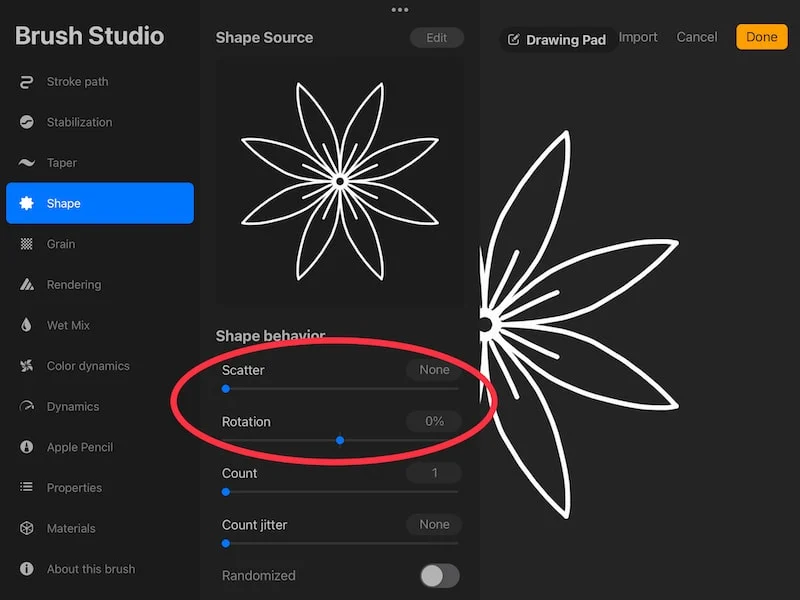
–Rotation: this slider within the Shape menu will adjust the rotation of your stamp in relation to your stroke.
–Scatter: this slider will randomize the rotation of your stamp every time you lay it down.

–Jitter: this slider will offset your shape by a certain amount every time you lay your brush down

Those are just a few of the settings you can play around with. Have fun adjusting your brush settings to experiment with how it impacts your stamp. You’ll learn a LOT through experimentation.
14. Preview your stamp brush at any time
As you’re finalizing your stamp brush in Procreate, you can preview it at any time in the drawing pad area on the right hand side of your screen.
To begin with, clear it by tapping on the pencil icon and tapping on Clear drawing pad.
Within this menu, you can also determine your preview size and color, as well as reset all of your brush settings, if needed.
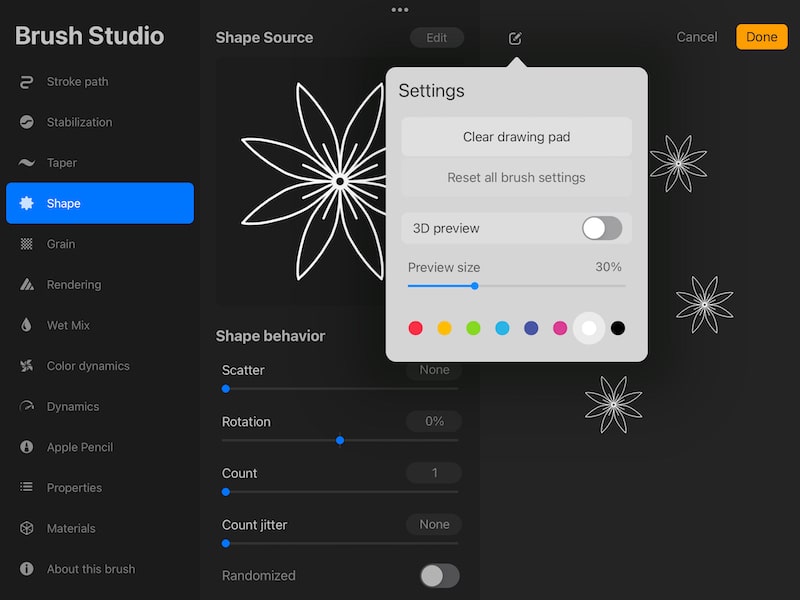

Every time you make a change to your brush, experiment with it in the preview area. That way, you won’t have any surprises when you finalize your brush and start using it.
15. When you’re finished with your brush, tap the done button
Once you’ve adjusted your brush’s settings to your desires, tap the Done button in the top right corner of your Procreate screen.
Now we can start having fun using your stamp brush!
How to Use Your Procreate Stamp Brush
To use a stamp brush in Procreate, select it within your brush library. Adjust the size and opacity of it with the sliders on the left side of your screen. Tap your Apple Pencil on your screen to place each stamp image. Stamps can be edited, colored, and resized in the same way as any other drawing.
As you’re getting started with your new stamp brush, there are a few things to look out for and consider. Let’s walk through them.
1. Be aware of your brush’s sizing
The first thing to consider when starting to use your new stamp brush is the size. The size slider on the left side of your screen will impact how big your stamp will be.
That said, if you’re finding that your stamp is too big or small, even after adjusting the sizing slider, go back into your brush settings.
Recall step 12 of this tutorial when we determined the minimum and maximum size for your stamp. If you feel like your stamp sizing is off when using Procreate’s brush sizing slider, try readjusting the minimum and maximum size of it within the brush settings.
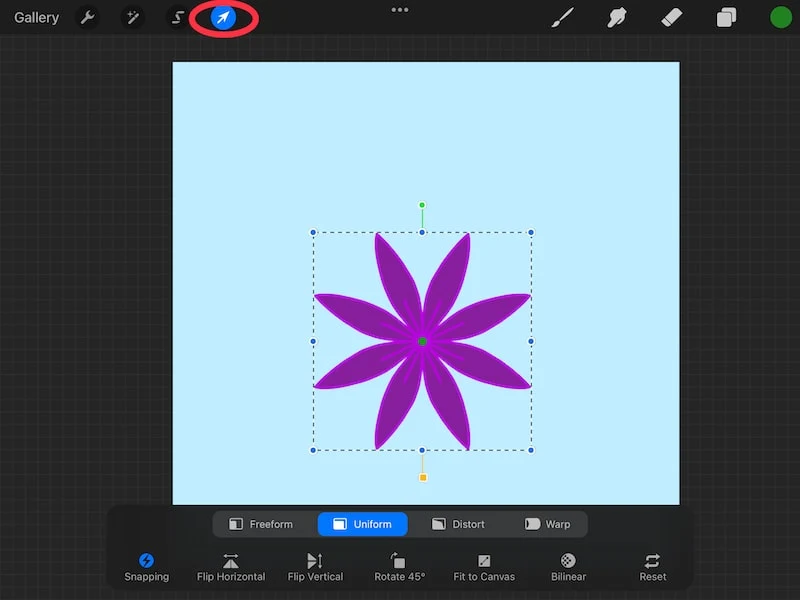
2. Use the Transform tool to reposition your stamped images
Once you lay down your stamp, it acts like any other object on your canvas.
This means that you can use the Transform tool to reposition your stamp on your canvas. I have a full guide on using the Transform tool that’s helpful to read for a deep dive on this awesome tool.
You can also use the Transform tool to resize your stamp. That said, it’s better to do your best to make your stamp the right size from the get-go, as your art can lose quality if you resize it too much.
Also, resist the urge to put a bunch of stamps on one layer. It can be fun to stamp, stamp, stamp, over and over again. That said, if all of your stamps are on the same layer, it’s a bigger hassle to work with each of your stamped images individually.

3. Color, erase, and add to your stamped images
Your stamp brushes are just like any other brushes. They just have fun shapes attached to them!
Don’t forget all of the neat things you can do with the lines and shapes you lay down with your brushes. This means that you can recolor them, add to them, erase them, and more.
It’s easy to feel boxed into your stamp brush – as though you need to keep the stamped image exactly as it originally was. That’s not true at all!
Have fun with your stamped images. Treat them as a base from which to work and grow from.
Making your own stamp brushes in Procreate opens a LOT of fun and creative potential for your art. Start creating your own stamp brush and see where it takes your art!
Check out more great posts about Procreate brushes:
How to Reset Procreate Brushes
How to Export Procreate Brushes the Easy Way
How to Stop Procreate Brush Opacity Buildup
Ultimate Guide to Procreate Brush Taper Settings


Diana has been an artist for over 27 years and has training in drawing, painting, digital drawing and graphic design. Diana’s latest obsession is digitally drawing with Procreate and Procreate Dreams. Diana has experience selling her art across a number of platforms and loves helping other artists learn how to make money from their art as well.