All over print shirts can be standout items in your print on demand store, or even your own closet. Luckily, there are a number of awesome print on demand platforms that can help you make beautiful all over print shirts that highlight your designs.
To make all over print art shirts, it’s important to create a design to cover every element of the shirt – front, back, and both sleeves. You can repeat the same design, or create unique designs for each space. Be mindful of where your design ends at each seam of your shirt to avoid any awkward transitions.
This post may contain affiliate links, which means I may earn a commission if you decide to purchase through my links.
If this is your first experience with designing all over print shirts, it can feel intimidating. There’s no doubt that it’s different from designing typical apparel.
That said, once you’ve practiced with it, you’ll start to get a feel for how to place your designs and arrange them naturally on the front, back, and sleeves of your shirt.
You’ll also start getting a feel for the types of art that work best for all over print shirts. This element is HUGE. Unfortunately, not all art works perfectly with all over print apparel.
For example, a small emblem or logo may not be the best choice for an all over shirt.
On the other hand, what about a big flowy design? Yeah, that could look good on a piece of all over apparel. Like the leggings I made with Printful below! I love Printful 🙂

Alright, since I mentioned Printful, let’s dig into the important details. What print on demand platforms even offer all over print shirts? Where do you even begin?
Printful and Printify are two of my favorite print on demand platforms for designing all over print apparel.
With both platforms, you’ll have access to high quality all over print shirts. Dream bigger than shirts though.
Shirts, sweatshirts, pillows, leggings, flags, and so much more. Check out the catalogs for Printful and Printify to see their current offerings.
Once you’ve chosen the all over print product you want to design, it’s time to build it within the platform. Here are some tips to make your experience as seamless as possible.
1. Set Up Your Print on Demand Account
In order to design and order all over print apparel, or any apparel for that matter, you need to have an account with the print on demand platform that offers the product you’re looking for.
Typically, it’s free to sign up for print on demand platforms. You only pay for products when you order them.
So, if you haven’t done so already, sign up for the print on demand provider of your choice. My recommendations are Printful or Printify, but you can choose any provider that suits your fancy.
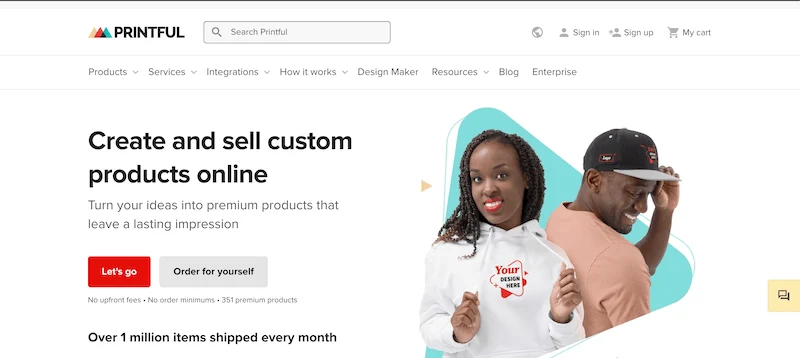
Printify does have a paid premium subscription, but it’s not required. You can create amazing products and use their service with a free account.
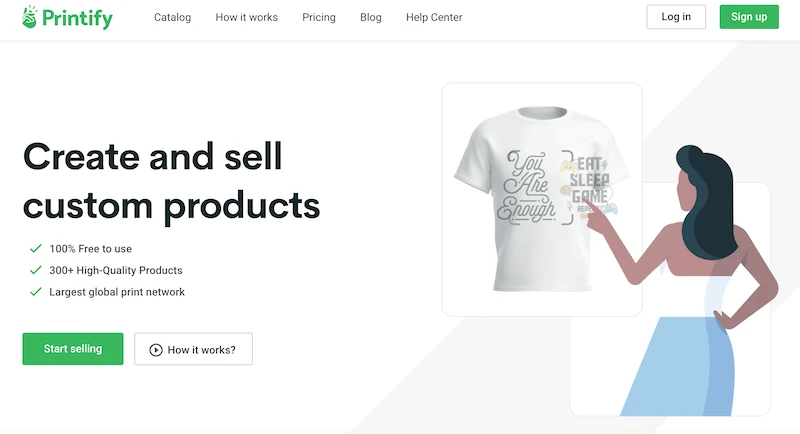
If you can’t choose between Printful and Printify, try them both out! I have a guide on using Printful and Printify together that’s helpful to read if you want to learn about optimizing both platforms.
Once you’ve set up your account, you can integrate it with Etsy, link it to another online store, or simply get excited to buy your own print on demand products for yourself.
Next, it’s time to choose your product and start designing.
2. Use the Product Template for Your All Over Print Product
Once you’ve set up your print on demand account, you’ll probably spend some time getting lost in the product catalog. I still fall into this blackhole ALL the time! There’s just so many fun products to check out.
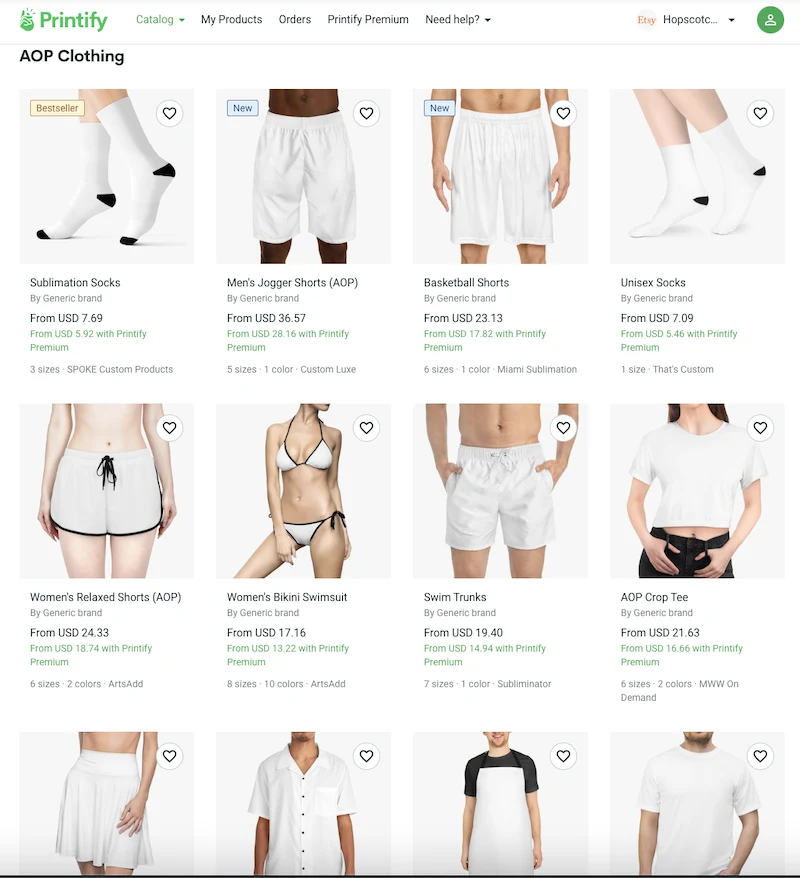
After you’ve crawled out of the blackhole, go ahead and choose the all over print product you want to design. Next, open the product’s design templates.
Most print on demand platforms should offer design templates. If they don’t, you may want to find another provider. Especially if you’re creating all over print designs.
These design templates can be incredibly helpful for understanding how to size your design from the get-go. That way, you’re not messing around with low resolution, wonky designs that just don’t fit right on your apparel.
Create your design with these templates in mind.
To find these templates in Printful, it will depend on the product page you’re looking at. If you’re already creating an order or adding this product to your store, click on the product info button that’s located under the product’s star rating.
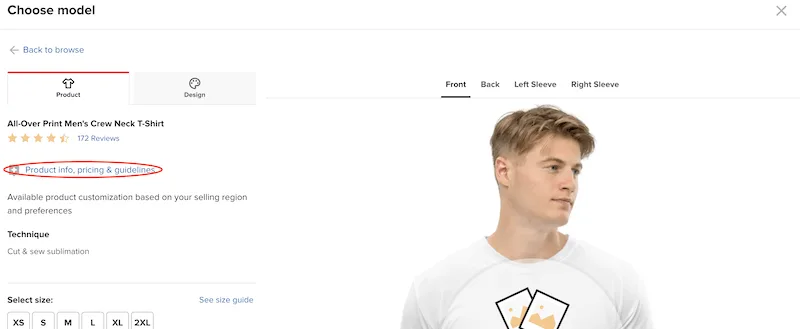
If you’re looking at the product within Printful’s general catalog, you’ll find the file guidelines button on the right hand side, next to the technique section. You can also scroll down to find it.
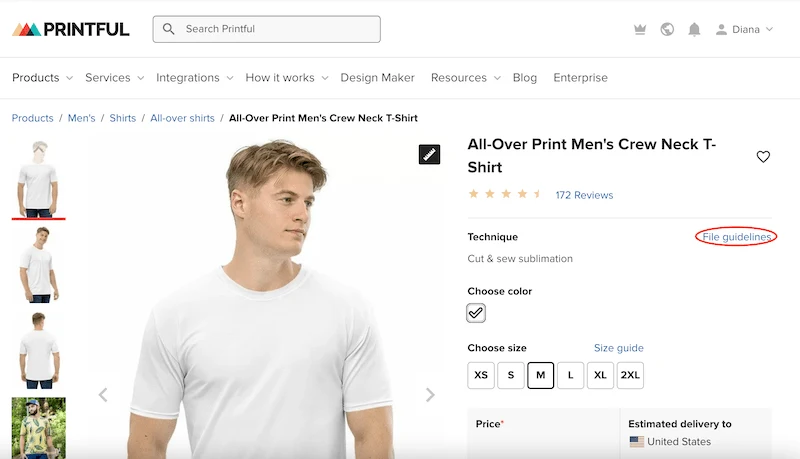
Make note of the print file sizes. The closer your design gets to these sizes, the better it will be.
It’s also a good idea to download the print file templates. This is a good idea for all apparel, but especially for all over print apparel!
When designing all over print apparel, it can be tricky to deal with seams. Having your designs line up properly so that there isn’t an awkward transition at every seam can be tough.
Laying your design out on the print templates can help you anticipate any awkward seams and adjust your design to accommodate them.
The process is similar for finding print files in Printify. Navigate to the product you want to create and click the button to start designing it.
In the design area, you’ll see recommendations for file size. Again, try to get your design as close to the product’s recommended print size as possible.
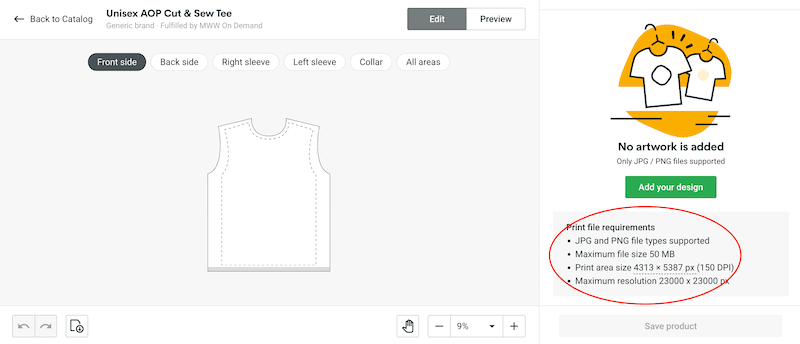
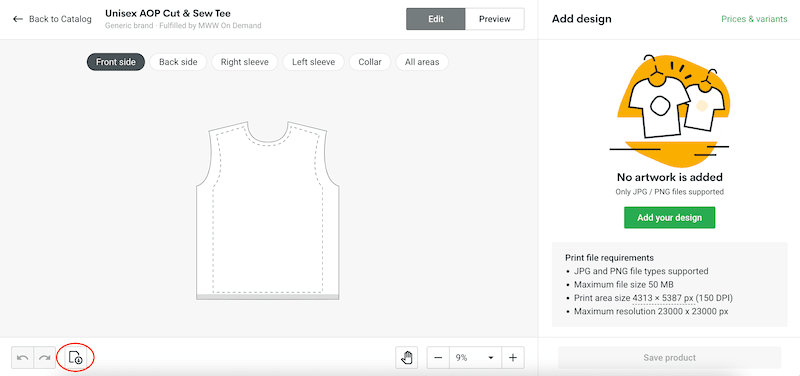
To download product templates in Printify, click on the area you want a template for – the front, back, sleeves, ect. Next, click on the download button at the bottom right corner of your screen. This will download a template you can use for that section of your product.
3. Check Your DPI
When creating print designs, the general recommendation is to aim for 300 DPI. Now, this doesn’t mean that all of your designs have to end up as 300 DPI.
What do I mean by that? Well, the DPI of your image is going to change depending on how you size it on your product. If you’ve stuck to the design templates and haven’t done a lot of resizing on your product, you likely won’t see a lot of changes to your DPI.
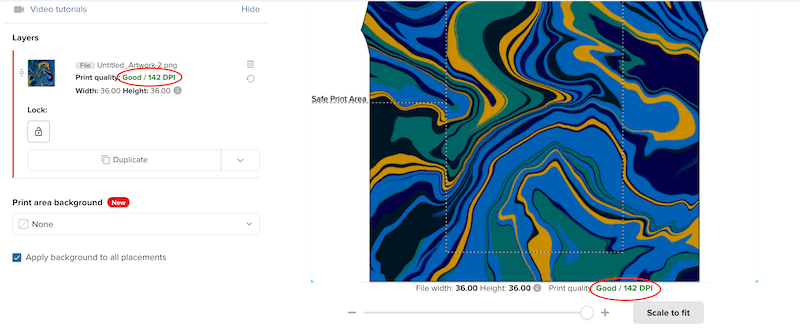
That said, you might upload your design to Printful or Printify and realize that your DPI isn’t what you expected. That’s ok! Both platforms will tell you what your design’s DPI is and whether it’s in a good range.
At the least, you want your DPI to be in the green.
For Printful, you at least want your design to be listed as good.
For Printify, you at least want your design to be listed as high resolution.
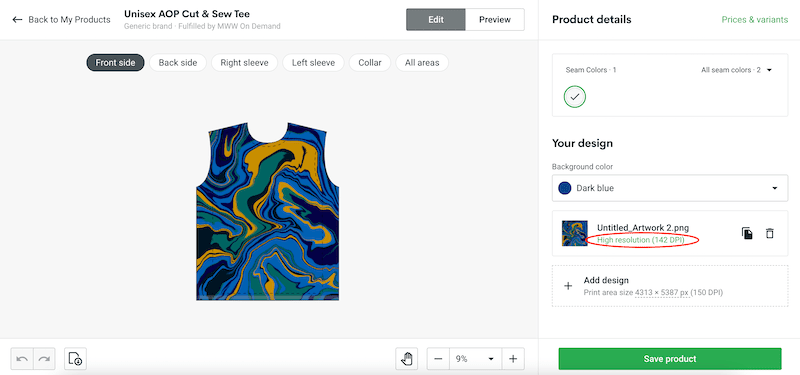
You can always aim for higher, but you at least want Printful’s and Printify’s stamp of approval.
If you’re not happy with the DPI of your design on your product, aim for re-uploading it as a larger file size.
4. Be Mindful of the Edges of Your Design
Now we’re onto the designing phase. As you’re working, be mindful of all four edges of your design. If you’re creating your design according to the product’s file recommendations, it’s likely that your edges will hit up against a seam.
This means that you won’t want any cutoff objects, dramatic color changes, or wonky lines. Anything that is cutoff at your edge will also be cut off at the seam on your all over print shirt.
The edges of your design are not only important for your seams, but also for any patterns you want to create. Let’s say that you don’t want to stretch your design across your entire print area – the front of your shirt, for example. Instead, you want your design to be smaller and to create a pattern across the front of your shirt.
Well, the edges of your design will be REALLY important in that case. If you plan to create a pattern, you need to make sure that the edges of your design flow together to the point where they’re unnoticeable.
You don’t want a shirt that looks like an awkward collection of squares…like the one below.
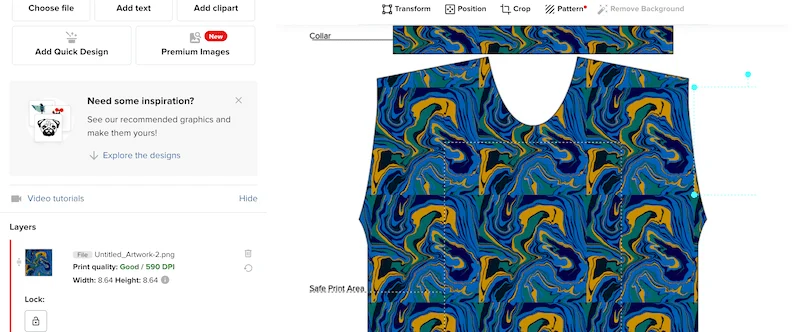
When you’re designing your all over pattern, make sure that all four sides of your design are compatible with each other – no matter how you repeat your design, it looks natural.
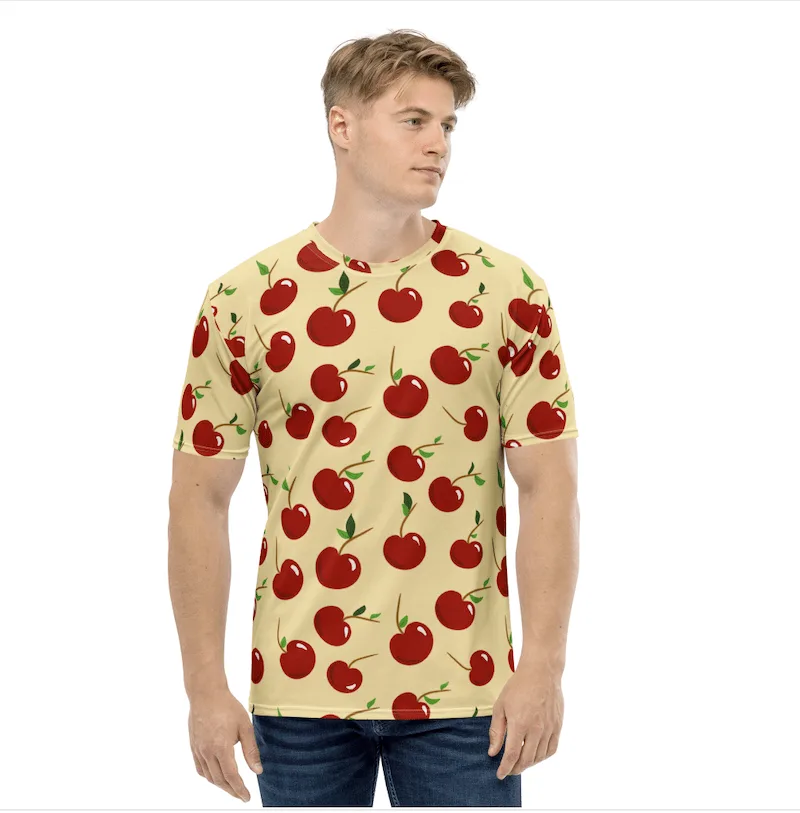
Like the design below. This is a patterned design, but it’s hard to tell. That’s because I made sure all of the edges were clean. No cutoff cherries or color changes.
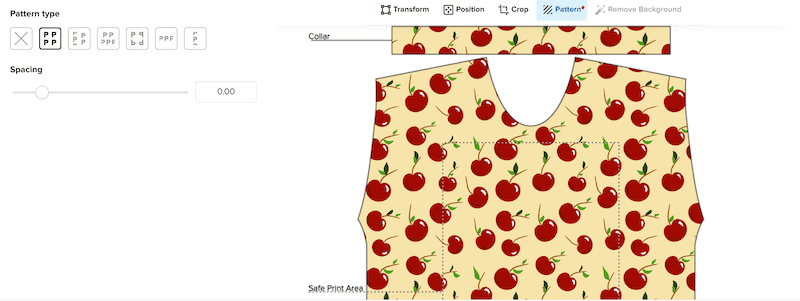
Now, this begs the question – why not just create seamless patterns to avoid this problem to begin with?
4. Seamless Patterns Don’t Work with All Over Print Apparel
If you haven’t heard of seamless patterns, or surface pattern design, it’s a way of designing patterns so that they can repeat and repeat and repeat without ever showing weird edges. They can even be scaled up or down without any issues.
These seamless patterns work well with Printful’s patterning tool. Unfortunately, I haven’t figured out how to make seamless patterns work in Printify. If you know how to do this, please write me and let me know!
Here’s my seamless pattern.
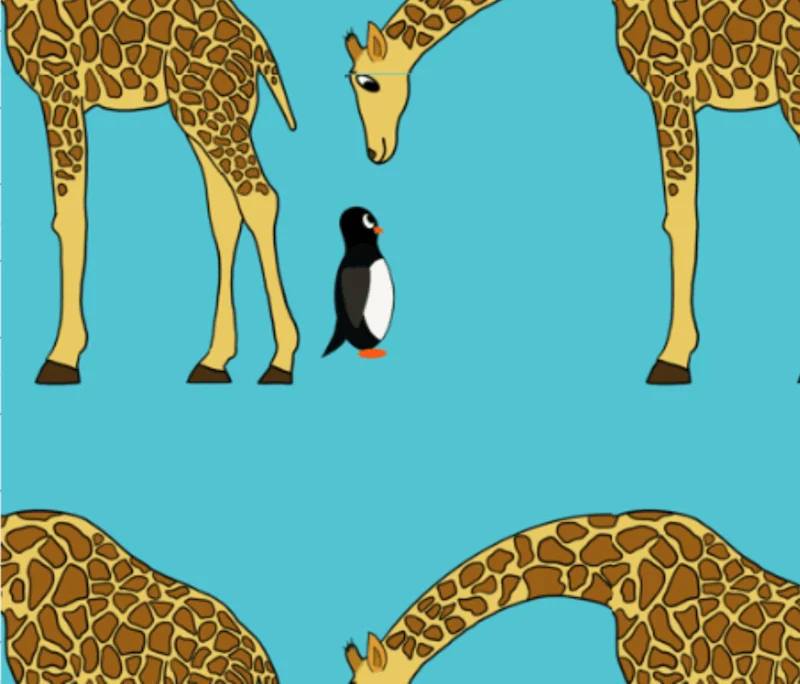
Within Printful, go ahead and upload your seamless pattern to your all over shirt as you would with any other design.
Then, click on the Pattern button. Choose the Block pattern option, which is the first option. This will line your designs side by side, which is what you want for a repeating, seamless pattern. Keep the spacing at zero.
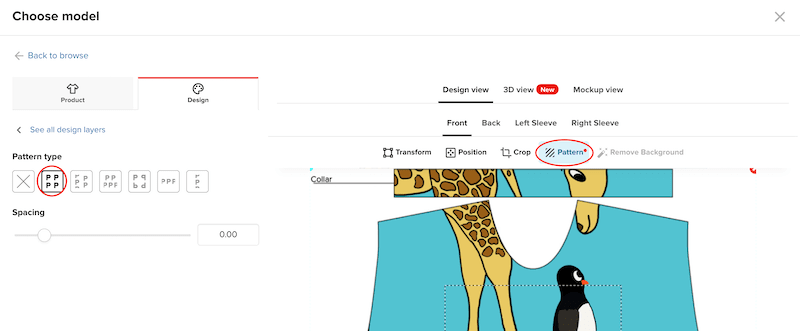
By default, your design will cover your entire design area when uploaded. To see the patterning, scale your design down with the sizing slider.
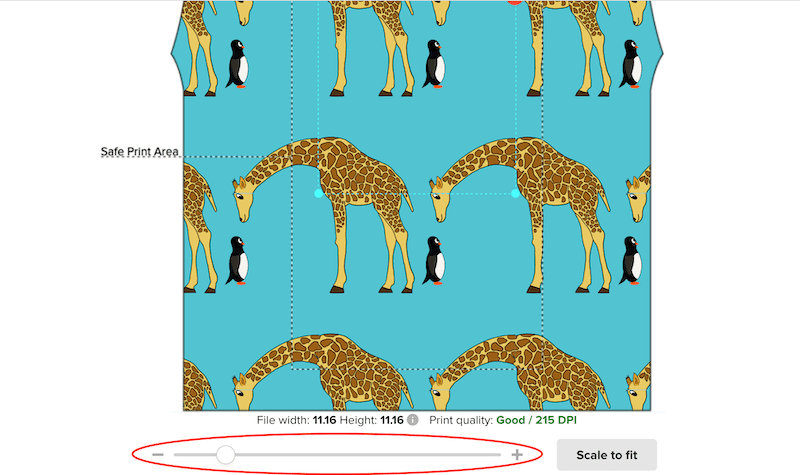
5. Experiment with All Over Print Designs
If you’re new to all over print designing, have patience with yourself and give yourself time to experiment.
Create designs that you never intend to sell, but are made with the intention of learning how all over print apparel works. Upload these designs to a product and play around with them.
Did you get the file size right?
What’s going on with the seams?
What type of patterning do you want? Do you want a pattern at all?
Even if you’ve been creating print on demand products for a long time now, all over print products can make you feel like a beginner again. They’re different! And that’s ok!
Take some time to experiment with them and get comfortable with them. It won’t be long before you’re creating beautiful all over print shirts and products you can be proud of.

Diana has been an artist for over 27 years and has training in drawing, painting, digital drawing and graphic design. Diana’s latest obsession is digitally drawing with Procreate and Procreate Dreams. Diana has experience selling her art across a number of platforms and loves helping other artists learn how to make money from their art as well.
