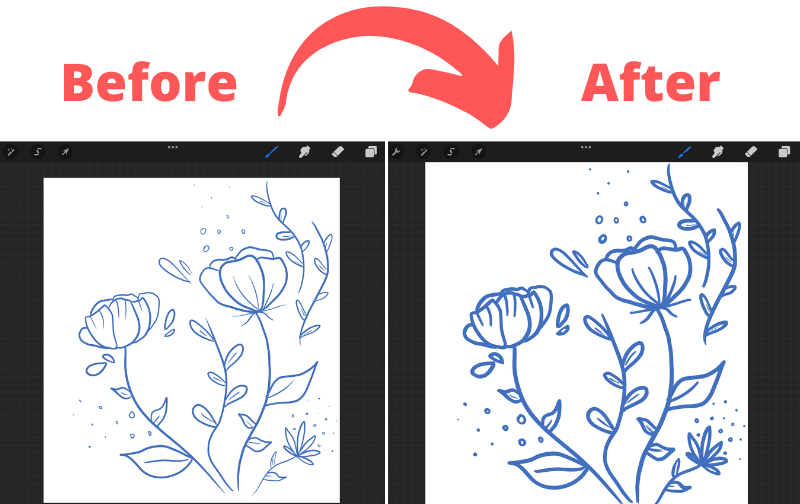
There’s nothing worse than spending hours on a piece of art, only to realize that the lines aren’t quite right. Specifically, they’re too thin. With traditional art, your only option would be to manually draw over all of your lines to thicken them. But, with digital art in Procreate, is there a magical way to make lines thicker?
The easiest way to make your lines thicker in Procreate after you’ve drawn them is to duplicate your line layer 4 times. Slightly nudge each of these 4 duplicate layers in different directions until they give the appearance of your lines being thicker. When you’re done, merge these 4 layers together.
It’s important to understand that this isn’t a one-tap, easy fix solution. Depending on the complexity of your art, you’ll need to do varying amounts of clean up and manual work to get your thickened lines to look the way you want them to look.
It’s MUCH better than re-outlining all of your line art manually. Despite the cleanup at the end, this technique will vastly speed up the process of thickening your lines.
For reference, it took me about 15 minutes to thicken the lines in my Procreate art below.

It’s also important to keep your line art on a separate layer, if possible. Since we’re doing this after the fact, it may be too late for that but, this is one of those important reasons to keep everything on separate layers whenever possible.
If your line art isn’t on a separate layer, this technique will still work. You just might need to do some extra cleanup at the end.
Let’s walk through the process of making lines thicker in Procreate, step-by-step.
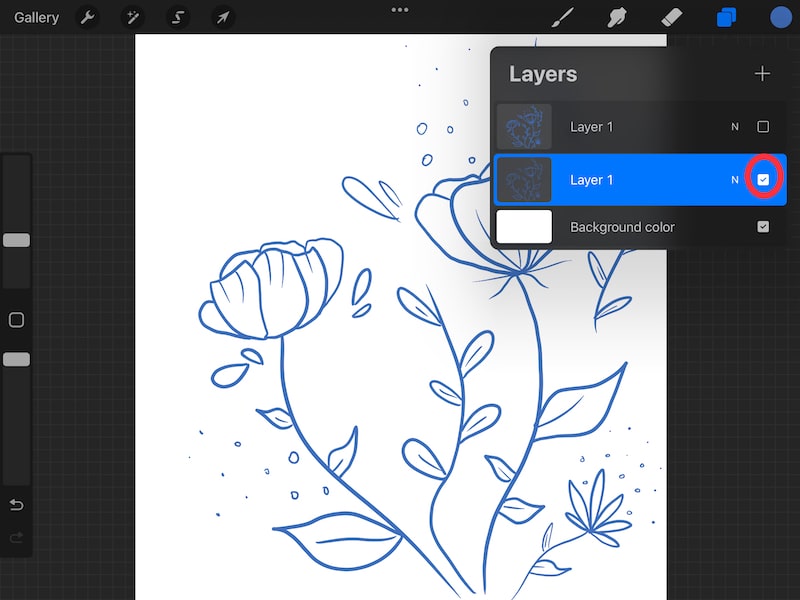
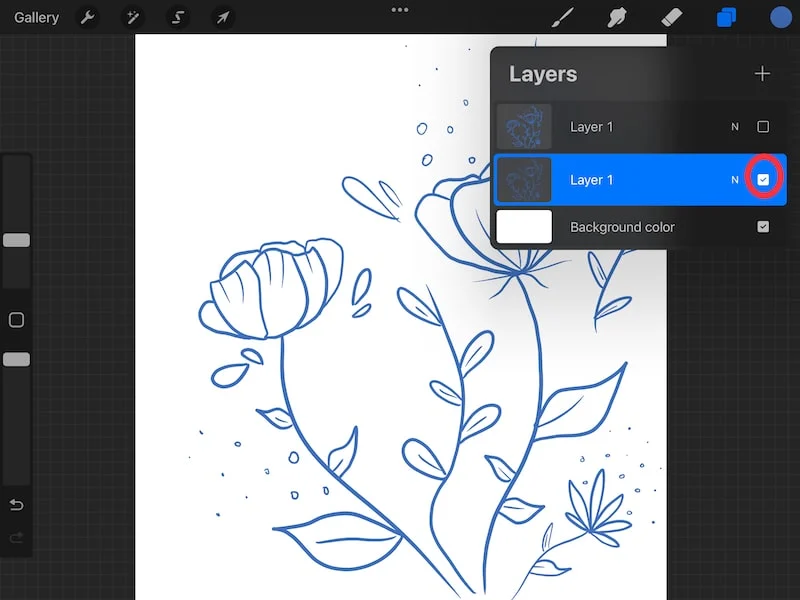
1. Isolate your line art layer, if possible
If the lines you want to thicken are on a single layer, uncheck all of your other layers so that just your line art layer is visible.
You can do this by tapping on the checkmark next to each layer.
Again, if your line art isn’t on a single layer, that’s ok. Just make sure to uncheck and hide any unnecessary layers that could get in the way.
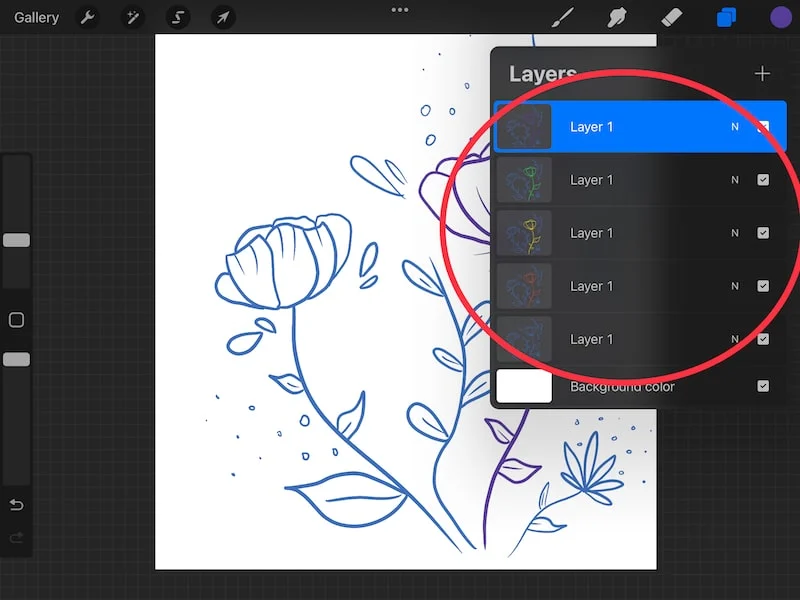
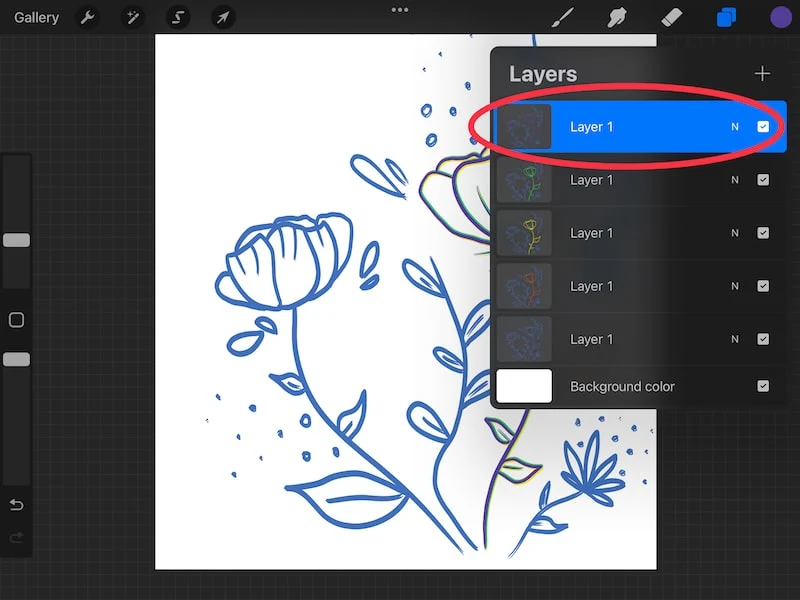
2. Duplicate your line art layer 4 times
Swipe your line art layer to the left so that you see a “Duplicate” button. Tap the “Duplicate” button to make a copy of the layer.
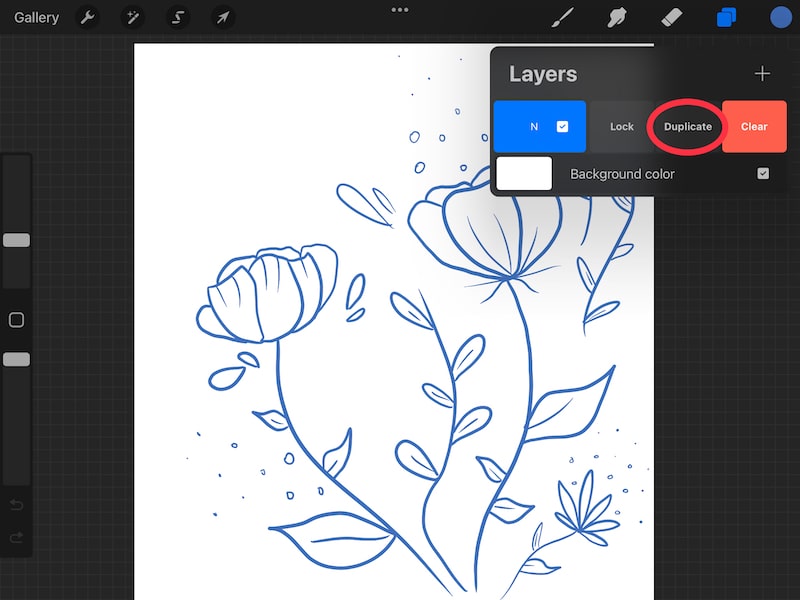

Complete this process a total of 4 times so that you have 5 line art layers – the original and 4 duplicates.
Important note: I made the middle flower a different color within each of my duplicates. This is just so you can more easily see the process we go through in the next few steps. You do NOT need to change the colors in your own artwork.

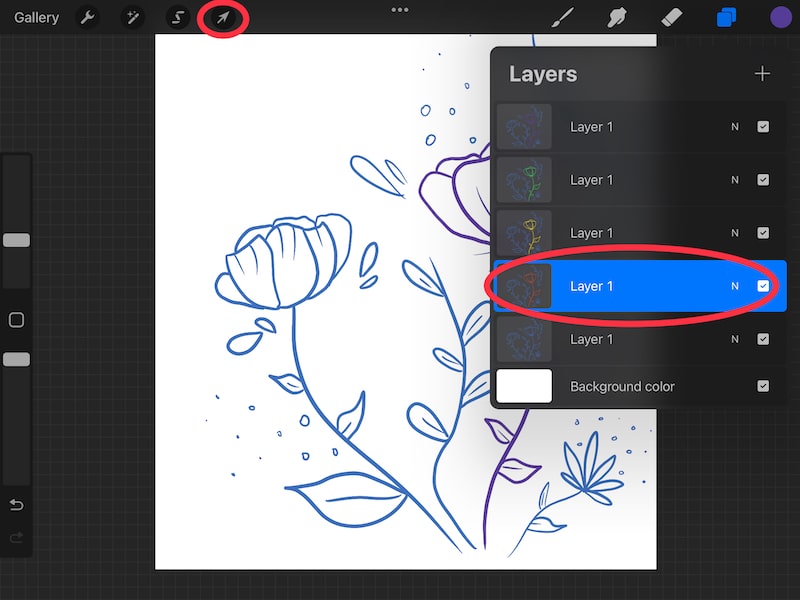
3. Select one of your duplicates
Tap on one of your duplicated layers to select it. While it doesn’t really matter which one you pick, I suggest starting with your first or last duplicate just so you can keep track of what you’re doing.
Remember to leave your original alone – don’t select it.
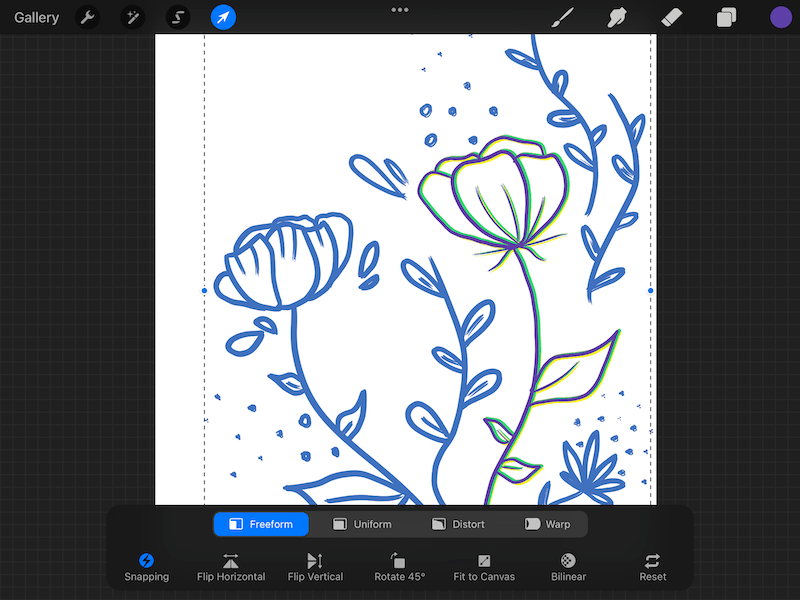
4. Tap on the Transform Tool
Once you have your duplicated layer selected and highlighted, tap on the Transform Tool. The Transform Tool is shown with the arrow icon.

Once you’ve activated the Transform Tool, don’t worry about the settings. This technique will work in the same way, regardless of your settings.
5. Repeatedly tap above your line art
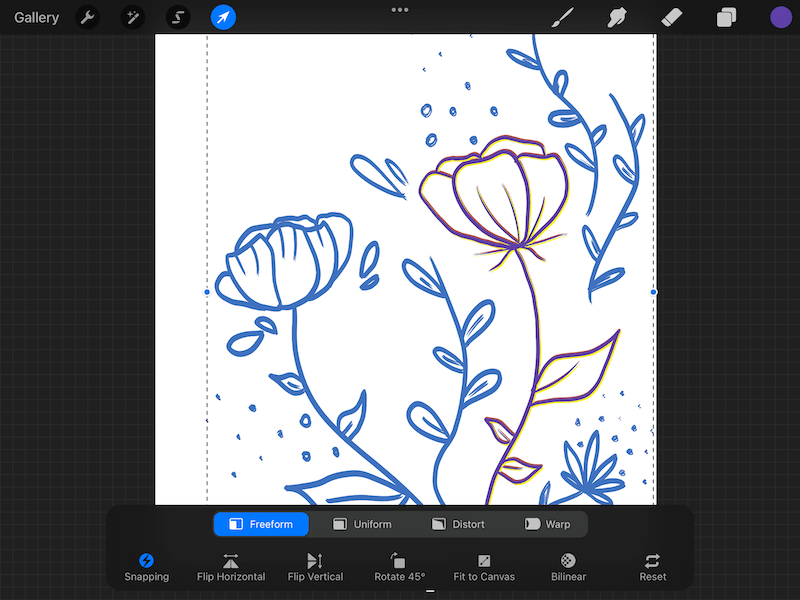
Using either your finger or your stylus, repeatedly tap above your line art. Actually, you could choose any direction – up, down, or side to side. We’ll be going in every direction eventually. Just keep track of which direction you choose first.
When you repeatedly tap on your canvas with the Transform Tool activated, your layer will ever so slightly move in the direction of your tap.
This is why it’s REALLY important to tap accurately. You don’t want to accidentally tap in a diagonal or skewed position. Your layer will move towards your finger or stylus, so it’s important to accurately tap directly up, directly down, directly left, or directly right.
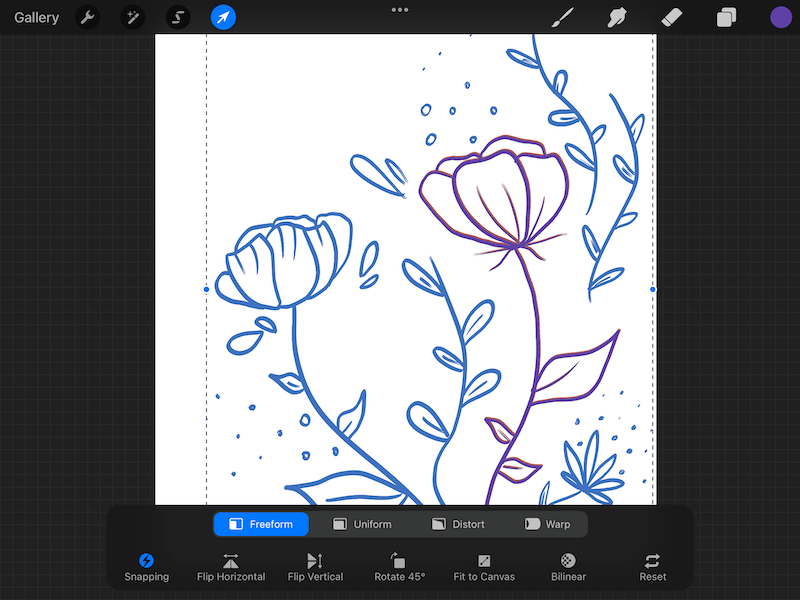

The number of times you tap and move your line art will depend on how thick you want your lines to be.
It will also depend on the type of art you’re creating. For example, if you have small lines or circles, things can get messy quickly. Take a look at how moving my layer dramatically impacted the circles in my art. I’m going to ignore them for now and clean them up later.
6. Select another duplicated layer, activate the Transform Tool, and tap to move your layer down
Now we’re going to repeat the process we did in step 5, but with a different layer that needs to move in a different direction.
So, tap on the next duplicated layer in your Layers panel to select and highlight it. Next, tap on the Transform Tool to activate it.

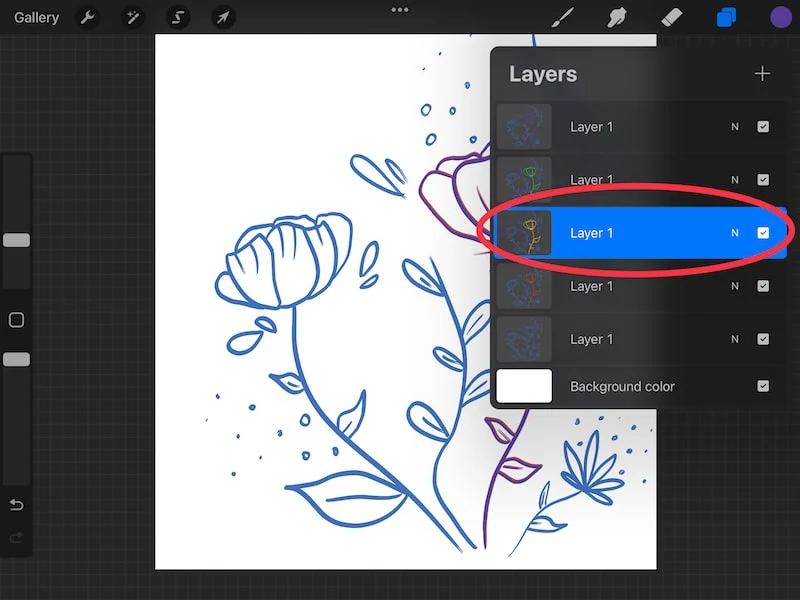
Using your finger or stylus, tap directly below your layer to move it down slightly.
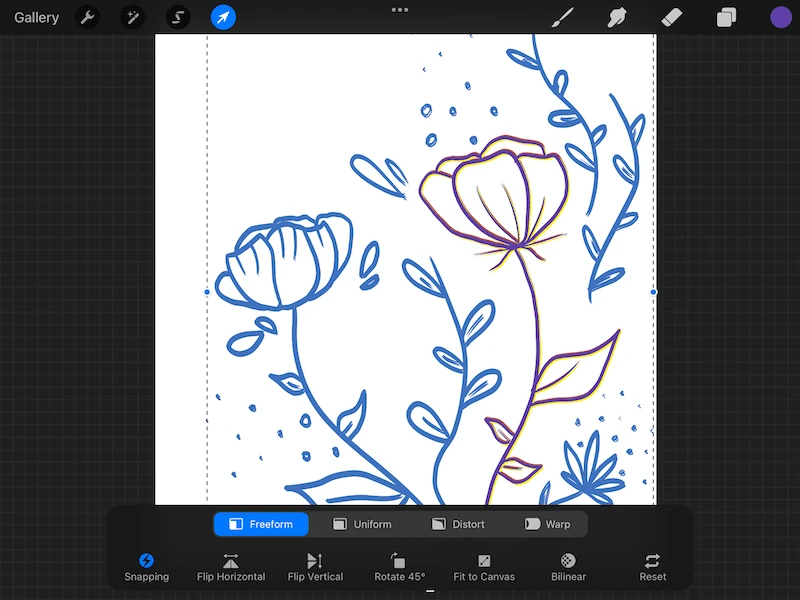
7. Select another duplicated layer, activate the Transform Tool, and tap to move your layer to the left
Repeat step 5 but, this time, move your layer next duplicated layer to the left


8. Select your last duplicated layer, activate the Transform Tool, and tap to move your layer to the right
Repeat step 5 but, this time, move your layer next duplicated layer to the right


Here’s a recap of what we just did: make 4 duplicate copies of your line art. Slightly move each of your duplicated layers in a different direction – up, down, left, and right. This “pads” your lines, which makes them thicker.
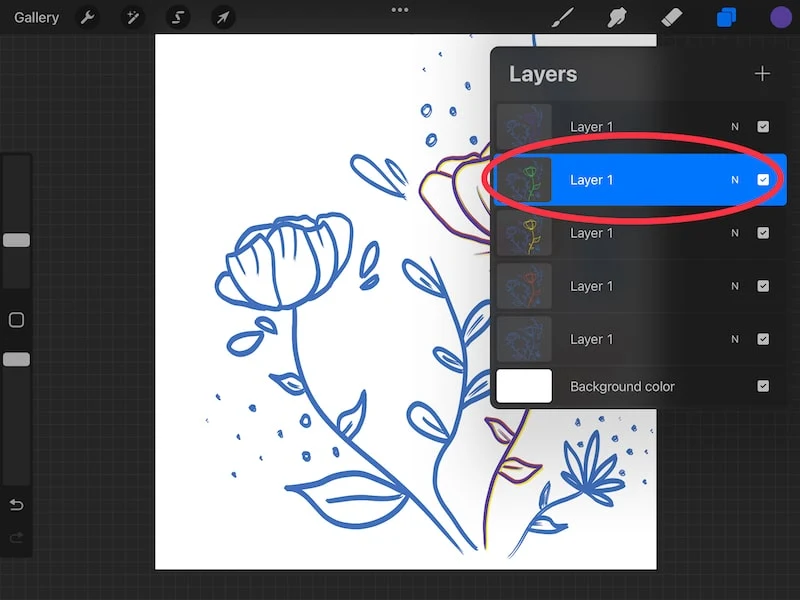
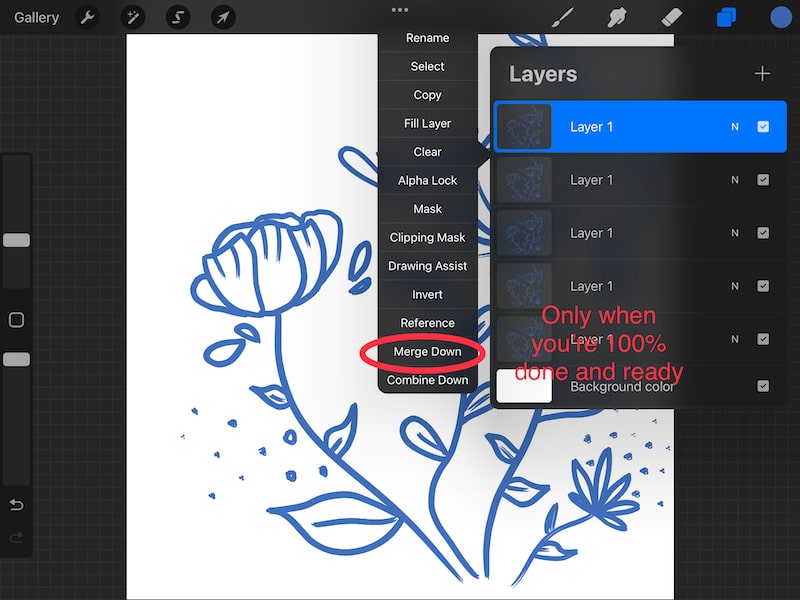
9. Merge your 4 duplicated layers together
When you’re done moving your duplicated layers up, down, left, and right, confirm that you like the results. You’ll have some clean up to do, but make sure that things look good overall.
When you’re ready, merge your 4 duplicated layers together. To do this, tap on the top duplicated layer in your list to open its settings. Tap on the “Merge Down” button.
Be 100% sure you’re ready to merge your layers because it can be hard or impossible to undo in Procreate down the road.
Do NOT merge your original layer. Leave your original layer untouched as a backup. Only merge your 4 duplicate layers.

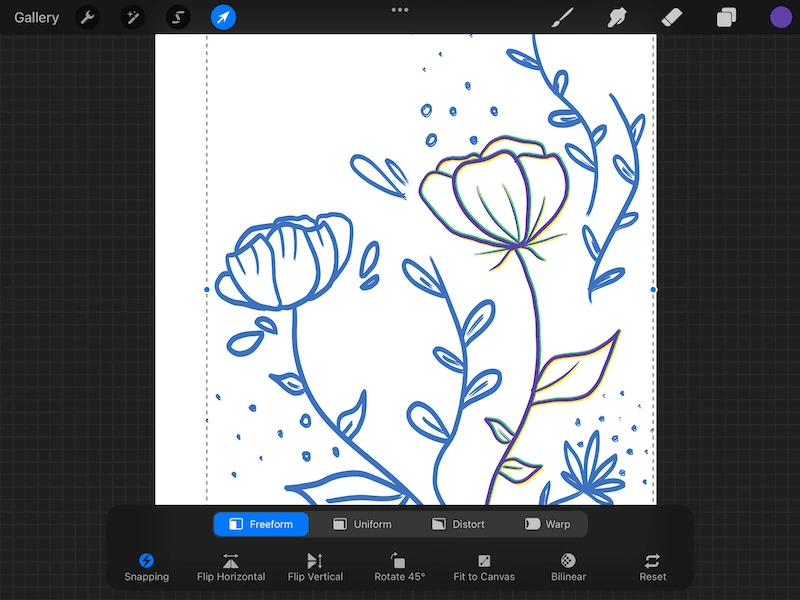
10. Clean up your newly thickened lines
It’s time to clean up our work. The amount of clean up you need to do will depend on your art. Usually, the more detailed your work is, the more clean up you’ll have.
There are also certain shapes, like circles that tend to get messed up with this technique. With the circles in my own work, I ended up erasing them and manually thickening them.
Erase anything that looks wonky or too thick; manually thicken any stray lines that need some help; do a general overview of anything that looks like it needs some TLC.
While this clean up process can feel time consuming and annoying, this process overall is MUCH faster than manually re-drawing over all of your lines to thicken them one-by-one.
Once you’re done with the clean up process, you’re done with the process! Hopefully you now have thicker lines you can be happy with as you move forward with your art.
You can see the difference by unchecking your thickened, duplicated layer so that only your original line art layer is visible. Toggle your thickened, duplicated layer on and off to see your success in making your lines thicker.
Then, pat yourself on the back and enjoy your new, thick, Procreate lines!


Diana has been an artist for over 27 years and has training in drawing, painting, digital drawing and graphic design. Diana’s latest obsession is digitally drawing with Procreate and Procreate Dreams. Diana has experience selling her art across a number of platforms and loves helping other artists learn how to make money from their art as well.