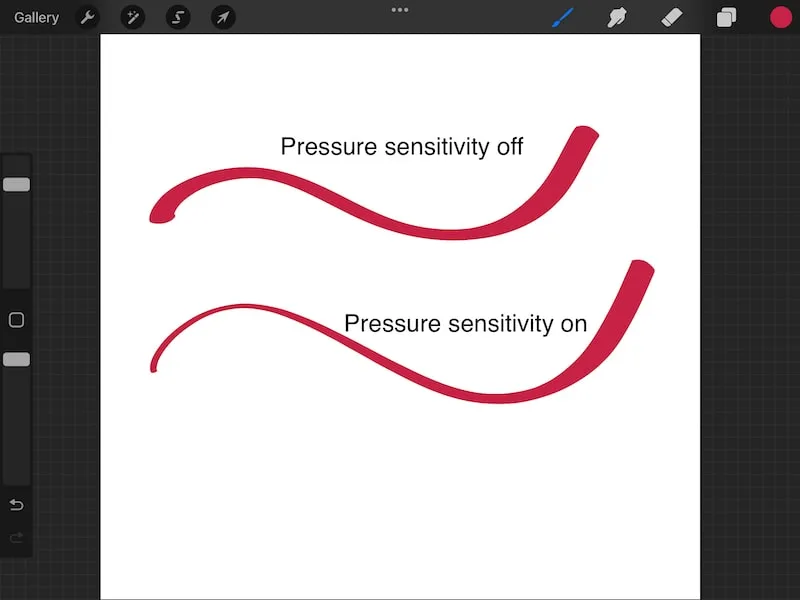
Pressure sensitivity in Procreate is awesome. It lets you draw a line of different thicknesses just by pushing harder or softer on your Apple Pencil. But, what if you don’t want this to happen? How do you turn off pressure sensitivity?
To turn off pressure sensitivity across Procreate, drag the dot in your pressure curve to the top right within your Procreate Preferences. To turn off pressure sensitivity for an individual brush, make a copy of the brush and set the size to zero in the Apple Pencil settings of the brush settings.
There are two ways to turn off pressure sensitivity that I normally use in Procreate, depending on what I need to do.
Firstly, we’re going to talk about turning off pressure sensitivity across the entirety of your Procreate app.

How to Turn Off Pressure Sensitivity Across All of Procreate
In this section, we’ll talk about how to turn off pressure sensitivity across the entirety of Procreate. This means that pressure sensitivity will be off no matter what brush you use or canvas you’re working on.
If you switch brushes or canvases, pressure sensitivity will still be off.
The flip side of this is that, once you turn pressure sensitivity back on again, it will be universally turned back on for all of Procreate.
In the next section, we’ll talk about how to pick and choose the pressure sensitivity you turn off for individual brushes. In this section though, we’re looking at the all or nothing approach of turning off Procreate’s pressure sensitivity across all of Procreate.
Here are the steps you’ll need to take:
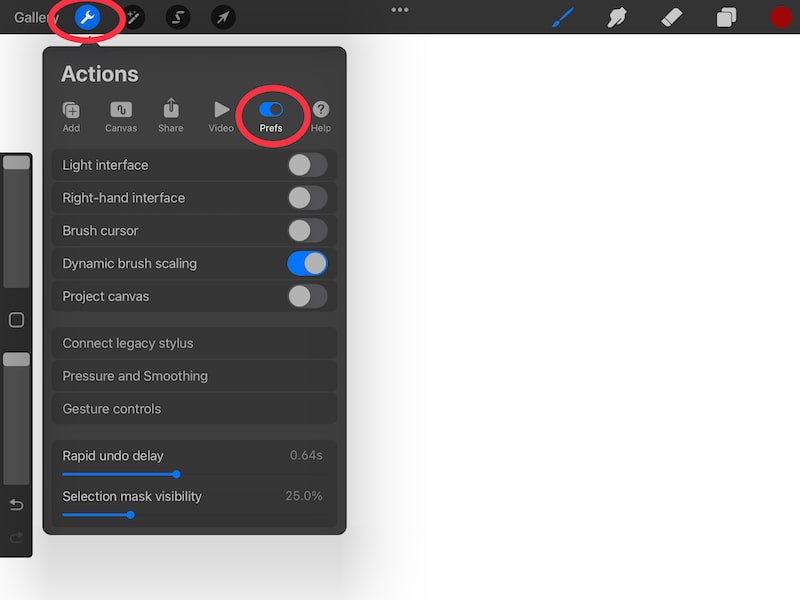
1. Tap on the wrench to open the “Actions” menu and tap on the “Prefs” button
You need to be within a canvas to do this. The effects will be universally applied across Procreate, but you need to set it up within the settings in a canvas – it doesn’t matter which canvas one you choose.
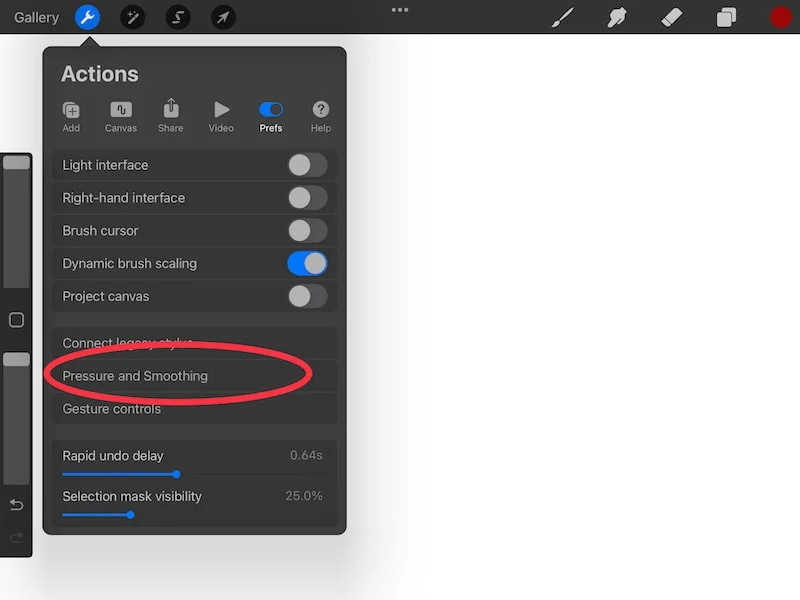
2. Tap on the “Pressure and Smoothing” button
Within the Procreate preferences, tap on the “Pressure and Smoothing” button. This will open a whole slew of options related to, well, pressure and smoothing.

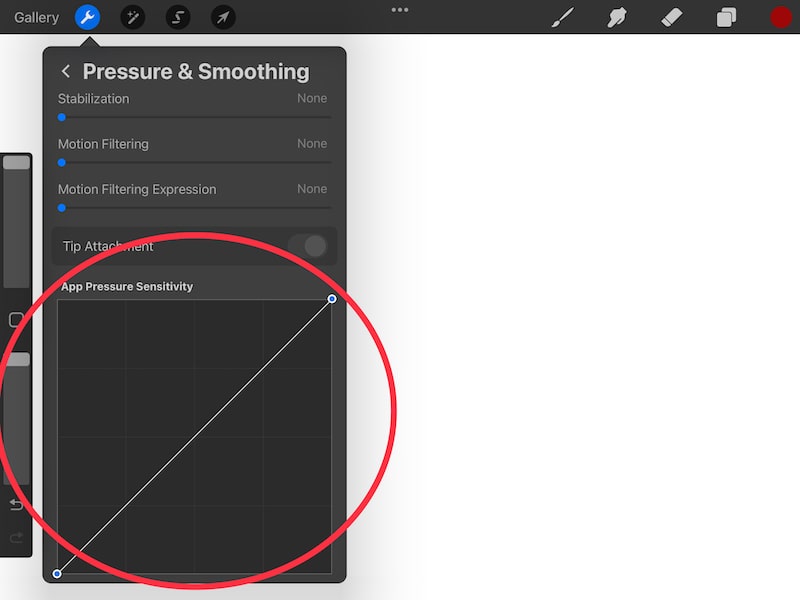
3. Find the “App Pressure Sensitivity” box
Within the “Pressure and Smoothing” settings, find the box that’s labeled “App Pressure Sensitivity”. In its default state, this box will have a diagonal line through it with dots at both ends.
If it doesn’t look this way and you want to reset things back to the default settings, scroll down within the “Pressure and Smoothing” settings and tap the “Reset all” button.

4. Move the top dot within the “App Pressure Sensitivity” box all the way to the left
Within the “App Pressure Sensitivity” box, put your finger on the top dot in the right hand corner. Drag this dot all the way to the top left corner. Basically, this line should go from being horizontal to vertical.
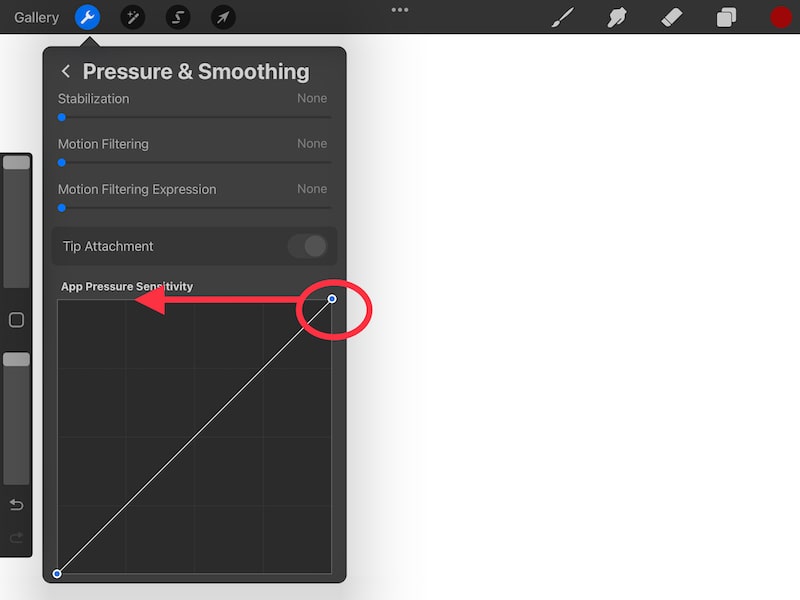

If you can’t get it all the way over to the left, that’s ok. Get it as close as possible.

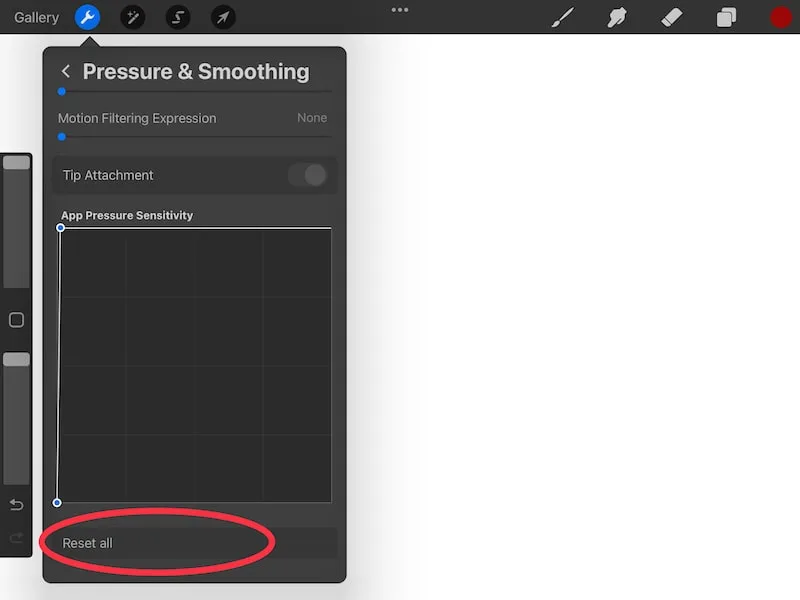
5. Reset everything to turn pressure sensitivity back on
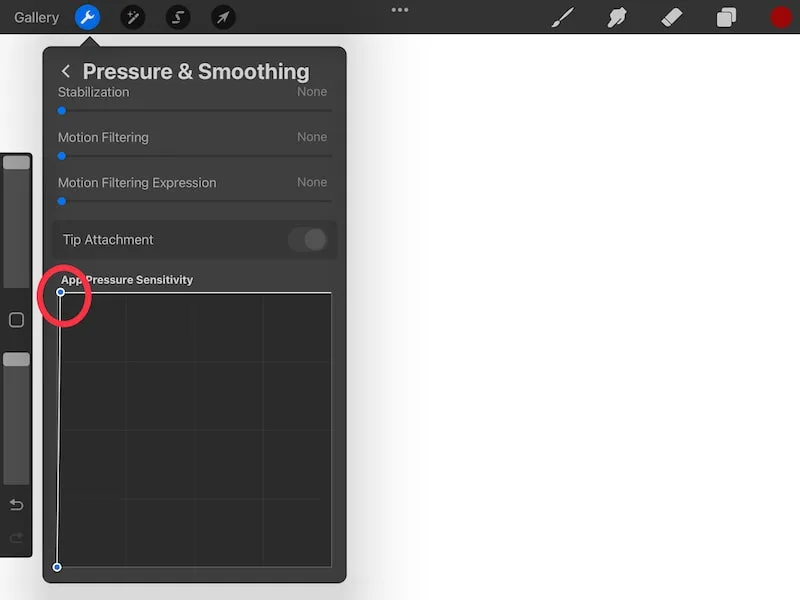
With the dot in the “App Pressure Sensitivity” box moved all the way to the top left, you’ll now have your pressure sensitivity turned off across all of Procreate.
This means that the thickness of your brushes will not be impacted by how hard you push on your stylus. Instead, the thickness of your brushes will be solely impacted by your brush size slider on the left hand side of your screen.
What do you do when you want to restore your pressure sensitivity again though?
Well, all you need to do is scroll down to the bottom of the “Pressure and Smoothing” settings and tap on the “Reset all” button. Keep in mind that this will reset everything within these settings.

If you have certain settings that you don’t want reset, you can rest the pressure sensitivity manually by dragging the dot in the “App Pressure Sensitivity” box back over to the right hand corner so that you have a diagonal line again.
Now that we’ve talked about how to turn off pressure sensitivity across all of Procreate, let’s talk about how to turn it off for individual Procreate brushes.

How to Turn Off Pressure Sensitivity for Individual Procreate Brushes
In this section, we’ll talk about how to turn off pressure sensitivity for individual Procreate brushes. This means that pressure sensitivity will be off for a specific brush, but not universally across all of Procreate.
This is a nice way of dealing with pressure sensitivity if you don’t want to worry about turning it on and off all the time for the entire app.
Also, if you have only specific brushes that you want to use without pressure sensitivity, this allows you to create a special brush that’s specifically designed to not have pressure sensitivity.
You can draw with it anytime you need to without always messing with your app settings. Keep in mind that this doesn’t apply to Procreate Pocket because pressure sensitivity doesn’t work in Procreate Pocket in most cases.
Here are the steps to take:
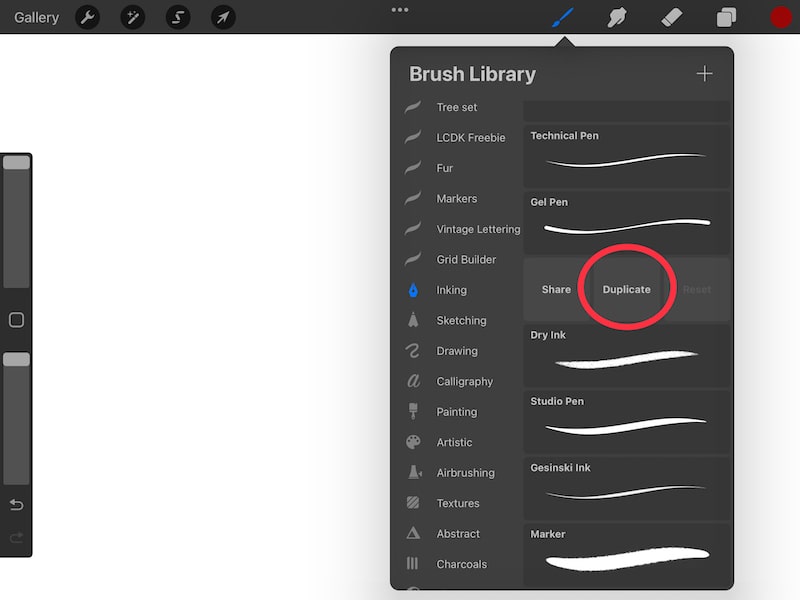
1. Duplicate your brush
We’re going to be creating a version of your brush without pressure sensitivity, but we still want to be able to easily access the original, pressure sensitive brush. This means that we need to duplicate your brush so that we have two versions of it.
Also, I’m a big fan of always backing up my artwork and creating duplicates within Procreate. There’s nothing worse than losing files and making changes you can’t reverse.
So, before I ever edit a brush, I always duplicate it. Even though we can always reset a brush, I don’t want to worry about that. Duplicating a brush gives me a brush I can play around with without worrying about messing up the original.
To duplicate a brush, swipe left on it and tap the “Duplicate” button.

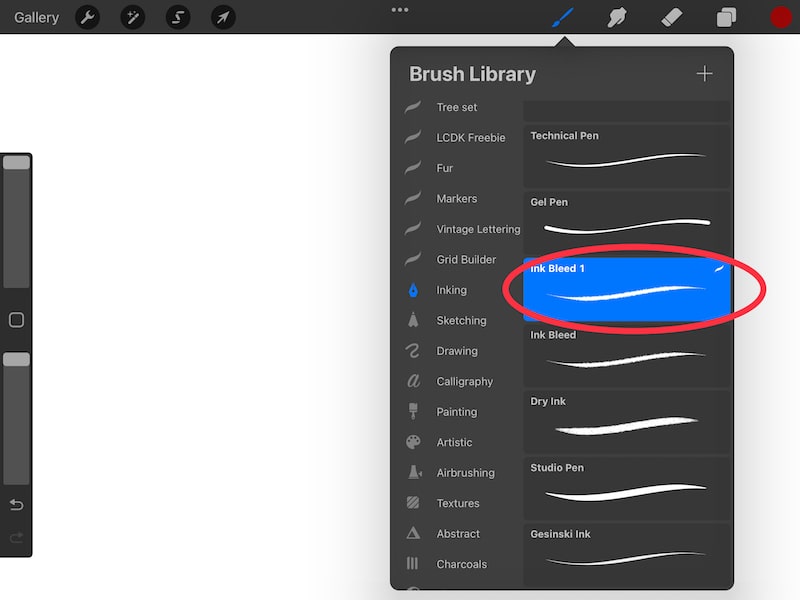
2. Tap on your duplicated brush twice to open the settings
Now that your brush is duplicated, tap on it once to select it and tap on it again to open its settings.

3. Tap on the “Apple Pencil” tab within the brush settings
Once you tap on your brush, the settings will pop up. Tap on the “Apple Pencil” tab.

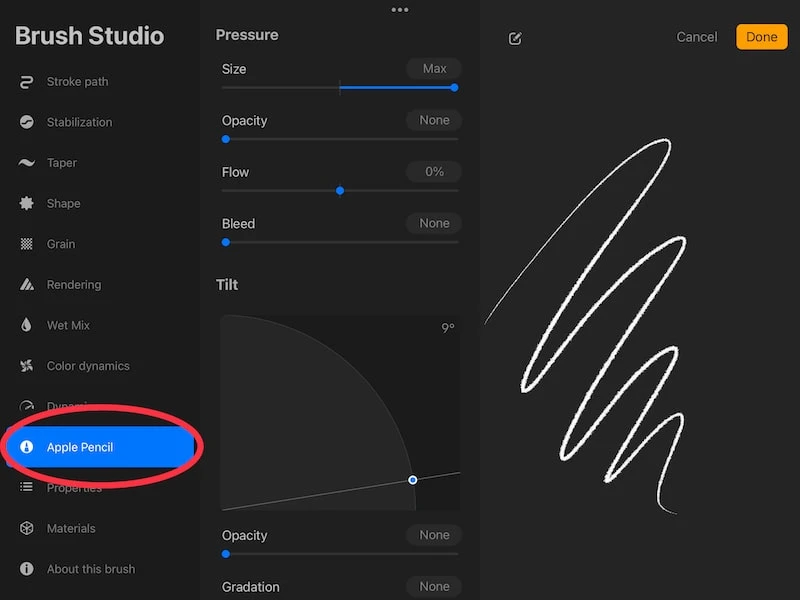
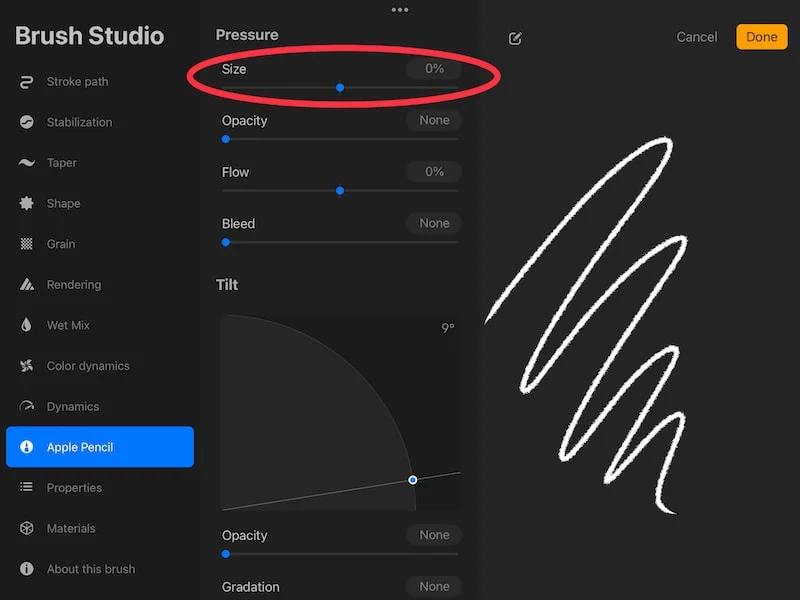
4. Set the “Size” to 0% within the “Pressure” section
Find the “Size” slider within the “Pressure” section of the “Apple Pencil” settings. It should be at the top. Slide the slider until it reaches 0%. This is telling your Apple Pencil to disregard the pressure when determining your brush size.

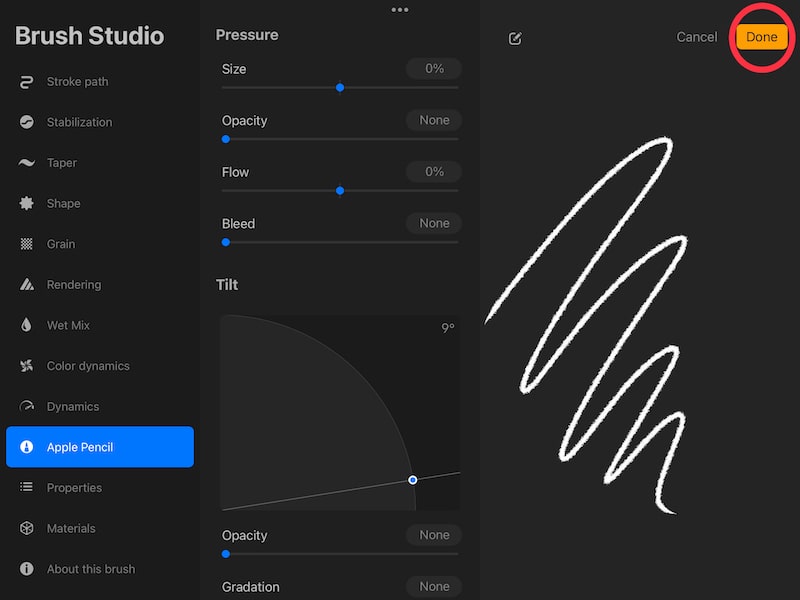
5. Tap the “Done” button
Once you’ve adjusted the “Size” slider to 0%, tap the “Done” button to finalize it.

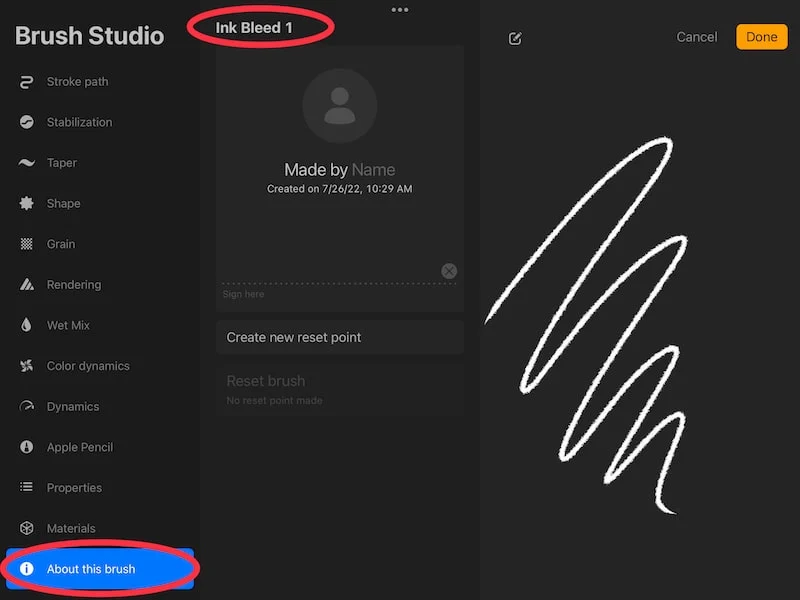
6. Rename your brush
Once you finish your brush, rename it so that you can tell the difference between your version that has pressure sensitivity and the one that doesn’t.
I have a full guide on renaming Procreate brushes and brush sets that you should check out if you want a deeper dive on this.
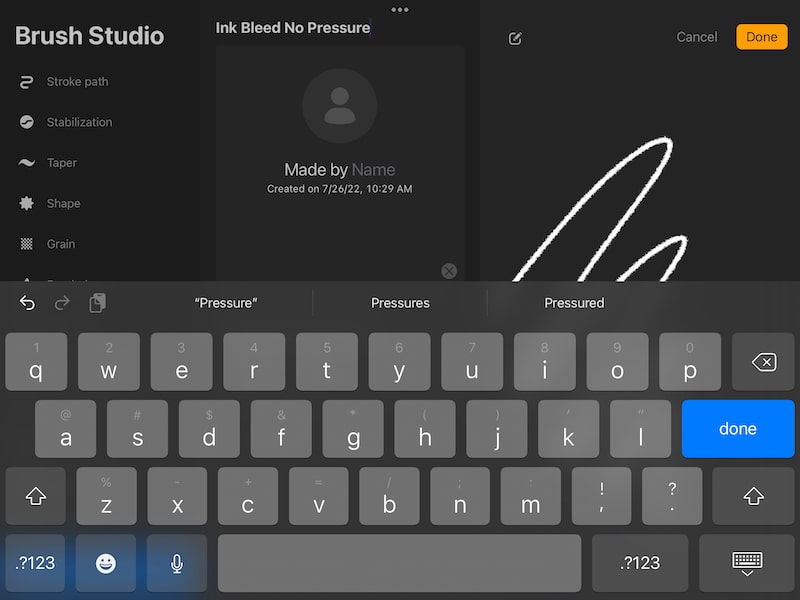
In short, double tap on the brush to open the brush settings again. Tap on the “About this brush” section and then tap on the brush name at the top of your screen.

You’ll see a keyboard appear, which will let you edit the name of your brush.

There you have it! Turning pressure sensitivity off and on in Procreate can give you more creative freedom with how you use your brushes for your art. Have fun with it and don’t let the pressure get to you 😉


Diana has been an artist for over 27 years and has training in drawing, painting, digital drawing and graphic design. Diana’s latest obsession is digitally drawing with Procreate and Procreate Dreams. Diana has experience selling her art across a number of platforms and loves helping other artists learn how to make money from their art as well.