Grouping your layers in Procreate is a great way to organize your work and make things more efficient. This is great…until you don’t want your layer group anymore. How do you ungroup your layers in Procreate?
To ungroup your layers in Procreate, drag and drop each layer outside of your group to a new spot in your layer’s panel. To quickly ungroup multiple layers, select each of your grouped layers by swiping right on them. This will allow you to drag and drop them outside of your group all at once.
There isn’t a special button that will ungroup your layers automatically. Ungrouping is a manual process that takes various amounts of time depending on the number of layers that need to be remove from the group
There are ways to speed it up though, which we’ll talk about.
Alright, let’s get started! Here are the steps for ungrouping layers in Procreate.
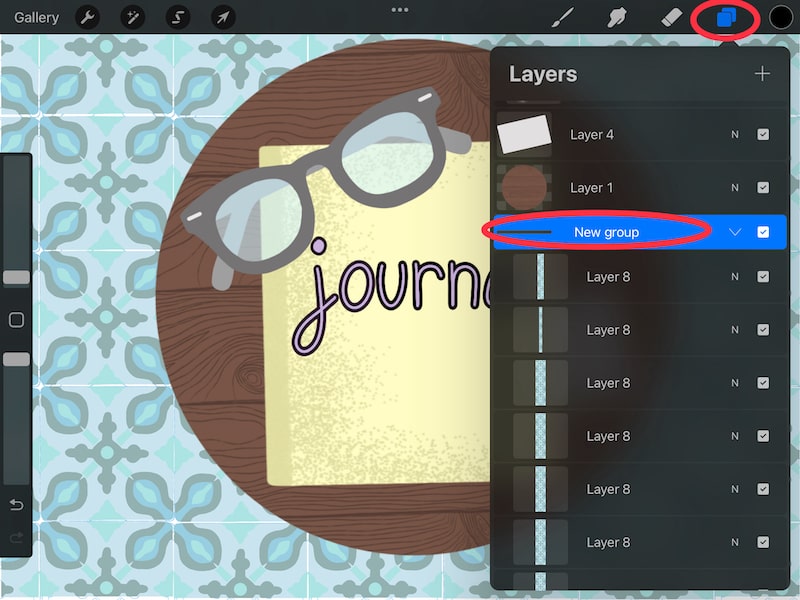
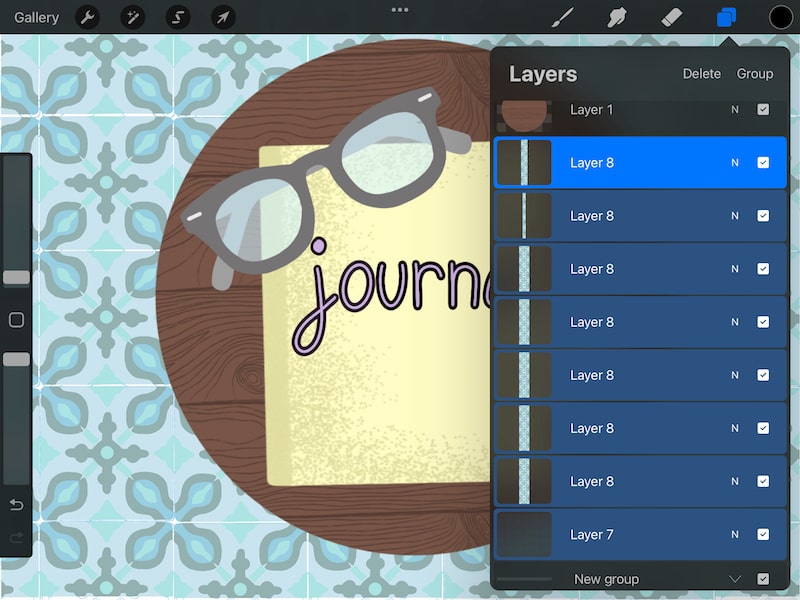
1. Navigate to your layer group in your layers panel
To begin with, let’s find those layers you want to ungroup! Open your layers panel and scroll until you find your layer group.

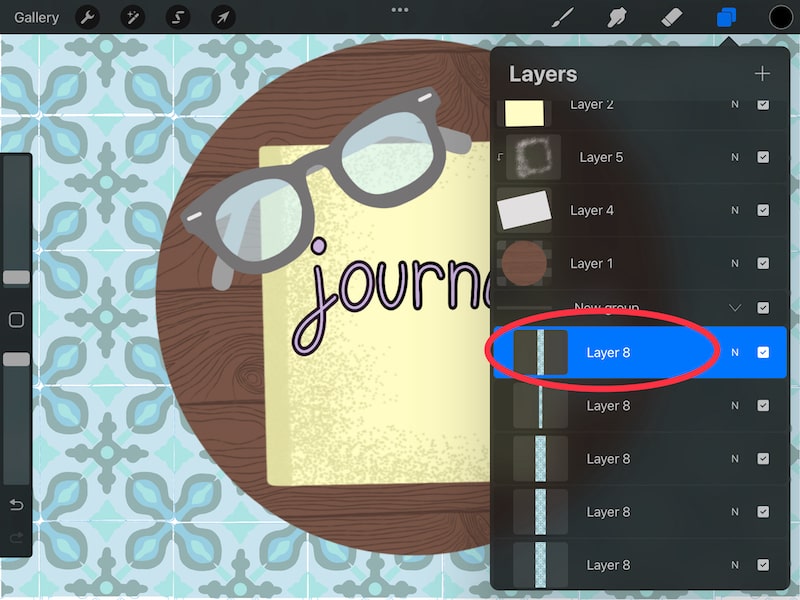
2. Tap on a layer you want to remove from the group to select it
Within your layer group, tap on the layer you want to move out of your layer group. If you only want to move one layer, tap on the one layer you want to move.
If you want to move multiple layers, we’ll talk about that in step 2. Begin by tapping on any one of the layers you want to move to select it.
When your layer is selected, it will be bright blue.

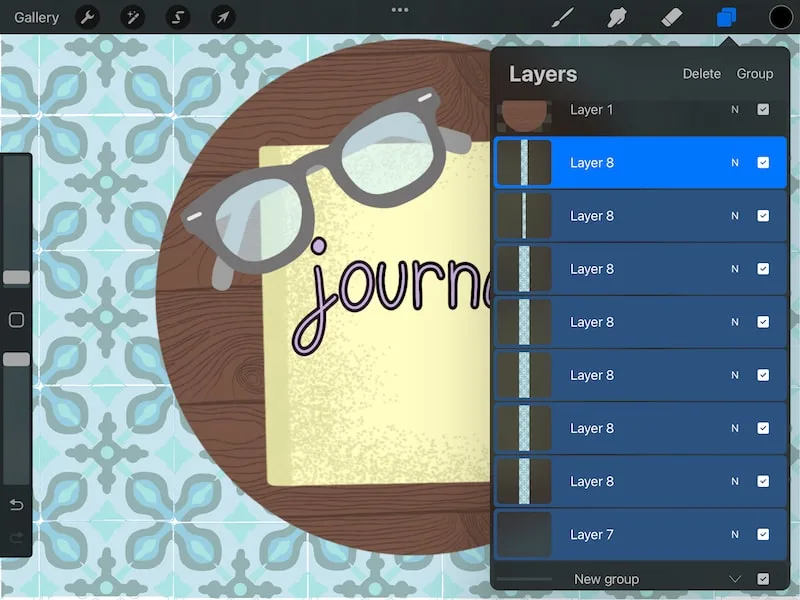
2. Swipe right on the layers you want to move
If you have multiple layers you want to remove from your layer group, or if you want to remove all of them, swipe right on them to select them.

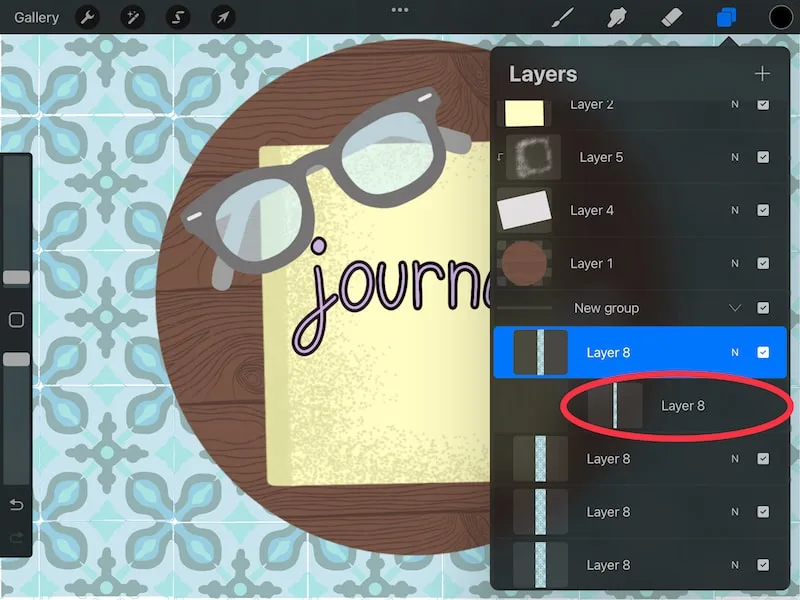
When you swipe right on a layer, the layer is selected. When you have multiple layers selected, the layer you tapped on first will be bright blue, while the others will be light blue.
Make sure all of the layers you want to remove from your layer group are selected before moving on to the next step.


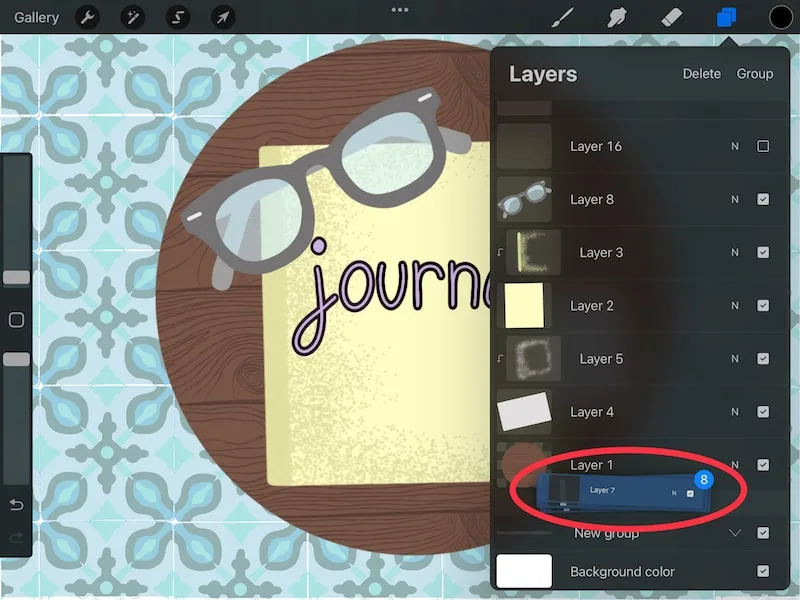
3. Hold down on your layers
With your layer(s) selected, hold your finger or stylus down on your selection. Once you move your finger or stylus, you’ll see your layer(s) pop out of your layers panel.
If you have multiple layers in your selection, they’ll bunch together underneath your finger or stylus.

4. Drag and drop your layer(s) to a new place in your layers panel
Once your layer(s) have popped out of your layers panel, drag and drop them to a new spot in your layers panel. Make sure you choose a spot that’s outside of your layer group.
Once you drag and drop layers to a spot that’s outside of your layer group, you’ve essentially ungrouped them. They’re no longer tied to that layer group and can function outside of it.
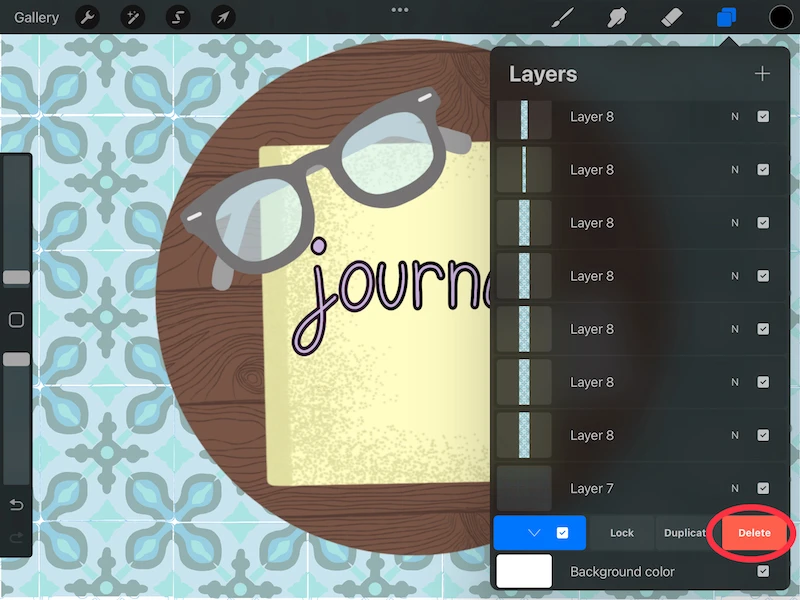
5. If necessary, delete your layer group
If you’ve removed all of your layers from your layer group, it might be this empty group clogging up your layers panel. If you don’t need it anymore, you can go ahead and delete it.
Always be very careful when deleting anything in Procreate. If you wait too long, you may not be able to use the undo feature to restore it. If you’re ever concerned about deleting something, making a backup beforehand is great.
To delete a layer group, swipe left on it. This will reveal a few buttons, including a “Delete” button.

Even though there isn’t a quick and easy button you can tap to ungroup your layers, with just a few steps, you can remove your layers from your layer group. This gives you options for organizing your layers and using them in the best way for your art!


Diana has been an artist for over 27 years and has training in drawing, painting, digital drawing and graphic design. Diana’s latest obsession is digitally drawing with Procreate and Procreate Dreams. Diana has experience selling her art across a number of platforms and loves helping other artists learn how to make money from their art as well.