Clip Studio Paint’s Free Transform tool lets you resize, reposition, drag, and otherwise adjust the objects in your art. It’s an awesome feature to know how to use!
To use Clip Studio Paint’s Free Transform tool, find it in the Edit menu, or use the Cmd+Shift+T keyboard shortcut. Use the Tool Property menu to adjust the settings. Drag the corners of the box around your object to adjust it. Hold down the command key to proportionally resize your object as you adjust it.
Using the Free Transform tool can be a neat way to make adjustments to your work. We’re going to walk through what you need to know to transform selections, layers, and multiple layers.
Before we get started though, it’s important to note that resizing raster-based work can result in quality loss. If you plan to transform your work, it’s important to keep this in mind. I have a full guide on limiting quality loss when resizing that can be helpful to read before making changes to your work.
Alright, let’s get started with transforming selections. This is useful if you need to transform a specific object on a layer that also contains other objects you don’t want to transform.
How to Free Transform a Selection
To free transform a selection in Clip Studio Paint, use the selection tool to isolate the object you want to free transform. Next, click on the Free Transform button and adjust your object as needed.
Let’s walk through this, step-by-step.
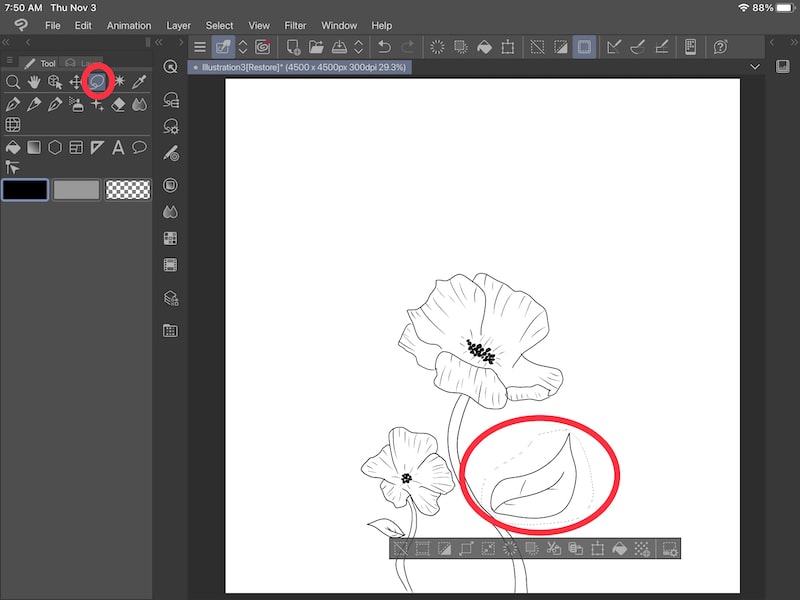
1. Use the selection tool to isolate your object
If you want to free transform a selection, you need a selection to free transform. So, we need to get started by creating your selection.
Click on the selection tool and choose the selection option that works best for the object you want to isolate.
In my example below, I used the Lasso tool to isolate my leaf. Since it was an irregularly shaped object, the Lasso tool gave me the freedom I needed to fully select my leaf without including other objects I didn’t want in my selection.

2. Activate the Free Transform function
Once you’ve confirmed that your selection is what you want it to be, it’s time to free transform it.
Go ahead and activate the Free Transform function.
One way to do this is to go to the Edit menu, clicking on the Transform button, and then the Free Transform button.
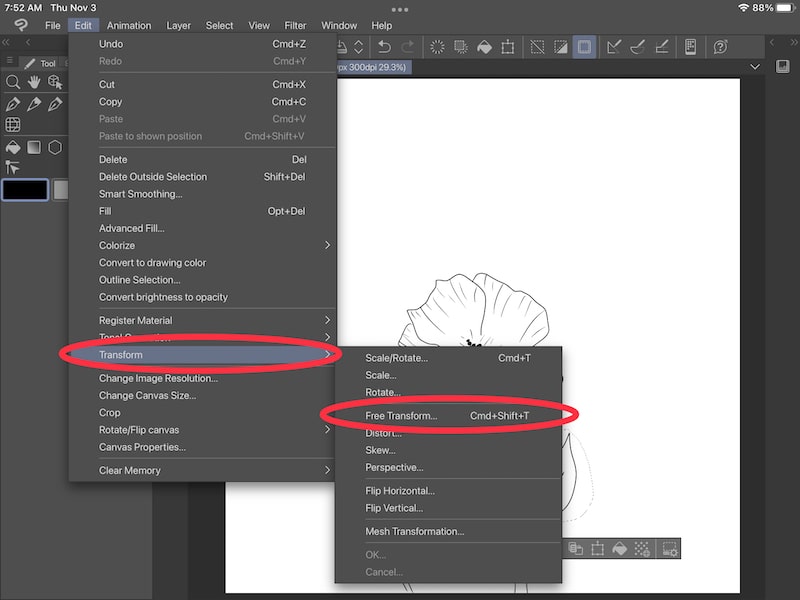
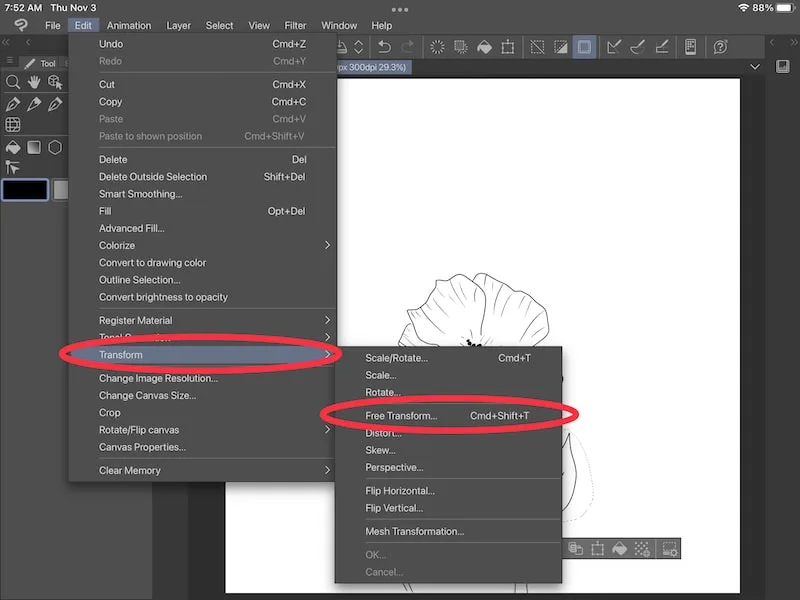
You can also use the Cmd+Shift+T keyboard shortcut.
3. Free transform your selection
The free transform function will put a box around your selection. This box will have nodes you can drag at each corner.
If you begin to drag a corner, you’ll see how you can shape and adjust your object from that corner. Work through every corner of your object until you get the adjustments you’re looking for.
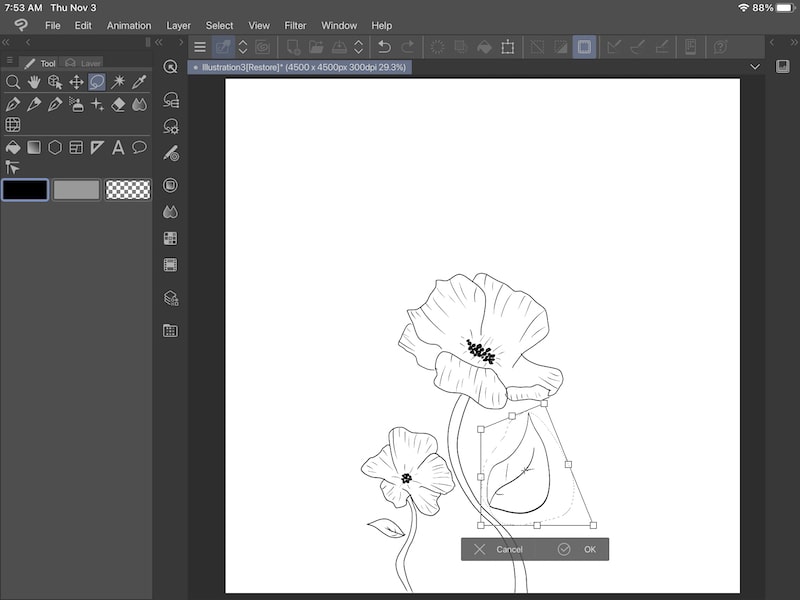
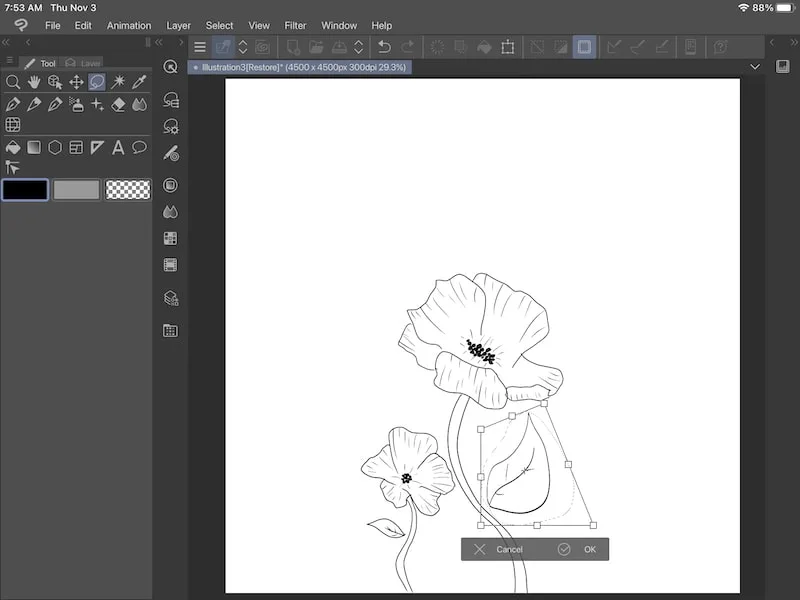
If you want to proportionally resize your object, hold down the command button as you drag one of the corners of your object.
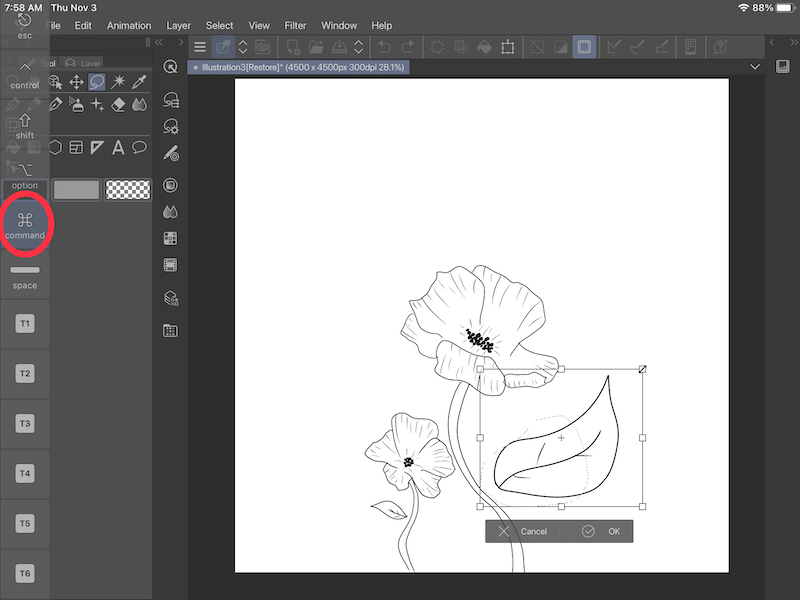

You can also resize your object with the transformation tool while it’s in the “scale/rotate” mode, but if you don’t want to take the time to switch tools, simply holding down the command key while in free transform mode is a great alternative.
Make sure you’re confident in your changes before you confirm them. As a reminder, resizing raster-based work can cause quality loss, so you don’t want to transform your work over and over again unnecessarily.
Alright, now that we’ve talked about using the free transform function with a selection, let’s talk about using it with a layer. Or, even multiple layers!
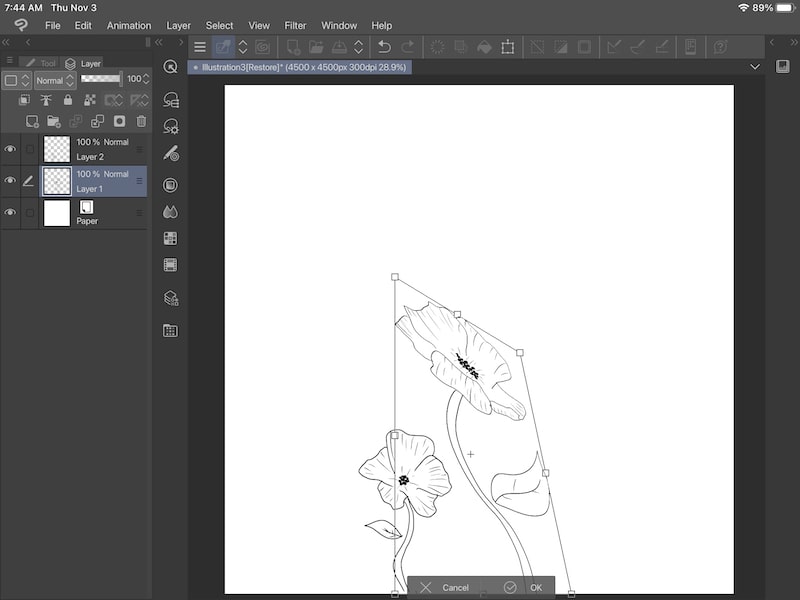
How to Free Transform a Layer
To free transform a layer in Clip Studio Paint, select the layer you want to free transform in the layers panel. Next, click on the Free Transform button and adjust the objects in your layer as needed.
Let’s walk through this, step-by-step.
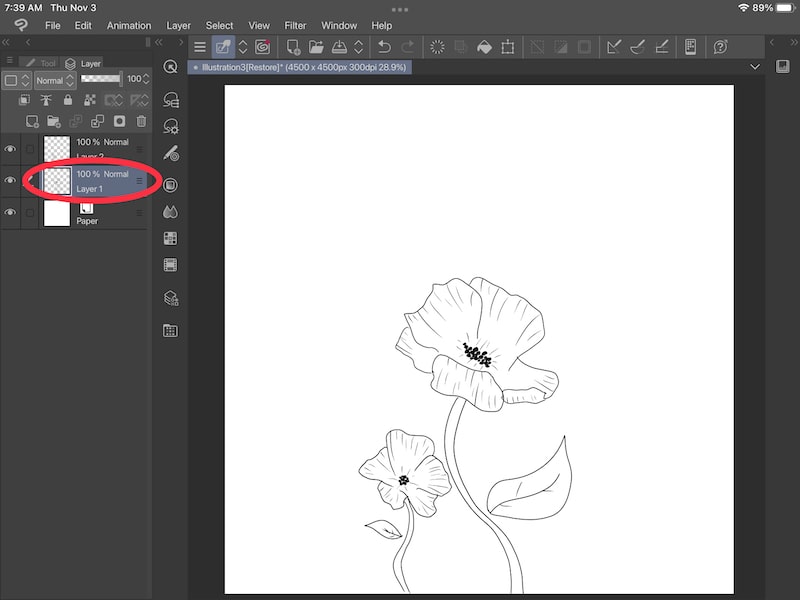
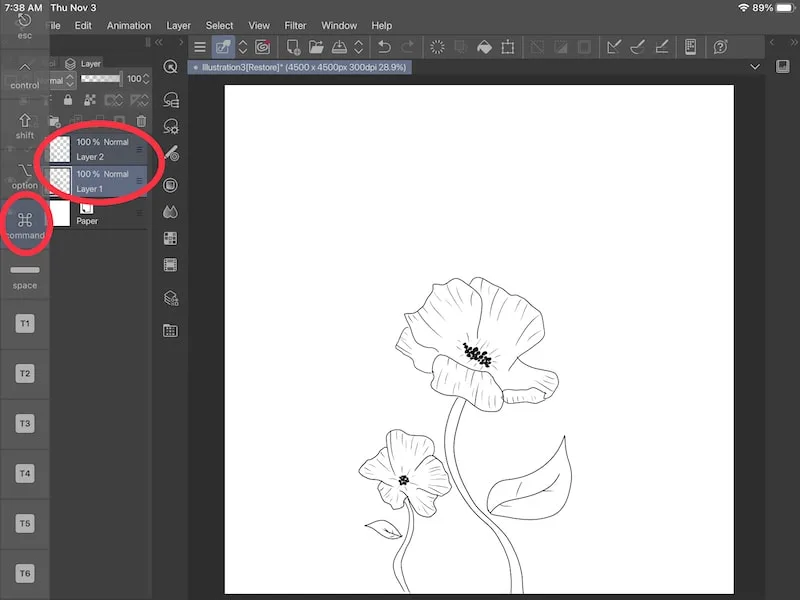
1. Select your layer in your layers panel
Navigate to your list of layers in Clip Studio Paint. Select the layer you want to free transform. You’ll know it’s selected when it’s highlighted.

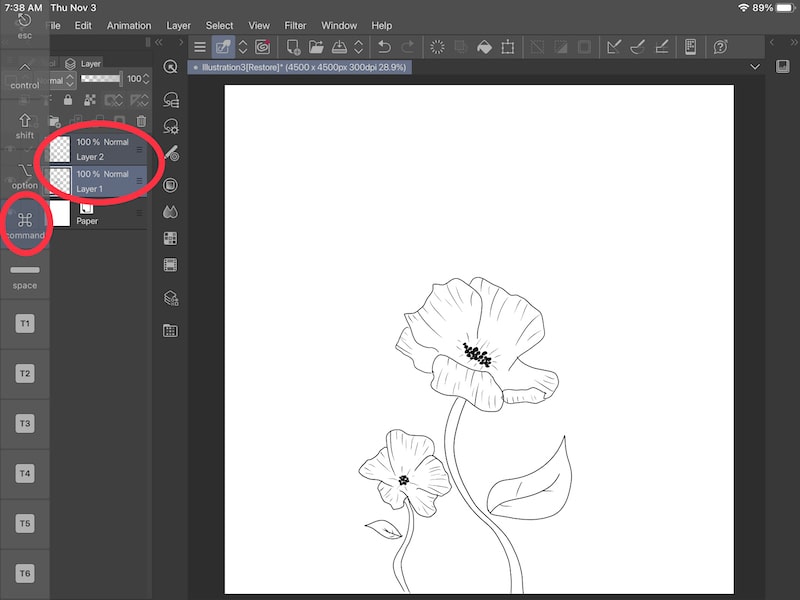
It’s possible to free transform multiple layers at once. To do this, you’ll need to select all of the layers you’ll want to free transform. You can do this by clicking on the checkmark next to each layer you want to select.
Or, hold down on the command button and click on each layer you want to select.
If you’re using an iPad, drag your finger out from the left side of your screen to access the keyboard.
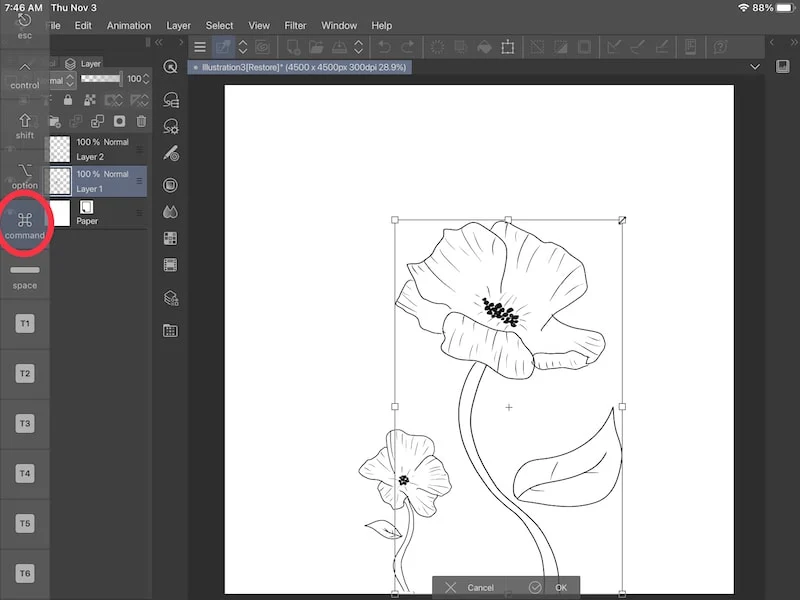
2. Activate the Free Transform function
Once you’ve confirmed that you’ve selected the correct layer(s), it’s time to free transform it.
Go ahead and activate the Free Transform function.
One way to do this is to go to the Edit menu, clicking on the Transform button, and then the Free Transform button.
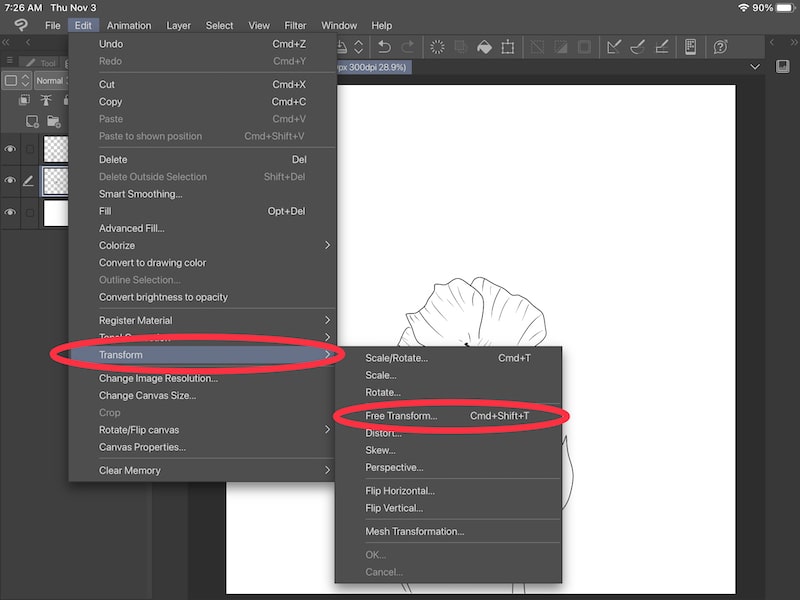

You can also use the Cmd+Shift+T keyboard shortcut.
3. Free transform your layer(s)
The free transform function will put a box around everything in your layer(s). This box will have nodes you can drag at each corner.
If you have a reference photo you want to import into Clip Studio Paint, this may help with positioning your drawing.
If you begin to drag a corner, you’ll see how you can shape and adjust your object from that corner. Work through every corner of your object until you get the adjustments you’re looking for.
If you want to proportionally resize the object on your layer(s), hold down the command button as you drag one of the corners of your object.

You can also resize your object with the transformation tool while it’s in the “scale/rotate” mode, but if you don’t want to take the time to switch tools, simply holding down the command key while in free transform mode is a great alternative.
Make sure you’re confident in your changes before you confirm them. As a reminder, resizing raster-based work can cause quality loss, so you don’t want to transform your work over and over again unnecessarily.
The free transform function can be a neat way to manipulate your art in ways you could never imagine with traditional art! Dragging around your work to create new shapes, positions, and effects can be such a fun way to make your art unique.


Diana has been an artist for over 27 years and has training in drawing, painting, digital drawing and graphic design. Diana’s latest obsession is digitally drawing with Procreate and Procreate Dreams. Diana has experience selling her art across a number of platforms and loves helping other artists learn how to make money from their art as well.