There are a lot of amazing features in Clip Studio Paint and I have to say that the perspective ruler is one of my personal favorites. It’s a wonderland of customizable vanishing points that can be used to make perspective grids. So, how do you use it?
To use Clip Studio Paint’s perspective ruler, choose it within your set of rulers. Next, start moving your stylus around your screen to set the location and rotation of each of your perspective lines. Depending on your layer settings, your lines will now snap to the perspective grid you’ve created.
As someone who has struggled with perspective in the past, Clip Studio Paint’s perspective grid is such a satisfying and marvelous thing to use.
That said, before you dive into Clip Studio Paint’s perspective world, there are some things you’ll want to know about how to use their perspective grid so you feel more empowered when using it instead of overwhelmed.
Let’s get started!
How to Create a Default Perspective Grid
Clip Studio Paint has default perspective rulers you can use to set up 1 point perspective, 2 point perspective, and 3 point perspective grids. This is really helpful if you want a perspective grid to work from and don’t want to set it up manually.
What I love about this option is that you can still adjust these grids to make them your own, but you don’t have to build them from scratch. They give you a nice foundation to work from.
Here’s what you need to do:
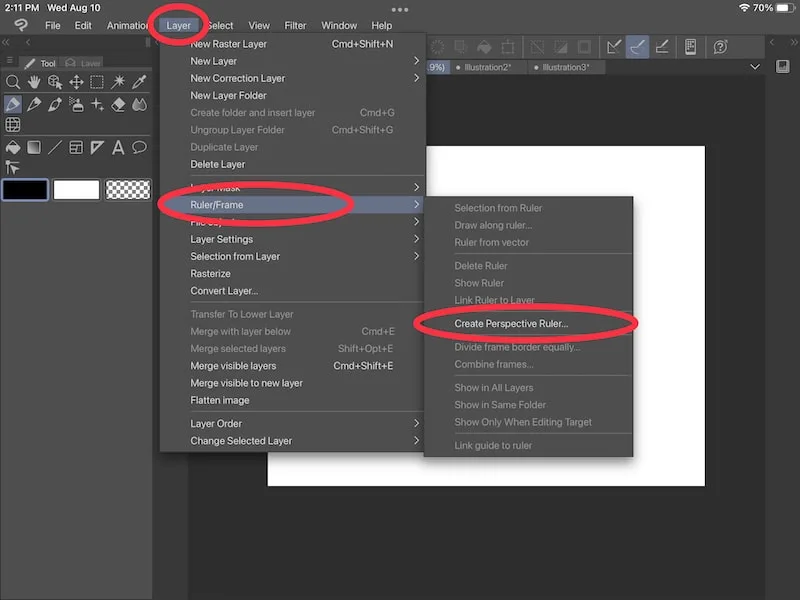
1. Open your “Layer” menu, choose the “Ruler/Frame” option, and click the “Create Perspective Ruler” button.
To begin with you’ll want to dive into your “Layer” menu. Within there, find the “Ruler/Frame” option. Find the button that says “Create Perspective Ruler” and click on it.

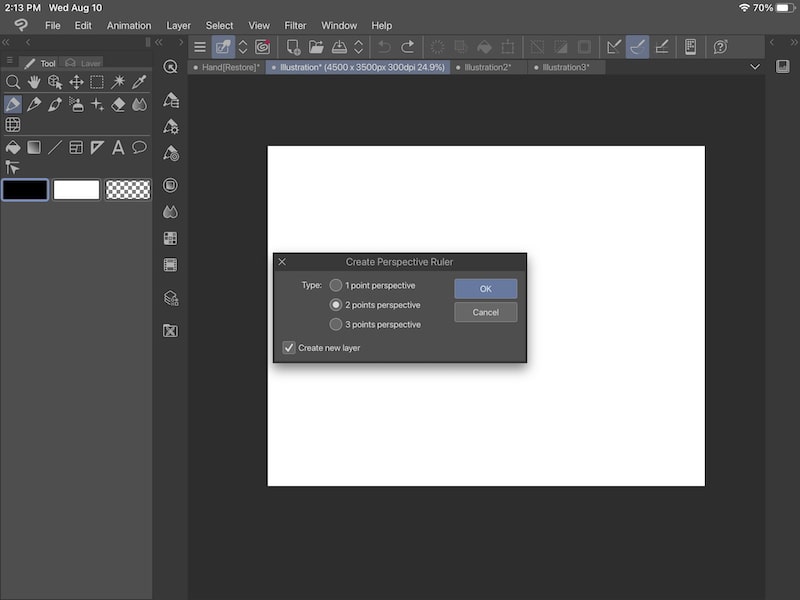
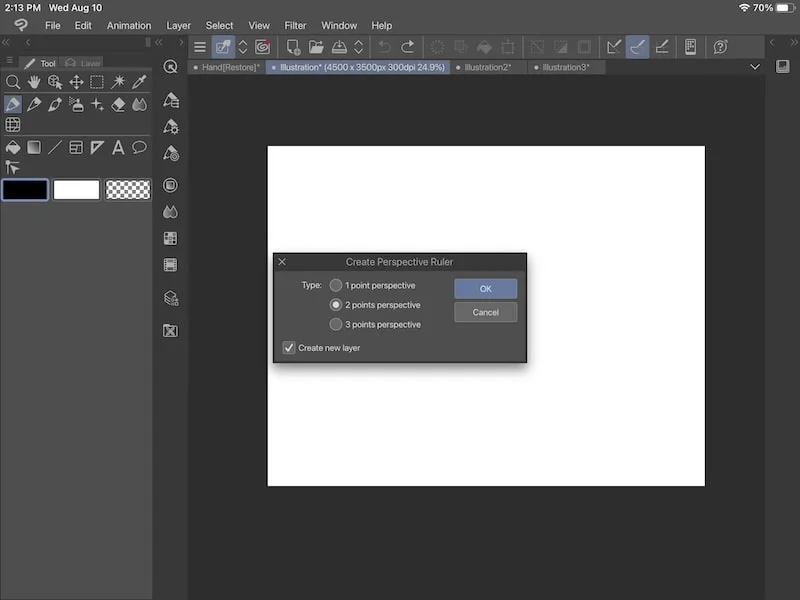
2. Choose the type of perspective grid you want
Clip Studio Paint gives you the option to create a 1 point perspective, 2 point perspective, or 3 point perspective grid.
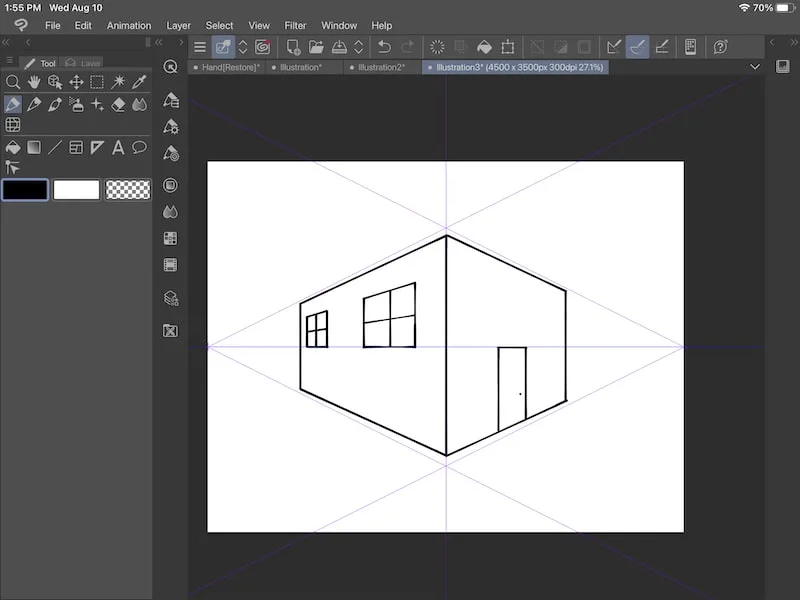
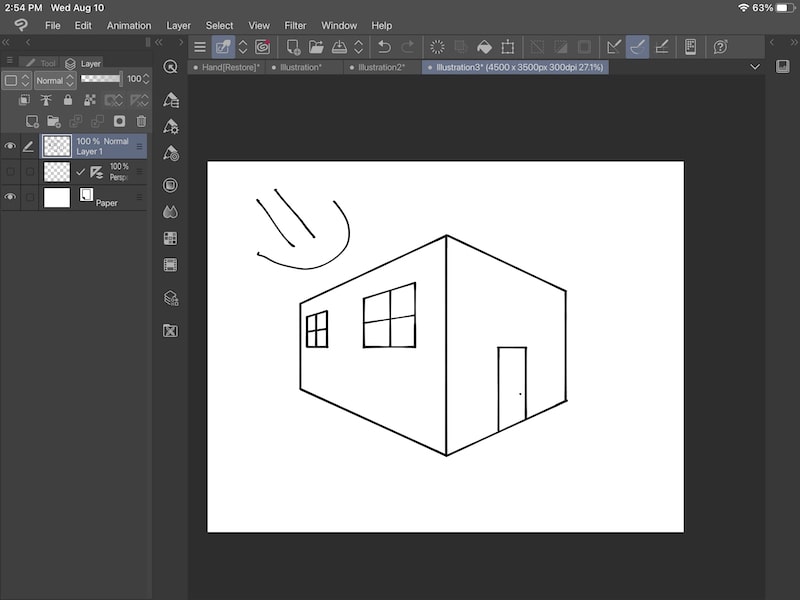
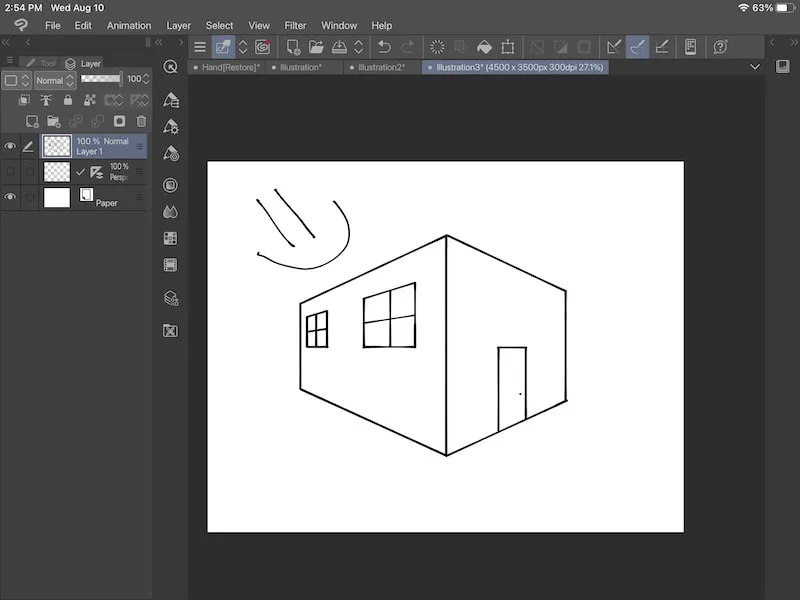
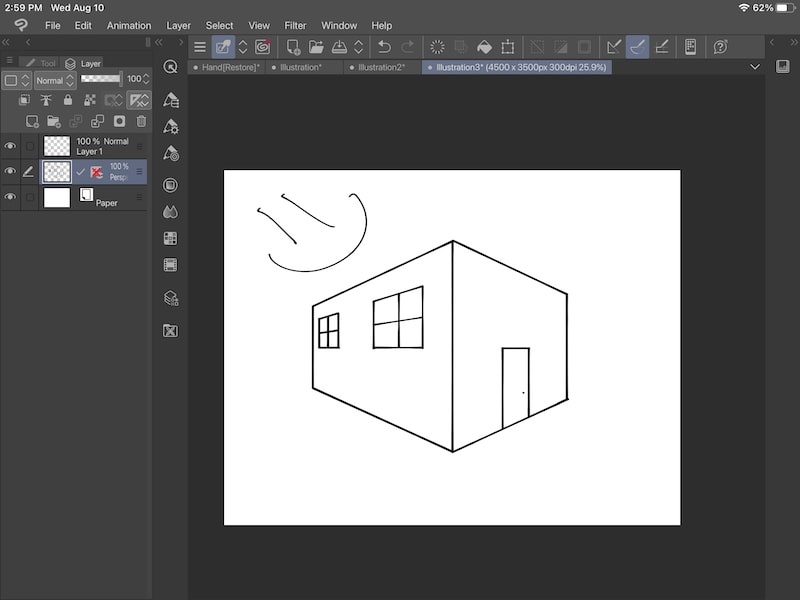
Here’s an example of a basic drawing on the default 2 point perspective grid.
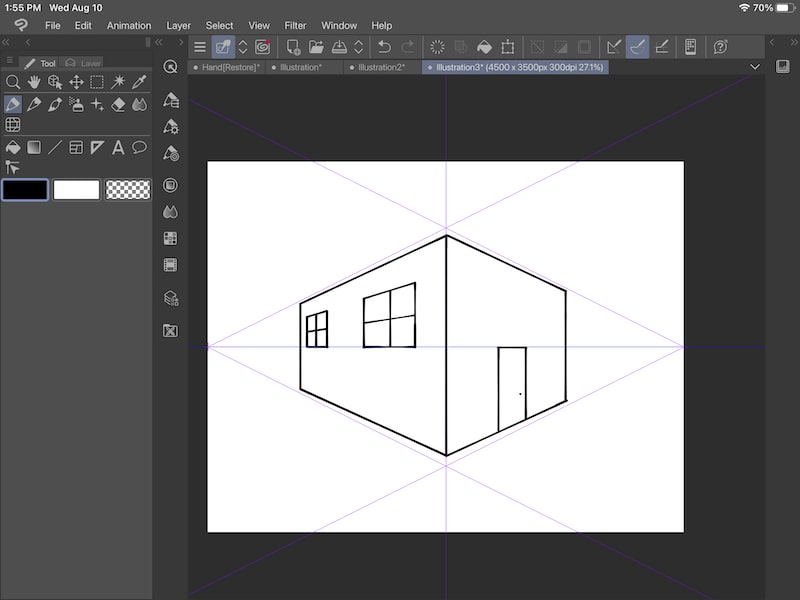
From there, you can start using your new perspective grid as is, or you can adjust it.
3. Adjust your perspective grid, if needed
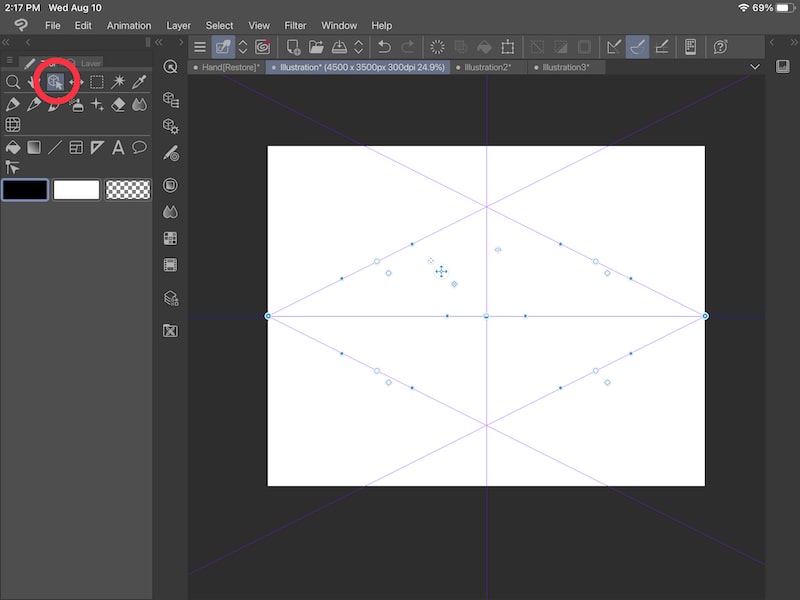
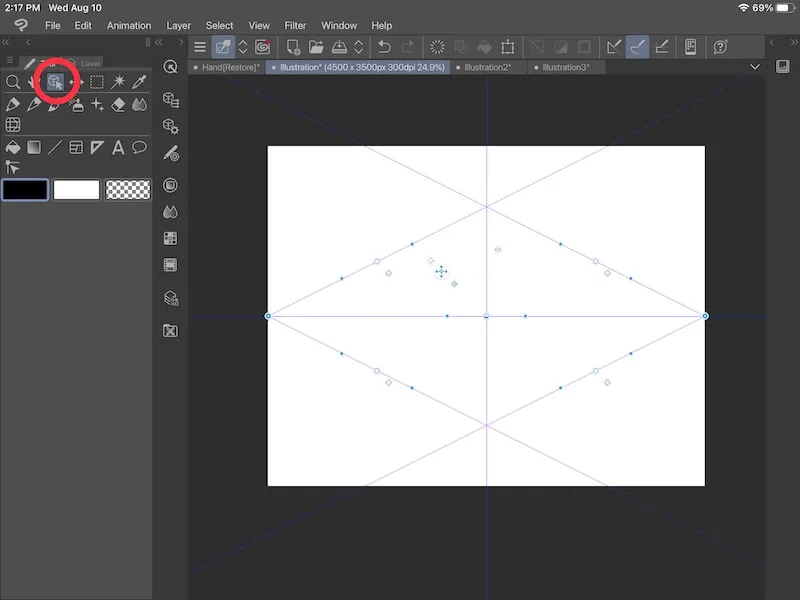
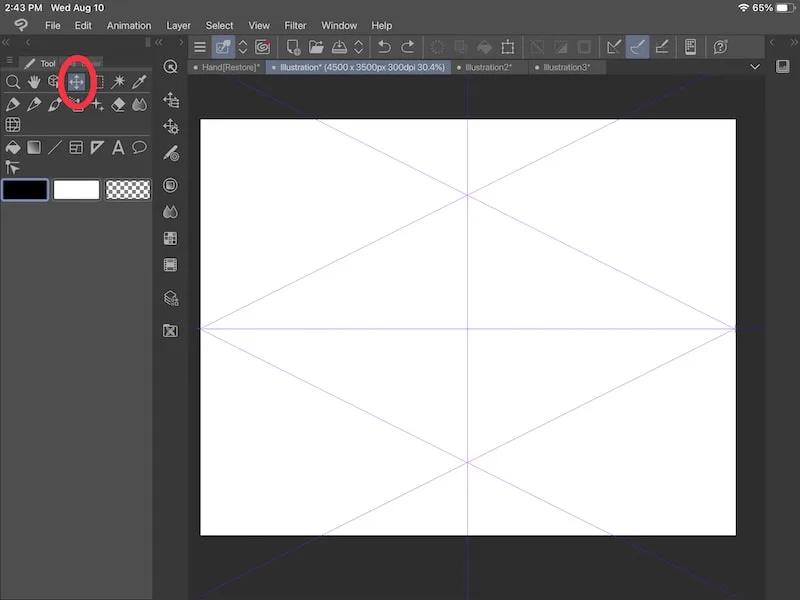
If you want to adjust your perspective grid, click on the object tool. It’s the one with the cube and computer mouse icon.
With the object tool selected, tap on your perspective grid. You’ll see vanishing points appear. Simply drag the dots around to adjust your vanishing points and perspective grid overall. We’ll talk more about adjusting your perspective grid later on.
How to Create Your Own Perspective Grid From Scratch
If you want to create a custom perspective grid, it isn’t as easy as clicking a button and getting started with your drawing. This is actually a great thing! Clip Studio Paint’s perspective grid is extremely customizable, which gives you a lot of options for the art you’re creating.
When you create your perspective grid, you’ll need to lay down each perspective line individually.
This might be a quick process if you only need a few perspective lines leading to a singular vanishing point. Or, it might take a bit longer if you have a bigger perspective infrastructure to set up.
Either way, you’ll want to take your time setting up your perspective grid because this will lay the foundation for the perspective work in your piece of art.
Alright, so here are the steps you need to know:
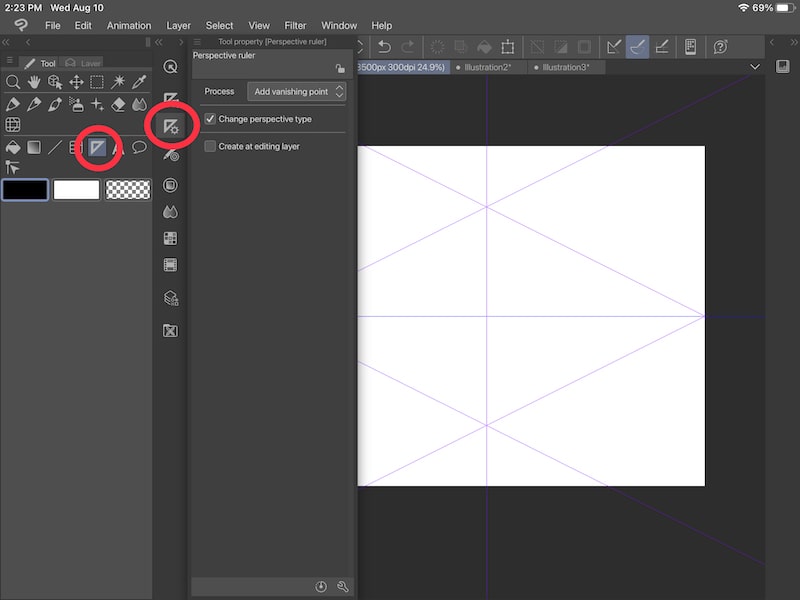
1. Choose the ruler within your tools and the Perspective ruler
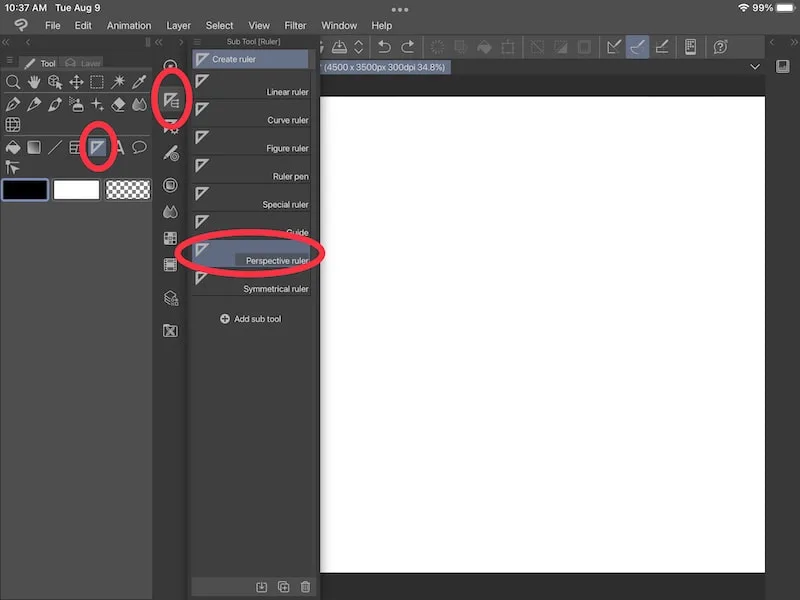
To get started, go ahead and choose the ruler within your selection of tools. The ruler is the one that has the triangle icon.
Next, click on the ruler sub tool selection, which is the first button in the list that has the triangle icon and 3 lines sticking out. Within the list that pops up, click on the “Perspective ruler” button.

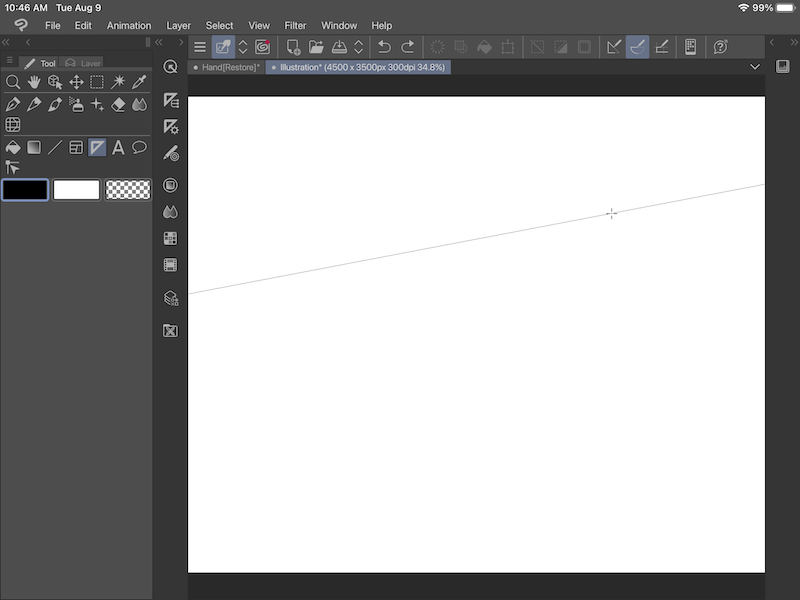
2. Place your perspective lines
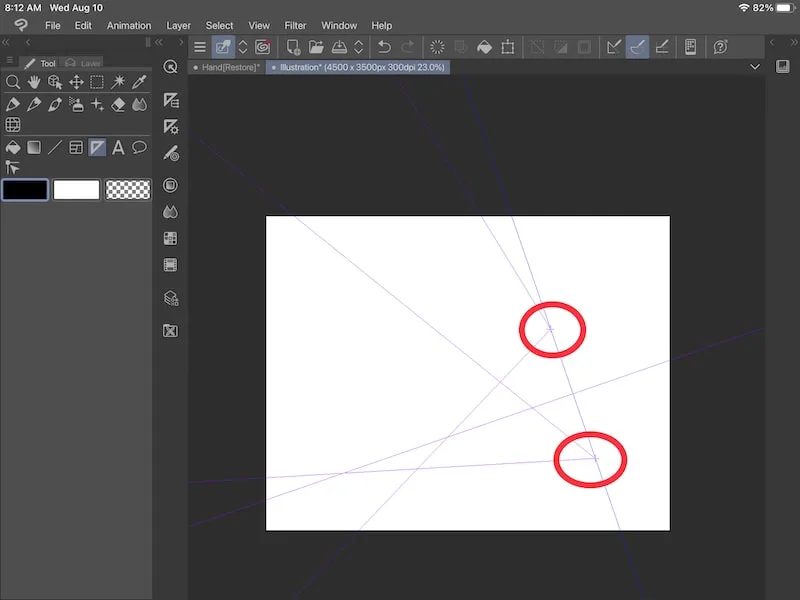
When you click on your computer screen, or tap your stylus on your iPad screen, you’ll see a line appear. You can drag it across your screen and rotate it to your needs.

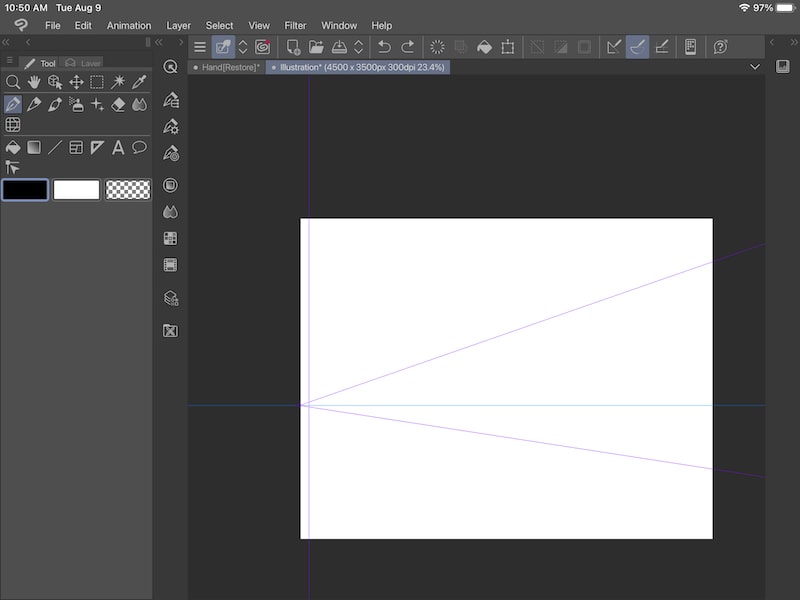
After you’ve placed your first perspective line, you’ll need to lay down your second perspective line to create a one point perspective grid.
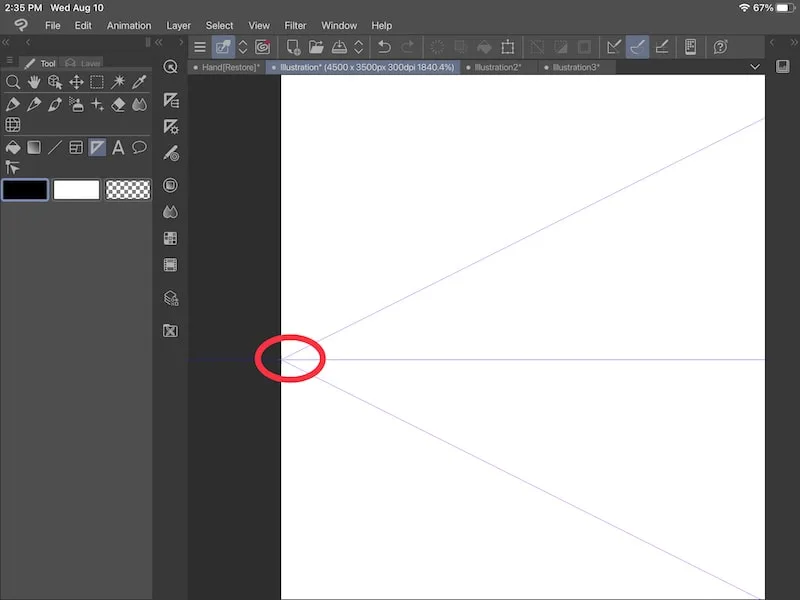
The blue line you see represents your horizon line, which is the eye level of the viewer.
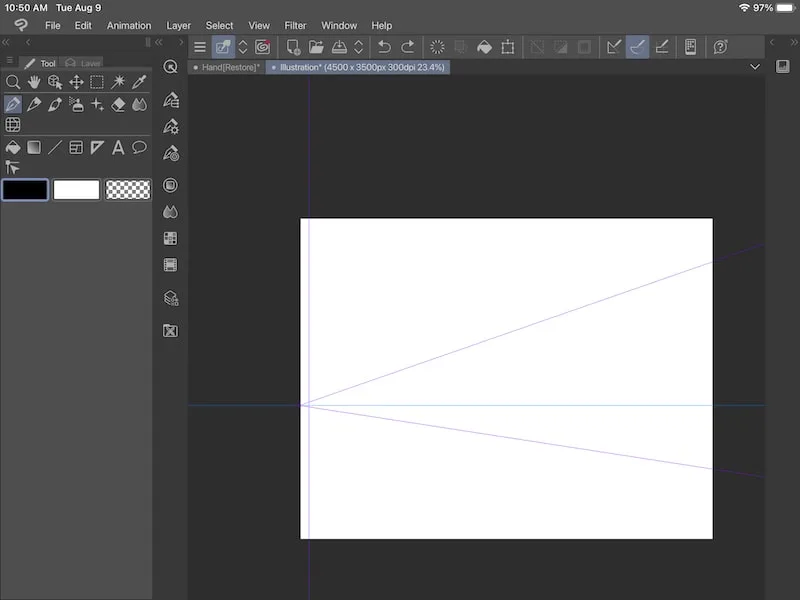
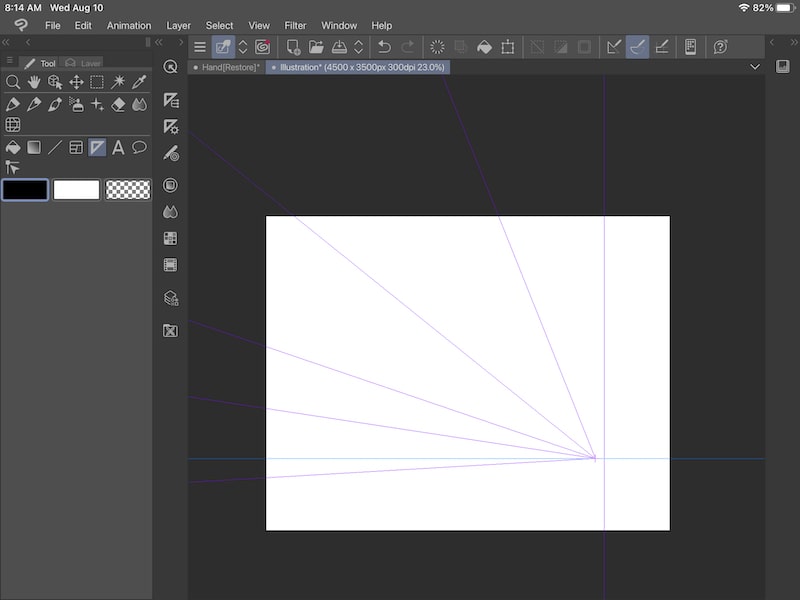
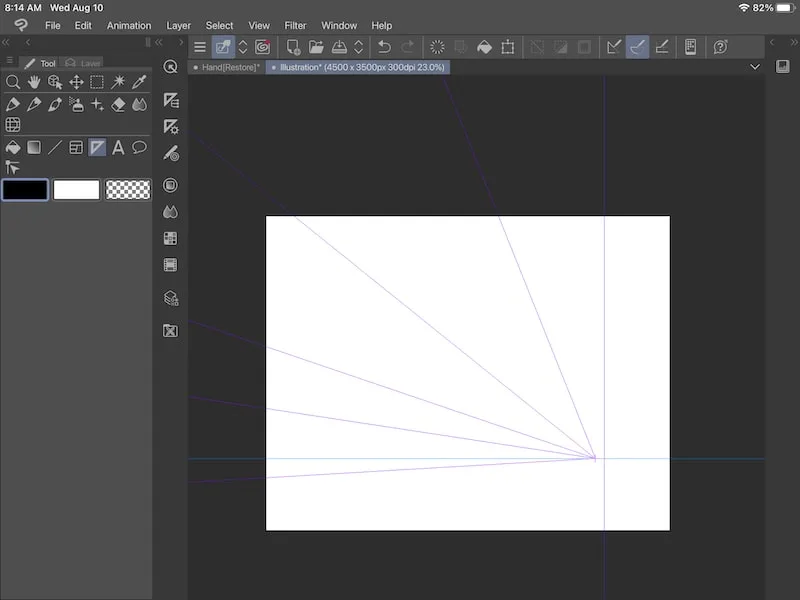
From there, keep placing as many perspective lines as you need to create your piece.
Keep in mind that you can undo a perspective line at any point. Personally, it often takes me a few tries to get the placement of my lines just right, so the undo feature becomes REALLY helpful.
How to Add or Delete Vanishing Points/Guides From Your Perspective Grid
Once you have your perspective grid setup, you may need to add or delete a vanishing point or guide.
Here’s what you need to do:
1. Click on the Tool property menu for the perspective ruler
Open your perspective ruler and choose the Tool property menu. This is the one with the triangle and gear icon.

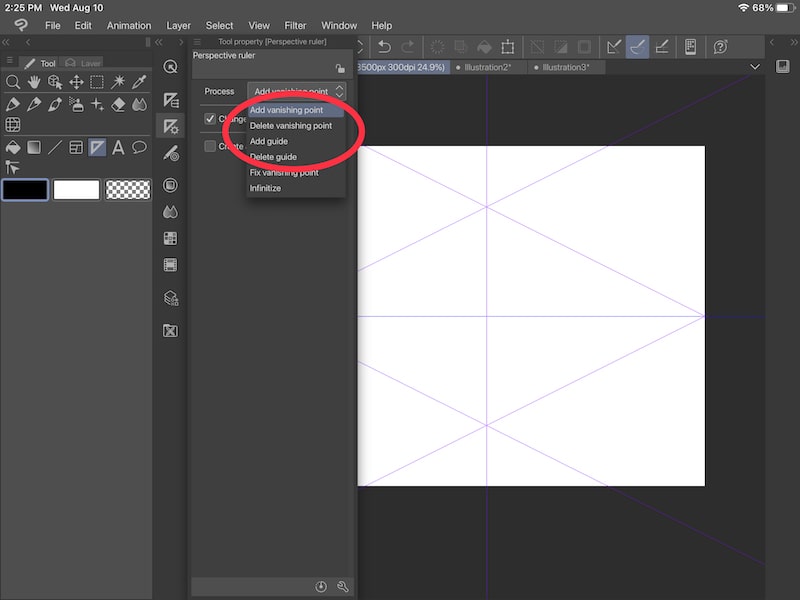
2. Choose to add or delete a vanishing point or guide
Under the “Process” drop down, choose either to add or delete a vanishing point or guide, depending on what you need.

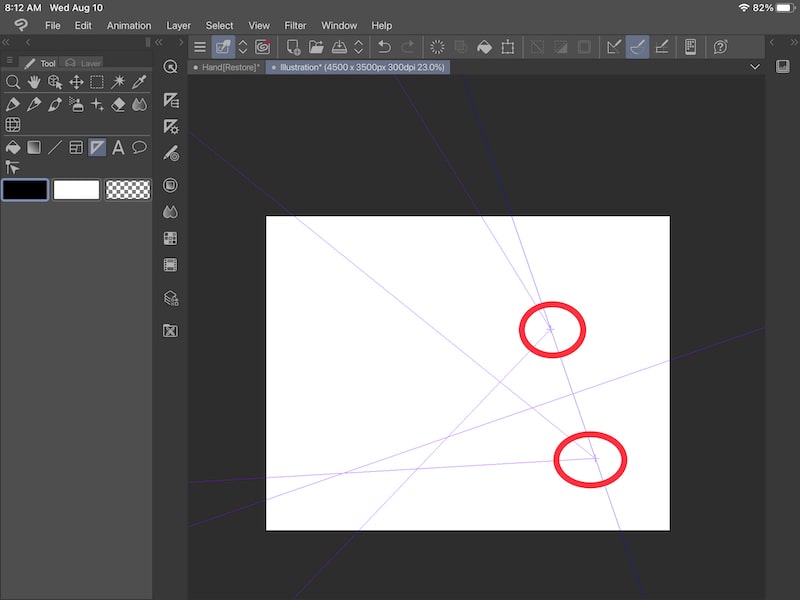
Quick tip: what’s the difference between vanishing points and guides anyways? Your vanishing point is where your lines converge on the horizon line.
This is why you get a triangle shape that expands outwards from your vanishing point. If you were to lay down another vanishing point, you would end up with two triangles expanding outward and your horizon line would adjust so that both vanishing points could sit on it.
On the other hand, your guides simply show you how your current vanishing point works. Quite literally, they’re guides. When you lay down a guide, it will simply expand out from your current vanishing point, showing you different angles shooting off from your vanishing point. Guides don’t change the perspective on your canvas or your horizon lines.
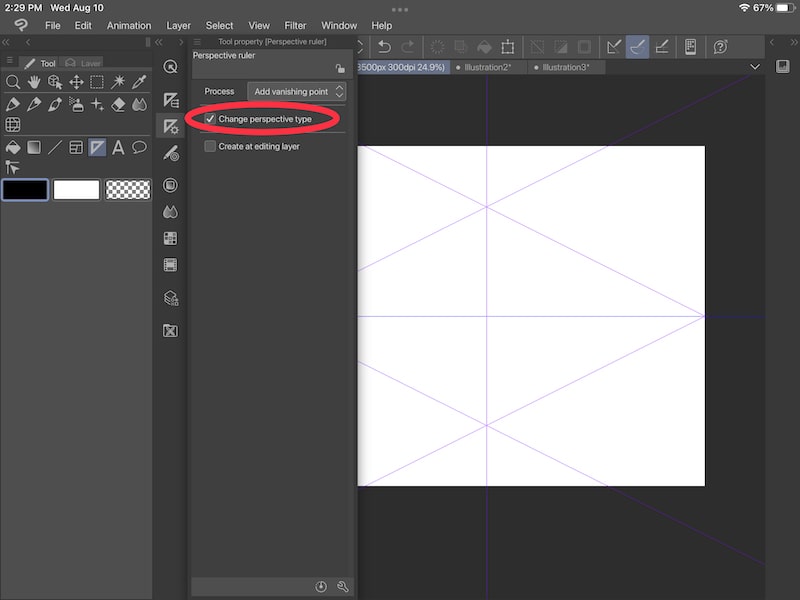
3. If you’re adding a vanishing point, decide if you want to change the perspective type
Below the process drop down, you’ll see a checkmark next to “Change perspective type”, which will be available to you if you’re adding a vanishing point. If you have this selected, the perspective of your canvas will adjust to the amount of vanishing points you have. For example, shifting from two point perspective to three.

If you’re wondering what the other options in the “Process” menu do, don’t worry, we’ll be covering the “Fix vanishing point” and “Infinitize” settings in the next section.

How to Adjust Your Perspective Grid
Once you’re happy with your number of vanishing points and guidelines, you can make more nuanced changes so that your perspective grid is what you want it to be.
Here’s how to make adjustments to your perspective grid in Clip Studio Paint:
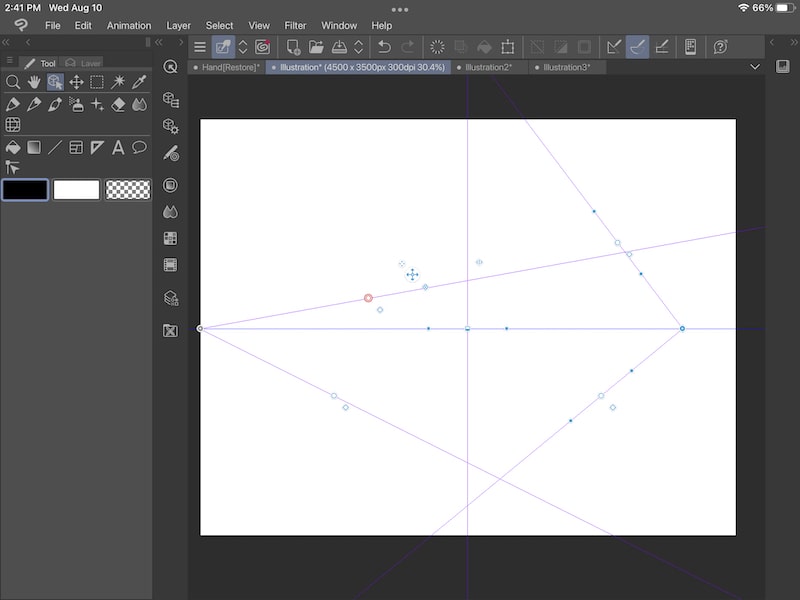
1. Start by “fixing” your vanishing points, if needed
By “fixing”, I don’t mean adjusting. We’ll talk about that next. What I mean by “fixing” is Clip Studio Paint’s term for locking your vanishing point into place.
This is a great option if you need to adjust your perspective lines, but don’t want to move your vanishing point and don’t want to worry about accidentally moving it while you move everything else.
Here’s where the “Fix vanishing point” option within the “Process” menu comes in.

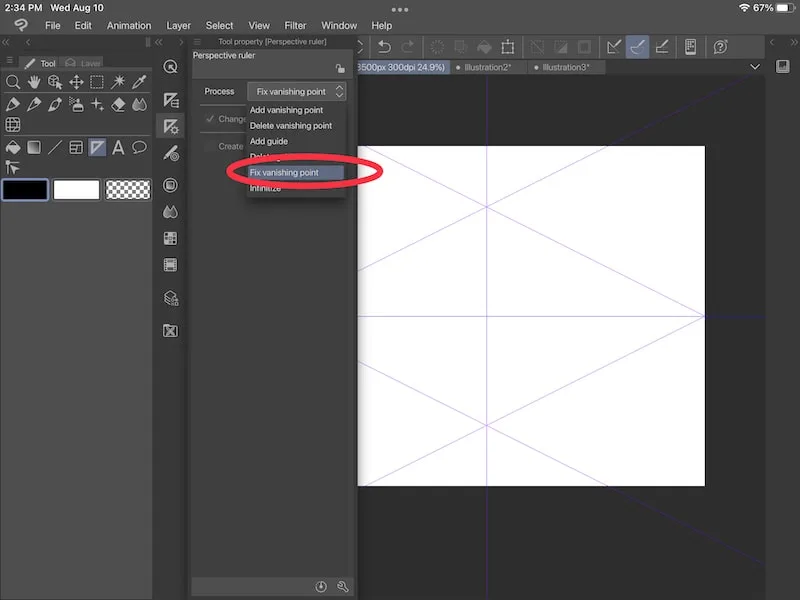
Choose that option and then click or tap on the vanishing point you want to secure. It will turn gray.

Down the road, once we start making other adjustments, you’ll notice that the vanishing point you “fixed” can’t be moved.
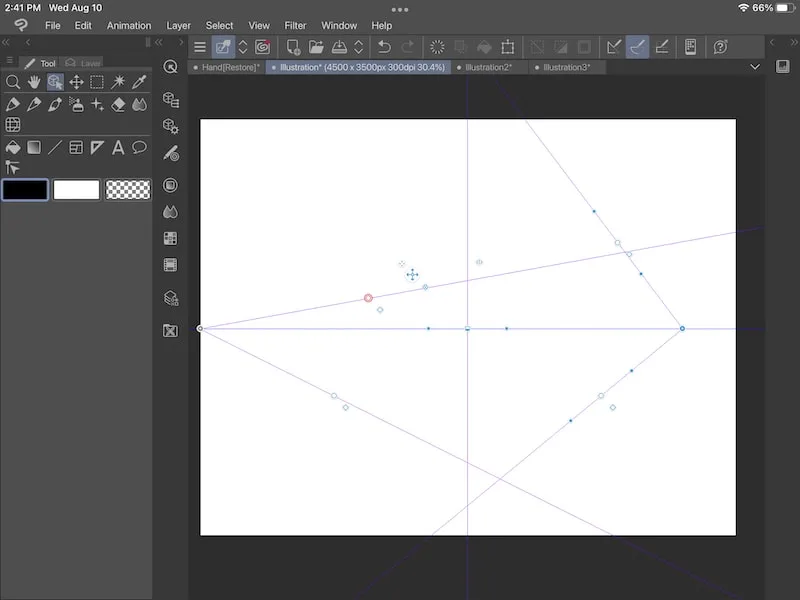
2. Select the object tool and then click or tap on your perspective grid
Choose the “Object” tool in your tool panel. With this tool selected, click or tap on one of the lines in your perspective grid.
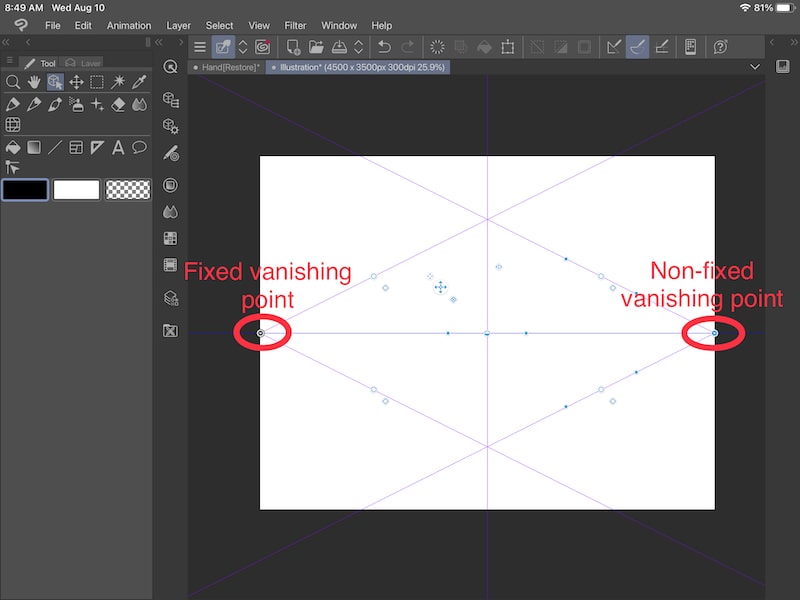
You’ll see dots appear all over your perspective grid. If you fixed any of your vanishing points, here’s where you’ll see them. Your fixed vanishing points will be gray, while the others will be blue.

3. Adjust your perspective grid, as needed
Now you can have fun adjusting your perspective grid! You can move around any of the dots, aside from any of the dots associated with fixed vanishing points.
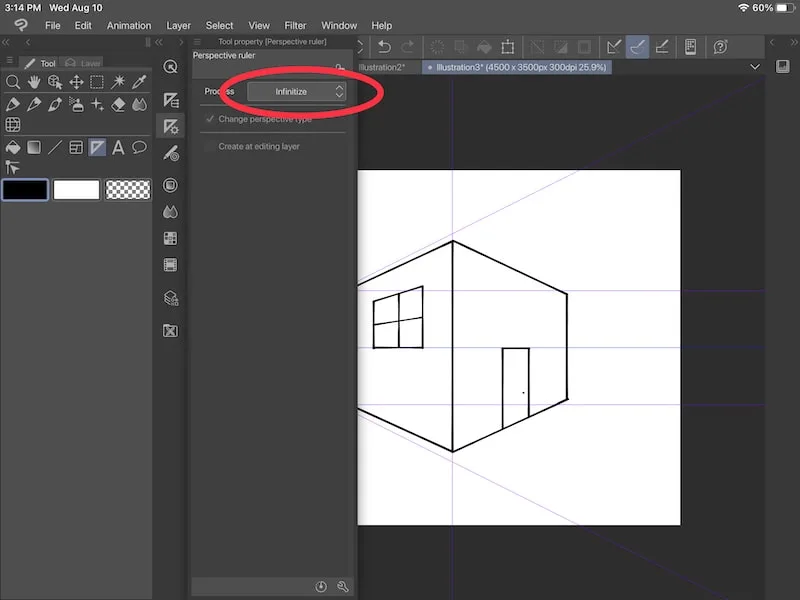
Since we’re talking about adjustments, let’s talk about the “Infinitize” option. If you choose this option and then click on one of your vanishing points, it will send them off into infinity.

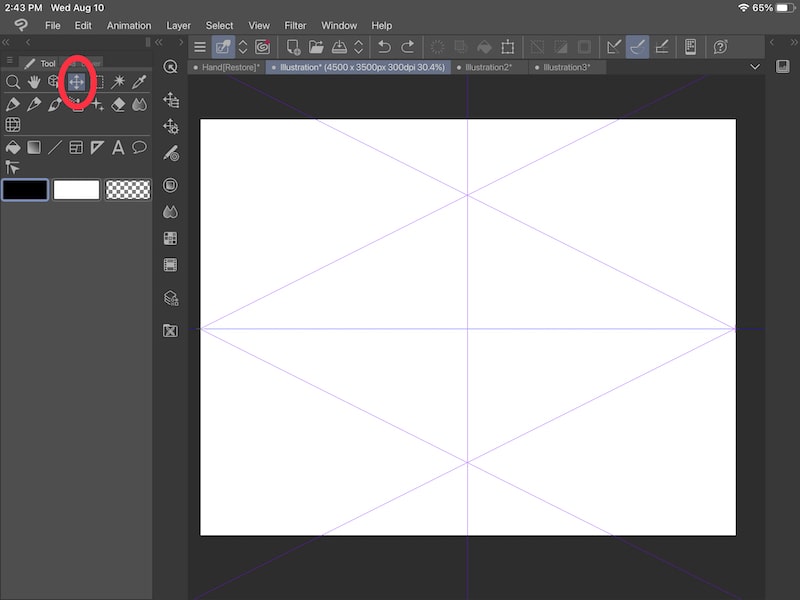
4. How to move your perspective grid, if needed
If you need to move your entire perspective grid, choose the “Move” tool in your tool panel.
Next, go back to your layer panel and look at your perspective layer.
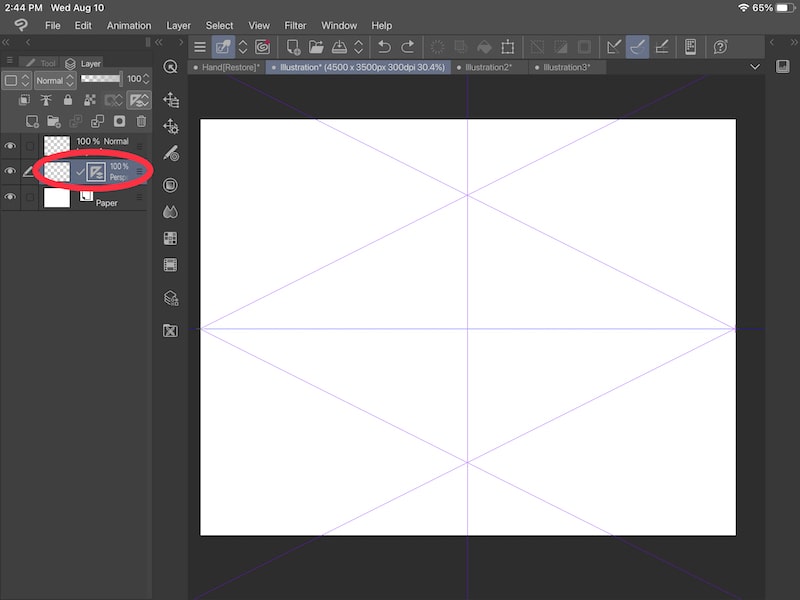

Firstly, we need to talk about the check mark. When that checkmark is there, that means that the “Link Ruler to Layer” option is enabled, which can also be found in the perspective settings.

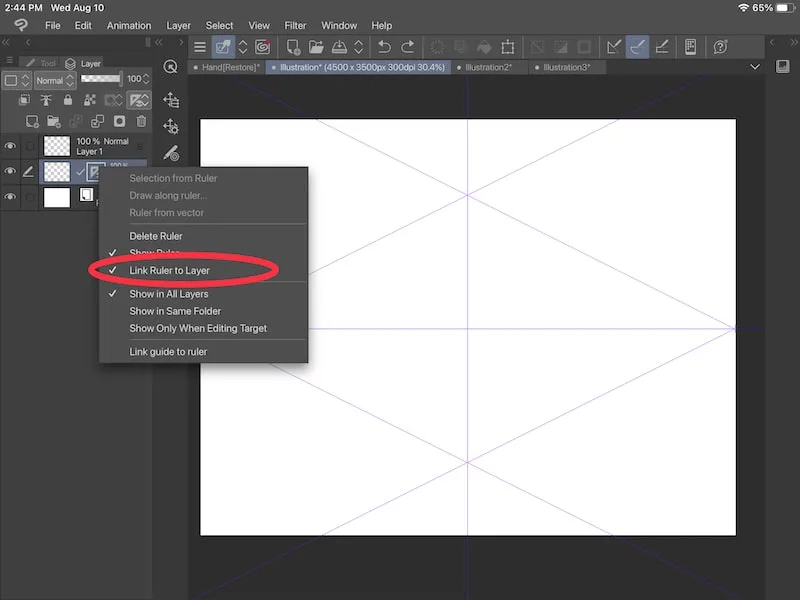
This means that your layer and your grid will move together. When that check mark is not there, your layer and ruler will not be linked and cannot be moved together.
If you want to move your layer and grid together, leave the check mark enabled and move your grid around your canvas.
If you DON’T want your layer and ruler linked, click the check mark to disable it. Next, make sure to click on the triangle icon within your perspective layer to select it. You’ll know it’s selected if it has a square around it. This will allow you to move your grid, independently of your layer.
5. Decide how you want your perspective grid to interact with your layers
You have a few options for how your perspective grid works with your layers. Click on the triangle icon and you’ll see a few options.
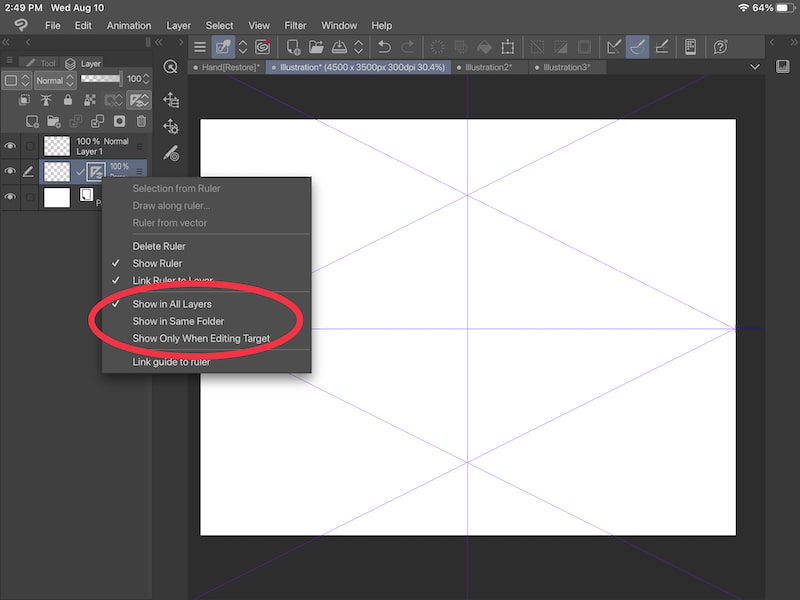
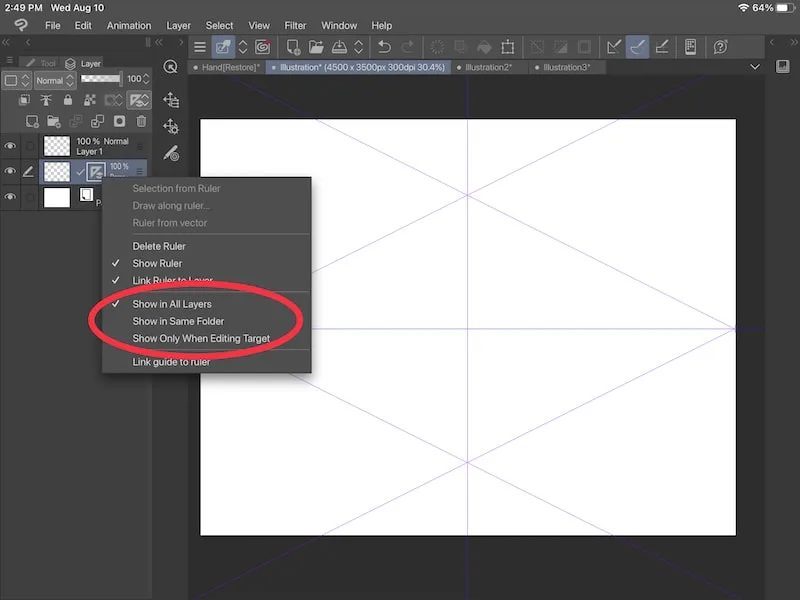
“Show in All Layers” means that your perspective grid will apply to all of your layers. All of your lines will snap to your grid until you turn it off, which we’ll talk about in the next section.
“Show in the Same Folder” will apply your grid to any layers in the same folder.
“Show Only When Editing Target” will only apply your grid to your perspective grid layer.
What you choose mainly comes down to preference and the type of art you’re creating/how many layers you’re working with.

How to Turn Off the Perspective Grid
We’ve done all of this work to set up our perspective grids but, eventually, you’ll need to turn it off. When you have your perspective grid on, every line you draw will snap to your grid.
That won’t work forever.
So, here’s how to turn off your perspective grid in Clip Studio Paint:
1. If none of your drawing is on your perspective grid layer, turn off the layer
When you created your art with your perspective grid, you may or may not have drawn on the same layer as your perspective grid.
If you didn’t, and all of your art is on different layers, you can simply turn off your perspective grid layer to get rid of your perspective grid.
To turn off your perspective grid layer, click or tap on the eyeball that’s next to it in the layer panel.
Now, you can draw on your other layers without your lines snapping to your perspective grid.
If you need to bring your perspective grid back, simply click or tap again where the eyeball would be to make it visible again.
2. If you’ve drawn on your perspective layer, uncheck the “Show Ruler” option
If you have art on your perspective grid layer you want to preserve, simply hold down on the triangle icon on your perspective layer and uncheck the “Show Ruler” option. Within these perspective settings is also where you can also delete your perspective ruler entirely, if you need to.

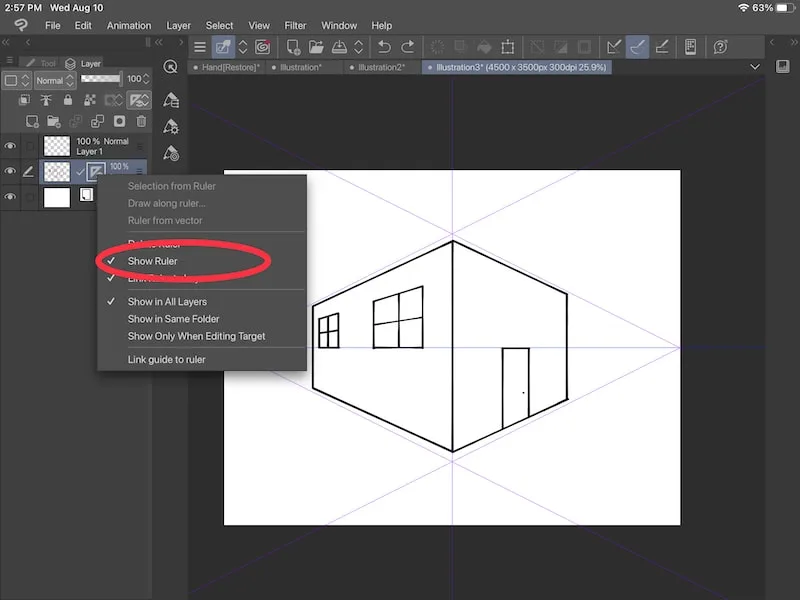
When you uncheck the “Show Ruler” option, you’ll see a red X through your perspective icon in your perspective layer, your grid will disappear, and your lines will no longer snap to your grid.

How to Add More Grids to Your Perspective Grid
If you’re still craving more grids after creating your perspective grid, you’re in luck! You can add various types of grids on top of your perspective grid to help with your drawing.
Here’s what you need to do:
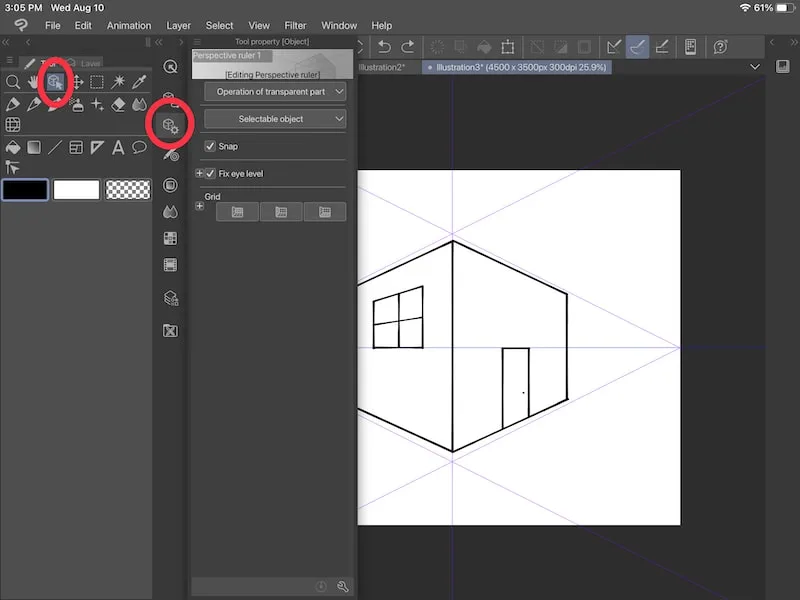
1. Make sure the perspective icon is selected in your perspective layer
In your layer panel, find your perspective layer and click on the perspective icon to select it if it isn’t already selected. You’ll know it’s selected if you see a white square around it.
2. Select your object tool and open the “Tool property” menu
Within your tool panel, choose the object tool, which is the one that has the icon of a cube and a computer mouse.

3. Choose your grid(s)
From there, navigate to the “Grid” section and choose whichever grids you need.
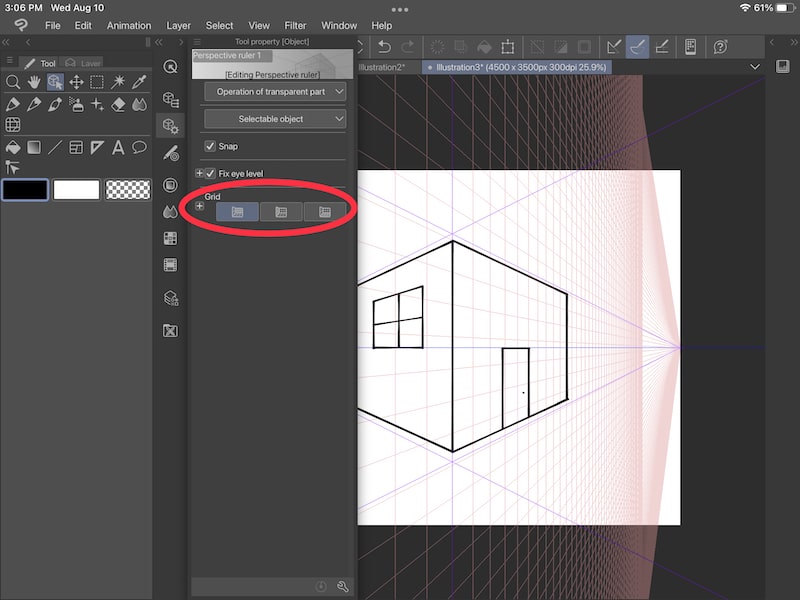
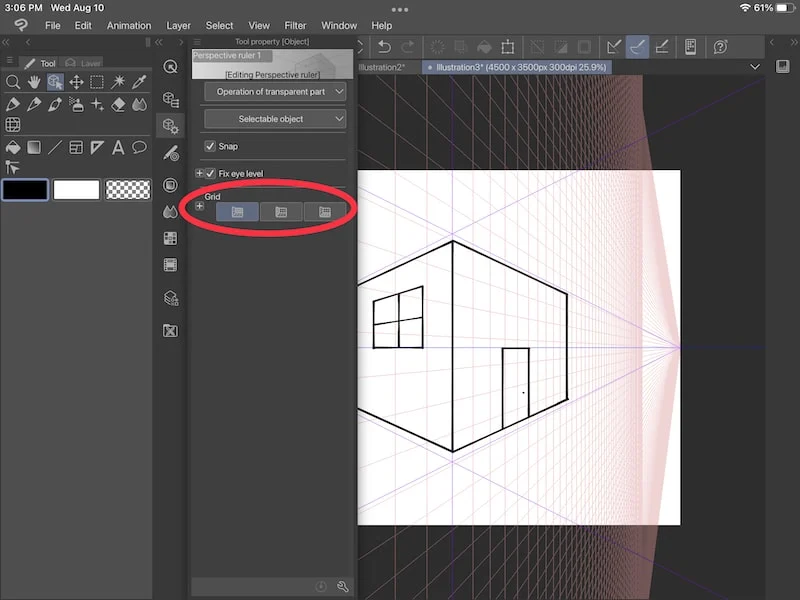
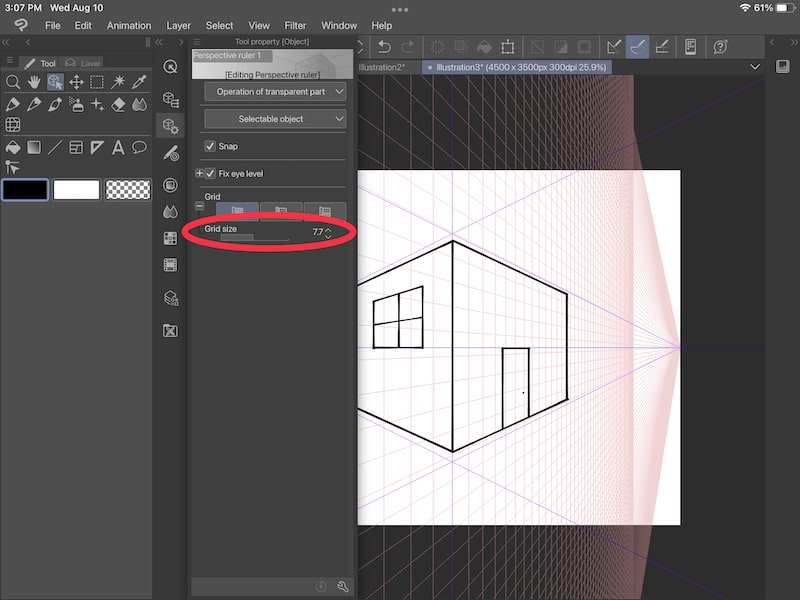
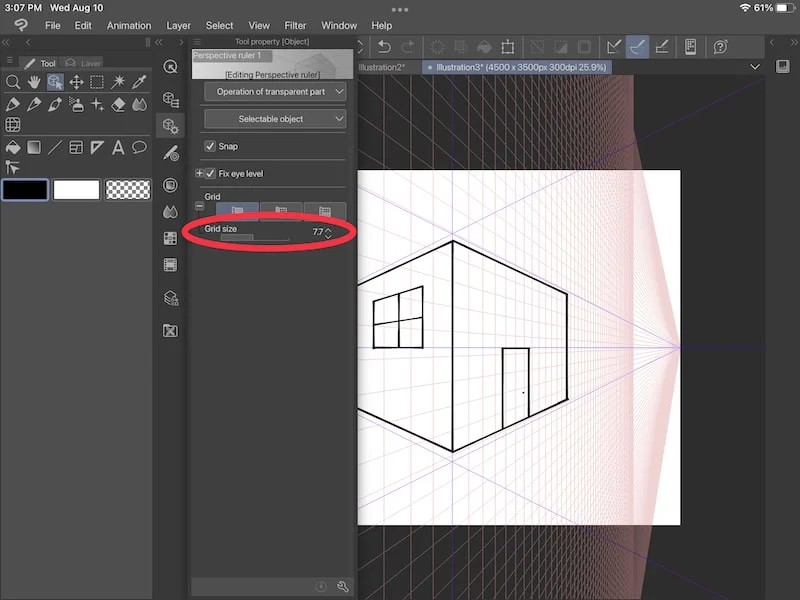
You can adjust the size of the grid you choose by clicking on the plus button and using the size slider that appears.
Clip Studio Paint’s perspective ruler can do a LOT of amazing things. This means that it can take some time to learn and get used to. That’s ok! Be patient with yourself and take the time you need to learn it properly. Once you do, you’ll enjoy all of the ways it can help you create amazing perspectives in your art!
For a fun followup to this tutorial, check out my tutorial on using Clip Studio Paint’s Symmetrical Ruler.


Diana has been an artist for over 27 years and has training in drawing, painting, digital drawing and graphic design. Diana’s latest obsession is digitally drawing with Procreate and Procreate Dreams. Diana has experience selling her art across a number of platforms and loves helping other artists learn how to make money from their art as well.