Alpha Lock is one of Procreate’s powerful tools that can feel daunting at first. What happened to the layer? Why can’t I draw in certain areas? Is this permanent? Alpha Lock always seems to raise any number of questions. Don’t worry, I had these questions when I first started using Procreate too!
Procreate’s Alpha Lock tool lets you draw on any existing pixels in your art, without drawing on any blank areas. This is useful for coloring within the lines or adding details to your objects. Keep in mind that Alpha Lock permanently impacts your layer, as your work isn’t separated on a different layer like when using a clipping mask.
We’re going to dive into the details of using Alpha Lock.
Before we dive in though, we need to talk about something that’s REALLY important! If you dive into this tool without knowing this, you could be seriously bummed. There have been times where I’ve forgotten about this and been seriously bummed myself so, listen up!
Alpha Lock Impacts Your Current Layer
When you use Alpha Lock, it directly impacts the layer you’ve activated it for.
This sometimes trips people up because there are similar masking features, like clipping masks, that isolate your drawing on a separate layer. This makes it easier to adjust your changes or remove them altogether.
I have a full guide on the differences between alpha lock and clipping masks if you want to learn more about that!
At a bare minimum, keep it in mind that Alpha Lock gets applied directly to your current layer. This means that, unless you’re vigilant about using the undo feature, anything you draw while Alpha Lock is enabled will become a permanent part of your layer.
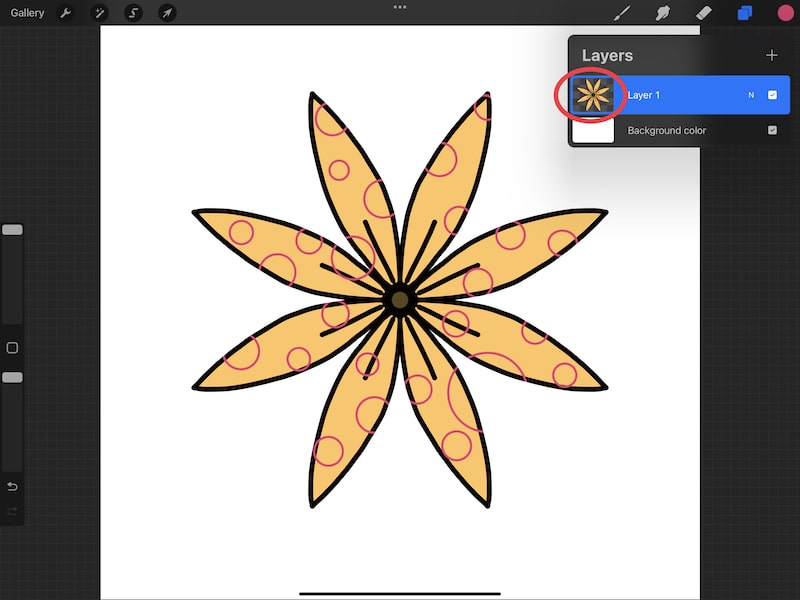
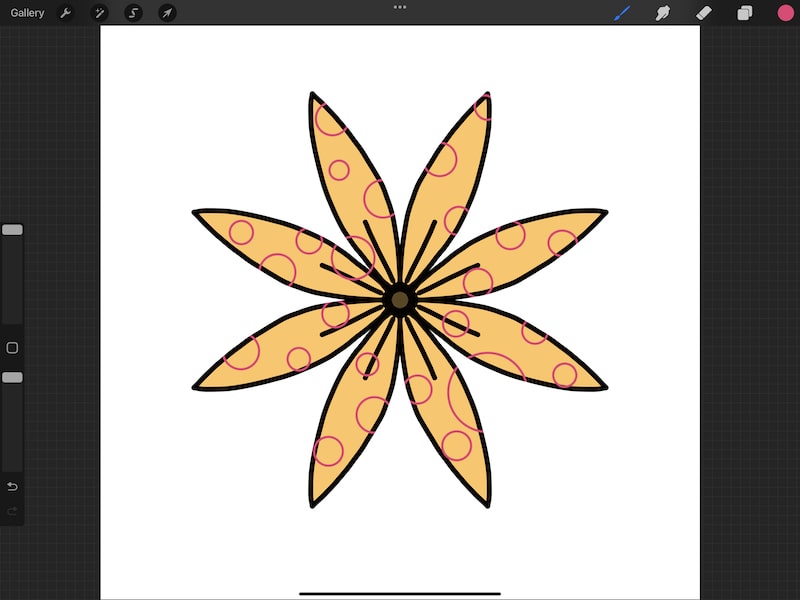
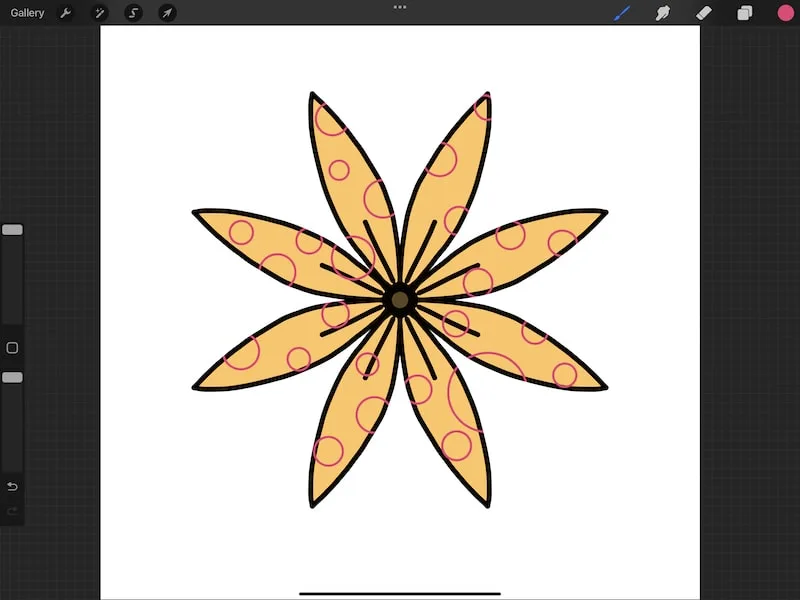
Take a look at the example below. I turned on Alpha Lock to draw pink circles on my flower petals. As you can see below, these circles are drawn right onto my flower layer.

If you’re not a fan of that, make sure to duplicate your Procreate layer prior to using Alpha Lock so that you have an extra copy to fall back on. You can also use a clipping mask instead, which gives you more flexibility by adding your design to a separate layer.
Alright, now that we’ve talked about the permanency of Alpha Lock, let’s dive into using it.
How to Use Procreate’s Alpha Lock
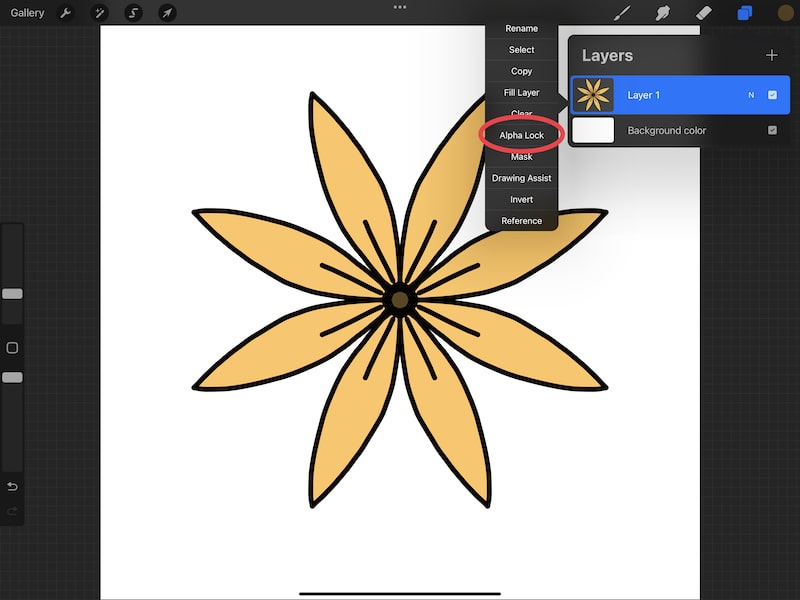
To activate Procreate’s Alpha Lock, tap on the layer to open its settings and choose Alpha Lock. Once Alpha Lock is enabled, you will only be able to draw on areas of your layer that are already filled with pixels. In other words, you CAN’T draw on areas that are blank.
Let’s walk through that, step-by-step.
1. Open your Layer’s panel
Alpha Lock is activated within a layer’s setting. This is where the other masking options live too. So, to get started with Alpha Lock, start by opening your Layer’s panel.
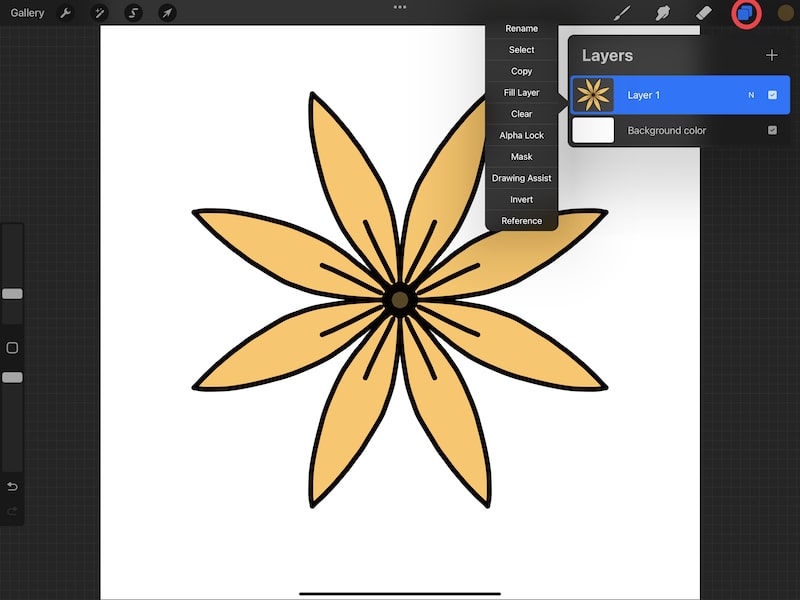
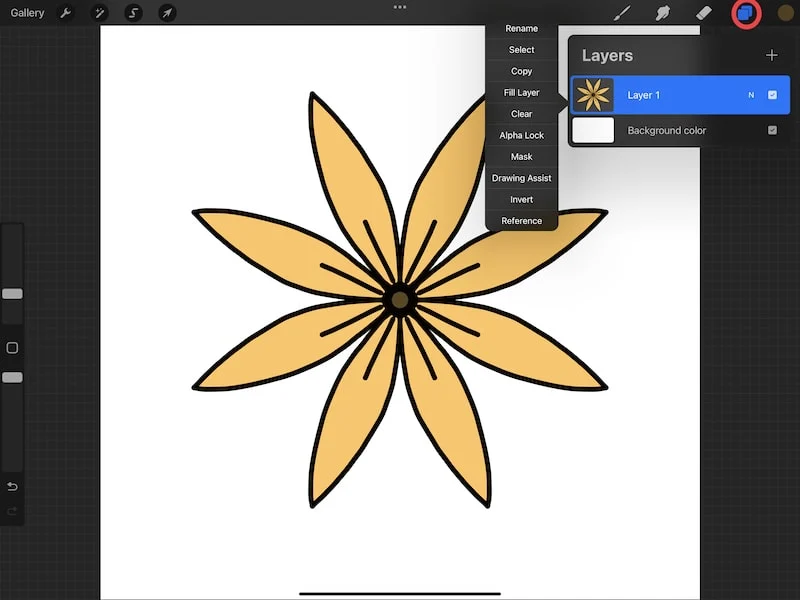
2. Tap on your layer to open its settings.
In your Layer’s panel, find the layer you want to use Alpha Lock with. Tap on the layer to open its settings.

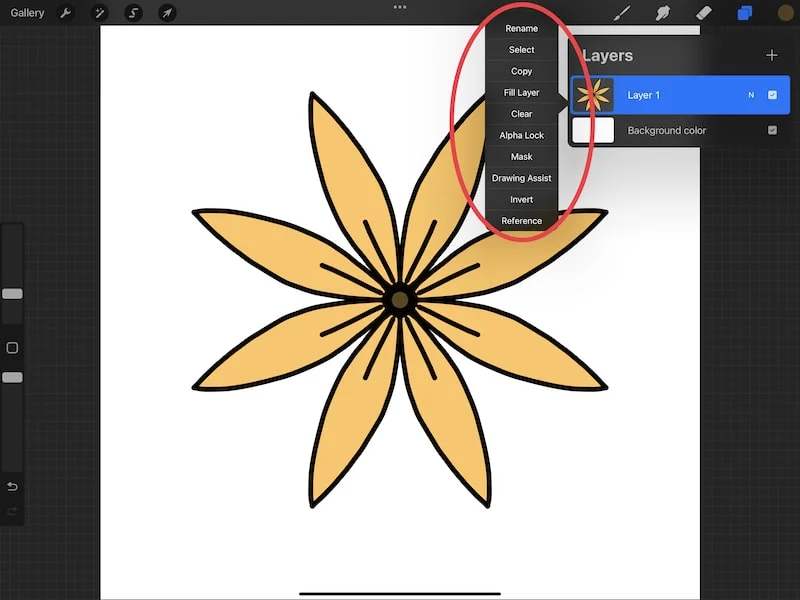
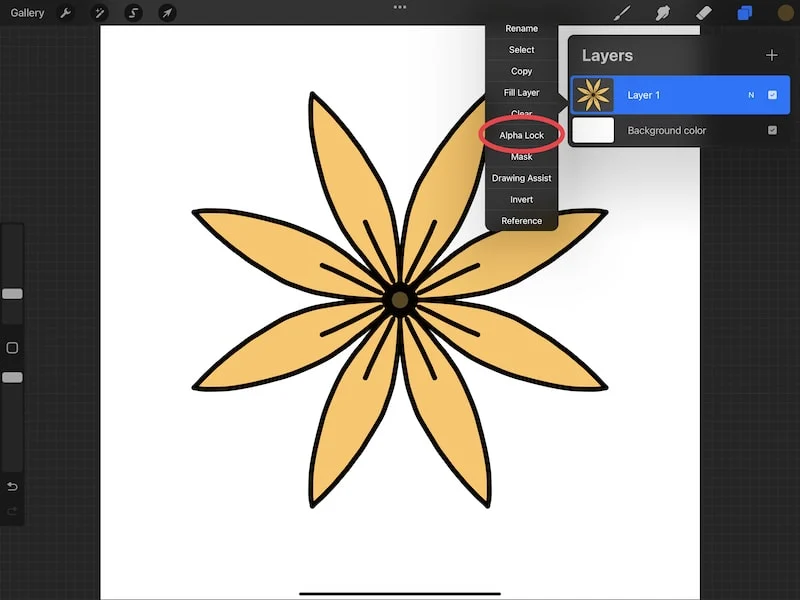
3. Choose Alpha Lock.
After opening the layer’s settings, tap on the Alpha Lock option.
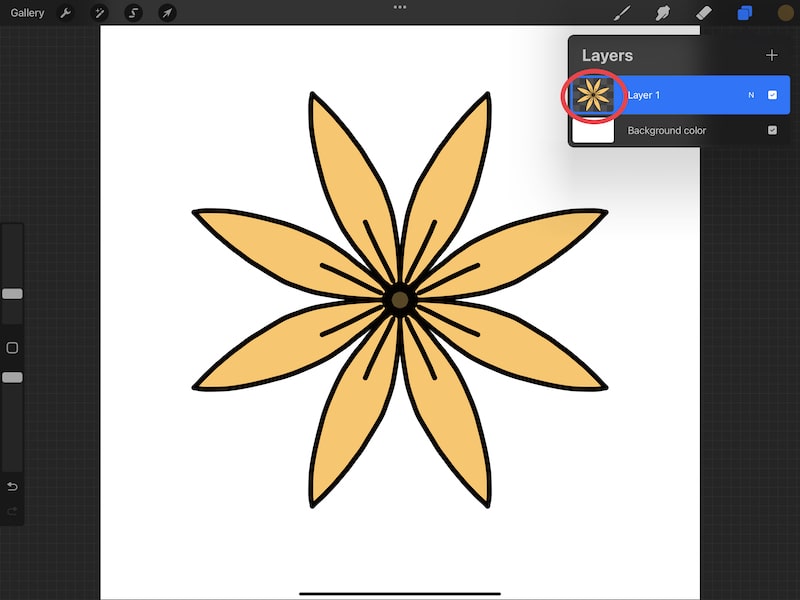
You’ll know that Alpha Lock is enabled when you see a checkerboard appear behind your layer.
While the checkerboard is small and hard to see, anywhere where the checkerboard is visible is an area on your layer where you won’t be able to draw.

Once you have Alpha Lock enabled, it’s time to use it!
As another reminder, anything you draw will be applied to your current layer. I know I’ve said this a lot, but it’s important.
Personally, I like to use Alpha Lock to apply details to an object or without going outside of the lines.
In the example below, notice that I drew circles that spanned two flower petals. Given that Alpha Lock was enabled, the circle didn’t show up in the blank space between the petals; it only showed up on the petals themselves.
Remember that this object has to already be filled with pixels for Alpha Lock to work. If it’s not, a great workaround is to use ColorDrop to fill an object with the background color of your canvas.
Then, your object will be filled with pixels for use with Alpha Lock, but it doesn’t appear like it is. As long as you don’t change your background color, you can go ahead and use Alpha Lock on your object.
There you go! Alpha Lock is a useful tool once you know how and when to use it. It can be super valuable for adding details to your object without having to worry about whether you’re going to draw outside of the lines of your object.
That said, keep in mind that Alpha Lock is one of the various masking options that Procreate offers. It’s the most permanent option, as it requires you to draw directly on your active layer.
If you want more flexibility with making changes to your drawing, I suggest checking out the clipping mask and layer mask options. Altogether, these masking options give you SO many creative choices for your art, so have fun experimenting with them and learning what they can do!


Diana has been an artist for over 27 years and has training in drawing, painting, digital drawing and graphic design. Diana’s latest obsession is digitally drawing with Procreate and Procreate Dreams. Diana has experience selling her art across a number of platforms and loves helping other artists learn how to make money from their art as well.