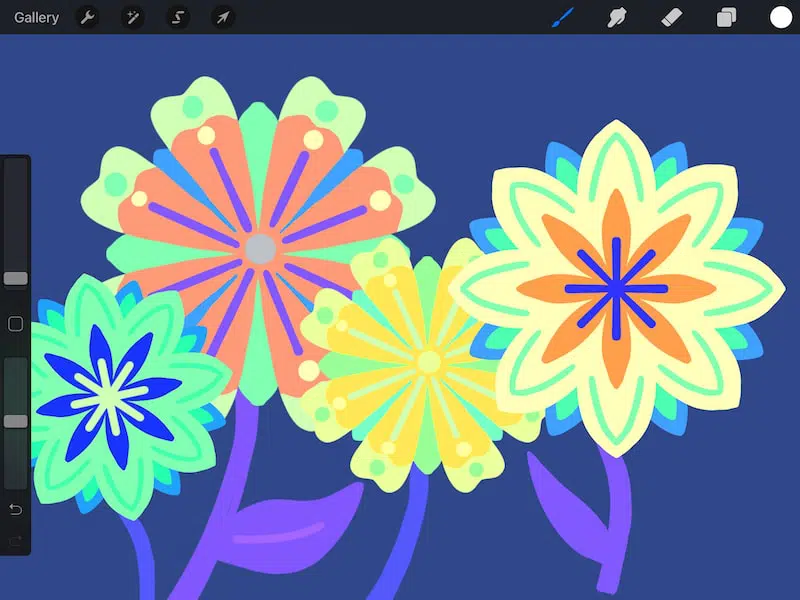
Being able to make quick and dramatic adjustments to your colors is a huge perk of Procreate. With traditional materials, you’d have to completely redo your work to see color inversions. With Procreate, it only takes a few simple clicks to invert the colors of your entire piece of art.
To invert colors on Procreate, tap on your layer’s settings and choose the Invert option. To invert the colors of your entire piece of art at once, create a new layer at the top of your layers list. Fill this layer with white. In the blend mode settings of this new layer, choose the Difference option. This will invert all of the colors on your canvas.
We’re going to talk about 2 ways to invert your colors in Procreate. The way you choose will vary depending on how many layers you have, if you want to invert your background color, and how easily you want to undo your changes.
Ok, to begin with, we’re going to talk about inverting the colors of each layer.
How to Invert Colors in Procreate, Layer-by-Layer
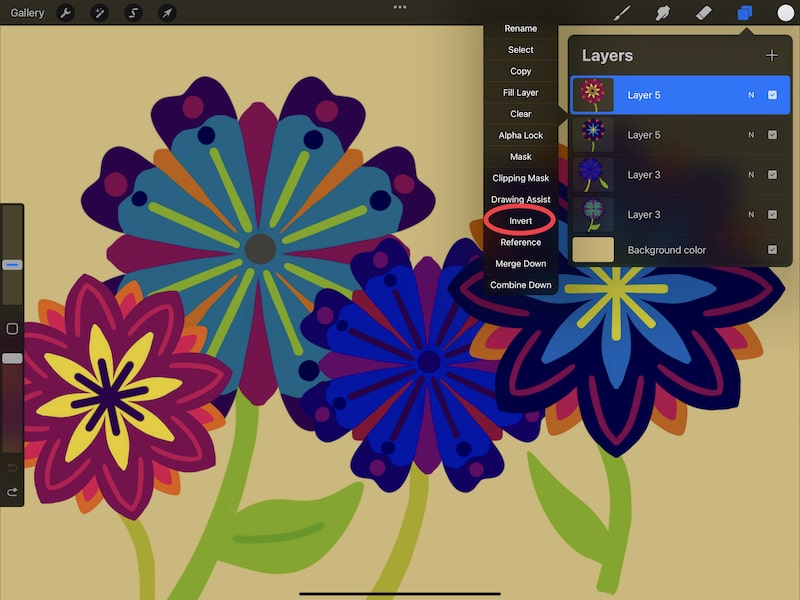
To invert the colors of each layer, tap on the layer to open its settings. Tap on the Invert button. Repeat this process for every layer you want to invert the colors of.
This process is completed layer-by-layer. This means that it’s a great choice if you don’t want to invert the colors of your entire piece of art, or you only have a few layers.
Important note: this process won’t invert the colors of your background. If you want to do this, look at my second method for inverting colors.
Alright, to invert the colors of individual layers in Procreate, here’s what you need to do:
1. Open your Layers panel
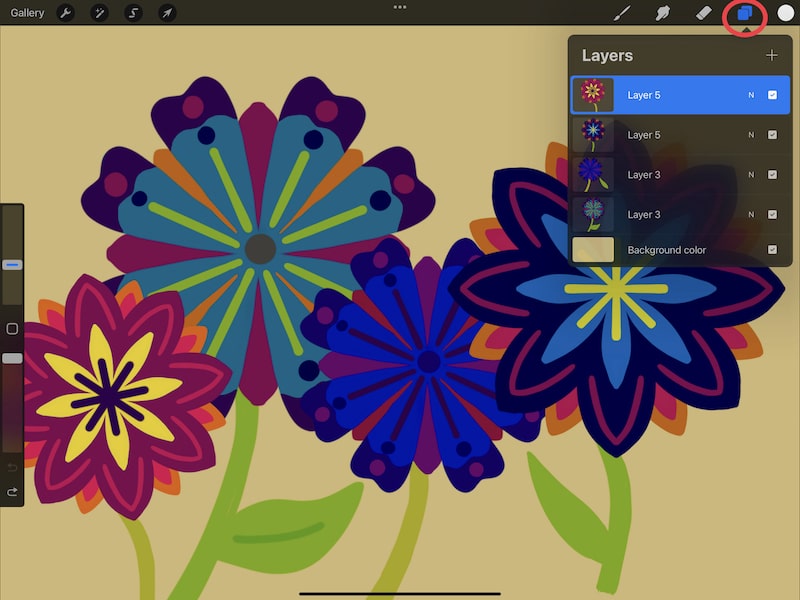

2. Tap on the layer you want to invert the colors of. Tap it again to open its settings and choose the Invert button.
Select the layer you want to invert the colors of by tapping on it. Next, open that layer’s settings. You can do that by tapping on it again. Tap on the Invert button to inver the colors of that layer.

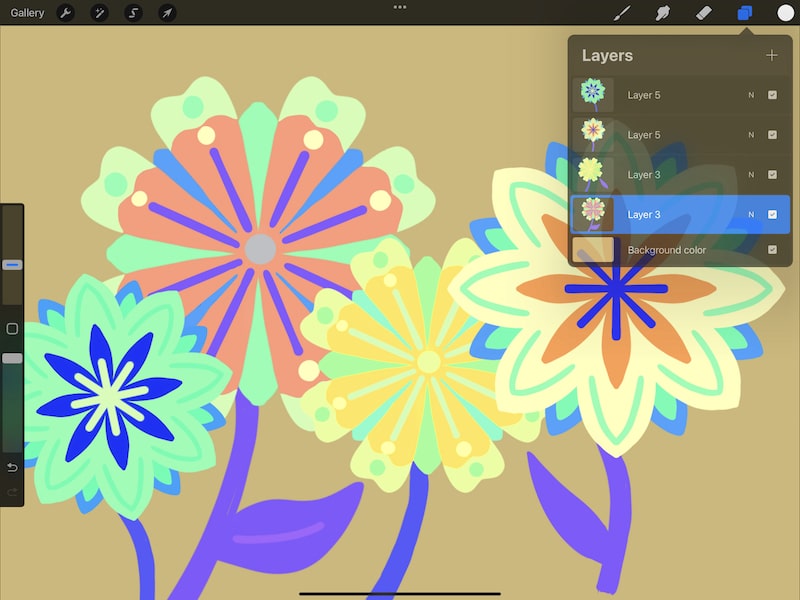
3. Repeat this process for every layer you need to.
For every layer you want to invert the colors of, simply repeat the process of selecting the layer, opening its settings, and tapping on the Invert button.

The process we just talked about is great if you only have a few layers, want to selectively invert the colors of your layers, or don’t want to invert your background color.
If you want to invert all of your colors at once, including your background color. Check out this next process. It’s also great if you want to be able to quickly switch your color inversion on and off.
Invert Colors in Procreate by Adding a Layer
To invert your colors with a layer, go ahead and add a new layer and fill it with white. Then, set the blending mode to Difference.
Let’s talk about how to do this method, step-by-step:
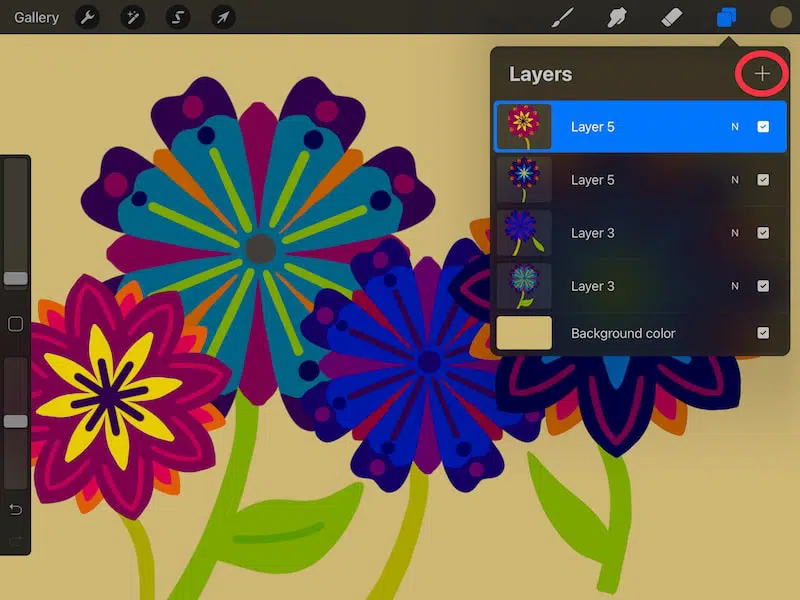
1. Add a new layer to your Procreate canvas
To invert our colors, we’ll need to start off with a new, blank layer that doesn’t have any design elements on it.
Open the Layers panel and click the plus symbol to add a new layer.

2. Add your new layer to the top of your layers list
If your new layer isn’t at the top of your layers list already, hold down on it and drag it to the top of your list.
This places it “on top” of all of your other layers. This ensures that your color inversion applies to all of the layers and design elements below it.
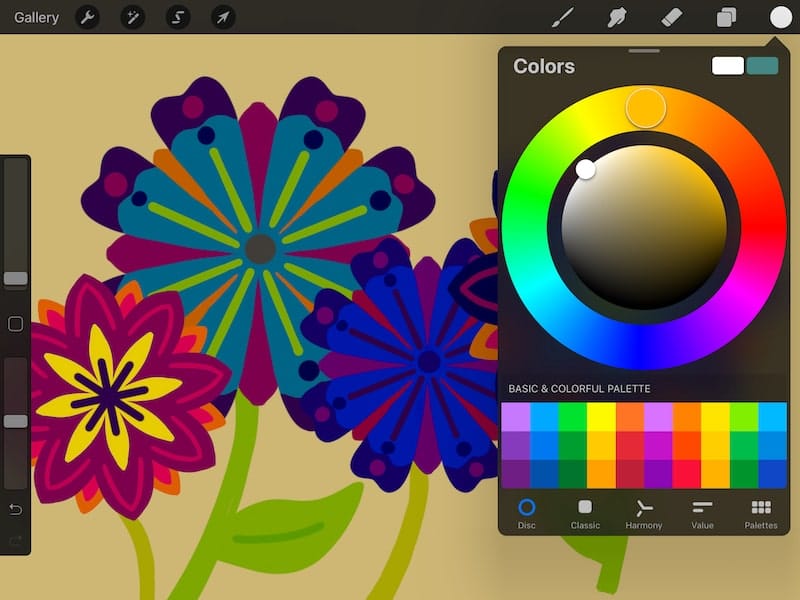
3. Choose white within the color wheel
Open the color wheel and choose white. If you have white saved in your palette, you can choose it there as well. Wherever your white color lives, you can choose it there. As long as you choose white.
Fun trick: if you ever need true white or true black, double tap in that area in the color wheel and it will snap to it. For example, if you want true white, double tap the color wheel near the white area. It will snap to true white.
It can be annoying to try to pick true white or true black manually, but end up with a color that is slightly navy or slight cream. This trick fixes that!

4. Open your layers panel and open the layer settings for your new layer
Now that we’ve chosen our white color, it’s time to head back to the layers panel. Open your layers panel and tap on the new layer you created in step one.
This will open the settings for this layer.
5. Click on the “Fill Layer” button.
Look at the list of options within the layer settings and click on the “Fill Layer” button.
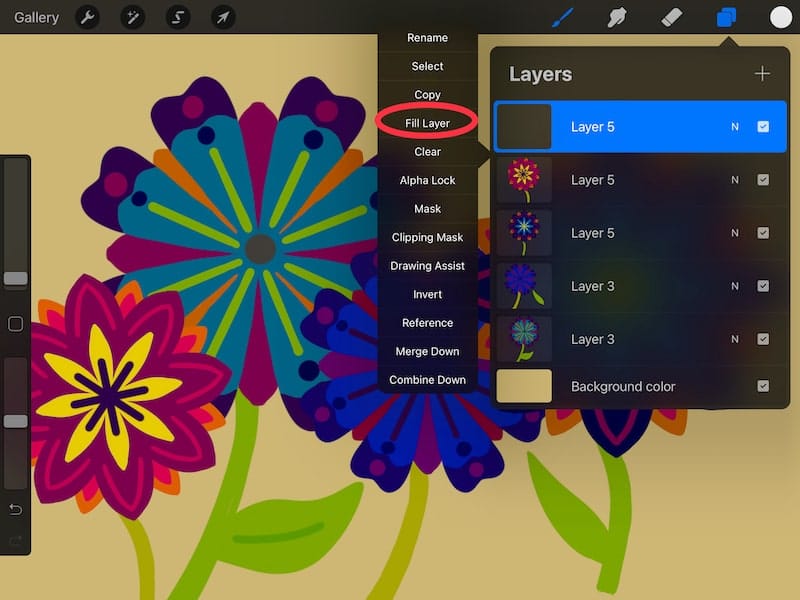

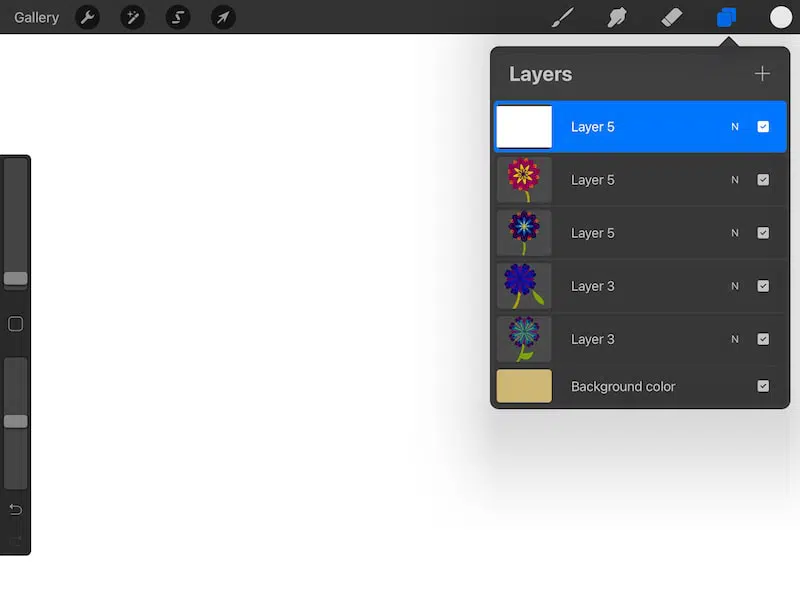
You’ll see your screen flood with white.
Given that this new, white layer is on the top of everything else, all of your design elements will be hidden because this new layer is filled with color. Don’t worry, everything is still there; it’s just hidden behind your new layer.

5. Open your layers panel again and open the blend mode settings within your new layer
Once again, click on your layers panel to open it. Click on the “N” icon listed on the right hand side of your first layer. This is the layer that we filled with white.
The “N” stands for “Normal” within the blend modes. By default, all new layers are set to the Normal blend mode.
To invert our colors, we’ll need to change that.

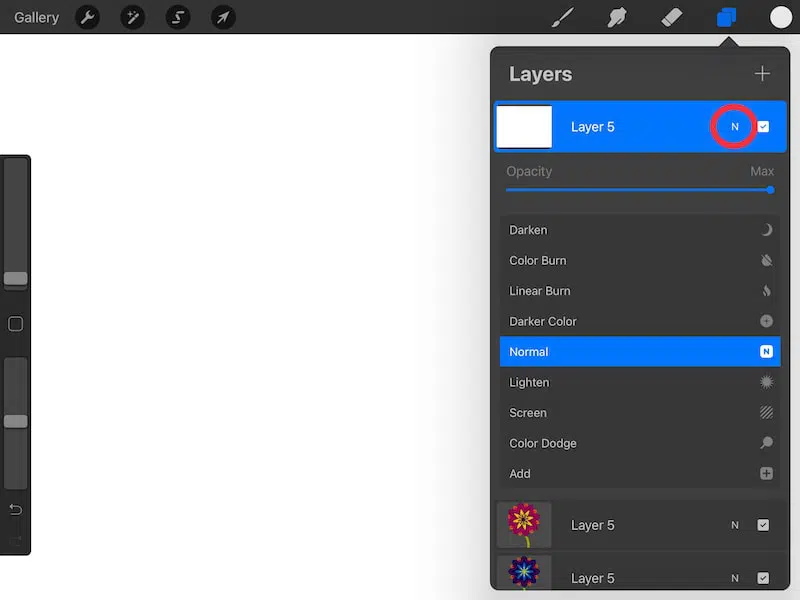
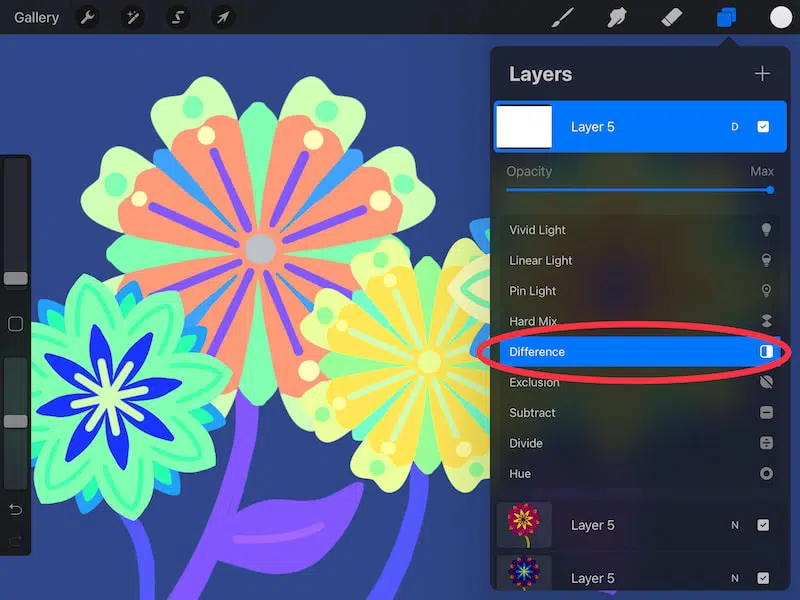
6. Scroll through the blend modes and choose the “Difference” mode
There are a LOT of blend modes. It’s actually a lot of fun to hover on each of them and see how it changes your art. The colors you’ll get are really neat!
Once you’ve had fun experimenting, find the “Difference” mode and stick with that.
When applied to a white layer, this “Difference” blend mode will invert all of the colors underneath it.

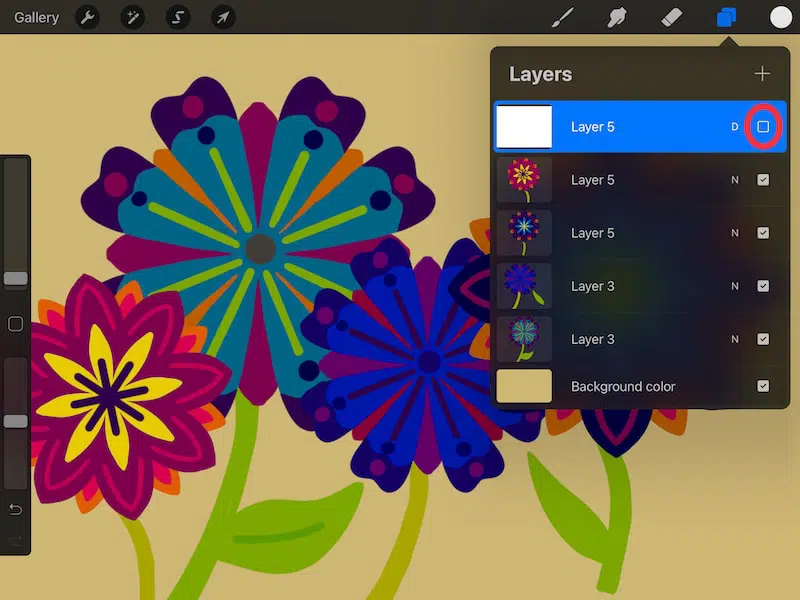
7. Uncheck the layer to undo your color inversion
If you want to undo your color inversion, simply uncheck the white layer you created. This will make it invisible and, thereby, reverse the color inversion you’ve done.
It can be fun to compare the inverted vs. non-inverted versions by quickly turning the layer on and off using its checkmark.

If you decide that you permanently want to remove the color inversion, you can completely delete the white layer, which will remove all of the color inversion effects you’ve created…which brings up the best part about this method.
Nothing about this color inversion method is permanent!
Given that all of our adjustments were made to a new, separate layer, we didn’t change anything about your original piece of artwork. Hooray!
There isn’t even a need to go through a long stretch of undoing everything.
Just uncheck or delete your layer and you’ll be back where you started!
Even if you don’t plan to invert your colors permanently, given how easy it is to perform and reverse, it can be fun to invert your colors just to see what happens.
There have been times when I’ve inverted my colors and ended up having “aha” moments about my original colors that I wouldn’t have had without this different perspective. So, have fun inverting your colors on Procreate and see what discoveries you make!


Diana has been an artist for over 27 years and has training in drawing, painting, digital drawing and graphic design. Diana’s latest obsession is digitally drawing with Procreate and Procreate Dreams. Diana has experience selling her art across a number of platforms and loves helping other artists learn how to make money from their art as well.