Crochet hooks have a unique design. This unique design isn’t simply aesthetic or random, it actually plays a very important role in how the crochet hook works and functions.
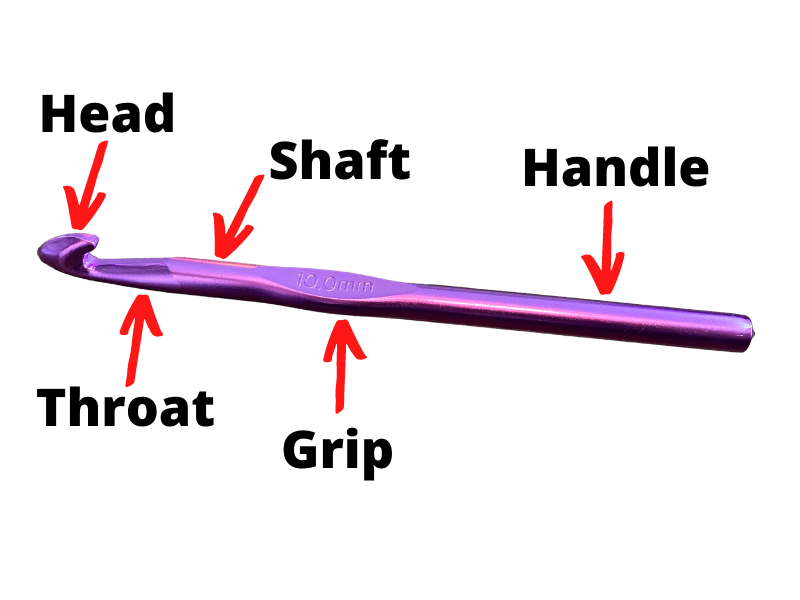
There are 5 main parts of a crochet hook, including the head, throat, shaft, grip, and handle. Within the head, there is a mouth and lip that makes up the signature “hook” of a crochet hook. Every part of a crochet hook works together as a whole to help crocheters make beautiful stitches.
Knowing all of the parts of a crochet hook is not only fun, but it’s also helpful for understanding why and how your crochet projects come together.
You’ll also come away with more appreciation for your little, mighty crochet hook! Let’s walk through every part of the crochet hook, from top to bottom.

1. The Head of a Crochet Hook

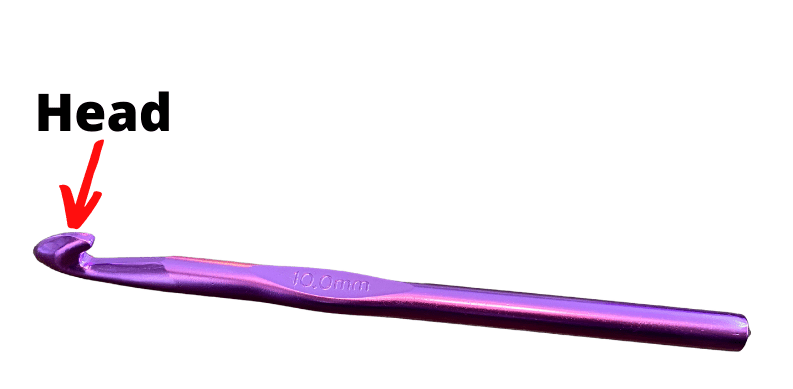
The head of a crochet hook has a pointy end so that it can easily poke through tight stitches as you’re building your crochet project. The head contains the mouth and the lip, which forms the signature “hook” that’s used for pulling and moving yarn as stitches are made.
The head of a crochet hook is properly named – not just because it’s at the top of the hook, but also the most complex part of the hook. It’s where the crochet magic happens.
To begin with, the crochet hook head is pointy. This is important, especially when you’re working with small and tight stitches that are challenging to navigate through.
Having the point at the end of the crochet hook makes it easier to burrow underneath each stitch as you’re working across your row.
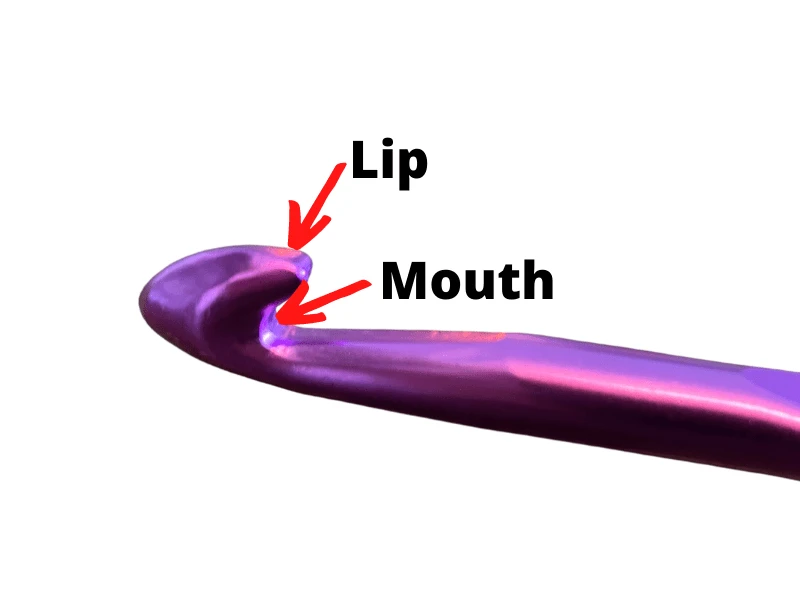
After the point of the crochet hook head, you’ll find the hook. The crochet hook is composed of two parts – the mouth and the lip. The mouth is the empty space of the hook, while the lip is the curved part that makes up the lip itself.

No part of a crochet hook is more important than any other part because they all work together to be a functional crochet tool.
That said, the head is what’s usually the star of the show given that the head, with its mouth and lip, is what creates the signature hook of the crochet hook.
2. The Throat of a Crochet Hook

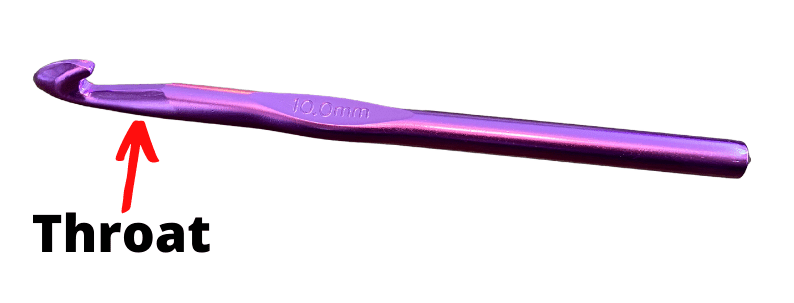
The throat of a crochet hook connects the head and the shaft. Specifically, the throat begins at the bottom of the mouth, which makes up the underside of the hook. The throat then slopes upwards until it reaches the shaft.
While often overlooked, the throat of the crochet hook is SO important!
Firstly, it makes room for the hook itself. Take a look at your crochet hook and notice how the throat swoops underneath the hook to connect to the mouth.
This slope of the throat plays a very important role in making sure that there’s enough room for the yarn within the mouth of the crochet hook. Without the throat being constructed in that way, the mouth and hook overall wouldn’t be able to grasp the yarn in a functional way.

3. The Shaft of a Crochet Hook

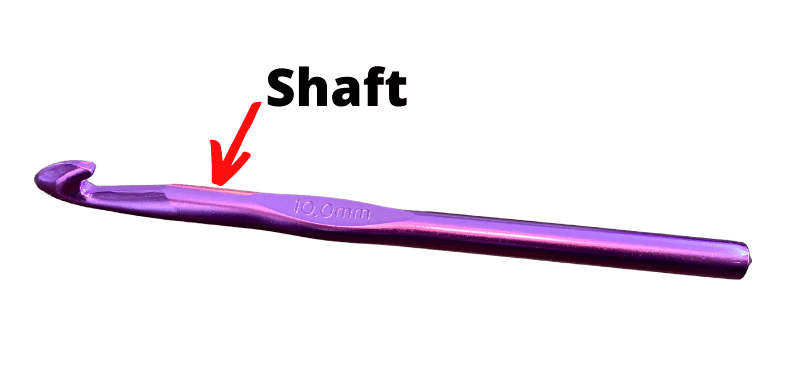
The shaft of a crochet hook connects the throat and the grip. The shaft is the same thickness of the handle, but is much shorter in length than the handle.
When looking at a crochet hook, the shaft would be indistinguishable from the handle if not for the grip in between the two of them.
The shaft is the same thickness and shape as the handle, but is much shorter in length than the handle so that the grip sits in the right place.
4. The Grip of a Crochet Hook
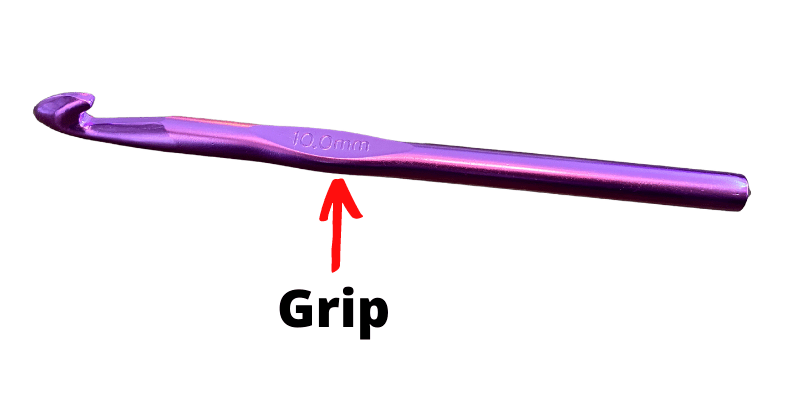

The grip of a crochet hook connects the shaft to the handle. The grip is also known as the thumb rest and is generally the place where crocheters hold the crochet hook. The location of the grip is ideal for moving, pivoting, and navigating the crochet hook while making stitches.
The great thing about crochet hooks is that they tell us where to hold them. There’s no guessing!
Depending on your crochet hook, you might find the size of your crochet hook written on the grip.
Find the flat indentation within your crochet hook – that’s your grip, or thumb rest. As you hold your crochet hook, your thumb sits on the top of this indentation, with the rest of your fingers wrapping around the back.
Notice how the grip sits above the middle of your crochet hook. This puts your fingers in the perfect spot for manipulating your hook as you create stitches.
For a fun experiment, try holding your crochet hook in different spots. Try holding it up higher, closer to the hook. Also try holding it lower down on the handle. Despite the newness of this positioning feeling uncomfortable, you’ll also notice that holding your crochet hook anywhere but the crochet’s grip isn’t ideal.

5. The Handle of a Crochet Hook

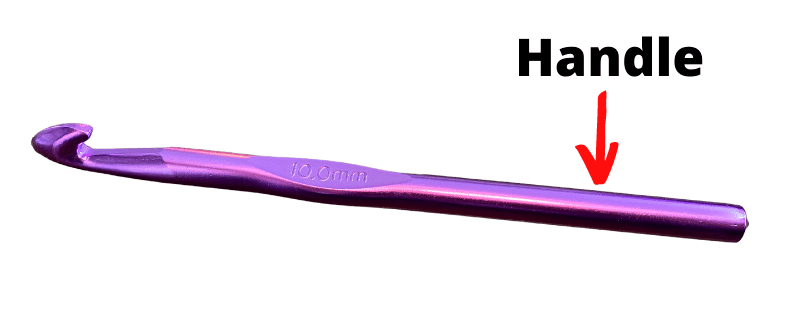
The handle of a crochet hook attaches to the grip and extends to the remaining length of the crochet hook. The handle will be the same thickness of the shaft that comes before the grip, but will be longer than the shaft in length.
Hold your crochet hook in your hand again, with your thumb resting comfortably on the grip. Notice how one or two of your fingers wrap around the back of your grip, while the other two wrap around the back of your handle.
The handle of your crochet hook ensures that the rest of your hand has a place to support your crochet hook, while also not getting in the way. You may notice the color fading away from the handle overtime, given how much it’s used.
These two fingers wrapped around your handle also offer important stabilization for your crochet hook and your hand. Try completing a crochet stitch without your ring and pinky finger wrapped around the handle of your hook. Before long, your crochet hook becomes unwieldy and hard to manage.
Crochet hooks are brilliant in their simplicity. With just 5 parts, they’re able to come together into a functional crochet tool that can create so many beautiful projects.


Diana has been an artist for over 27 years and has training in drawing, painting, digital drawing and graphic design. Diana’s latest obsession is digitally drawing with Procreate and Procreate Dreams. Diana has experience selling her art across a number of platforms and loves helping other artists learn how to make money from their art as well.