There are a lot of neat features in Procreate’s Adjustments panel. Arguably, one of the neatest is the liquify feature. Quickly and easily add effects to your Procreate art with just a few simple clicks.
To Liquify in Procreate, open the Adjustments tab and click on the Liquify button. Choose between Push, Twirl Right, Twirl Left, Pinch, Expand, Crystals, or Edge. Use your finger or stylus to apply your chosen Liquify feature to your piece of art.
There are SO many options to choose from in the Liquify panel – each one of them deserves its own credit and attention. So, we’re going to do just that! We’re going to look at all of the unique and great qualities of every Liquify feature so that you can take full advantage of them and take your Procreate art to the next level.
Before we dive in, let’s quickly talk about how this information applies Procreate Pocket. That way, if you’re a Procreate Pocket user, you can know how the Liquify settings will uniquely work for you before we get too far in the weeds.
How to Liquify in Procreate Pocket
The Liquify features in Procreate Pocket work in the same exact way as in the iPad Procreate app. While the displays look different due to the size differences between the iPhone and the iPad, Procreate Pocket gives you the same Liquify abilities you would expect with the general Procreate app.
Whether you are a general Procreate user, or a Procreate Pocket user, this information on all of the Liquify features will apply to you. So, grab your iPad or your iPhone and let’s start liquifying!
If you love tutorials like this, make sure to check out my post about classes you can take to level up your Procreate skills.
Let’s also clear up another common question that’s going to be important moving forward.
Can You Liquify Multiple Layers at Once?
With Procreate, you can liquify multiple layers at once. This is useful for applying a consistent effect across your entire design, no matter how many layers you have. It’s useful to put all of the layers you want to liquify into a single group so that it’s easier to keep track of them.
With many of Procreate’s effects, you can only apply them to one layer at a time. This is why the ability to liquify multiple layers at once in Procreate is a huge perk. Take advantage of it!
How to Use the General Liquify Settings
Within each Liquify feature, there are 4 different settings you can adjust to customize how your Liquify feature will look: Size, Pressure, Distortion, and Momentum. These 4 settings each have sliders to determine if you want them to have a minimal or a maximal impact on your Liquify feature.
Let’s run through each of these individually. You will see these 4 settings within every single Liquify feature, so it’s REALLY important to understand how they work.
Important note: when you use the Liquify features, you are basically using a brush. So, just think of each Liquify feature as a different type of brush that you will then use with your art. When you adjust any of the 4 settings below, you are adjusting how your Liquify brush appears.
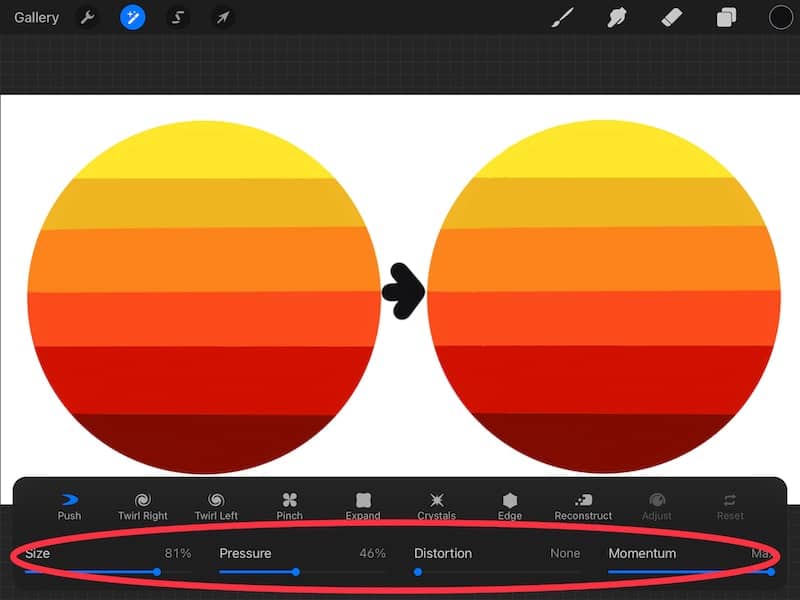
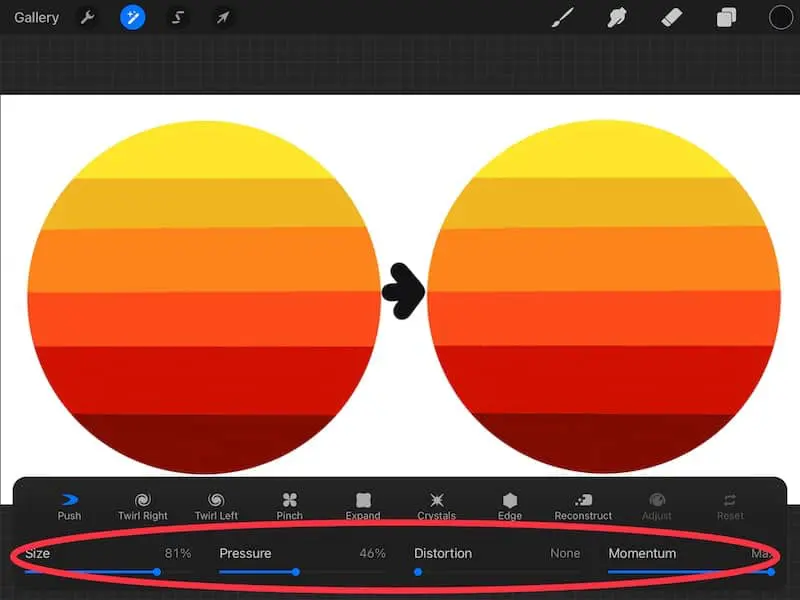
Size: this impacts how large your Liquify brush is. As you adjust the size slider, think of it as the same thing as adjusting the size feature of any other brush. When using the Liquify tools, you don’t have access to the size slider on the side of your canvas that you normally do. Instead, you have this special size slider right within your Liquify settings.
For most features, DO NOT set your size slider to be as small as possible or as large as possible. At the smallest size setting, you will often see no impact at all. At the largest size setting, you will often see that the impacts are too extreme.
Pressure: this impacts how strong your Liquify brush is. If you adjust the slider to minimal pressure, you will end up with a subtle effect. If you adjust the slider to maximal pressure, you will end up with a more dramatic effect.
Distortion: this impacts the smoothness of your Liquify brush. If you adjust the slider to minimal distortion, you will end up with smoother lines. If you adjust the slider to maximal distortion, you will end up with more jagged and chaotic lines. “Distorted” actually explains it really well.
Momentum: this impacts how much your design moves after you pick up your stylus. To see momentum in action, swipe your finger across your design at minimum and maximal momentum. If you adjust the slider to minimal momentum, when you swipe your finger across your design, everything will stop moving as soon as your finger lifts off of your screen. If you adjust the slider to maximal momentum, you’ll see that your design keeps moving a little bit even after you’ve lifted your finger from your screen.
Now that we’ve talked about the 4 settings you’ll need to be familiar with for each of the Liquify features, let’s dive into each feature individually. Get excited because these are really neat.
How to Use Procreate’s Liquify Push Feature
Procreate’s Liquify Push feature will literally push parts of your design around so that it will look flowy, wavy, or distorted. The Push feature can be used to change the shape of your entire design, or to mix the colors within your design.
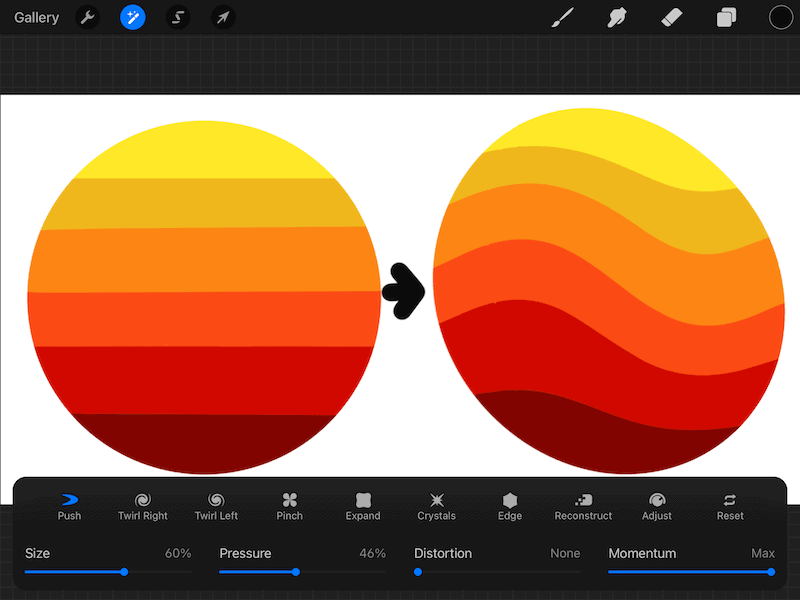
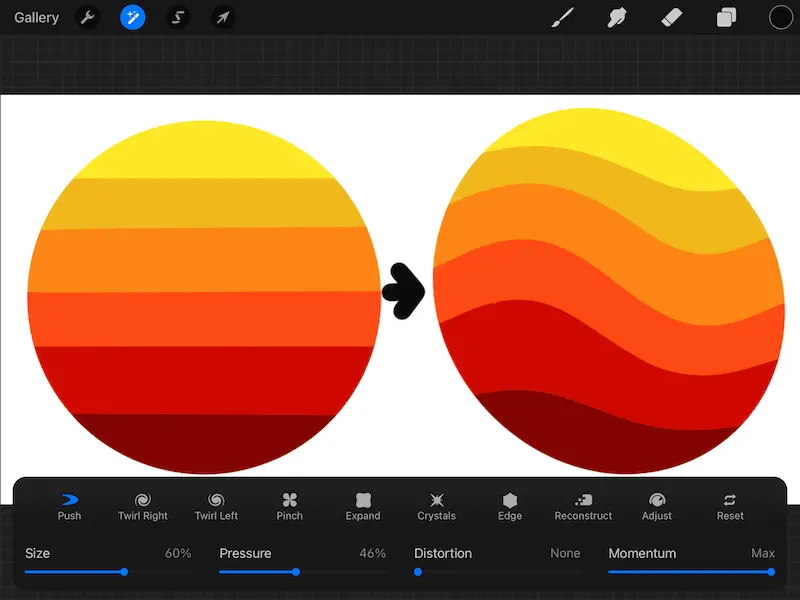
I LOVE to use the Liquify Push feature to create quick and easy waves in my colors. I also use it to create marbled art and neat paint swirls. I personally use the push feature the most, as I find it the easiest to control and manipulate.
Be careful about how often you pick up your stylus as you work. Whenever you put down your stylus and start pushing things around, everything within that one “push” will be connected. As soon as you pick up your stylus and put it back down again, it will start a new push that no longer influences the push before it.
How to Use Procreate’s Twirl Right and Twirl Left Liquify Features
Procreate’s Twirl Right and Twirl Left features will twist all of your colors into a spiral to the right or to the left, depending on which option you choose. You can hold your stylus down to create one continuous swirl, or lift up your stylus and put it back down to create multiple spirals.
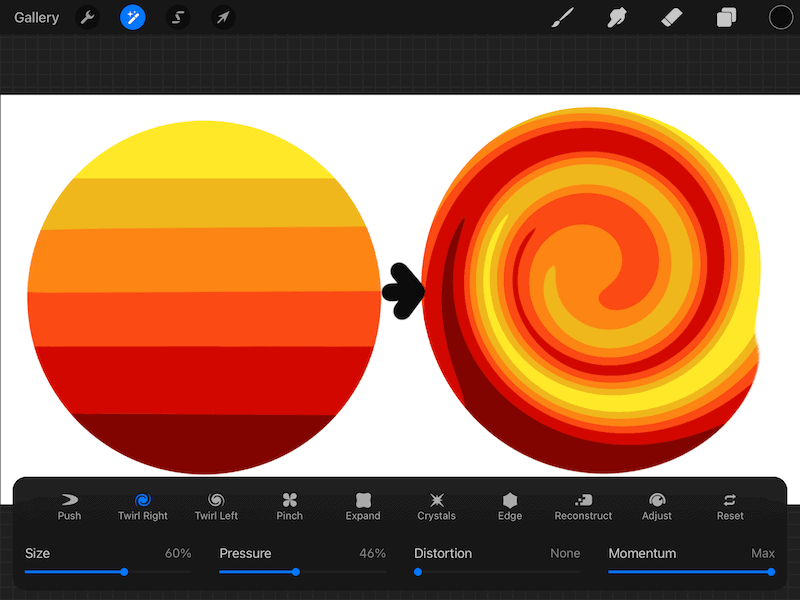
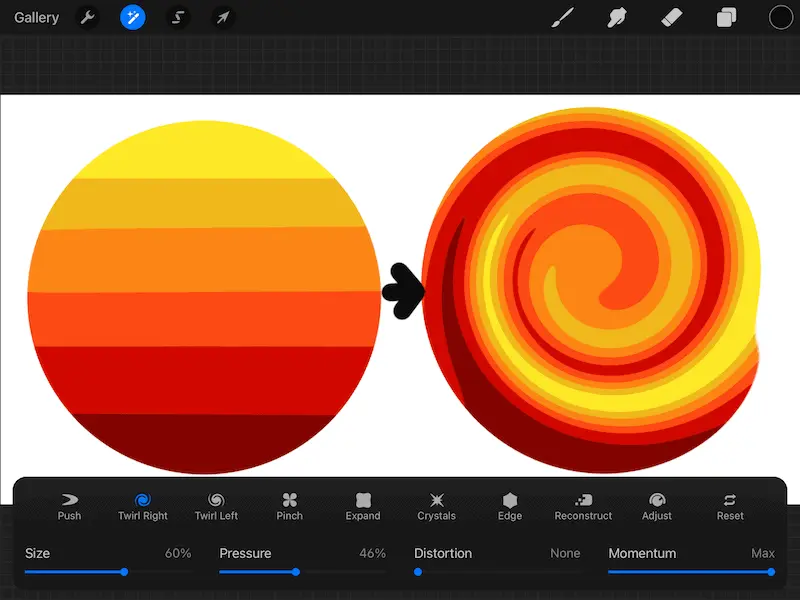
Spiraling your colors can give you an intricate tie dye effect in just a matter of seconds. It’s weirdly relaxing and satisfying, so I suggest giving it a try!
Lifting your stylus up quickly, before a spiral has formed, is a great way to create marbling effects in your artwork.
How to Use Procreate’s Pinch Liquify Feature
Procreate’s Pinch Liquify feature will squish your colors and design together. You can hold your stylus down to continually pinch one section of your design, or lift your stylus and put it back down to create multiple areas of pinching and squishing.
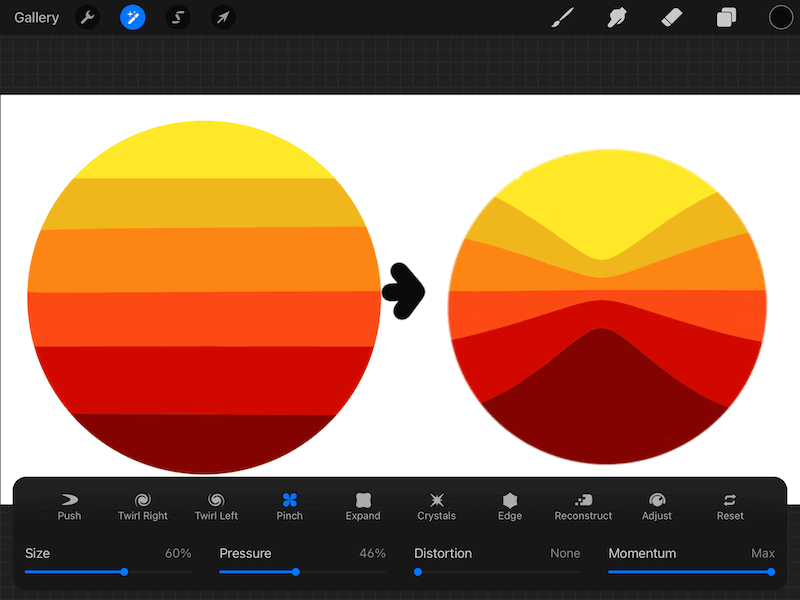
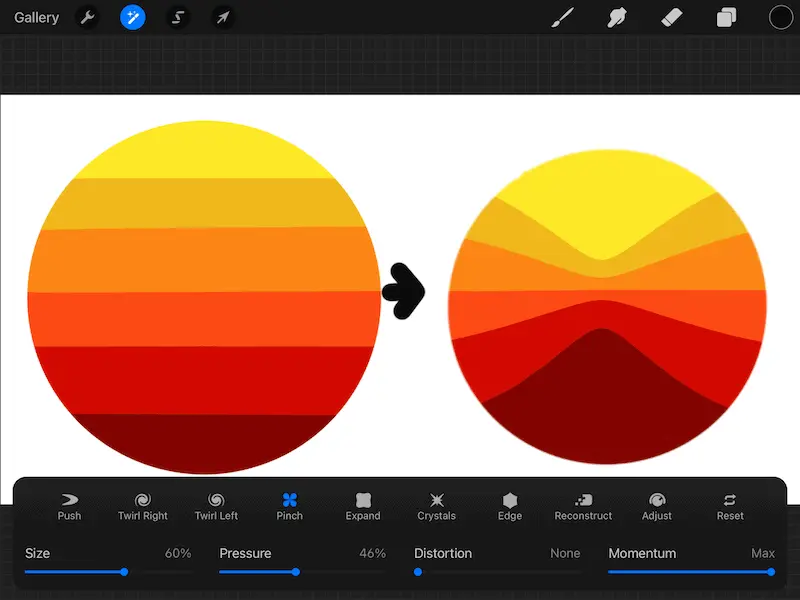
I love to use the Pinch feature to create bow ties, hearts, mountains, and more. Especially if your design has a lot of colors in it, the Pinch feature is more efficient than drawing everything by hand.
How to Use Procreate’s Expand Liquify Feature
Procreate’s Expand Liquify feature will balloon your colors and design. You can hold your stylus down to continually expand one section of your design, or lift your stylus and put it back down to create multiple areas of expansion.
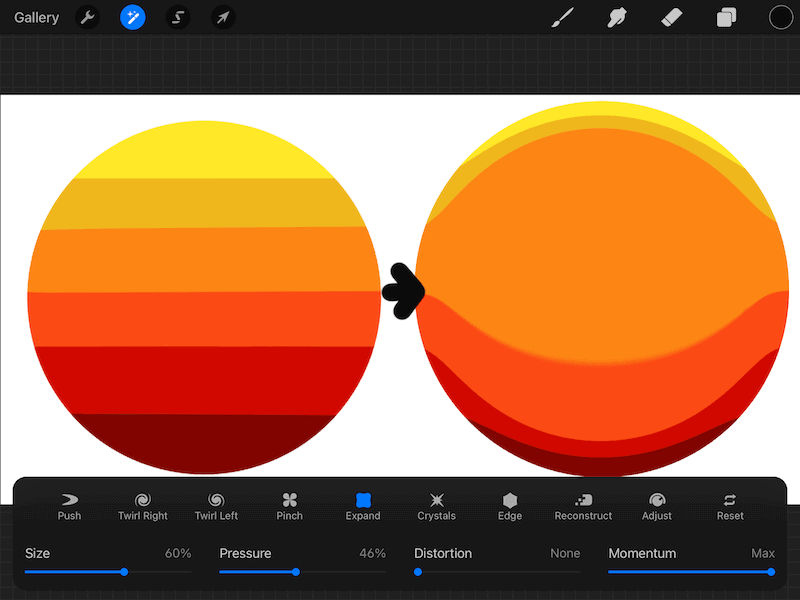
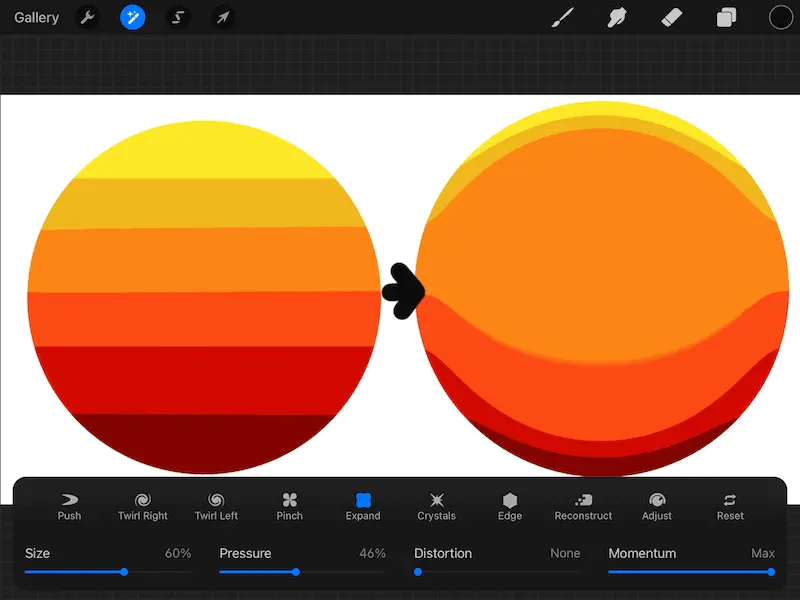
The Expand Liquify feature is the opposite of the Pinch Liquify feature. You can get a neat effect by expanding one spot and then pinching another spot right next to it.
Both the Pinch and Expand Liquify features can add some great dimension and perspective to your art.
How to Use Procreate’s Crystals Liquify Feature
Procreate’s Crystals Liquify feature will create jagged edges in your paint that look like crystals. This is a great way to add texture to your designs and to eliminate any straight lines that need more pizzazz.
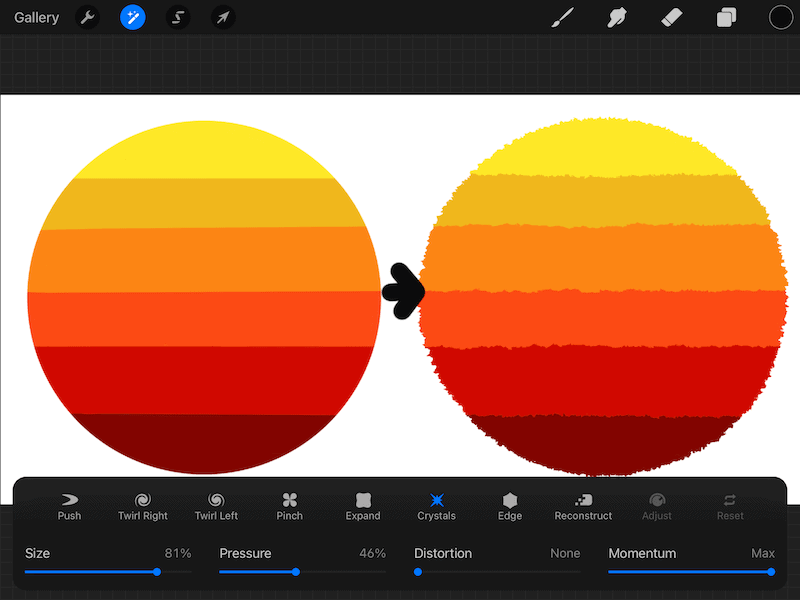
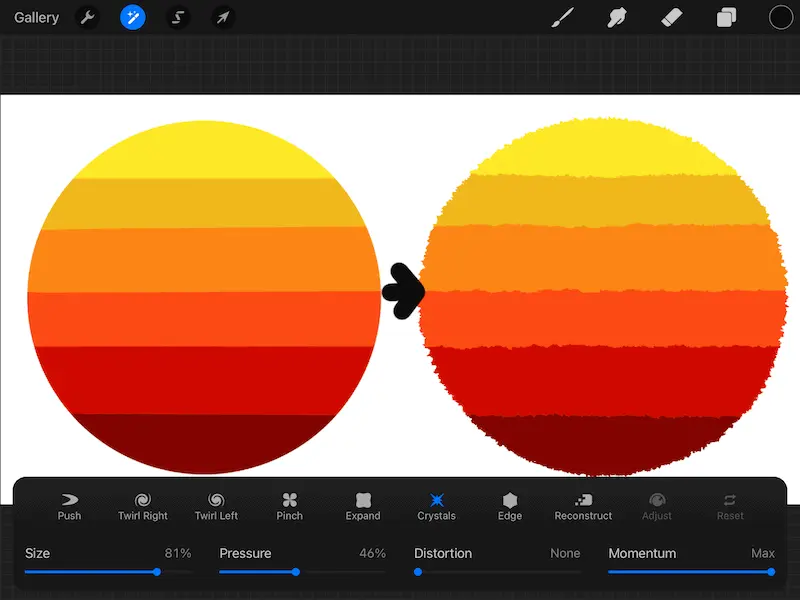
The Crystals feature is so specific and specialized that I don’t tend to use it a lot. It definitely makes its own mark that’s hard to customize as much as the others.
That said, it’s a fun feature that you might end up using a lot, depending on your style of art.
How to Use Procreate’s Edge Liquify Feature
Procreate’s Edge Liquify feature will pull your design towards your stylus. Overtime, this will make your design smaller until it’s practically invisible. This is a unique way to reshape your design, while also giving it a unique look.
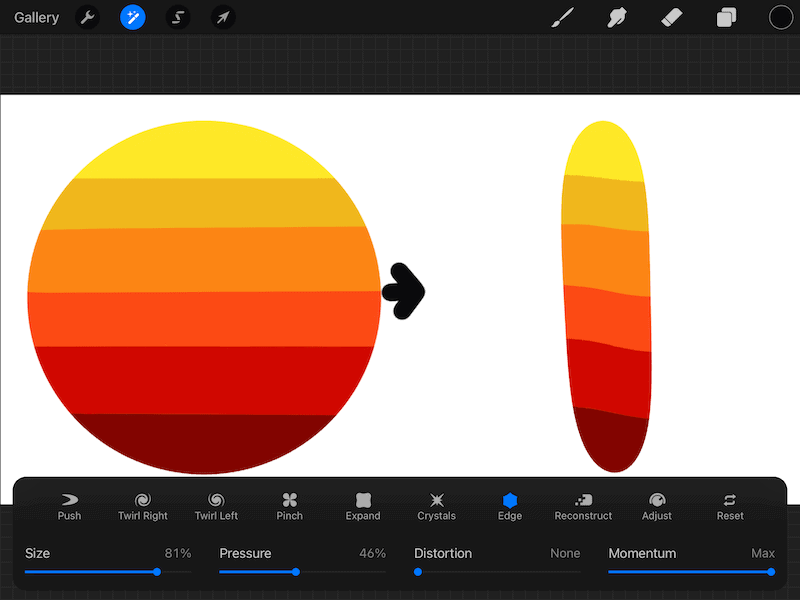

As you can see from the example below, the Edge feature is especially fun with circles, especially ones with a lot of colors in them. If you apply the Edge feature in a straight line over and over again, you’ll eventually end up with a line. If you apply it in a circle over and over again, you’ll eventually end up with a small circle.
The Edge feature is one that has a TON of uses depending on the art you’re creating, so make sure to experiment with it.
How to Use Procreate’s Reconstruct Liquify Feature
If you apply one of Procreate’s Liquify features and regret it later, you can use the Reconstruct tool to bring your design back to its non-liquified self. Similar to Procreate’s undo feature, it does not work if you’ve closed Procreate or returned to the gallery.
The benefit of the Reconstruct tool is that you can restore parts of design, without fully undoing everything. For example, if you went overboard with applying crystals to your design, you can use the Reconstruct tool to take some away.
If you simply were to undo it, you would have to start all over again with applying your crystals.
Important note: similar to Procreate’s undo feature, it does not work if you close Procreate, or leave your design and return to the Gallery. At that point, it will forget your design history and whatever liquifying you’ve done will be permanent.
How to Use Procreate’s Adjust Liquify Feature
If you apply one of Procreate’s Liquify features and it’s more or less than you wanted, you can use the adjust tool to influence how your Liquify effect looks after the fact.
The thing that’s so great about the Adjust tool is that it allows you to apply your Liquify feature and then adjust it to your liking. Usually, we manipulate the Liquify settings and then apply the feature to our artwork, hoping that will look good.
The Adjust tool lets you see the real-time impacts of adjusting your settings.
How to Use Procreate’s Reset Liquify Feature
If you want to start over from scratch, Procreate’s Reset feature will undo all of the Liquify features you’ve applied to your design. If you’ve applied multiple Liquify features, this is more efficient than using Procreate’s undo feature, as it will reset everything without multiple taps.
When using Procreate’s undo feature, you need to tap your screen to undo every single individual stroke you’ve applied to your design.
If you use the Reset feature, it will undo all of your liquifying without needing to make multiple, individual taps. Efficiency for the win!
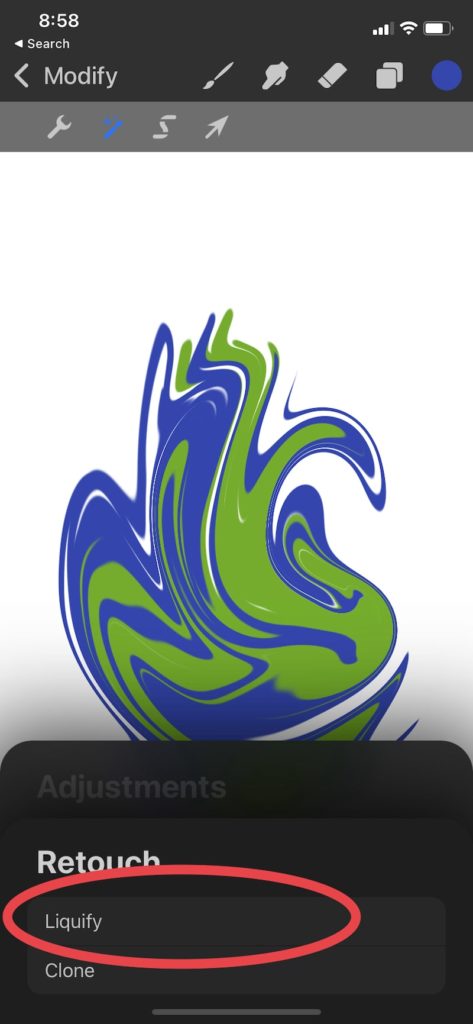
Does Procreate Pocket Have the Liquify Feature?
Procreate Pocket does have a Liquify feature. To access it, click on the Modify button and then the magic wand icon to open the Adjustments menu. Within the Adjustments menu, open the Retouch tab to find the Liquify feature.
The Liquify feature can be tricky to find within Procreate Pocket, but once you’ve found it, it works in the same way that it does on the iPad’s Procreate app.

The Liquify features in Procreate are a fun and easy way to add complex elements to your artwork in no time. Have fun experimenting with them and seeing what you can create in Procreate!


Diana has been an artist for over 27 years and has training in drawing, painting, digital drawing and graphic design. Diana’s latest obsession is digitally drawing with Procreate and Procreate Dreams. Diana has experience selling her art across a number of platforms and loves helping other artists learn how to make money from their art as well.