When drawing with Procreates, there’s nothing worse than drawing on a layer you never intended to or, holy smokes, accidentally erase parts of a layer that you need. Learning to lock layers in Procreate can protect your art and give you confidence that it’s safe as you work.
To lock layers in Procreate, open your Layers panel and swipe left on the layer you want to lock. Click the Lock button. This will lock your layer, which means that you can’t draw on, erase, or change your layer in any way until you unlock it again.
Here’s a step-by-step guide on how to lock your layers on Procreate.
1. Open the Layers panel.
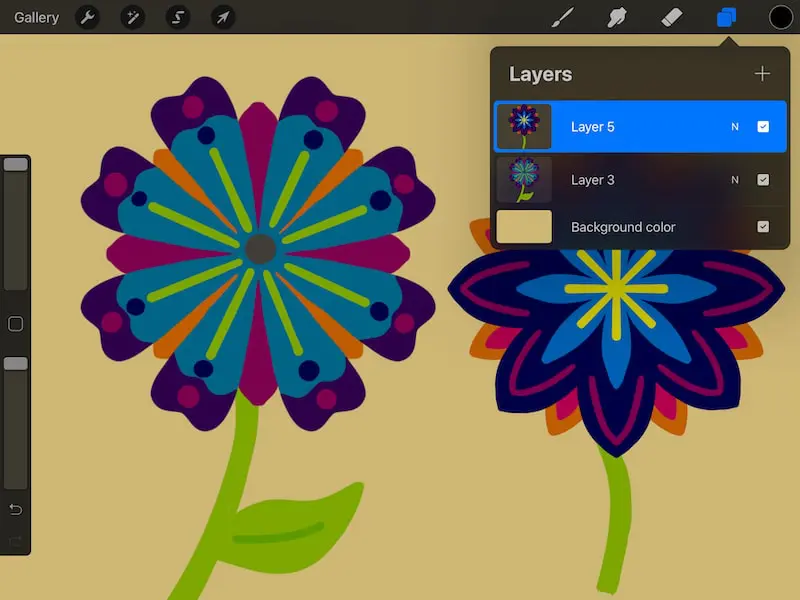
2. Swipe left on the layer you want to lock.
3. Click the lock button.
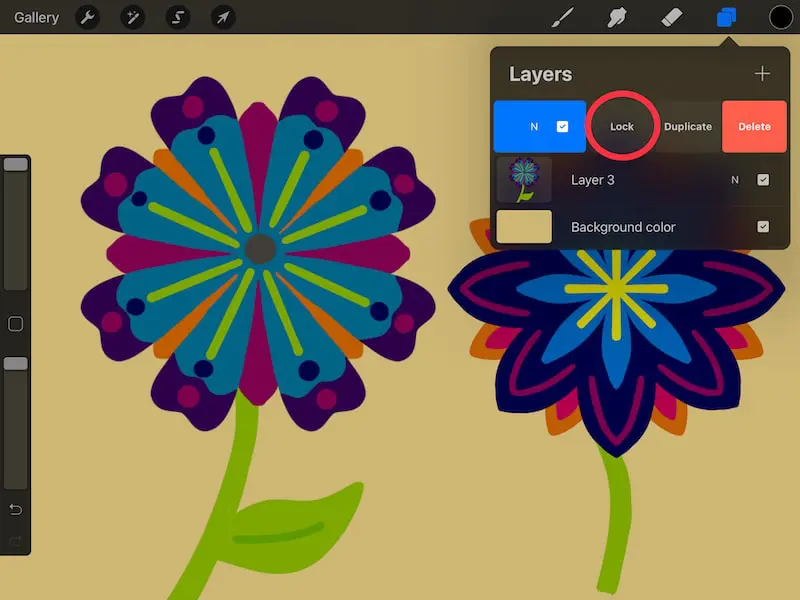
4. You’ll now see a lock symbol on your layer to indicate that it’s locked.
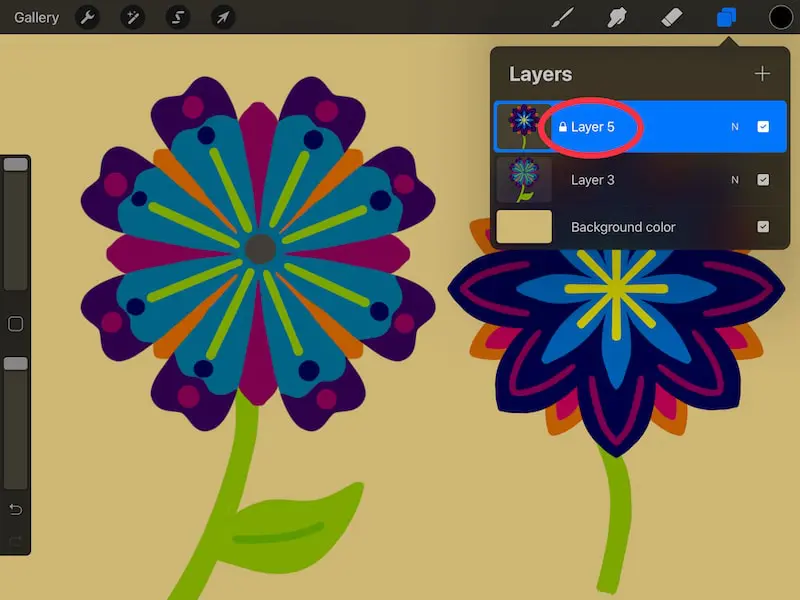
5. Deselect the layer by clicking on a different layer.
6. Continue with your art with confidence that you won’t mess up your locked layer.
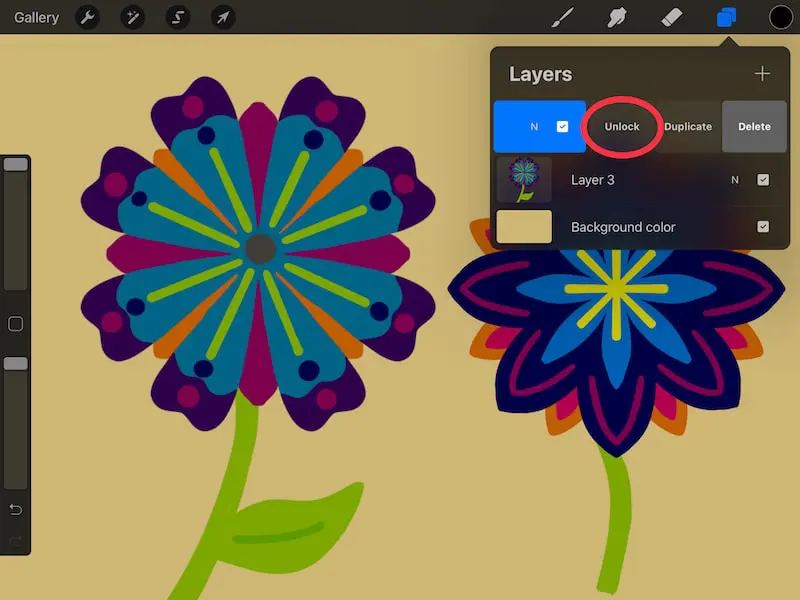
7. To unlock your layer again, swipe left on it and click the Unlock button.
Locking your layers in Procreate is an underused, hidden gem of a feature. Here’s why.
Let’s say that you have a layer that you’ve been working really hard on. Eventually, you get it to a point that you’re happy with. Aside from some minor tweaks at the end, you’re ready for this layer to be locked in and considered finished.
But, your layers are vulnerable. As you continue to work on the rest of your design, there’s a chance that you could accidentally select your finished layer and draw on it again, lower its opacity, or erase something.
I can’t even count the number of times that I’ve accidentally drawn on a layer that I never intended to. It’s SO frustrating!
Of course, until I started taking advantage of locking layers.
Now, once I’m done working on a layer, I lock it. That way, I know I’ve protected it from my own careless ways. Ok, so locking layers may be great and all, but what actually happens when you lock a layer and then try to draw on it?
What Happens When You Draw on a Locked Layer?
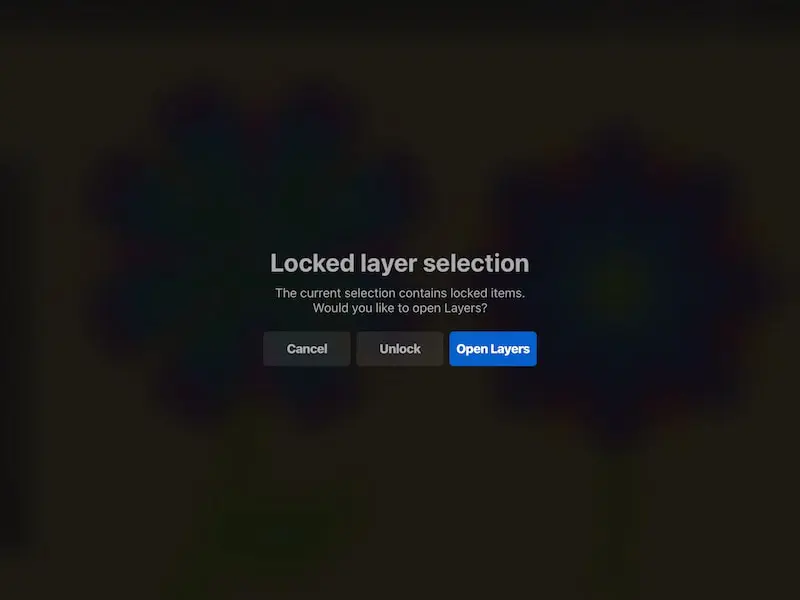
When you draw on a locked layer in Procreate, you will get a notice across your screen telling you that your layer is locked and that you’ll need to unlock it to make any adjustments to it. Either navigate to a new layer, or unlock it within the screen notification or the layers panel.
Once you start locking your layers, you’ll accidentally draw on them ALL of the time! This is actually a great thing because it means you’ve been saved from drawing on a layer you never intended to.
It also means that you’ll get VERY used to Procreate’s locked layer notification.
Whenever you try to draw or erase on a locked layer, a full screen notification will appear on your screen telling you that your layer is locked. This notification will also give you a few options.
From that notification screen, you can unlock your layer, open your layers panel, or cancel everything and return to your canvas.
If you don’t want to unlock your layer via the screen notification, you can also unlock it by opening your layers panel, swiping left on the layer, and hitting the unlock button. It’s the same steps you took to lock your screen in the first place.
Locking Layers in Procreate Isn’t the Same as Procreate’s Alpha Lock
Locking one of your Procreate layers is not the same thing as turning on Alpha Lock. Locking a layer will prevent you from making any changes whatsoever to your layer. Alpha Lock will still allow you to draw or erase on a layer, but only on already created elements.
When you lock a layer, you won’t be able to make any changes to it at all. Any attempt to draw on it or erase it will trigger the full screen notification telling you that your layer is locked.
Alpha Lock works differently. When you turn on Alpha Lock, you will only be able to draw on or erase any elements that are already there.
This makes Alpha Lock an amazing choice when you’re trying to color inside the lines or focus on specific elements without having to worry about making a mess of things.
Make sure to keep these different features in mind as you’re working.
Lastly, we need to talk about “locking your canvas.” You may have found this post because your canvas keeps zooming in and out and rotating wilding and you’re wondering how to “lock” it in place. I put this in quotes because it has less to do with locking than it does with disabling a key feature.
Let’s talk about how to do this.
How to Stop Your Procreate Canvas From Moving Around
If you’re tired of your canvas moving around too much, open your gesture control settings and turn off the rotate with pinch zoom setting. This will make it harder to accidentally rotate your canvas as you work.
The first step to stopping your Procreate canvas from moving around so much is to turn off the rotation features. Here’s how to do that step-by-step.
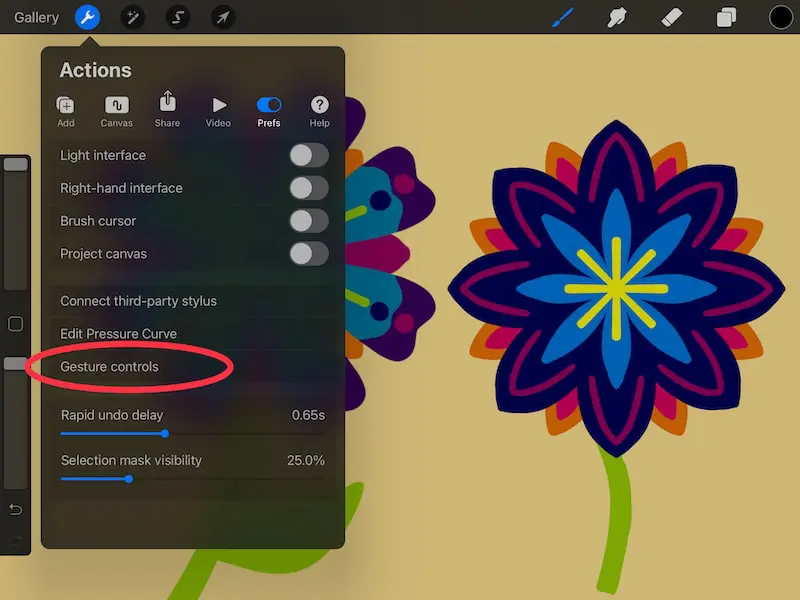
1. Click on the wrench to open the actions tab.
2. Click on the Preferences tab.
3. Click on Gesture controls.
4. Click on the General tab down at the bottom.
5. Toggle off the Rotate with pinch zoom option.
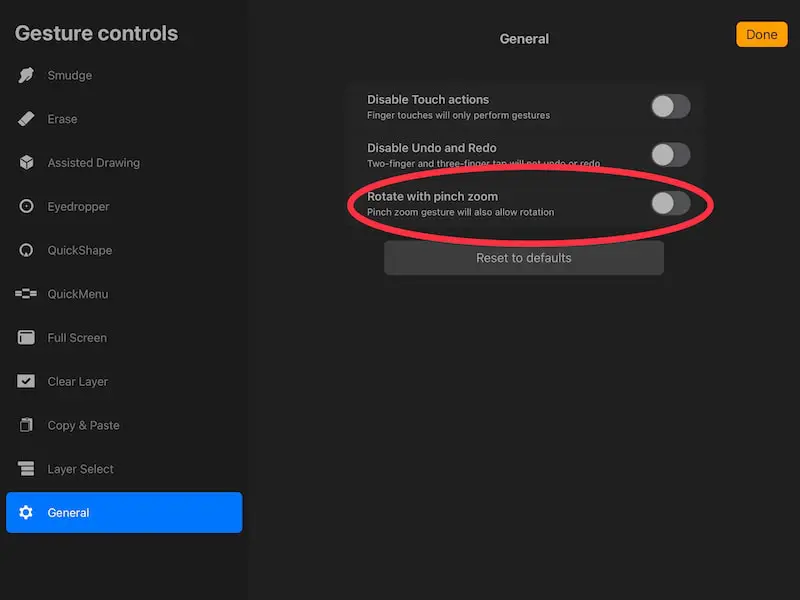
This will prevent you from being able to rotate your canvas when you use pinch it.
But, what about locking the rest of your canvas? Mainly, this would refer to disabling the zoom feature.
Unfortunately, at the time of this writing, Procreate has yet to introduce a way to disable the pinch to zoom feature. It’s something that Procreate users have been asking for a LONG time now, so hopefully it is something that will be included in future updates.
Locking layers in Procreate is a great way to protect your art as you work. Add this to your regular Procreate routine and you’ll find a lot of benefits to the ease and efficiency with which you work.
Diana has been an artist for over 27 years and has training in drawing, painting, digital drawing and graphic design. Diana’s latest obsession is digitally drawing with Procreate and Procreate Dreams. Diana has experience selling her art across a number of platforms and loves helping other artists learn how to make money from their art as well.

