In order to get the most out of everything that Procreate can do, you need to understand a key feature: layer opacity. Being able to change your layer opacity will open up a lot of possibilities for your art.
To change the layer opacity in Procreate, open your Layers panel and use two fingers to tap on your layer. This will open an opacity slider for that layer. Slide it to the left to reduce your layer’s opacity and slide it to the right to raise your layer’s opacity. You can also find the opacity slider in the layer’s settings.
Let’s run through the basics of using layer opacity in Procreate so that you can start mastering this great design program.
If you are used to older versions of Procreate, things have changed with Procreate 5. In older versions of Procreate, the opacity slider was tucked into the Adjustments menu with Liquify, Bloom, Blur, etc.

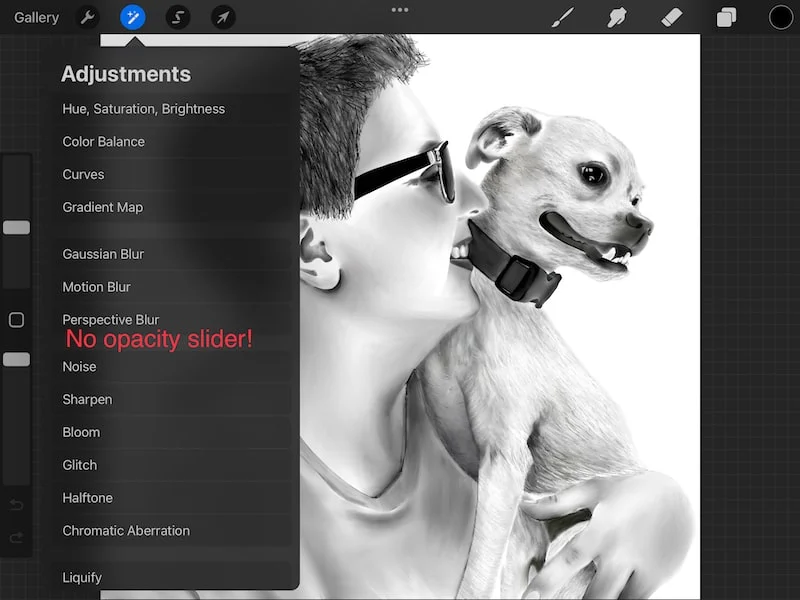
With the new update, the opacity slider is no longer in the Adjustments menu but, don’t worry, it’s still easy to access. There are two ways to see the current opacity levels of your layers in Procreate:
How to Change Layer Opacity with Two Fingers
The quickest way to change a layer’s opacity in Procreate is to use two fingers to tap your desired layer within your Layers panel. This will trigger an opacity slider to appear on your screen. Slide your finger to the left to lower the opacity and to the right to raise it.
We’ll be talking about two methods for changing your layer opacity in Procreate. This is the quickest method, but choose the one you prefer.
Here’s what you need to do:
1. Double tap the layer within your Layers panel with two fingers.
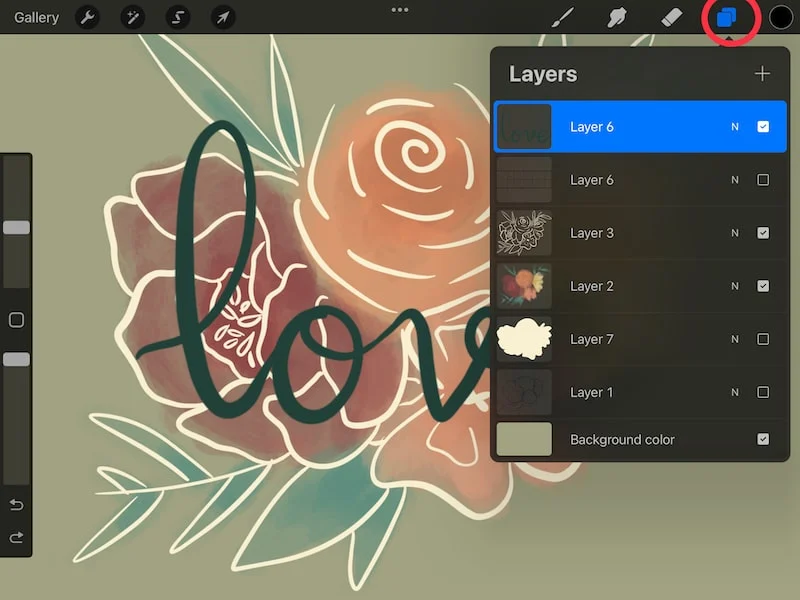
The quickest way to access a layer’s opacity slider is to double tap on it within the Layers panel. Begin by opening your Layers panel in the top right corner of your screen.


2. Use two fingers to tap on the layer you want to adjust the opacity of.
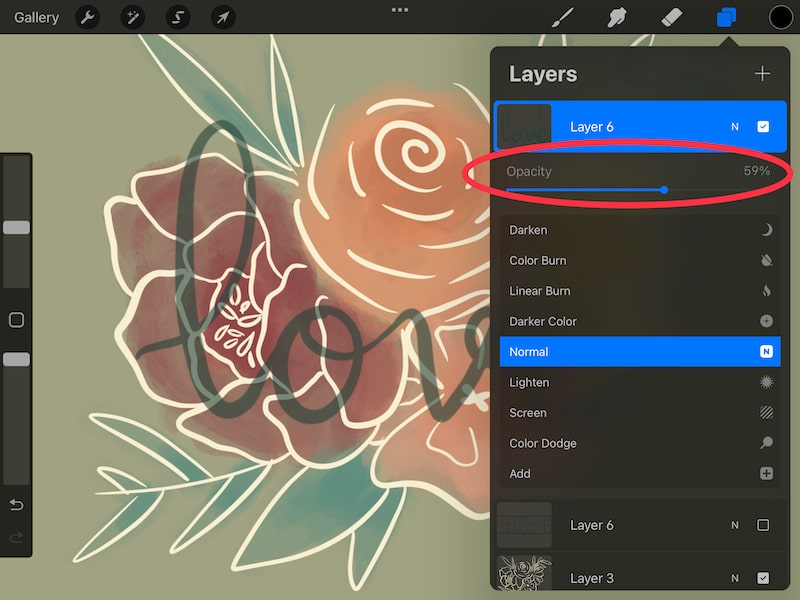
For example, I used two fingers to tap on the layer that had the word “love” on it.
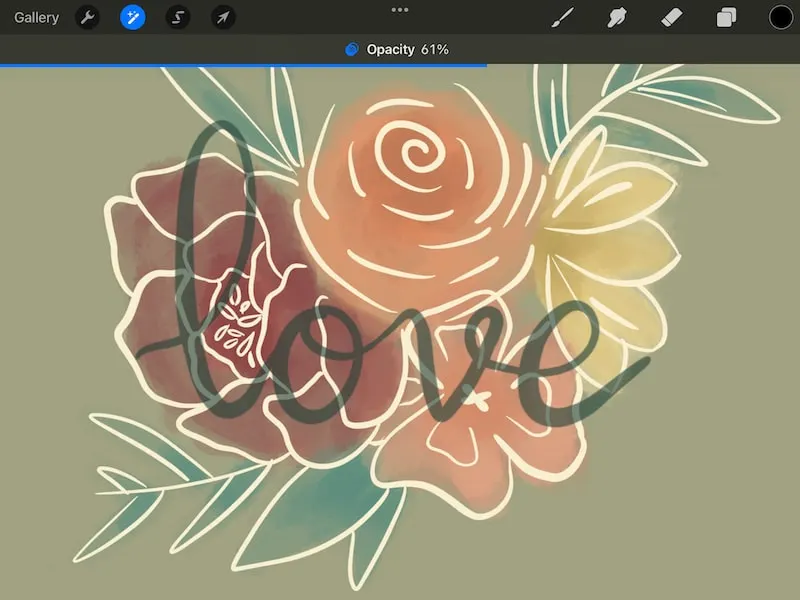
3. Use your finger to adjust the opacity of your layer.
Once you tap on your layer with two fingers within your layers panel, you’ll see an opacity slider appear at the top of your screen. Use your finger to adjust the opacity. Slide your finger to the left to decrease the opacity and slide it to the right to increase it.

How to Change Layer Opacity within the Layer Settings
You can also adjust your layer opacity within your layer’s settings. Open your Layers panel and tap the letter “N” on the right-hand side of it. This will open up your layer’s opacity slider and blend modes. Slide your finger to the left to lower the opacity and to the right to raise it.
This method isn’t as fast as the method we talked about above, but it’s still pretty quick and easy. Try out both methods and see which one you prefer.
Here’s what you need to do:
1. Open your Layers panel
Once you open the Layers panel, find the layer you need. No need to tap on it or anything – simply know where it is for now.

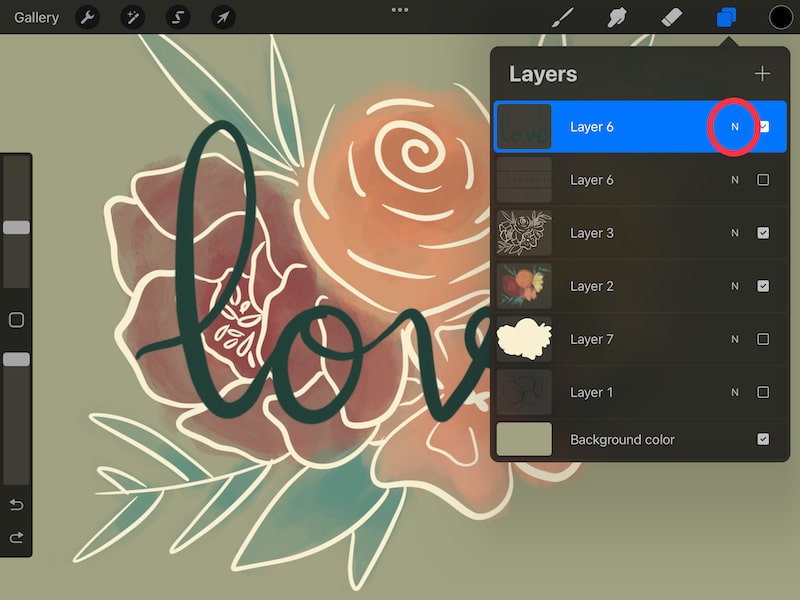
2. Click on the “N” next to the layer you want to change the opacity of.
This “N” stands for the “Normal” blend mode. If you’re using a different blend mode for your layer, you’ll see a letter that describes that blend mode. Whatever letter it is, tap on it.
We’re not actually dealing with blend modes when changing the opacity slider – it’s just that you need to tap on the blend mode icon to open the layer’s settings, which is where the opacity slider lives.

3. Use your finger to adjust the opacity slider.
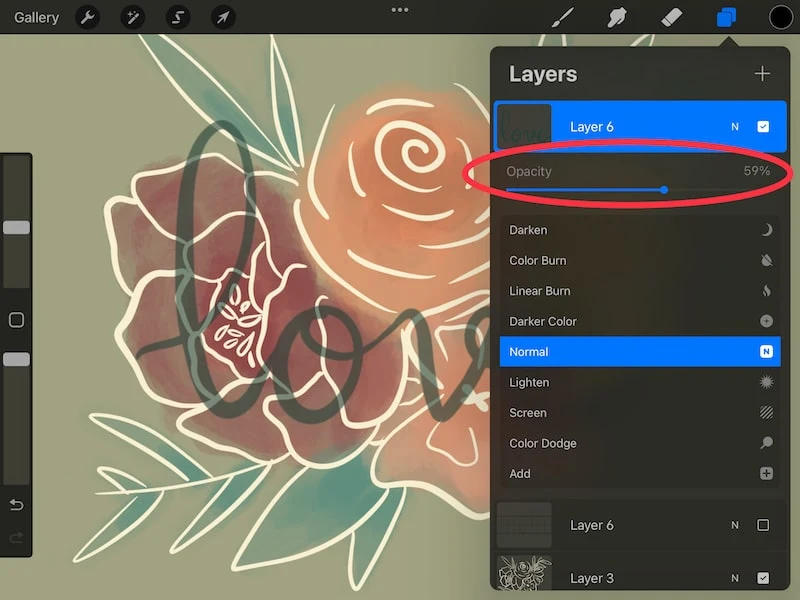
Once you tap on the blend mode icon, a list of settings will appear. The majority of these settings will be taken up by your blend modes. At the top though, you’ll see an opacity slider.
Use your finger to adjust the slider, sliding it to the left to decrease your opacity and sliding it to the right to increase it.
Keep in mind that all layers start off with 100% opacity, meaning they are fully visible and not being diluted at all.
Also keep in mind that you can only see and adjust the opacity of one layer at a time. Even when looking at the opacity within the layers panel, you’ll only see the opacity for the layer you’ve selected.
How to Control the Opacity of a Layer in Procreate Pocket
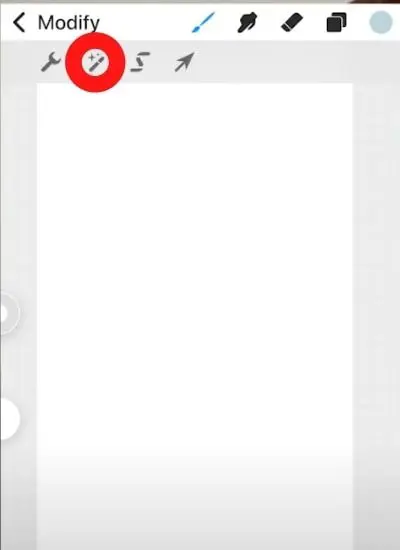
To control the opacity in Procreate Pocket, click the “Modify” tab at the top of the screen and click the magic wand symbol. Click “Opacity” and use your finger to increase and decrease the opacity of your layer.
Procreate Pocket is the Procreate app designed for the iPhone instead of the iPad. Many of the functions work in the same way; they’re simply more compact due to the smaller screen size.
Let’s run through the steps again, broken down:
1. Click the “Modify” tab at the very left of the top menu bar.
2. When you click the “Modify” tab, find the magic wand symbol and click it. This is the same as the “Adjustments” tab in the Procreate iPad app.
3. Within the “Adjustments” tab, click “Opacity” and slide your finger across the screen until you’re at your desired opacity level.

Things to Keep in Mind When Changing Layer Opacity
Once you get the hang of using the opacity settings within Procreate, it’ll be second nature and something you don’t have to think about too much. That said, there are some important things to keep in mind so that you don’t get frustrated.
1. You can’t change the opacity of multiple layers at once. You can have only one layer selected when adjusting opacity layers, if you try to do it with multiple layers selected, you’ll get an error message.
You can only change the opacity of one layer at a time.


2. If you think you lost a layer, check the opacity. Especially once you accumulate a lot of layers, it’s easy to forget that you set one to 0% opacity and then suddenly wonder where it went.
Should you find yourself with a case of the disappearing layer, check your opacity and make sure it isn’t accidentally set to 0%.
3. Deselect layers instead of setting them to 0% opacity. Let’s just avoid the problem we just talked about. If you don’t need a layer, deselect it by checking the box that’s too the right of the “N.” It’s quicker and easier than adjusting the opacity levels and it avoids the problem of losing your layers.
Procreate is an amazing design program that’s easy to use once you get the hang of it. Master these opacity settings and you’ll be well on your way to unlocking the potential of this amazing program. Go forth and create great art!
Check out more great posts about Procreate layers!
How to Use Procreate’s Clipping Masks and Layer Masks
How to Change the Color of a Layer in Procreate
The Ultimate Guide to Layer Limits
How to Select, Move, Delete, and Group Multiple Layers in Procreate
How to Share Procreate Images with Layers
How to Lock Layers in Procreate to Protect Your Art


Diana has been an artist for over 27 years and has training in drawing, painting, digital drawing and graphic design. Diana’s latest obsession is digitally drawing with Procreate and Procreate Dreams. Diana has experience selling her art across a number of platforms and loves helping other artists learn how to make money from their art as well.