Backgrounds can be beautiful, but they can also be a pain. Whether it’s a piece of art you made or an image you took, the good news is that you can use Procreate to remove them!
To remove the background in Procreate, either use the selection tool or the eraser. The selection tool lets you isolate the main subject of your image or piece of art and copy and paste it to a new layer. The eraser allows for a more hands-on approach that’s best for detailed backgrounds.
As an artist myself, there are a number of reasons why I need to remove backgrounds from my art.
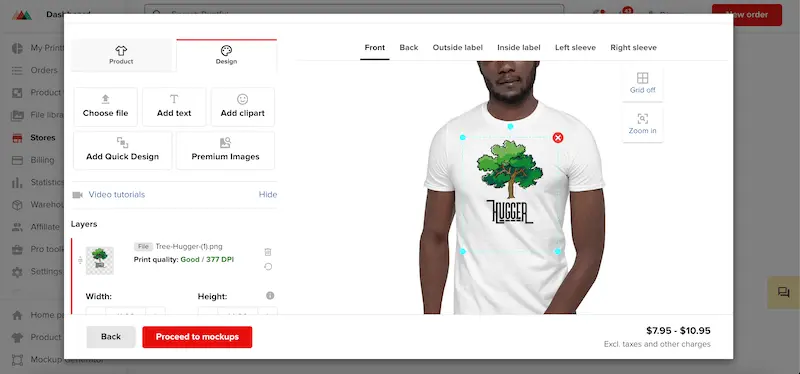
Preparing art to be sold through print on demand is a very important reason for learning how to remove backgrounds.
There’s also photobashing, photo editing, creating new types of art, cleaning up an image, and more.
If you plan to sell your art on mugs, shirts, sweatshirts, or any other product you can imagine, you’ll NEED to remove the backgrounds of your designs and art.

There are a few methods you’ll want to understand to remove the backgrounds from your images or art. The method you choose will depend on they type of background you’re working with.
For example, if your background is really busy and chaotic, you’ll want to use a different method than if you have a solid background.


To begin with, let’s talk about something you should do prior to getting started with any of these techniques.

Uncheck as Many Layers as Possible
Unchecking a layer in Procreate will turn it off and make it invisible in your piece of art. If you have any background elements that are isolated on their own layers, go ahead and uncheck them so you won’t have to deal with them later when you need to remove the rest of the background.
To turn off a layer, open your layers panel and tap on the checkmark next to each layer you want to remove. The checkmark should disappear, along with all of the elements on it.
You might realize that all of your art is on one layer, so there aren’t any other layers to turn off. This will often be the case if you’re using an image or anything you’ve imported. That’s ok! Skip to the next steps.
On the other hand, you might realize that unchecking your layers was all you needed to do! Hooray!
You may now have a transparent background with only your needed elements on it. I have a full post on making a transparent background in Procreate.
Or, maybe you ended up somewhere in the middle, with part of your background removed, but more you need to take care of. Let’s dive into what to do from there!
Use the Automatic Selection Tool to Remove Backgrounds with Procreate
If you have a background that is in high contrast with the image you’re trying to isolate, using the automatic setting of Procreate’s selection tool will work well for removing some, or all, of the background of your photograph or art.
This method will work best if your image or artwork has these qualities:
- Your background doesn’t have a lot of detail, or has easily distinguished objects
- The subject you want to isolate is large and stands out from the background
- Your background and image have high contrast (a charcoal drawing on a cream piece of paper, for example)
In general, this method works best for digitizing art with a solid background. This is because the backgrounds normally meet all of the criteria above. Traditional art that you’ve taken a picture of sometimes fits this criteria.
It can be tricky, so we’ll talk about it at the end of this section.
Photos are more likely to have busy backgrounds that confuse the automatic selection tool and can be tough to use with this method.
If you aren’t sure if the automatic selection method is the right choice for the image or piece of art you’re removing the background of, give it a try and see what happens. This method is the quickest method on this list, so you won’t waste a lot of time experimenting with it.
Whenever I need to remove a background, I always try this method first, even if I don’t think it will work with the background I have. If it doesn’t work, I undo it and move onto another method.
Or, there are times when it partially works and removes a significant portion of the background. Then, I can finish removing the background with the other methods we’ll talk about.
Experimentation is the key.
Here are the steps you’ll want to take to remove your background with Procreate’s automatic selection tool:
1. Create a new canvas or hide everything on your existing canvas
The image you want to remove the background from should be the only thing visible on your Procreate canvas. Either start fresh with a new canvas, or uncheck all your other layers until your image is the only thing left.
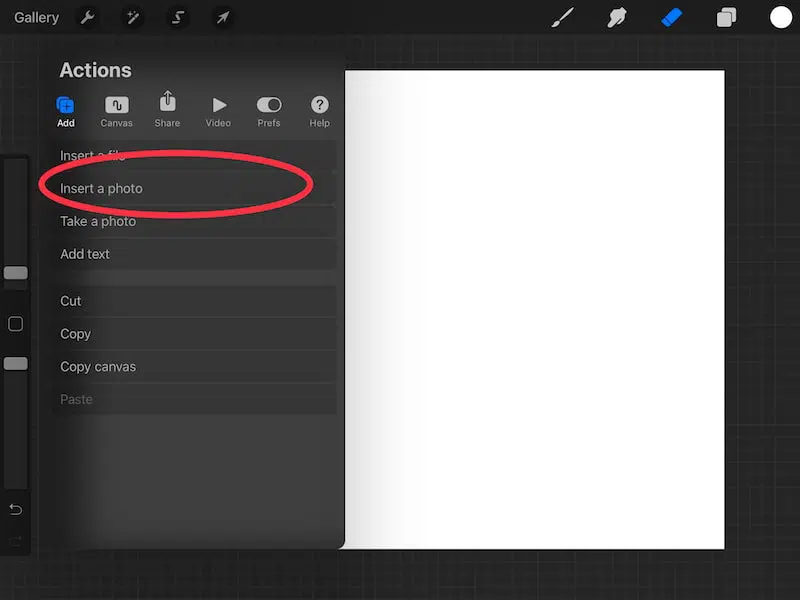
2. Import your image, if needed
If you haven’t done so already, click on the wrench to open the Actions menu. Click on the “Add” button and then click on the “Insert a photo” button. Choose your photo and import it into your Procreate canvas.

3. Stretch your image across your canvas
In the top toolbar, click on the Transform tool (the arrow icon) and stretch your image across your canvas. Use the Uniform setting so that your image doesn’t get distorted. Make it as large as possible.
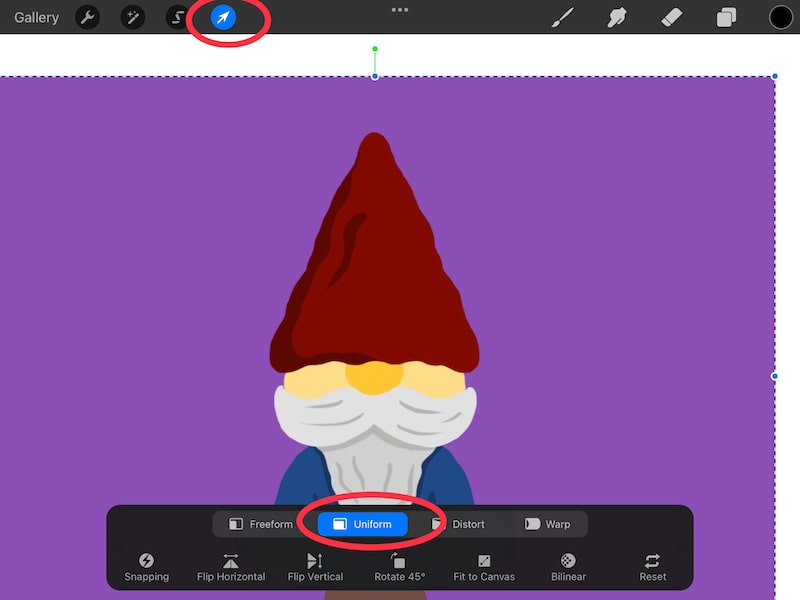
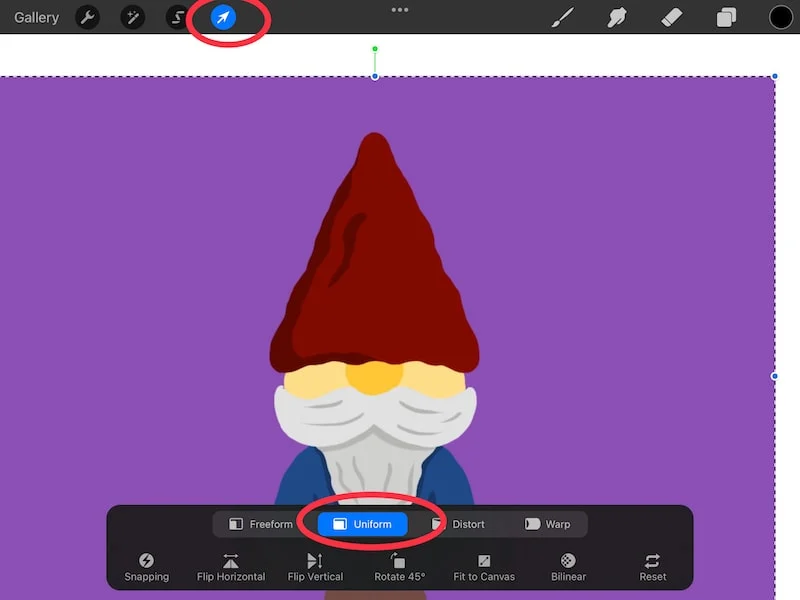
Feel free to let your background fall off of your canvas space. This will actually make it easier to remove whatever background is left. Just make sure that your primary image doesn’t get cut off.
4. Click on the Selection tool and choose the automatic setting
In the top toolbar, click on the Selection tool (S icon). Within the Selection settings that appear at the bottom of your screen, choose “Automatic.”

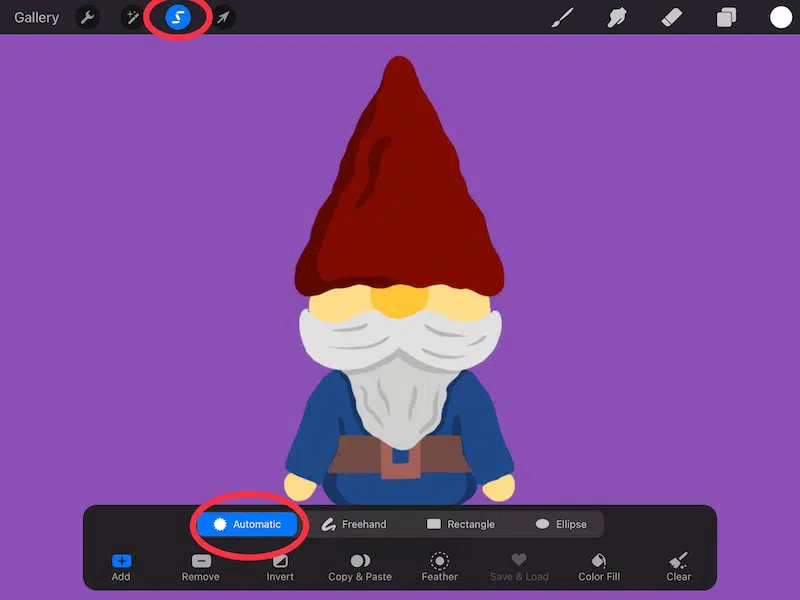
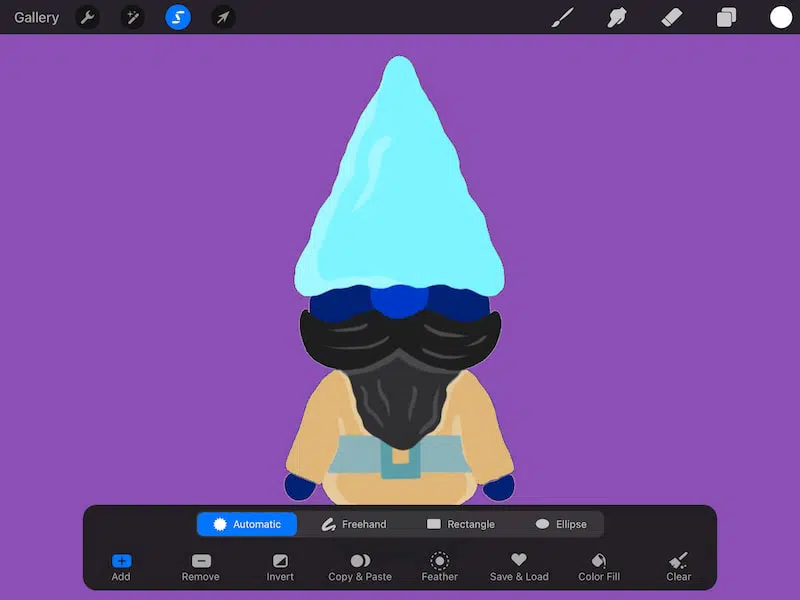
5. Click on the background of your image
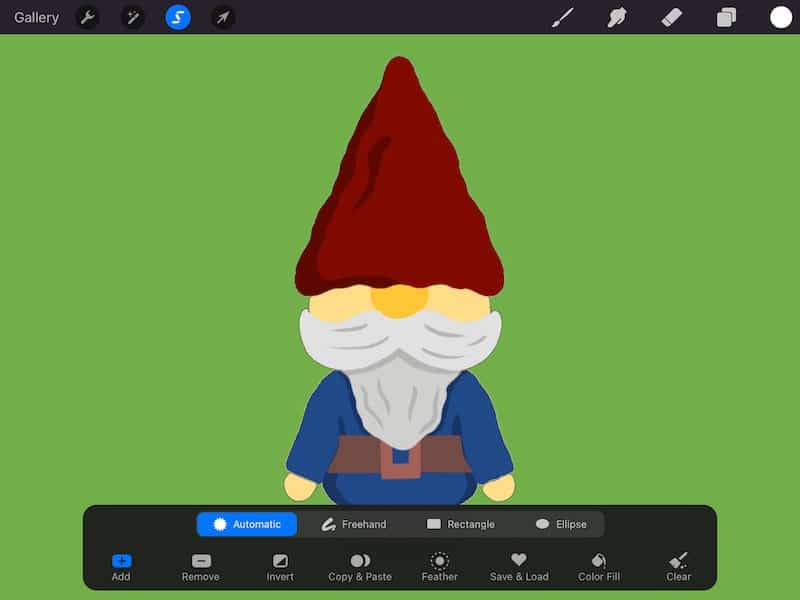
Once you have the automatic setting selected, tap on the background of your image. You’ll see it change colors.
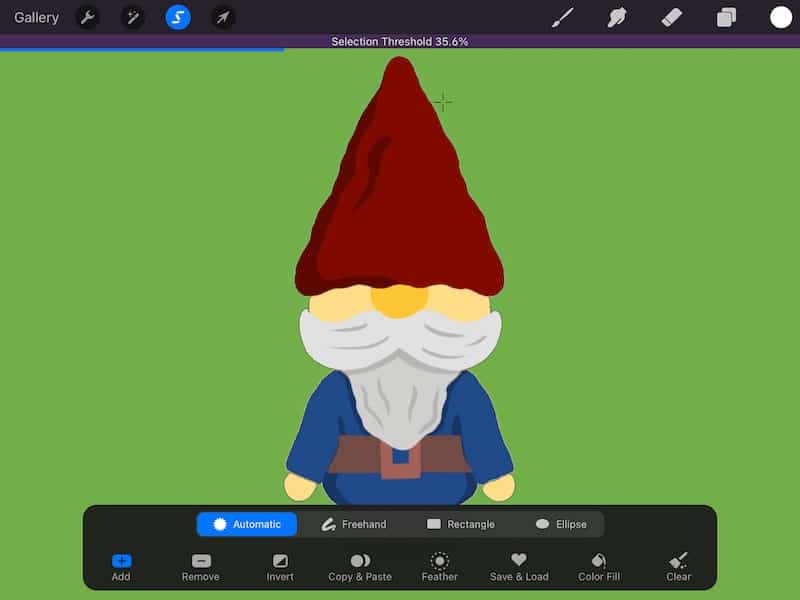
6. Slide your stylus across your screen from left to right to increase the selection threshold
This is when you’ll figure out if this method will work for your image so, buckle up.
When you clicked on the background, you probably noticed that it changed colors. Our goal here is to have all of the background be that color, with our primary image staying unchanged.
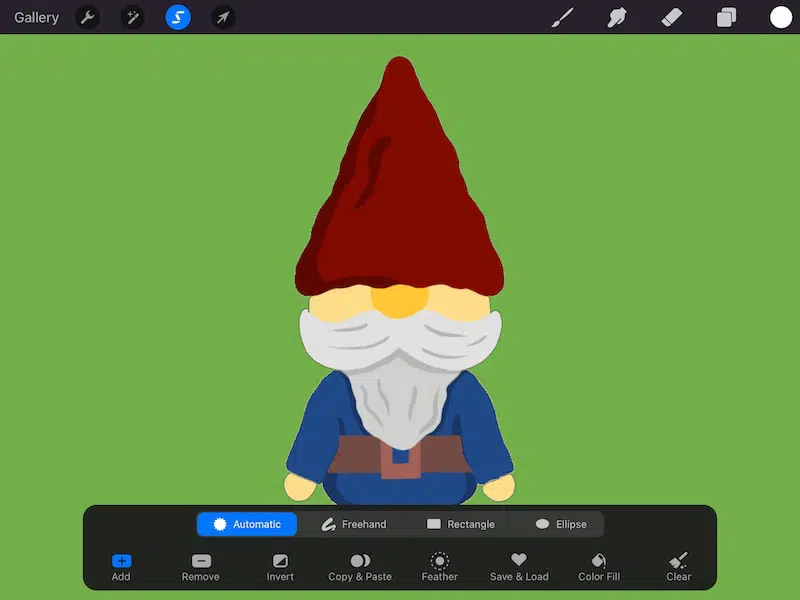
In this case, we want all of the background to be green without any of the green spilling over into the gnome. If we see any green on the gnome, we’ve gone too far.
You want to capture as much of your background as possible before it starts seeping into your primary image.
To do this, slide your stylus across your screen from left to right. This will increase your selection threshold. Only slide until you notice the selection start the seep into your primary image. Once it does, decrease the threshold again until only your background is selected.

If you notice that you can’t click on your background without some of your primary image being selected, this method won’t work for you.
By default, the automatic selection setting will start off at the minimum threshold. So, if you tap on your background and the selection is already seeping into your primary image, that’s a clear sign this method won’t work for the background and image you’ve chosen.
Or, that you need to start the automatic selection on a different part of your background.
Ideally, you’ll be able to click on your background with the automatic selection tool and it will only select your background, without your primary image included.
7. Click on Invert
The “Invert” button is in the Selection settings at the bottom of your screen. When you invert your selection, you’ll end up selecting your primary image instead of your background. That’s what we want to do!
You may be wondering why we didn’t just select or primary image instead of the background. I often find it harder for the automatic selection tool to isolate my image than the background. That’s why selecting the background and inverting it tends to work better.
But, it depends on your image, so feel free to play around with it.

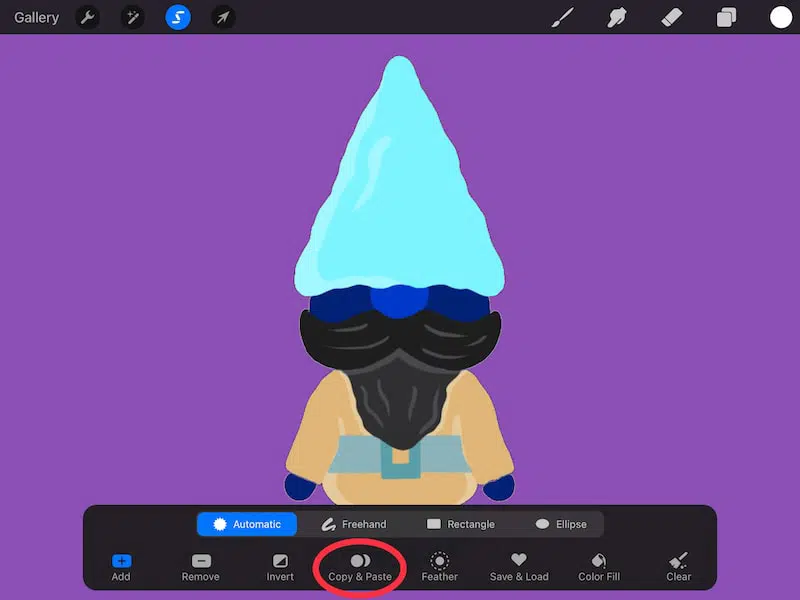
8. Click on Copy & Paste
The “Copy & Paste” button is in the Selection settings at the bottom of your screen. Copying and pasting will take your primary image, which is now selected, and paste it onto a new layer.

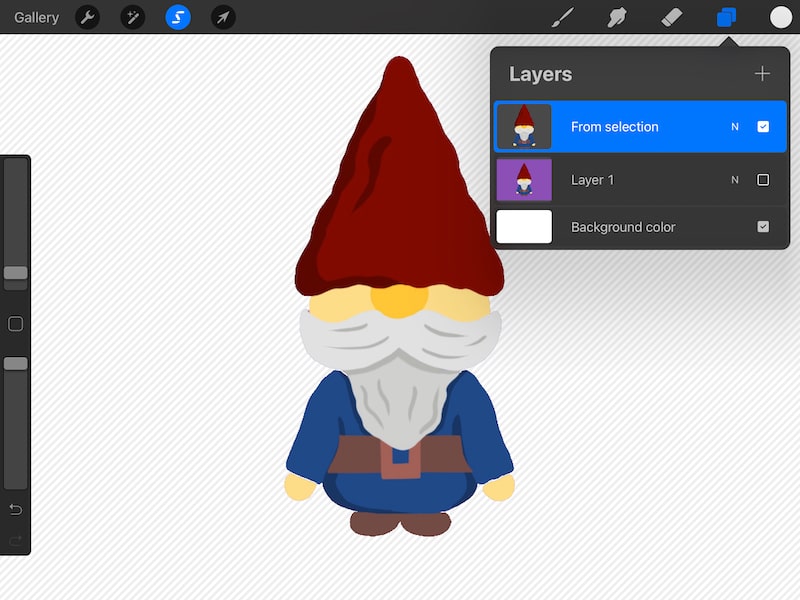
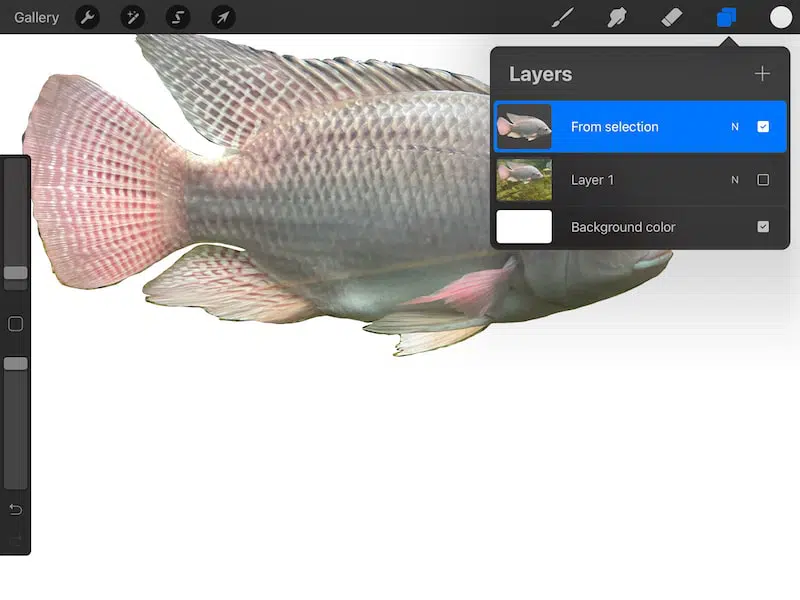
9. Uncheck your first layer to double check your work
At this point, we’ve finished the process, but you’ll want to check your work. Go into your Layers panel and uncheck your original layer to hide it. This will leave your copied and pasted layer as the only visible layer.
Take a look at this layer to make sure that your primary image looks good and that your background has been successfully removed.
If you were removing a white background (or your background color is the same color as the background you removed), uncheck the background color as well to double check your work.

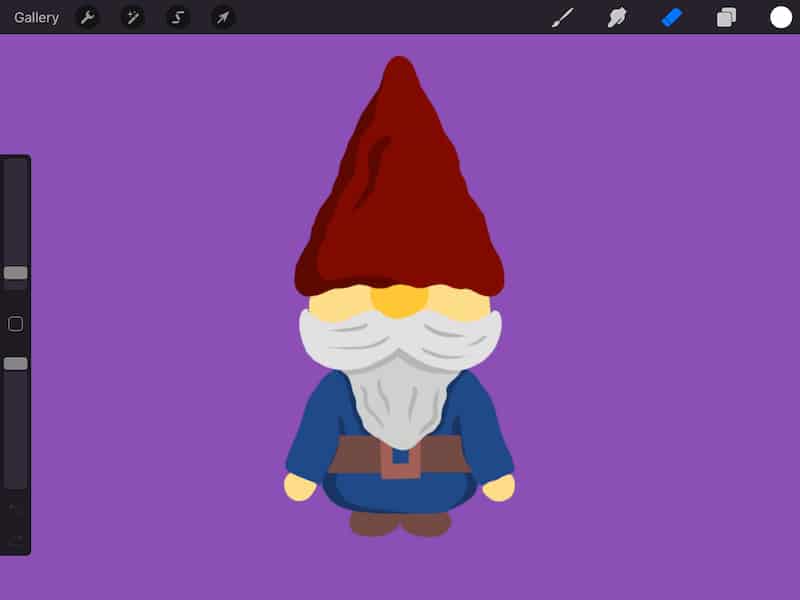
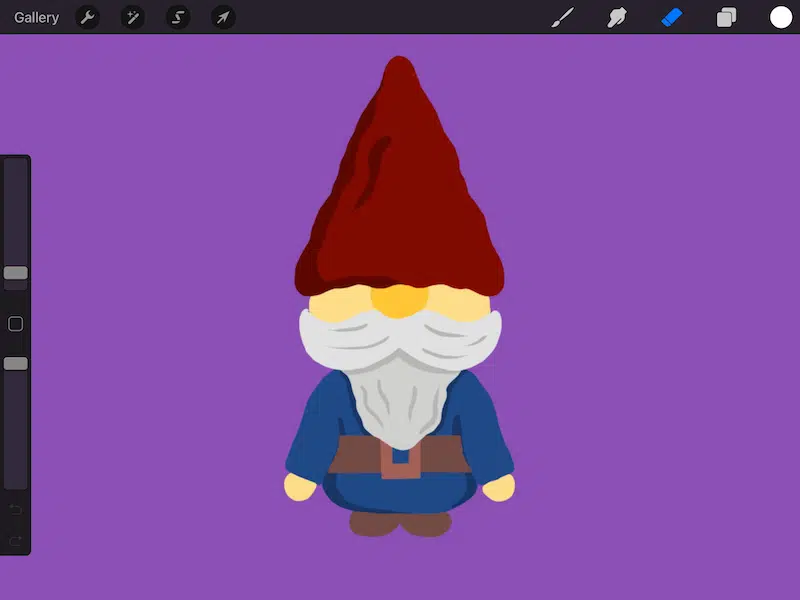
10. Clean things up with the eraser, if needed
If any of your background got left behind, click on the eraser tool to clean things up, if needed.
This method of removing your background with Procreate’s automatic selection tool is the quickest method. That said, it doesn’t always work depending on the image you’re using.
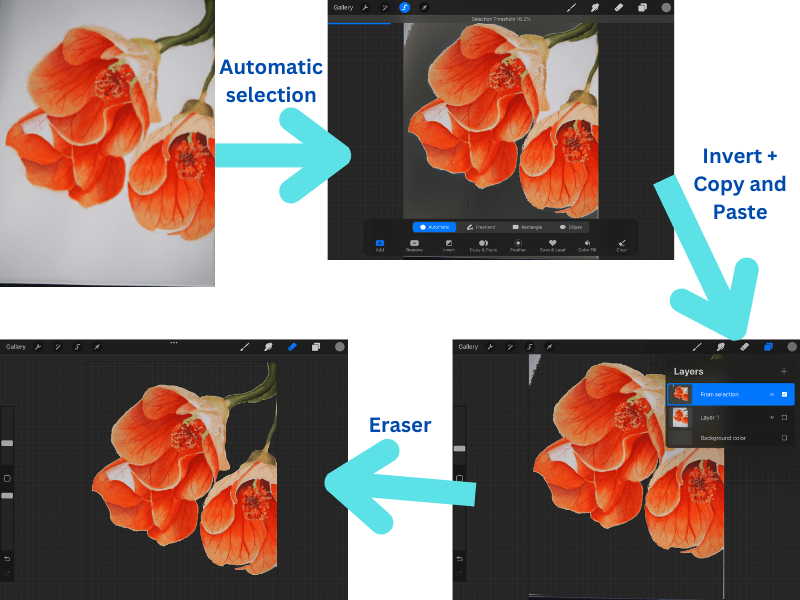
With my traditional art, for example, there are times when I can use the automatic selection method to remove some of my background, but I use the eraser to remove the portions that the automatic selection couldn’t detect.
That’s ok! If you can at least remove part of your background, it reduces the amount of manual eraser work you need to do later on. Here’s my process with one of my art pieces that I took a picture of and imported into Procreate.
Note, I turned off the background layer to make it transparent since both my Procreate background and my art’s background were white. I find it easier to see my eraser work when turning off the background.

Alright, let’s talk about the other methods.
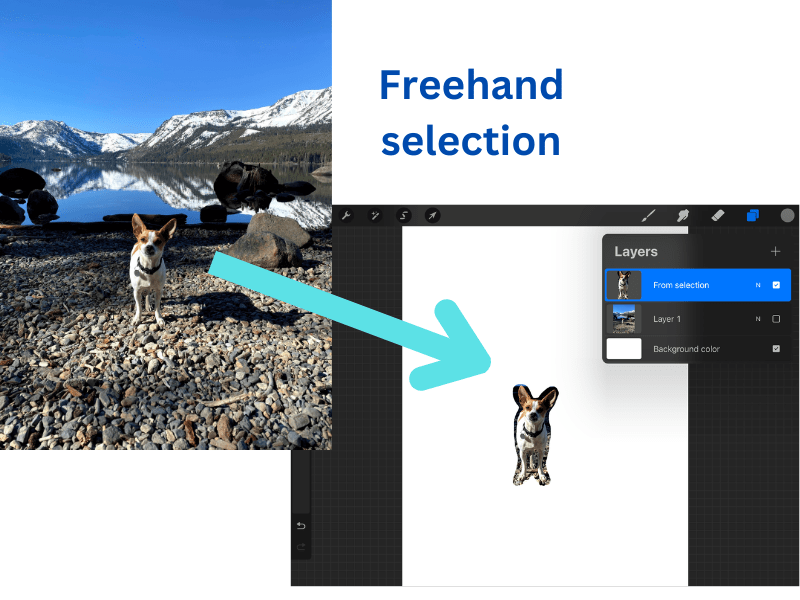
Use the Freehand Selection Tool to Remove Backgrounds with Procreate
If your background is busy, or the image you want to isolate isn’t in high contrast with the image you’re trying to isolate, using the freehand setting of Procreate’s selection tool is a good option for removing the background of your photograph or art.
This method will work best if your image or artwork has these qualities:
- The automatic selection method didn’t work for you
- Your background is busy
- The image you want to isolate doesn’t stand out from the background (doesn’t have high contrast)
In general, this method works best for photographs. Even if your photograph does meet the criteria for the automatic selection method, for some reason, Procreate struggles with photographs. This freehand method is usually best.
Here’s how to remove backgrounds with the freehand selection tool in Procreate:

1. Create a new canvas or hide everything on your existing canvas
The image you want to remove the background from should be the only thing visible on your Procreate canvas. Either start fresh with a new canvas, or uncheck all your existing layers until your image is the only thing left.
2. Import your image, if needed
If you haven’t done so already, click on the wrench to open the Actions menu. Click on the “Add” button and then click on the “Insert a photo” button. Choose your photo and import it into your Procreate canvas.
3. Stretch your image across your canvas
In the top toolbar, click on the Transform tool (the arrow icon) and stretch your image across your canvas. Make it as large as possible.
Feel free to let your background fall off of your canvas space. This will actually make it easier to remove whatever background is left. Just make sure that your primary image doesn’t get cut off.
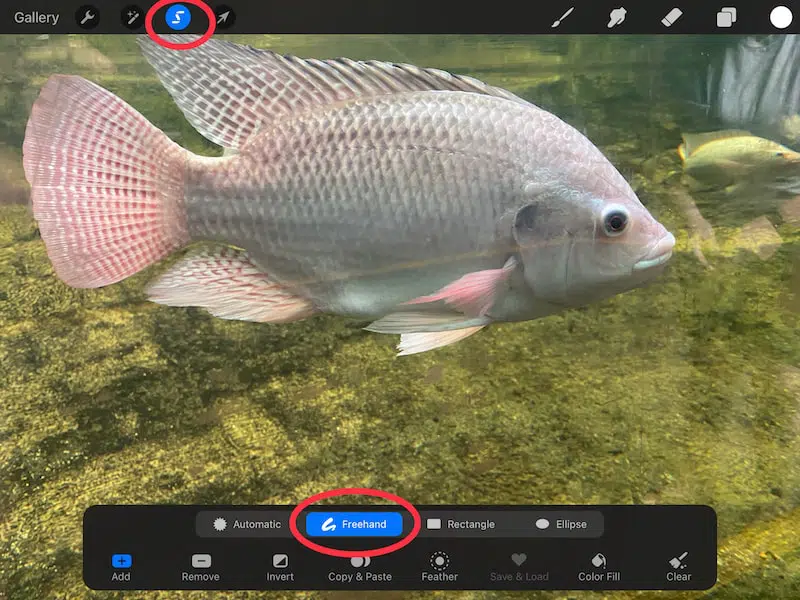
4. Click on the Selection tool and choose the freehand setting
In the top toolbar, click on the Selection tool (S icon). Within the Selection settings that appear at the bottom of your screen, choose “freehand.”

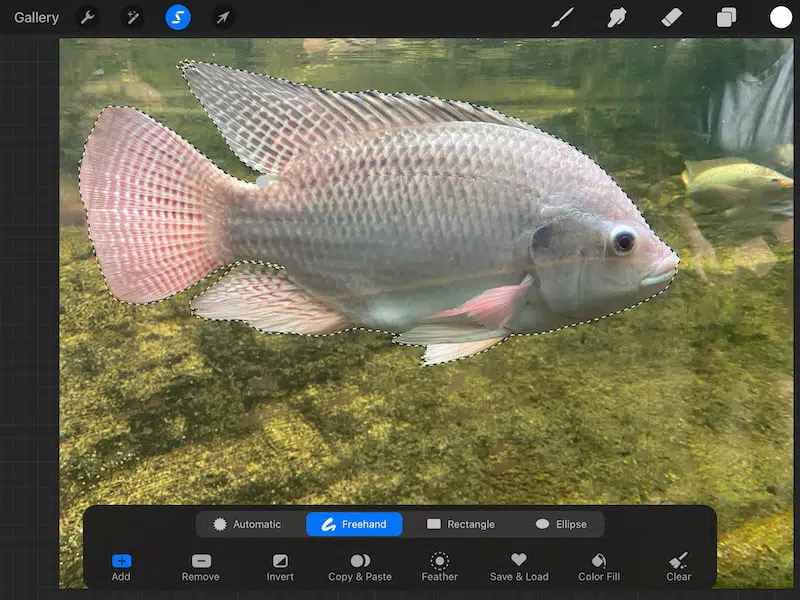
5. Outline your image with the freehand selection tool
Start outlining your image and you’ll see a line appear that looks like a row of marching ants. Make sure that you hug your image as tightly as possible.
Anything that ends up within your marching ant outline will be preserved. Anything you leave outside of it will ultimately be deleted.
When you’re finished, make sure that the ends of your lines meet. Basically, your outline needs to be a closed shape with the beginning of your line joining with the end of your line.

Important tip: if your image is really detailed and it’s too labor intensive to outline the whole thing with the selection tool, read the next section about removing backgrounds with the eraser tool. There’s a way to merge this selection method with the eraser method when working with really detailed images.
In that case, outline as much of it as you can and manually erase the rest later.
I love merging these techniques, so don’t think you only need to use one.
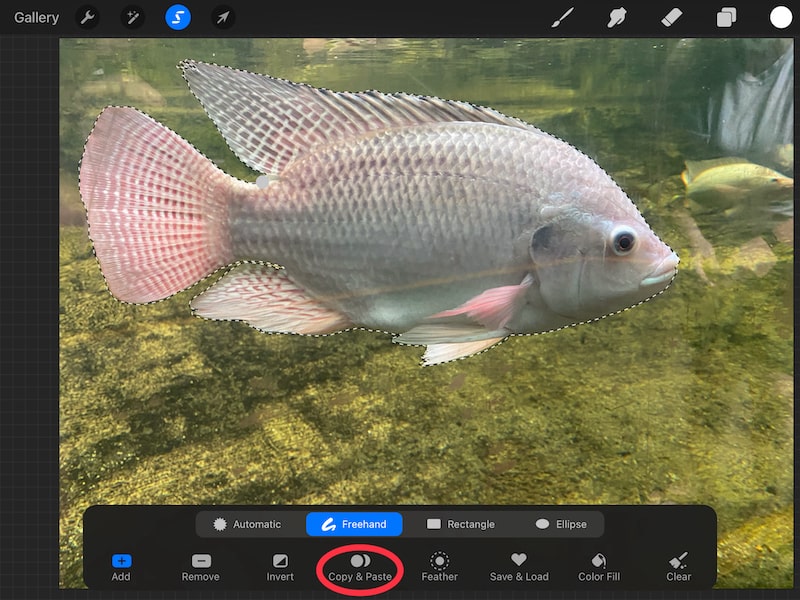
6. Click the Copy & Paste button
Once you’re done with your outline, click the “Copy & Paste” button within the selection tool menu.
This will copy and paste your selection to a new layer.

7. Uncheck your original layer
You now have a new layer with only your selection on it. Ideally, this should be your primary image without the background.
Uncheck your original layer so that this new, copied and pasted layer, is the only thing that’s visible.

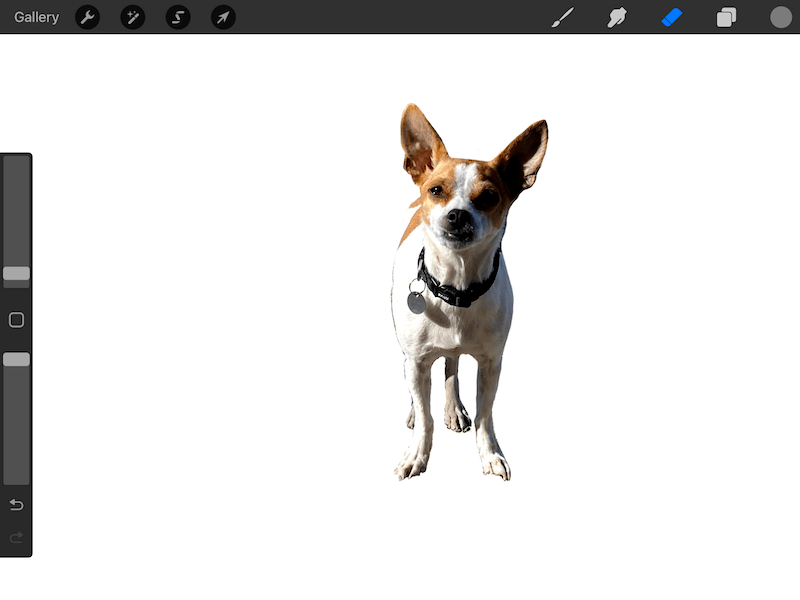
8. Clean up your work with the eraser tool
Take a look at your new layer and make sure that your entire background is gone. Using the freehand selection tool can be tricky, especially if you have a detailed image. It’s possible that some of your background is still hanging around.
If so, grab your eraser tool and erase any stray background marks by hand.
The eraser tool is a handy asset to have when removing backgrounds in Procreate. In fact, you can remove your entire background with it.

Use the Freehand Selection Tool and the Eraser Tool Together to Remove Backgrounds with Procreate
If you have a detailed image, but you don’t want to erase the entire background by hand, use the freehand selection tool to loosely outline your image and remove as much of the background as possible. Then, use the eraser to remove the sections that require more precision.
This method will work best if your image or artwork has these qualities:
- You have a detailed image
- Your image has a lot of background that can easily be deleted
- You want a quicker method that sill includes some manual erasing
Follow all of the steps listed in the freehand selection section. But, instead of trying to hug your image as tightly as possible with your selection, just loosely outline your image.

Once you’re done, grab the eraser and use that to finish removing the background. Zoom in on your image as much as you need to get those fine details with your eraser.

This method can be a quicker way to remove the vast majority of your background, while still giving you the ability to use the eraser for the more detailed work.
Use the Eraser to Remove Backgrounds with Procreate
Another method for removing backgrounds in Procreate is using the eraser tool to remove everything aside from the primary image. This method is the most time intensive, but it can be useful for detailed images that require a lot of precision and small movements.
This method will work best if your image or artwork has these qualities:
- Your image is very detailed
- Your image doesn’t have a lot of background (read about the next method if your image is detailed, but has a lot of background)
- You prefer to do things by hand
The eraser method works best if you have a detailed image with a lot of pieces sticking out into your background. Think about a porcupine vs. a basketball.
If you use the selection tool, it might be hard to preserve every single quill. Using the eraser, you can lower the size of the tool as small as needed so that you can manually erase in every nook and cranny.

Simply continue erasing until you’ve removed your background!
Removing the background of images and artwork in Procreate can be tedious at times, but it is easy once you get the hang of it. It also opens up so many doors for you to be able to sell your work on products, digitize your traditional art, and more!


Diana has been an artist for over 27 years and has training in drawing, painting, digital drawing and graphic design. Diana’s latest obsession is digitally drawing with Procreate and Procreate Dreams. Diana has experience selling her art across a number of platforms and loves helping other artists learn how to make money from their art as well.