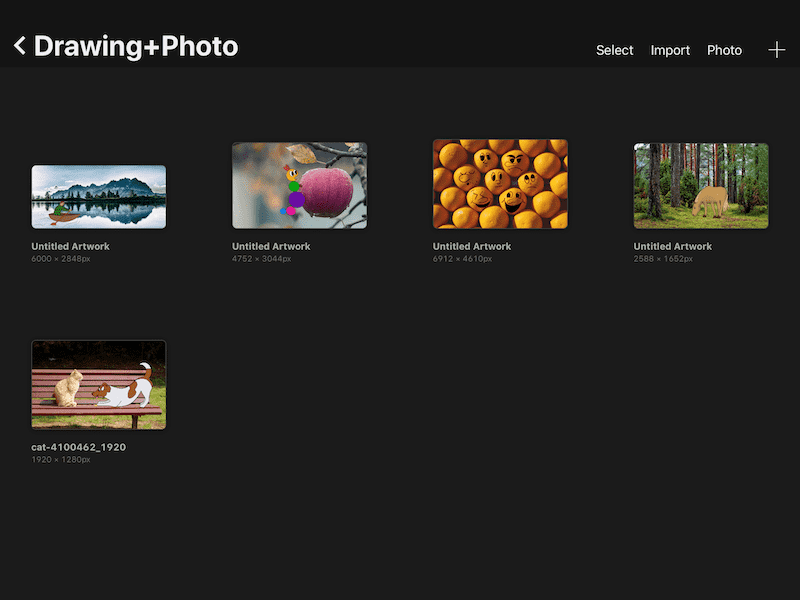
Stacking your designs in Procreate can be a great way to clean up and organize your gallery. But, what do you do if you need to change your stacks? How do you unstack? Luckily, unstacking in Procreate is easy and gives you a lot of freedom to reorganize your Procreate gallery in a way that makes sense for you.
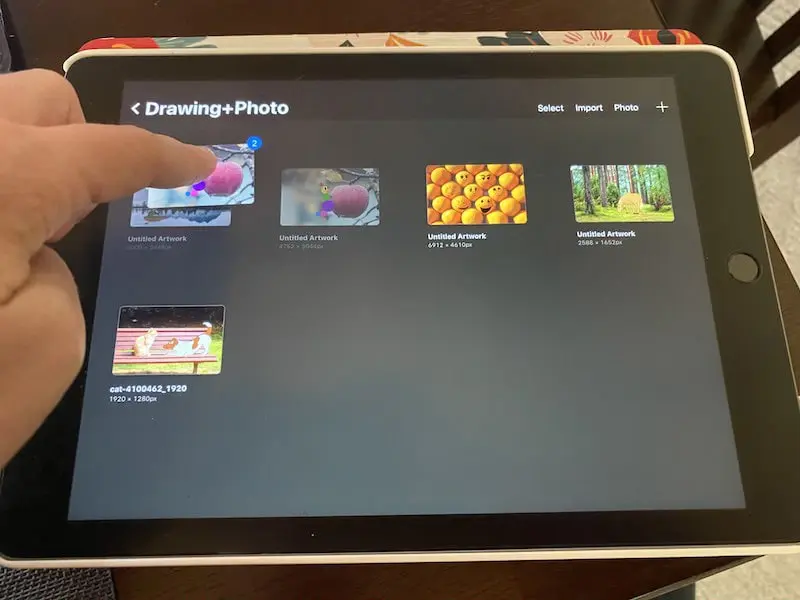
To unstack your canvases in Procreate, begin by opening the stack you want to dismantle. Hold and drag one of the canvases within the stack to the top left corner of your screen until your screen returns to your Gallery. Drop your canvas in your Gallery or add it to a different stack.
If you’ve created Procreate stacks and suddenly wondered if they’re permanent, don’t worry! We’re going to talk about how to undo a stack in Procreate, quickly and easily.
Let’s walk through the process of unstacking, step-by-step.
Here are the steps on how to unstack in Procreate.
1. Open the Stack You Want to Dismantle
Before you start this unstacking process, make sure you know where you’ll be moving your designs to. You’ll be able to either put them in the general Gallery, or in another stack.
2. Hold Your Finger Down on the First Design You Want to Unstack
You will need to hold your finger down and keep it firmly in place. If you don’t, you might end up simply clicking into the design.
3. With Your Finger Held Down, Move the Design
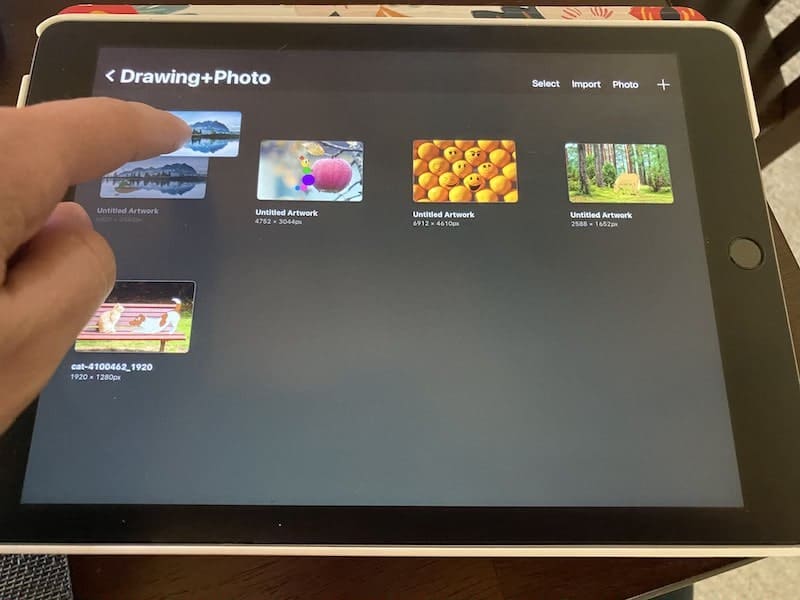
Make sure that your finger is still firmly placed on your design before you move it. If your finger slips, your design will snap back into its original place.
Slowly move your design in any direction to make sure that your design is selected and movable. To verify, you’ll see the design turn semi-transparent and follow your finger.
4. Select Other Designs You Want to Unstack

If you want to remove multiple designs from the stack, you can move them all at once instead of one at a time. This does take a little coordination though, so don’t worry if you don’t get it right the first time.
Keep your finger held down on the first design and use your other finger to tap on any other designs you’d like to move. You’ll see that any other designs you select will snap to your first design. It will look like you’ve just created another stack, but you haven’t.
They’ll separate once you release them at the end of this process.
5. Move Your Designs to the Top Left Corner
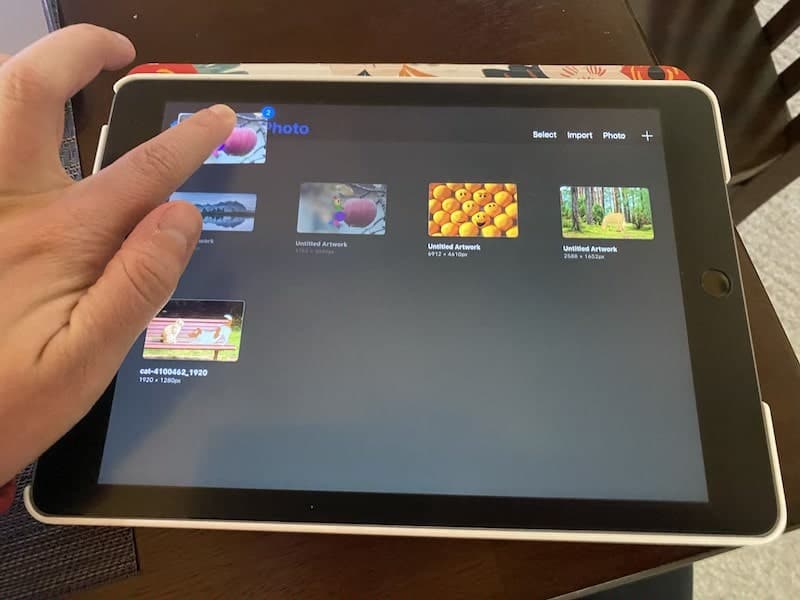

Once you’ve selected all of the designs you want to move, drag your finger to the top left of your screen where the name of your stack is displayed.
6. Hover Over Your Stack Name Until the Gallery Appears
Keep your finger firmly on your stack and hover it over the name of the stack until you see your screen pop to the gallery. It may take a second, so be patient. It can also take some getting used to, so don’t worry if it takes a few tries. If nothing happens, try readjusting the position of your stack.
7. Release Your Designs into the Gallery or a New Stack
If you want your designs to be in the general Gallery, simply release your finger once your screen pops to it. If, instead, you want your designs to be moved to another stack, keep your finger firmly held down on your designs and drag them to the new stack. Hover over the new stack until you see your screen pop to the new stack and then release your designs.
Unstacking in Procreate is as simple as that!
Like I said, unstacking and moving your designs around can take some practice. Procreate can be finicky at times. Aside from simple practice, there are some tips and tricks to keep in mind to make sure that your stacks work for you and against you.
Unstack Designs Strategically
When you have a big stack that you need to dismantle, it’s tempting to remove them all at once. I would avoid the temptation and make sure you have a plan for where all of your designs are going. If you undo your stacks carelessly, it can be an organizational mess.
It’s best to unstack your designs in logical chunks. Take all of the ones that will be going to the general Gallery in one batch, and then group the rest in accordance to where they’ll be organized.
For example, if you have three designs that will be added to an already existing stack, unstack those three designs at once and take them directly to their new stack.
The whole benefit of stacks is keeping your designs organized, so keep that in mind as you shift things around.
Look Through Your Stacks Regularly
Even though I love stacks, it’s really easy for designs to get lost in them. They can be like those file folders that were meant to keep everything organized and accessible, but end up stuck in the back of the file cabinet. That’s where that super important document went! Whoops.
It’s a good practice to look through your stacks on a regular basis. That way, you won’t lose or forget about any of your designs.
While you’re at it, make sure that your stacks are still organized in the best way possible.
As you create more and more designs, your organizational needs will change. It will make sense to put things in different spots, or create new stacks based on new criteria. Maybe you started an amazing t-shirt store with your art and you now need a stack of your business designs!
Just be mindful about how your stacks are working for you and use this handy unstacking technique to rearrange things as needed.


Diana has been an artist for over 27 years and has training in drawing, painting, digital drawing and graphic design. Diana’s latest obsession is digitally drawing with Procreate and Procreate Dreams. Diana has experience selling her art across a number of platforms and loves helping other artists learn how to make money from their art as well.