These days, we deal with a lot of different types of media files. JPEG, PNG, TIFF, MOV, SVG, and yes, PDF. If you know and love Canva the way that I do, you’ll be happy to know that you can upload PDFs to the platform and use them for your designs.
To upload a PDF to Canva, drag and drop it onto your Canva homepage. This will import your PDF file as a new design in Canva. All of the elements and text within your PDF will be editable independently from each other within Canva .
If you’ve used Canva for a while, you’re probably thrilled that it now allows for PDF uploads. For a long time, this wasn’t the case. In order to upload PDFs to Canva, you had to convert them to image files first. Not anymore!
You can now upload PDFs to the homepage of your Canva account. We’ll talk about how to do this, as well as why PDF files can only be uploaded to your homepage.
Here’s how to upload PDFs to Canva, step-by-step:
1. Navigate to your Canva homepage.
You need to be on your account’s homepage, NOT within a design. This is important because Canva doesn’t currently support uploading a PDF into an already created design. We’ll talk about that later in this article.
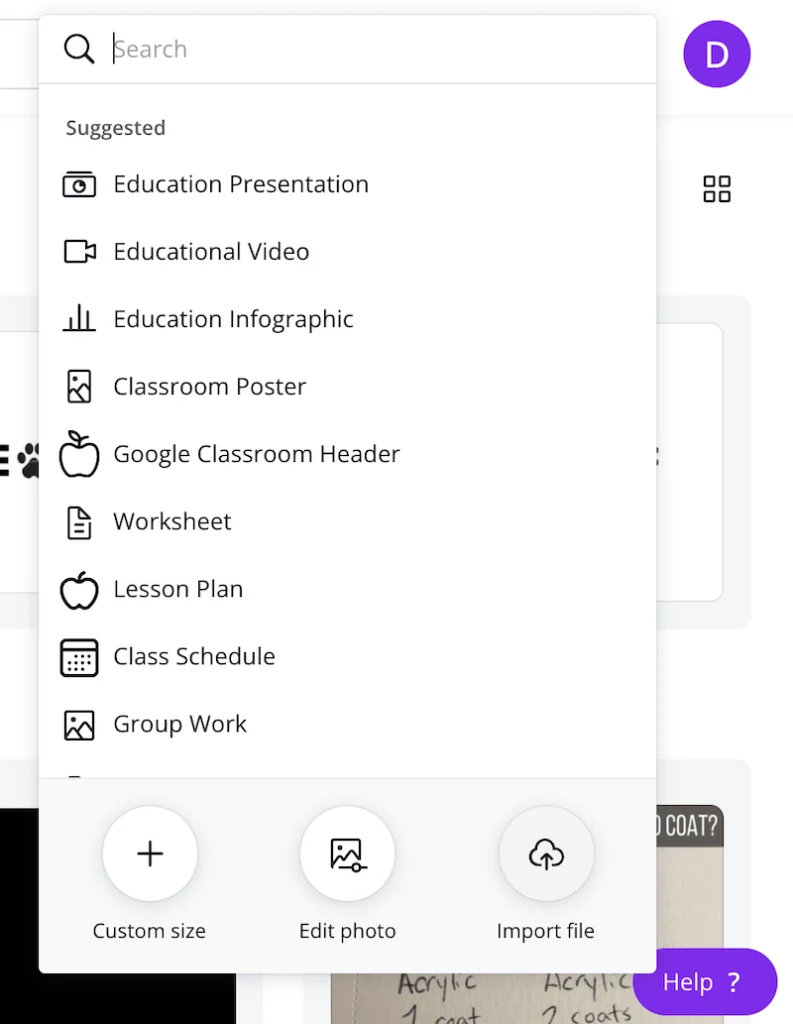
2. Drag and drop your PDF into your Canva homepage OR create a new design and choose to import your PDF file.
Your first option is to drag and drop your PDF file onto the homepage of your Canva account. Plop it anywhere you please.

Alternatively, Click the big purple button to create a design and choose the option to upload a file. Find your PDF file and upload it.
3. Use your PDF as a new design.
When you upload a PDF, it will create a new design. If everything has gone correctly, your images, elements, and text should all be editable and independent from one another.
This is neat because, instead of a static image, your PDF will import in a way that lets you manipulate it and create a new design from it.
This is fantastic if you plan to create a new design from the PDF you upload to Canva.
This is NOT so fantastic if you need to add a PDF to an existing Canva design. If you try to drag and drop your PDF into your media library within an existing design, you will get an error message.
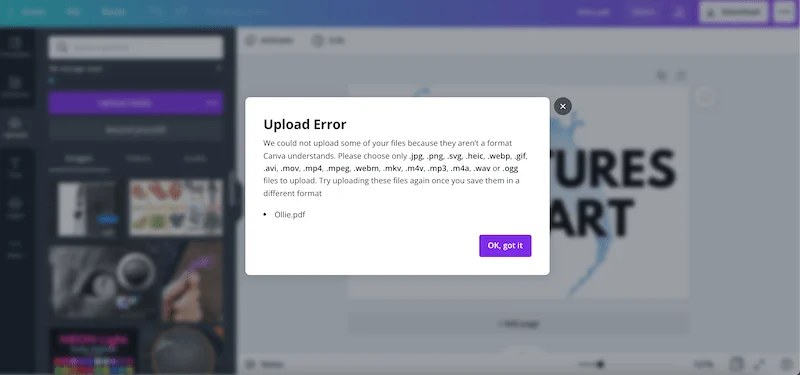
Ideally, you’ll want to create a new Canva design based on the PDF file you import from your homepage. This is the easiest way to go about things, even if you have to copy and paste some elements from one Canva design to another.
This is because PDFs you upload to Canva are editable. All of the elements, text, and images are separated from each other and can be manipulated separately from each other.
With the the workaround we’ll talk about now, this isn’t the case. But, if you really need to upload a PDF to an existing design, and/or you don’t need to edit the PDF a lot, here’s what you can do.
If you need to upload a PDF to an existing Canva design, you’ll need to convert it to a file type that Canva supports within their designs.
This includes:
- JPEG, PNG, HEIC, and WebP images under 25MB each and under 100 million pixels total
- SVG images under 3MB each, between 150 to 200 pixels wide, and saved as “SVG 1.1”
- MOV, GIF, MP4, MPEG, MKV, or WEBM files under 1GB
- M4A, MP3, OGG, WAV, or WEBM files under 250 MB
- fonts in formats .otf, .ttf, and .woff
There are additional specifications and requirements for files aside from JPEGs and PNGs, so be sure to review Canva’s guidelines here. Familiarizing yourself with Canva’s file guidelines can save you a lot of time and headache wondering what’s going wrong when you try to upload an obscure file.
If you need to upload a PDF to a current Canva design, you’ll want to convert your it to a compatible file type. The ones that make the most sense in this case are JPEG and PNG files.
Before we dive into the conversion process, let’s talk about whether you should choose a JPEG or a PNG based on the quality you’re looking for.
Which is better quality JPEG or PNG?
JPEGs use lossy compression and PNGs use lossless compression.
Lossy compression removes parts from the image that are supposed to be undetectable to the human eye. That said, the more that the image is compressed, the more you can see the flaws. It can also lead to reconstruction errors when imported into a new program.
Lossless compression doesn’t remove anything from the image as it compresse it, which means that the quality is usually higher than those that use lossy compression. It also reduces the risks of errors (source).
Given that PNGs use lossless compression, they’re a higher quality and more reliable choice.
Note: due to the compression methods, PNGs tend to be larger than JPEGs. The lossless compression used with PNGs doesn’t remove as much information as the lossy compression method used with JPEGs. If file size is a concern, you want to keep this in mind.
I will almost always choose PNGs or JPEGs for the reasons above. That said, JPEGs wouldn’t have become such a popular image choice if they were absolute trash. No, JPEGs are great. Most of the time, you won’t even notice the differences between a PNG and a JPEG.
But, because we’re talking about design, it’s good to go with the highest quality choice, which is PNG.
Ok, now that we’ve geeked out about image compression, let’s get back to uploading our PDF into Canva.
How to Convert a PDF into a PNG
1. Use a file converter
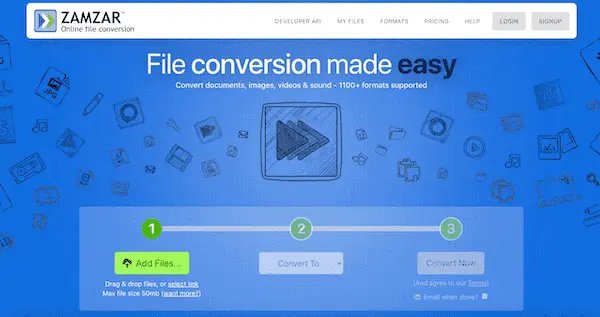
The first step to this process of uploading your PDF to Canva is converting your PDF into a PNG. For this process, simply Google “PDF to PNG converter” and you’ll have an entire list of great options to choose from. Zamzar is one that will appear near the top that I normally use.
As you’ll notice, most of these programs give you the option to convert your PDF into any number of formats, so this is where you can decide where you fall on the JPEG vs. PNG debate.
Simply pick one of the PDF to PNG converters listed in Google, upload your PDF into it, wait for the conversion to take place, and download the PNG it spits out.
2. Drag your new PNG into Canva
Now that your PDF has been converted into a PNG, it’s compatible with Canva’s in-design media library and ready to use.
Drag and drop your PNG into your design and create your design as you normally would.
3. Download your design as needed
When you’re done with your design, it’s time to download it in whatever file type you’ll need to use. If you want to turn your design back into a PDF, I suggest using the print ready setting. This will give you the highest quality PDF version of your design.
If you need an image file, you’ve guessed it, download it as a PNG.
Important note: when you upload a PDF into Canva via your homepage as a new design, it is editable. All of the elements and text are independent of each other and can be edited as any other design would.
When you convert a PDF into an image, it is a static image, which means the elements and text are not independent from each other and can’t be edited.
There you have it. Even though Canva doesn’t allow you to upload PDF files directly into your existing designs, the workaround is pretty quick and easy. Before we close out, here are a few things to keep in mind.
Will converting a PDF to a PNG mess anything up?
Whenever you convert a file from one format to another, you’re at risk of something going wrong. Basically, the more moving pieces you have, the more chances there are that something will get jammed. When you do your conversion, there’s a chance of some quality loss or a bigger glitch.
Just make sure to check your files every step of the way and you’ll be totally fine.
Can I upload a Word document or other text document to Canva?
If you have Word documents or other types of text documents, save them as PDFs and then upload it to your Canva homepage.
Sometimes, we get word documents that are full of pictures. That’ll work. But, if your word documents are actually full of words. You’ll be much better off copying and pasting them into Canva’s text feature instead of turning them into an image. Turning a long string of words into an image is a recipe for squashed, distorted, and weirdly positioned text.
What if the PDF has multiple pages?
Canva can accept PDF files up to 100 pages.
Can I edit my PDF in Canva?
If you upload a PDF into Canva as a new design, all of the text and elements will be separated from each other and can all be edited separately.
That said, this is NOT true for scanned documents. If your PDF is a scanned document, it will appear as a static image.
You also may struggle to edit colors. This is dependent on the PDF you upload.
Lastly, fonts may appear differently when you upload a PDF into Canva. Canva does it’s best to match fonts, but if your PDF uses fonts that Canva doesn’t have, it can’t always match them 100%.
Canva is a great design software, that can now work with PDFs! Simply drag and drop them into your homepage and start designing. If you need your PDFs to be added to an existing design, with a simple conversion, we can turn PDFs into images that work seamlessly with Canva. Simple as that. Happy designing!

Diana has been an artist for over 27 years and has training in drawing, painting, digital drawing and graphic design. Diana’s latest obsession is digitally drawing with Procreate and Procreate Dreams. Diana has experience selling her art across a number of platforms and loves helping other artists learn how to make money from their art as well.

