Making custom brushes in Clip Studio Paint is a really fun way to open up a lot of creative opportunities for your digital art. Do you need a certain brush to create a certain effect? Cool! Go create it! But, how?
In this tutorial, we’re going to walk through the steps you need to take to create your own custom brushes in Clip Studio Paint.
Let’s get started!
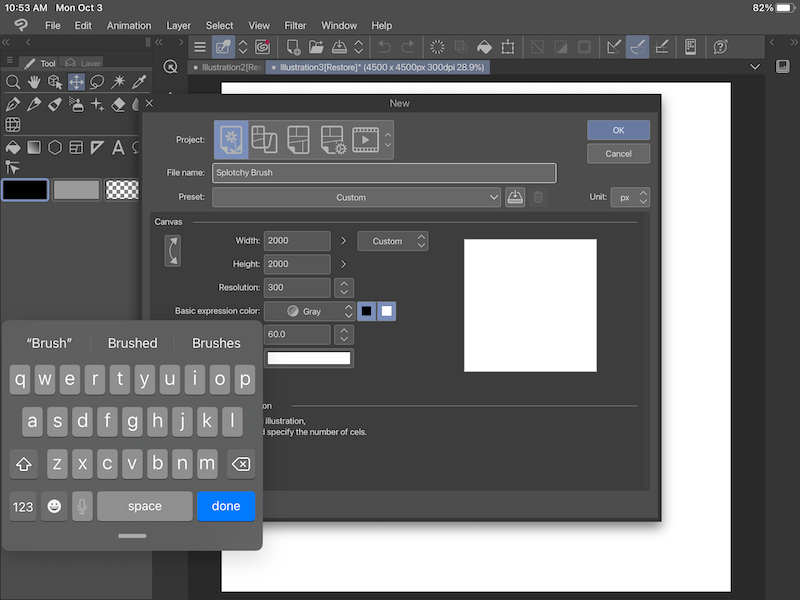
1. Make a new canvas in gray or monotone
To begin with, you’ll want to create a new canvas in Clip Studio Paint. You don’t need to worry too much about the size – a basic square canvas will do. Just make sure it’s not so small that your brush shape ends up being pixelated and not so large that it slows things down.
Next, you want to make sure your canvas is gray or monotone. Drawing your brush shape in color won’t work.
Go ahead and name this new canvas as well. I usually name the canvas the same, or similar, to the brush I plan to create with it.

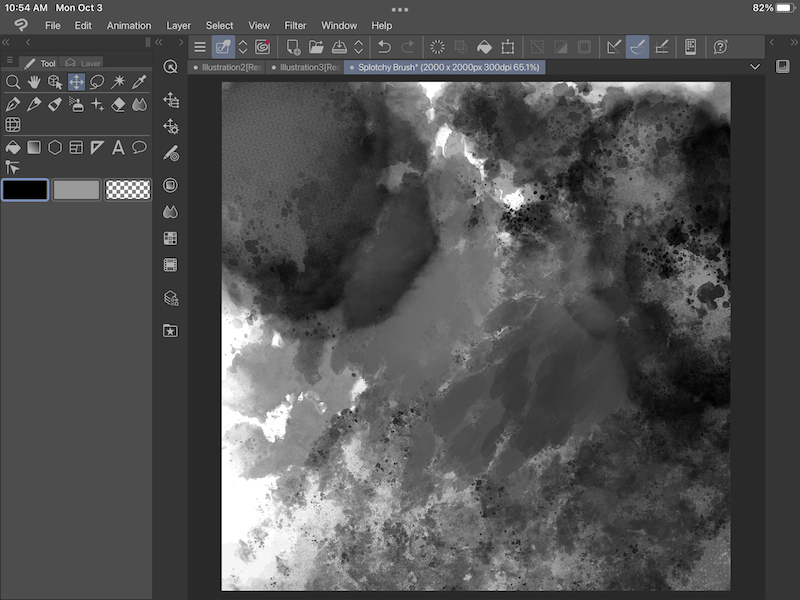
2. Create your brush tip shape
On the gray or monotone canvas you just created, design your brush tip shape. Whatever you draw here will become your brush tip, so be intentional about this.
While there are a LOT of other settings that influence what your brush looks, your brush tip plays a big role.
Since we created a gray or monotone canvas, you’ll be drawing your brush tip in black and shades of gray. That’s normal!
Don’t worry, once your brush is created, you’ll be able to use it with any color you wish. For the creation process though, the brush tip needs to be drawn in black and shades of gray.

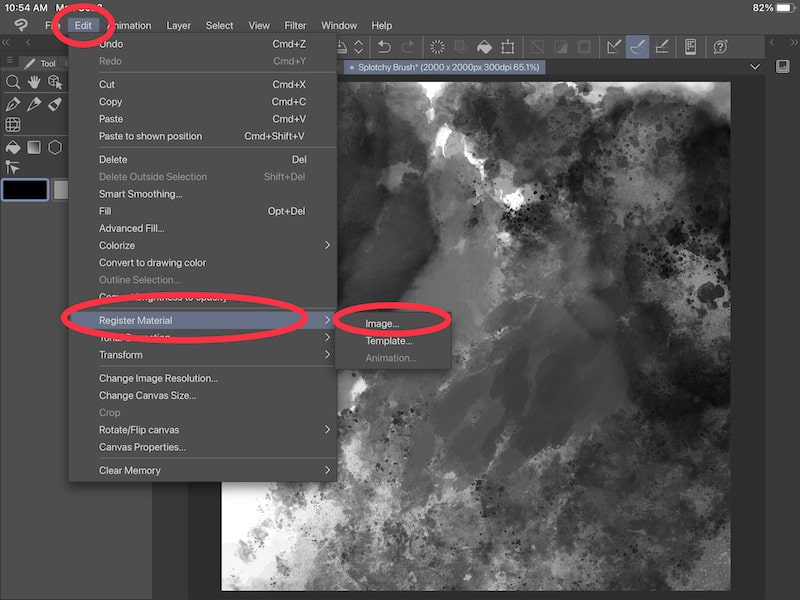
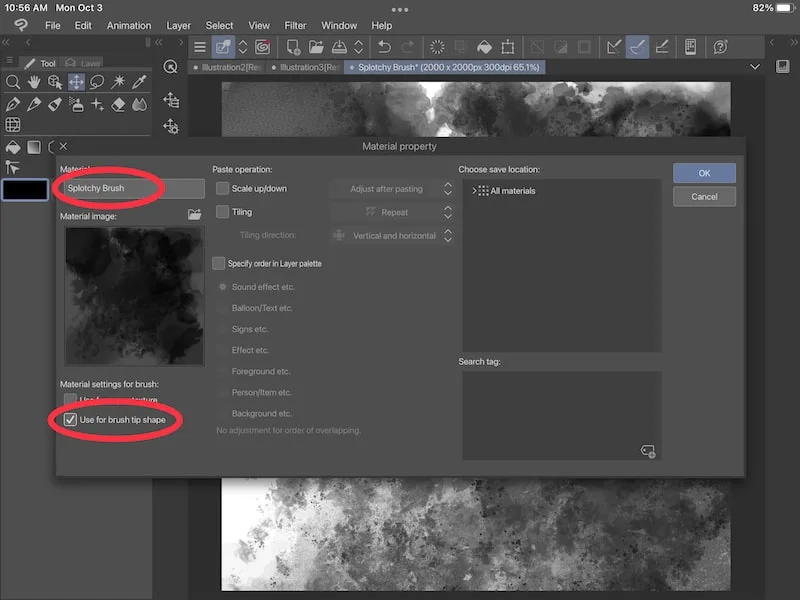
3. Use the “Register Material” button and save your brush tip as an image
Once you’re done drawing your brush tip shape, open the “Edit” menu and scroll down to the “Register Material” button. Within there, choose the “Image” option.

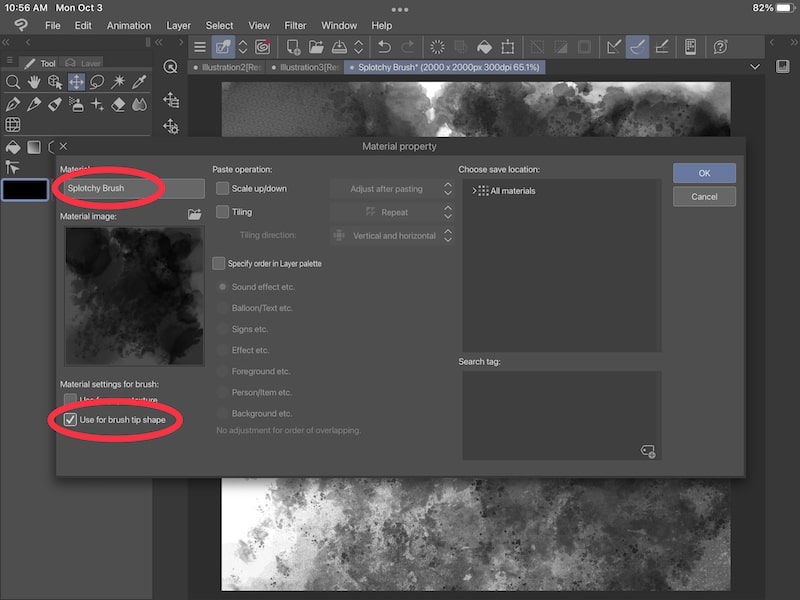
4. Name your brush tip and enable your image for use as a brush tip shape
When you choose to register your brush tip drawing as an image, you’ll see a panel of settings that you need to establish.
Firstly, name your brush tip. This is the name that will appear within your list of Clip Studio Paint materials. Name it something that’s descriptive and recognizable.
Secondly, check the box for “Use for brush tip shape”. This will let the image you created show up when the time comes to choose the brush tip for your new brush.
5. Choose where to save your brush tip image
Within your Clip Studio Paint materials, you’ll need to decide where you want to save your new brush tip shape.
I personally have a folder of custom brushes that I use.
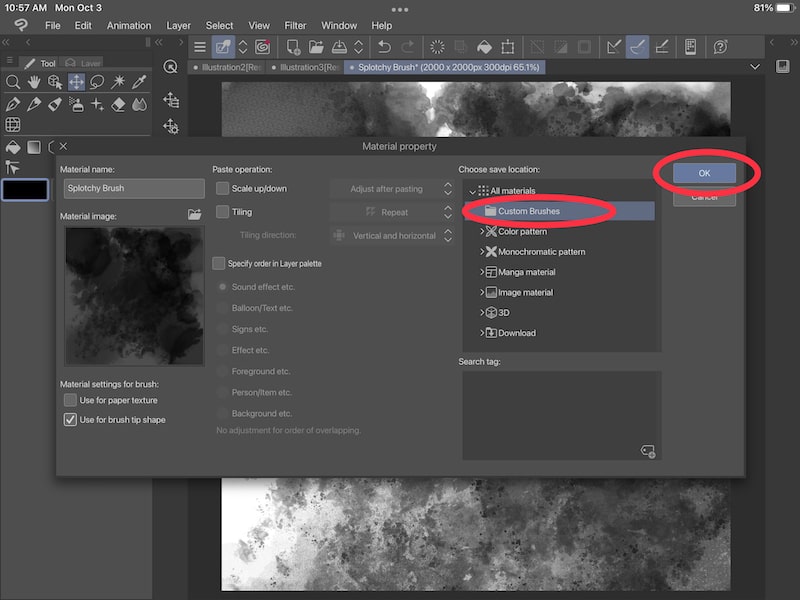

If you don’t know how to create folders, navigate to your materials folder at the bottom of your toolbar. Then, click on the new folder button.

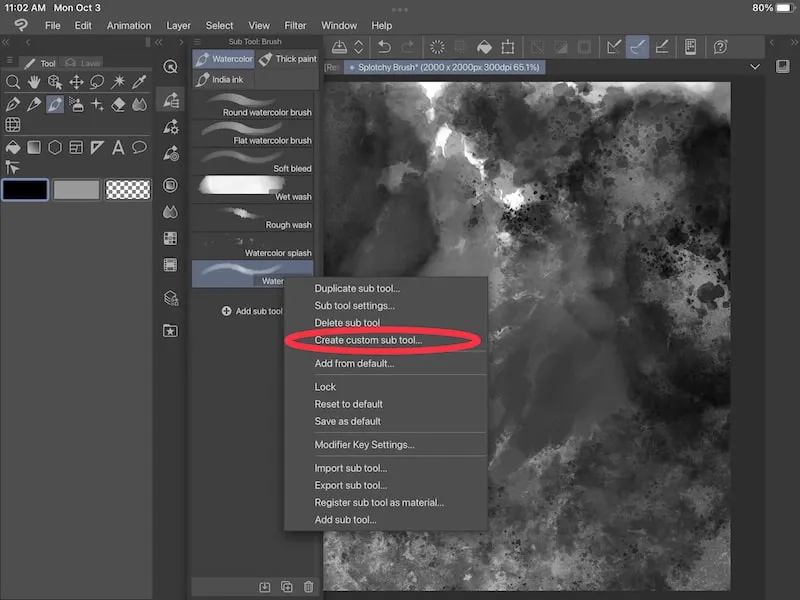
6. Create a custom sub tool or duplicate a brush
Now we need to create the base for your new brush. You have two options here.
One option is to duplicate a pre-existing brush. This can be an efficient choice if a brush already exists that’s similar to the brush you want to create. That way, all of the brush settings of the existing brush transfer over to your new brush and you only need to swap out the brush tip shape and make any adjustments, as needed.
To duplicate a brush, choose the “Duplicate sub tool” button for the brush you want to duplicate.
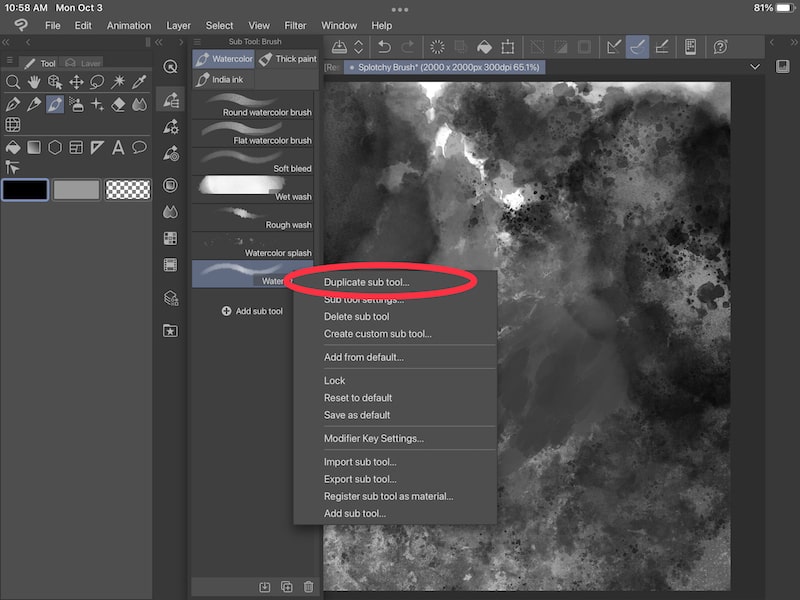
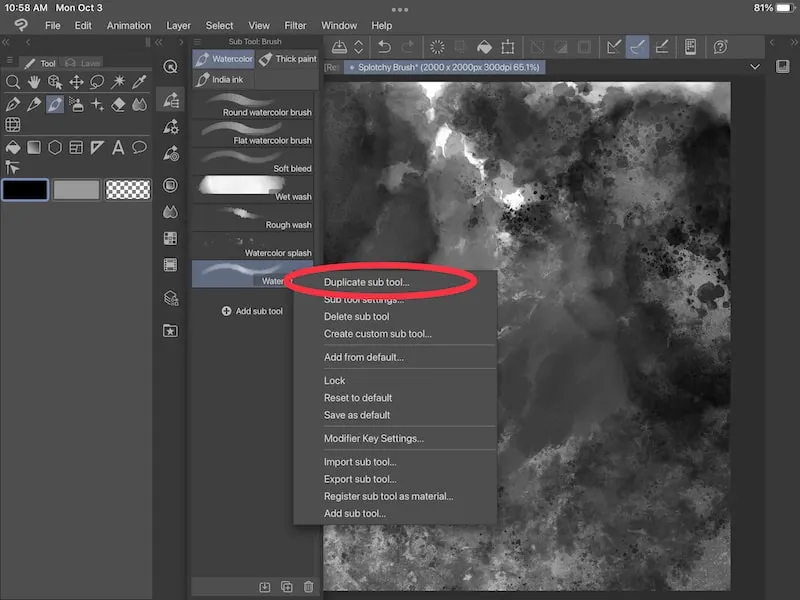
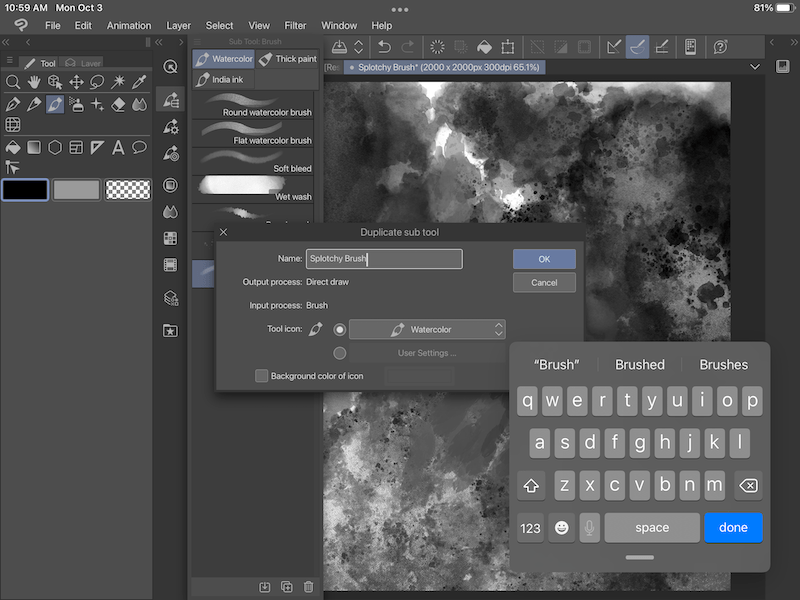
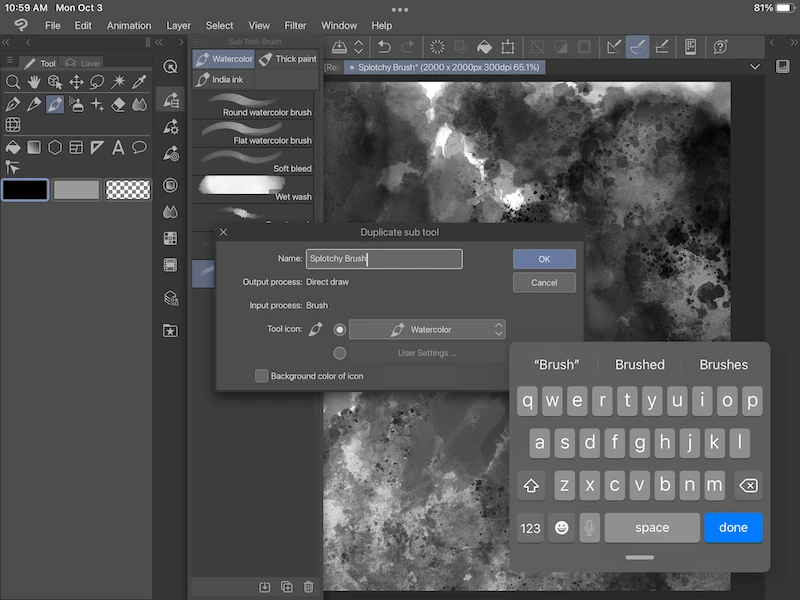
Name your brush, decide on the brush’s icon, and click the “OK” button.
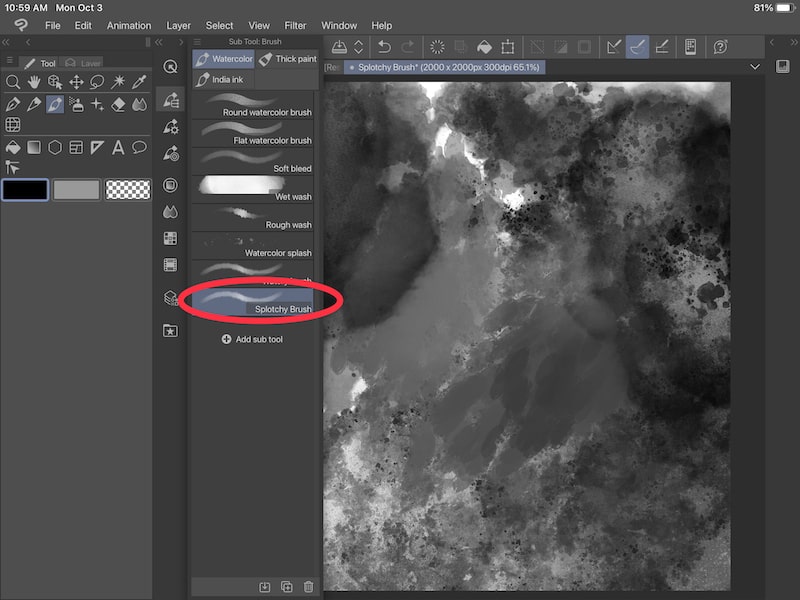
This will create a copy of the brush you duplicated, but with the custom name you assigned it.
The other option is to create a new brush from scratch. This can be a great option if you want to fully customize your brush with a clean slate.
To create a new brush, choose the “Create custom sub tool” button from any brush. Just make sure you do it from the category you want your brush to live in. For example, if I want to create a new brush within the “Watercolor” category, I’ll create my new brush within there.

Name your new brush and determine the icon you want to use for it. Leave the “Output process” as “Direct draw” and the “Input process” as “Brush”.
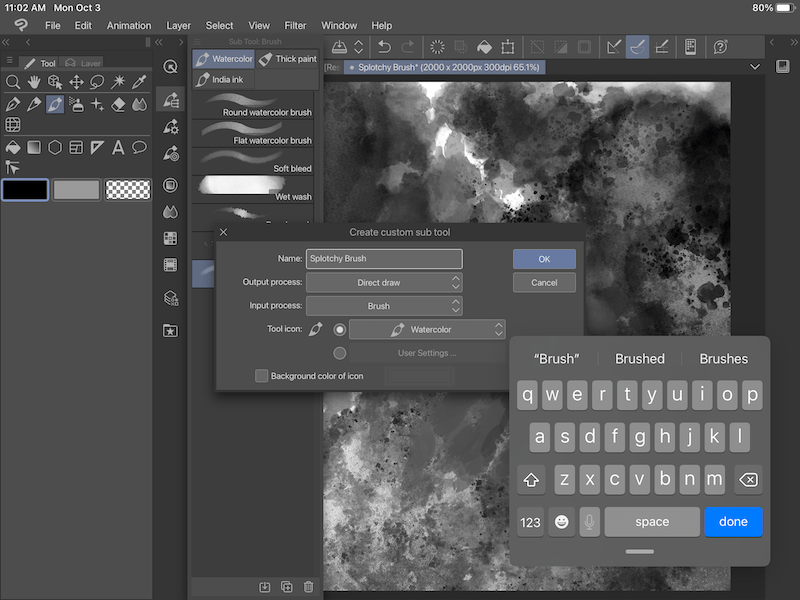

It can be fun to look at everything that Clip Studio Paint has to offer within the output and input process dropdowns. There are so many awesome options for the tools you can create! Don’t choose anything other than “Direct draw” and “Brush” for the purposes of this tutorial, but it can be fun to dream.
Then, click the “OK” button.

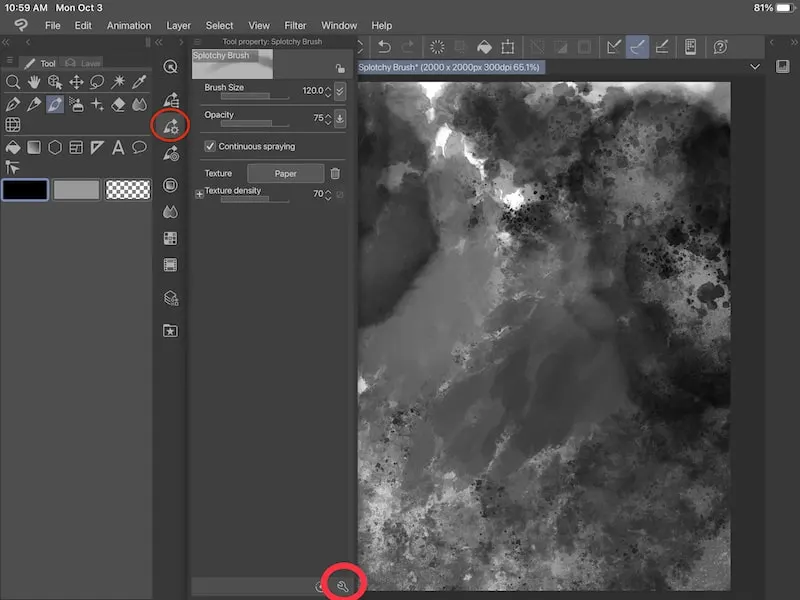
7. If you duplicate a pre-existing brush, navigate to the “Tool property” menu for your new brush and click on the wrench
If you duplicated a pre-existing brush, make sure the brush is selected and click on the “Tool property” menu button. This is the one that has the gear icon on it. Then, click on the wrench at the bottom of your “Tool property” menu.

If you created a new brush from scratch, the “Sub Tool Detail” menu will pop up automatically after you click on the “OK” button in the previous step.
8. Navigate to “Brush tip” and “Material”
Once you’ve opened the “Sub Tool Detail” menu, navigate to the “Brush tip” section and make sure that “Material” is selected.

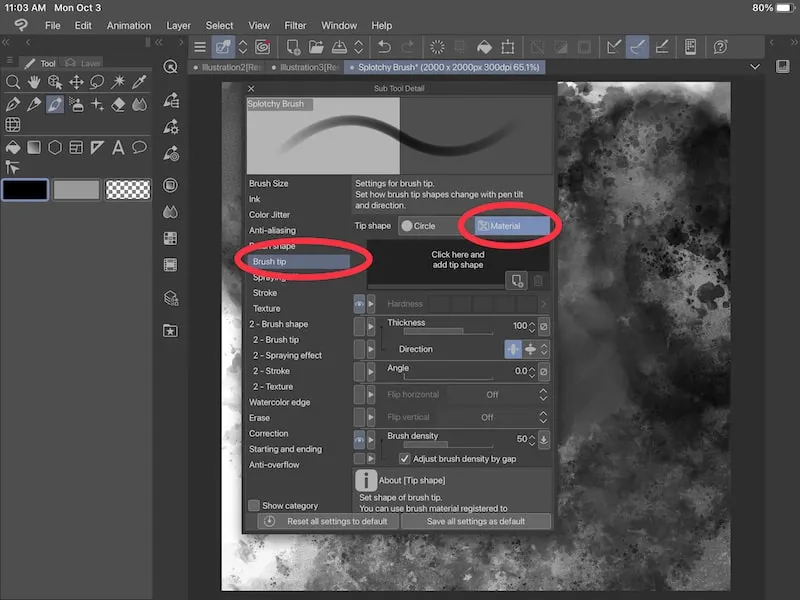
If you duplicated your brush, depending on the type of brush you duplicated, you might see an image in the box below the “Circle” and “Material” labels. This is the current brush tip that’s being used for your brush. Click on the little downward arrow within that brush tip shape image to select and change your brush tip shape.
If you created a brush from scratch, you won’t see an image below the “Circle” and “Material” labels. Click on that empty space.
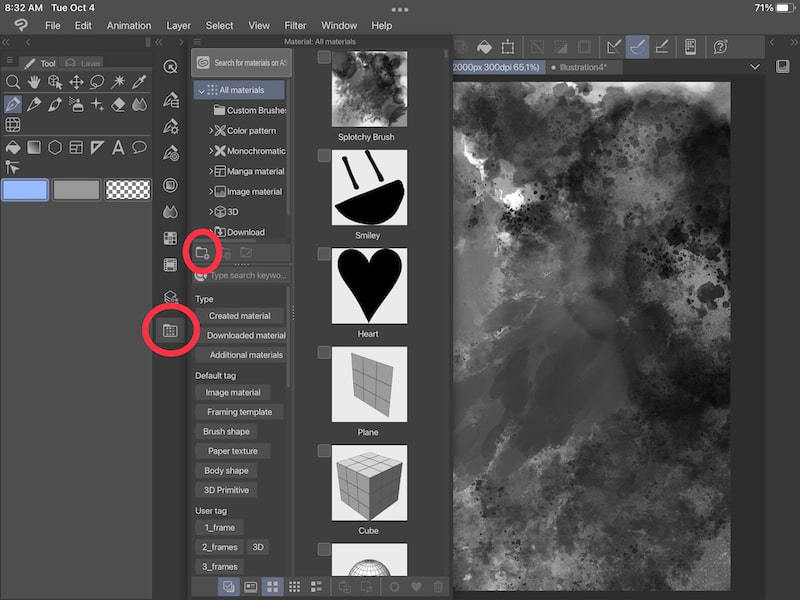
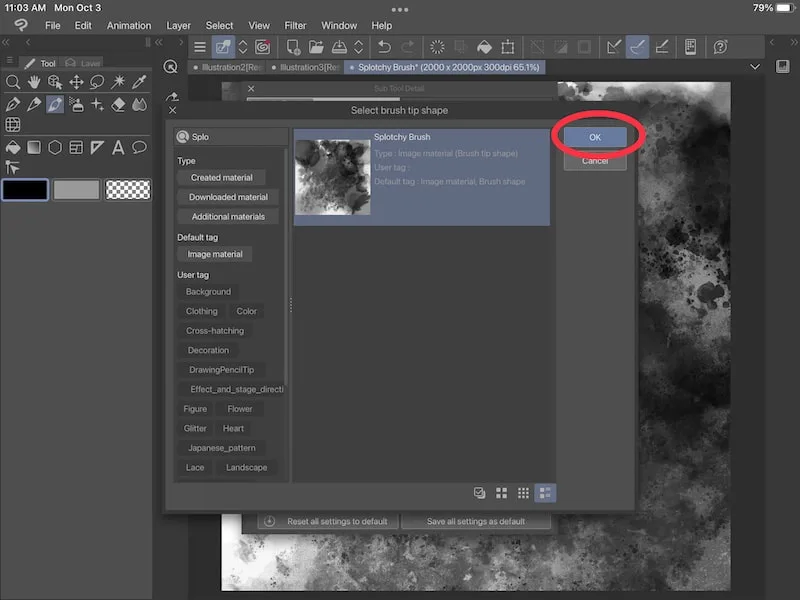
9. Find the brush image you created
Now you need to find and select the brush tip shape image you created. Either scroll through the options or search for the name of the image you saved.
When you’ve found it and selected it, click the “OK” button.

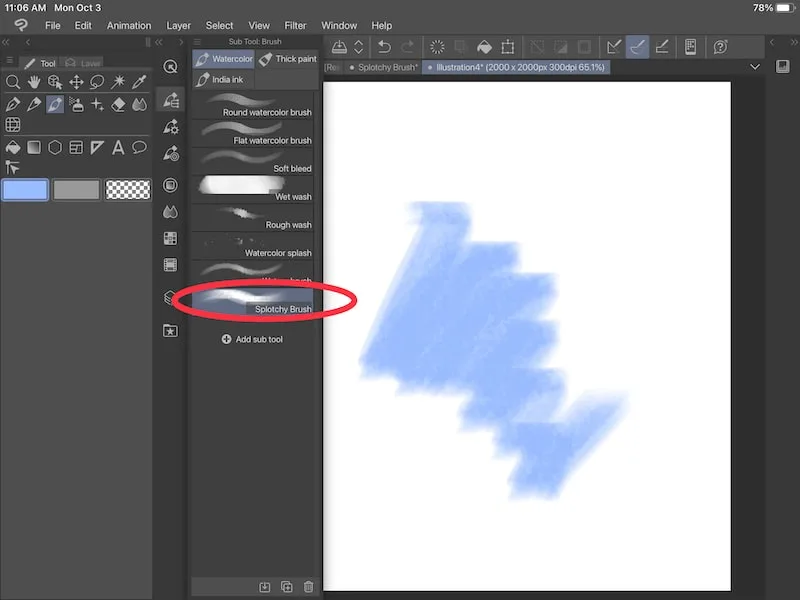
10. Customize your brush
Now it’s time to customize your brush! There are SO many ways to customize your brush.
Personally, when creating brushes, I try to adopt an experimentation mindset and see where things lead me. I try out a few settings, see what results I get, then return to my brush settings to make more adjustments.
Overtime, I’ll eventually land on the brush I’m looking for!
Something I want to draw your attention to is the ‘texture” setting. You might have created this wonderfully textured brush tip shape but, once you create your brush, you wonder where all the texture went.
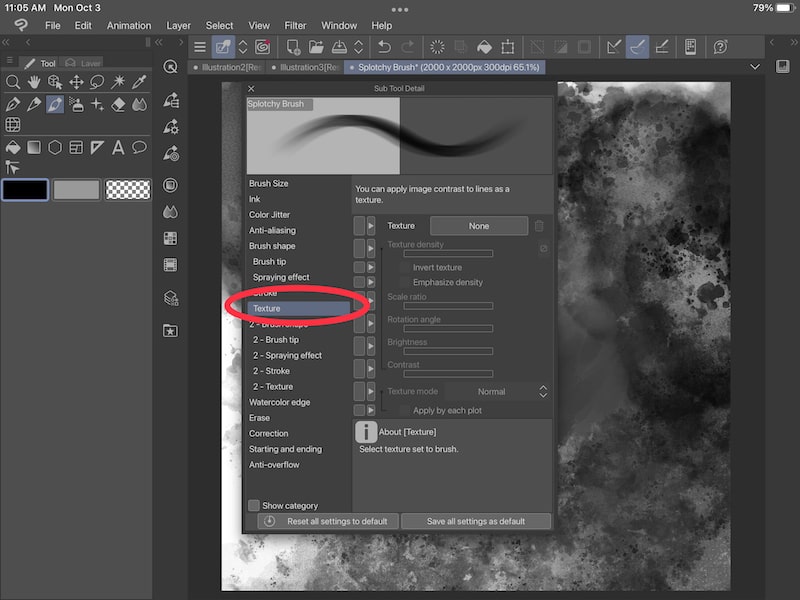
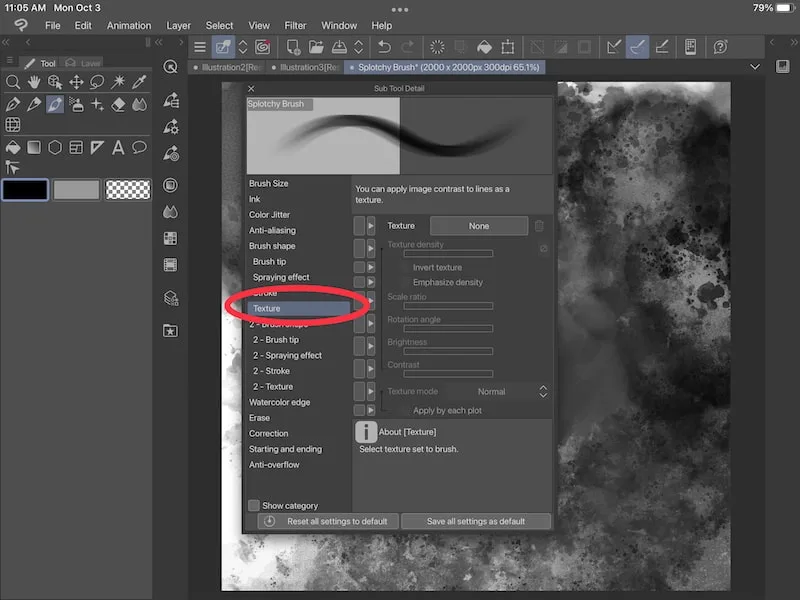
Your brush tip shape isn’t the only thing that influences your brush. If you want texture in your final brush, it’s important to pay attention to the “Texture” section. Here you can choose a texture to apply for your brush.
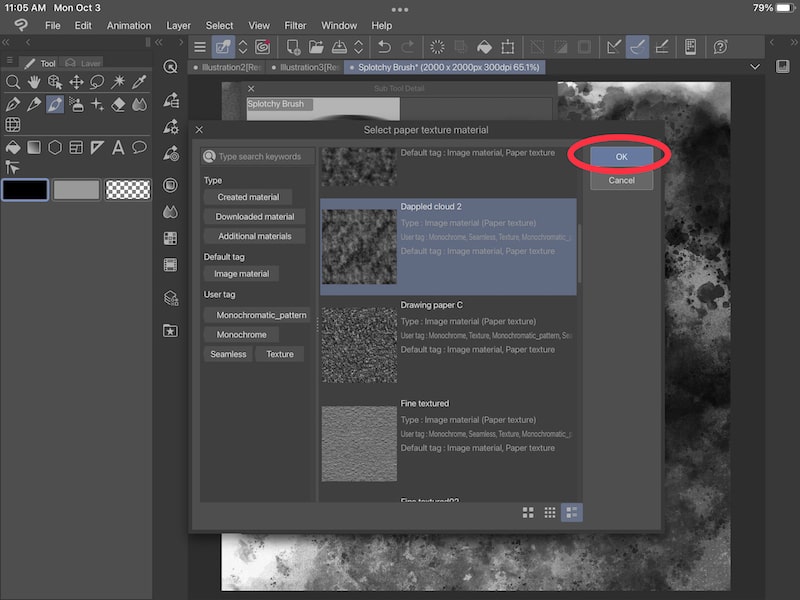
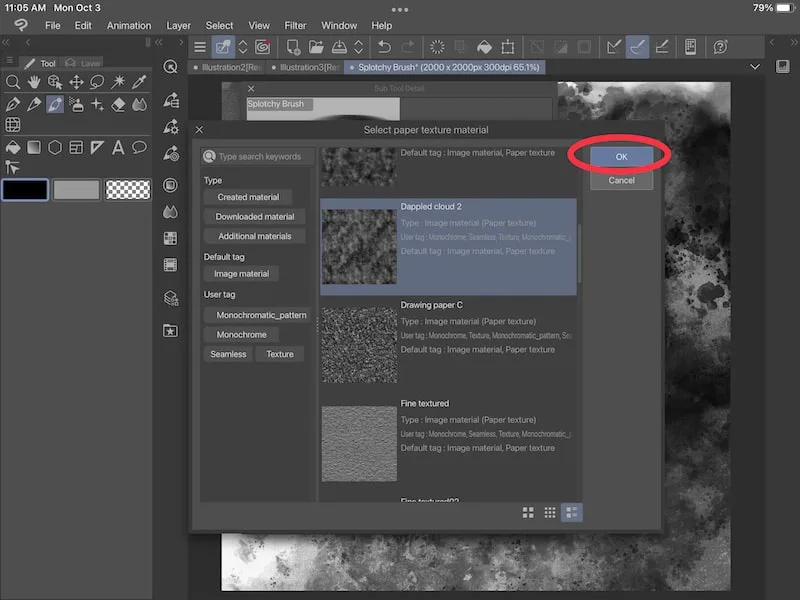
If you want a textured brush, don’t forget about this step!
11. Enjoy your new brush!
Take as much time as you need to experiment with different brush settings and options. Have fun with it! It’s neat to see all of the various ways that you can customize brushes in Clip Studio Paint.

Once you’re done and happy with your brush, it’s time to start using it. Remember that you created a gray or monotone canvas to create your brush tip. In order to use your brush with color, you’ll need to use a color canvas.
I often forget to switch my canvases and then wonder why I can’t draw in color, so it’s something to look out for!
Creating custom brushes in Clip Studio Paint is such a fun way to add unique and personalized brushes to your collection. Have fun creating your brushes and making new art with them!
Today we learned about creating custom brushes, but you can also import brushes as well! While you’re learning about brushes, continue on to learn how to import brushes into Clip Studio Paint.


Diana has been an artist for over 27 years and has training in drawing, painting, digital drawing and graphic design. Diana’s latest obsession is digitally drawing with Procreate and Procreate Dreams. Diana has experience selling her art across a number of platforms and loves helping other artists learn how to make money from their art as well.