
If you’re a Procreate artist who is using Clip Studio Paint, a natural question might come up. Can you import Procreate files into Clip Studio Paint? If so, how? Procreate files can be imported into Clip Studio Paint after being exported as PSD files. Given that PSD files are compatible with both Procreate and Clip …
Clip Studio Paint

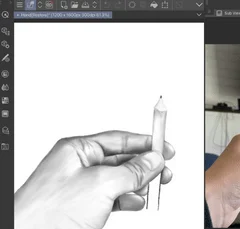
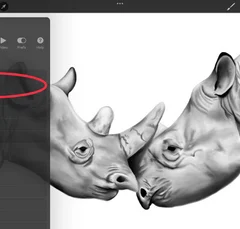
Reference images can be really helpful when creating art. But, it can be a pain to think about printing a picture, using another device to open your images with, or finding some method of having your reference photo easily available. Luckily, Clip Studio Paint has a reference window that makes it quick and easy to …

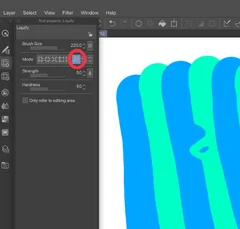
Clip Studio Paint’s liquify tool lets you push, pull, warp, and shape your art. It’s such a fun feature that lets you more easily create effects that would be tricky to create by hand. To use the liquify tool in Clip Studio Paint, begin by clicking on it in the tool panel. Within the tool …

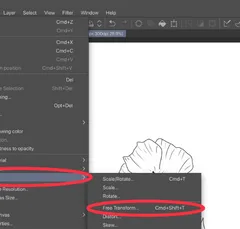
Clip Studio Paint’s Free Transform tool lets you resize, reposition, drag, and otherwise adjust the objects in your art. It’s an awesome feature to know how to use! To use Clip Studio Paint’s Free Transform tool, find it in the Edit menu, or use the Cmd+Shift+T keyboard shortcut. Use the Tool Property menu to adjust …

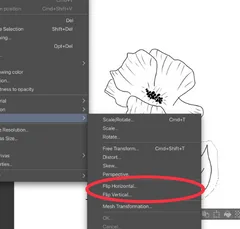
Maybe you’ve created an awesome piece of art, but start to wonder if the positioning is correct. Maybe an object, or an entire layer would look better if it was flipped. To flip a selection in Clip Studio Paint, use the selection tool to isolate the object you want to flip. Use the Transform tool …

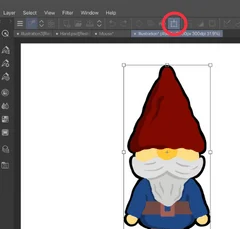
It happens to all of us. We’re working on art in Clip Studio Paint and realize it’s the wrong size. Whomp whomp. That’s why this tutorial is all about resizing images, objects, and canvases in Clip Studio Paint. To resize an object or image in Clip Studio Paint, use the transformation tool. To resize a …
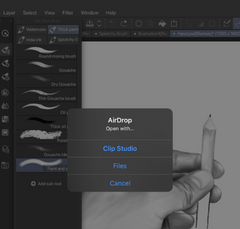
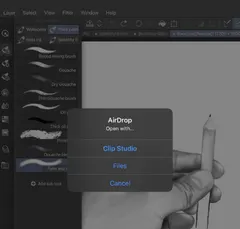
If you like to draw on your iPad with Clip Studio Paint, you might be wondering how you can import brushes to create some awesome new art. The simplest way to import brushes into Clip Studio Paint on an iPad is to click on them within your Files folder directly, or choose to import a …

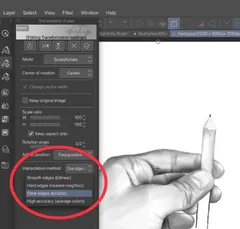
As digital artists, we all know that quality is important. Pixelated, fuzzy, or blurry drawings can be a bummer. That’s why we need to be careful when resizing our work in Clip Studio Paint. When resizing raster-based work in Clip Studio Paint, quality loss happens because the pixels are stretching or shrinking to accommodate the …


Making custom brushes in Clip Studio Paint is a really fun way to open up a lot of creative opportunities for your digital art. Do you need a certain brush to create a certain effect? Cool! Go create it! But, how? In this tutorial, we’re going to walk through the steps you need to take …

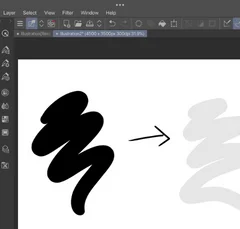
Adjusting the opacity of your layers and brushes lets you decide how opaque or transparent you want different elements of your digital art to be. This is SO important for creating the effects you want for your art. Luckily, Clip Studio Paint makes it easy to adjust the opacity of your layers and brushes. To …