One of the big perks of digital art in Procreate is being able to reorganize and move your layers. This lets you draw behind or in front of other objects and play around with how they’re positioned on your canvas overall.
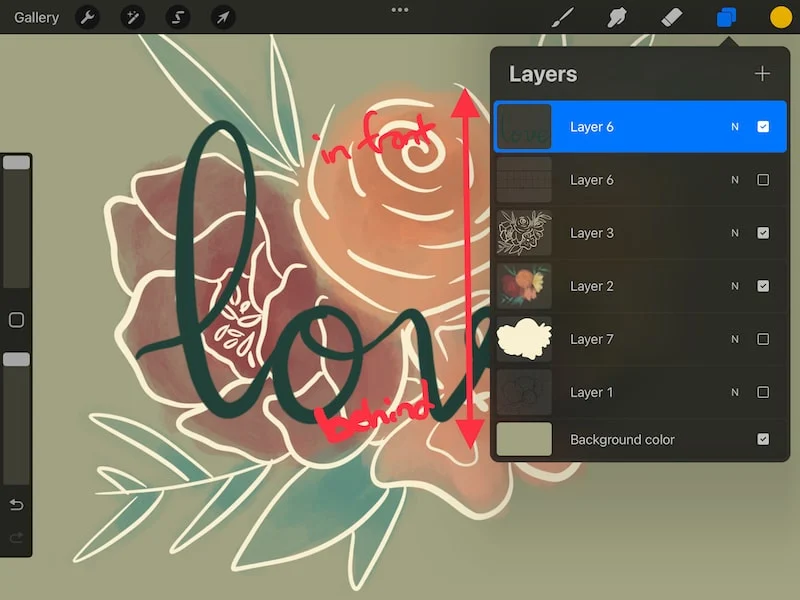
The order of your layers in Procreate will determine which layers, and any objects drawn on them, are behind or in front of each other. Layers near the bottom are technically behind any layers on top of them. If you want to move an object behind or in front another object, move it down or up your list of layers.
Strategically moving your layers up and down your list of layers is an extremely valuable way to make the most out of digital art.
With traditional art, you can’t suddenly move your objects behind or in front of other objects. Once you decide how things are going to be positioned, and lay them down on your paper that way, you’re locked in.
You’d have to redo your artwork in order to change it.
With digital art, things don’t work that way.
Procreate’s layers make it super quick and easy to move your objects behind and in front of each other. You can even make your objects disappear so that you can focus on your background object without the distraction of your front and center objects.
To say that I LOVE this feature is an understatement.
Here’s the short and snappy explanation of how “behind” and “in front” work in Procreate. When you open your layers panel in Procreate, your layers will sit in a vertical row.
Any layers that are below other layers, sitting closer to the bottom of the list, will behind all of the layers on top of them.
Conversely, any layers that are above other layers, sitting closer to the top of the list, will be in front of layers on top of them.
Think bottom=behind and on top=in front
We’re going to practice moving objects behind and in front of each other using Procreate’s layers. Here’s what you need to know:
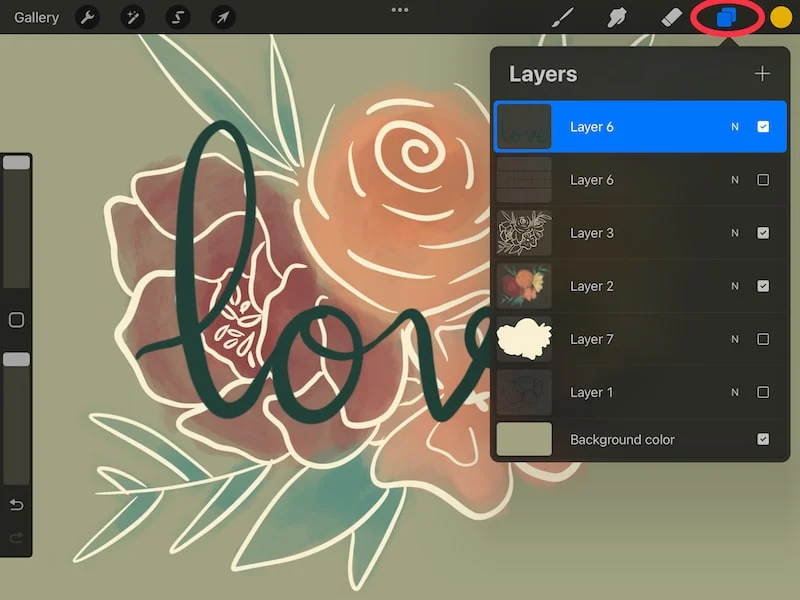
1. Open your layers panel
Your layers panel lives in the top right corner of your Procreate screen. It’s the one that can be found with the square icon. Once you’ve found it, tap on it to open it.
2. Find an object you want to move behind another object
To start with, let’s practice moving an object behind another object. To do this make sure you have at least two layers within your layers panel and there is something drawn on each of them.
If you need to create any new layers, click on the + icon in the top right corner of the Layers panel.
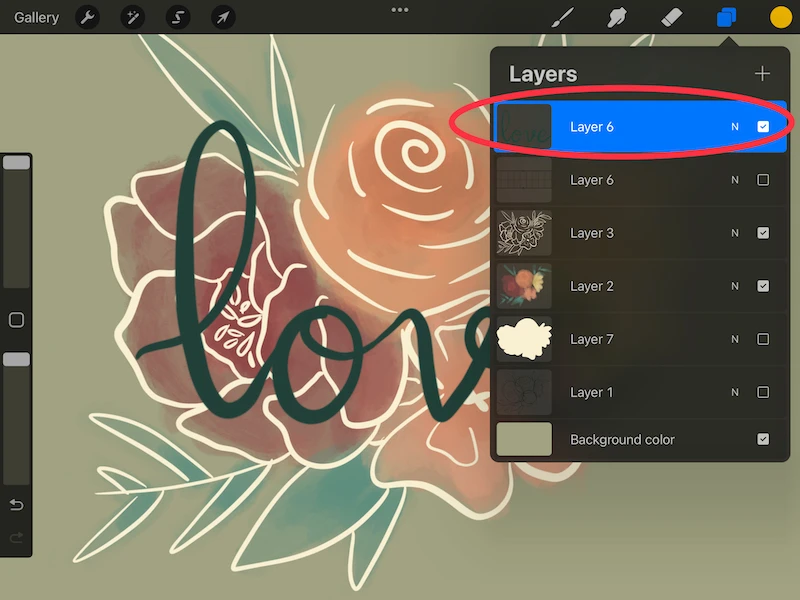
3. Hold your finger down on the layer you want to move
Find the layer that contains the object you want to move behind your other object. Hold your finger down on this layer. It will pop out of your layers panel, which means it’s ready to move.
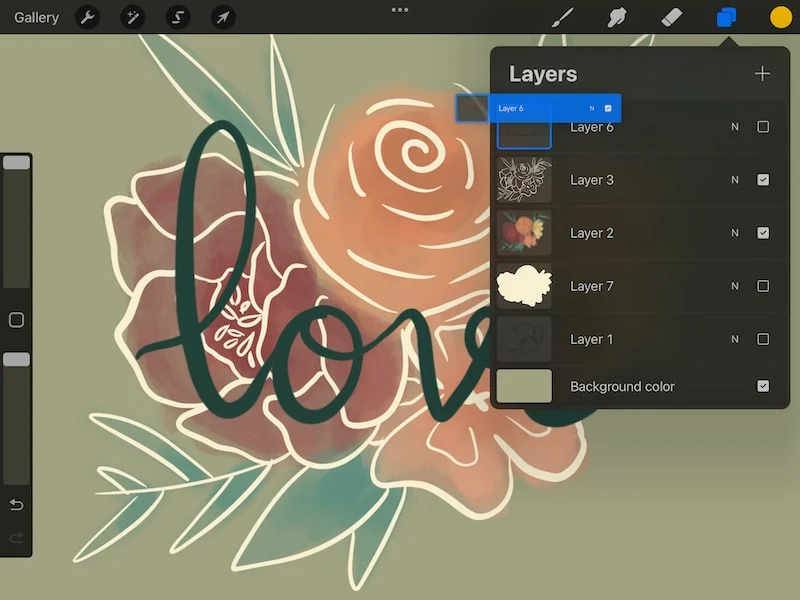
4. Move your layer DOWN your list of layers in your layers panel
Move this layer down your list of layers. Where specifically? Remember that your layer will be behind any layers above them and in front of any layers below them.
So, move your layer below all of the layers that you want to have in front of your layer.
The drawings or images on the layer you just moved will now appear behind any drawings or images on layers that are positioned above this layer in your layers panel.
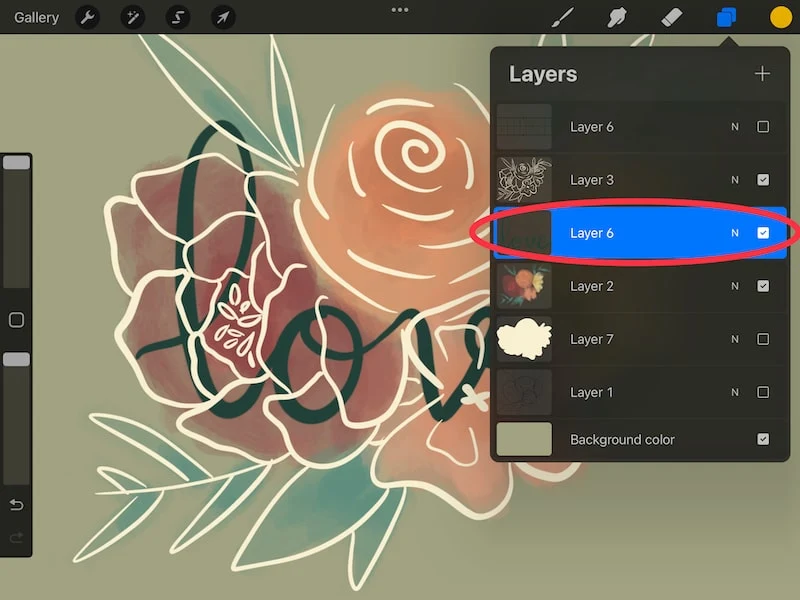
5. Now find an object you want to move in front of another object
Let’s practice moving an object in front of another object. To do so, the first thing you need to do is identify that object and know which layer it’s on.
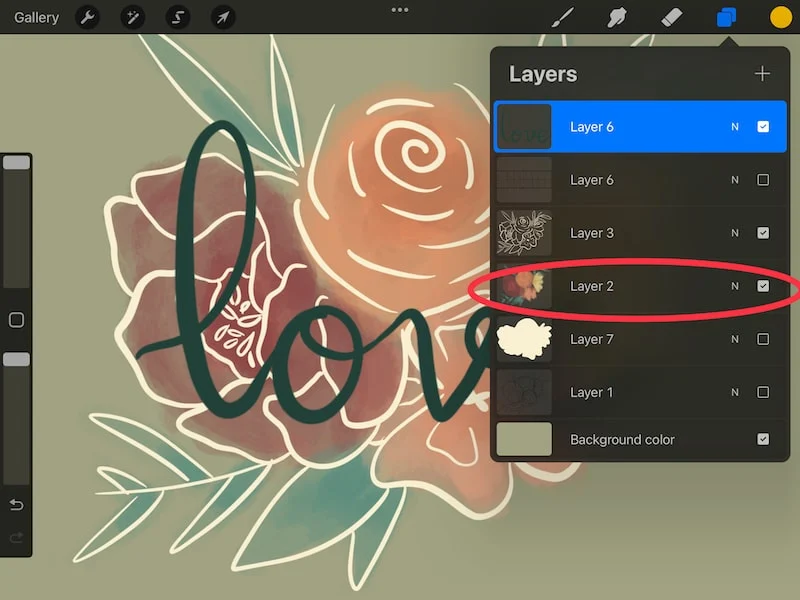
6. Hold your finger down on the layer you want to move
Hold your finger down on this layer. It will pop out of your layers panel, which means it’s ready to move.
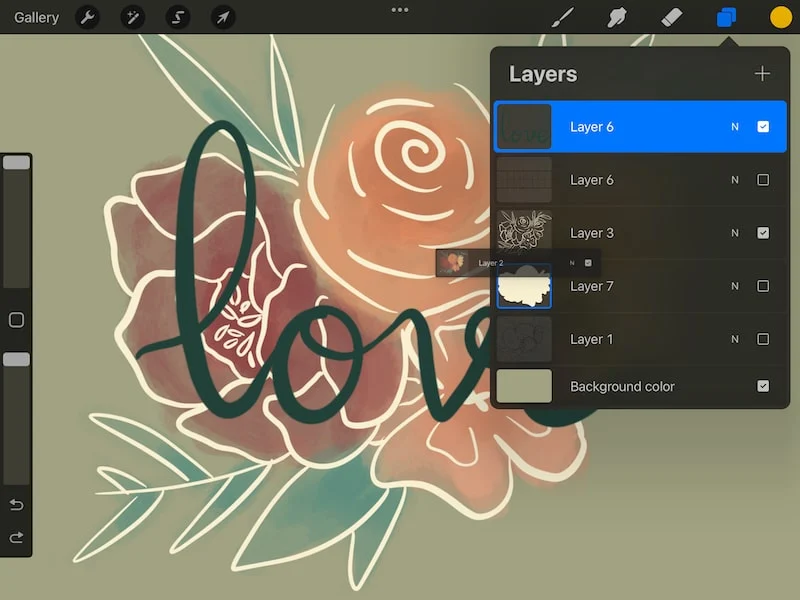
7. Move your layer UP your list of layers in your layers panel
Move this layer up your list of layers. Where specifically? Remember that your layer will be in front of any layers above them and behind any layers below them.
So, move your layer above all of the layers that you want to have behind your layer.
The drawings or images on the layer you just moved will now appear in front of any drawings or images on layers that are positioned below this layer in your layers panel.
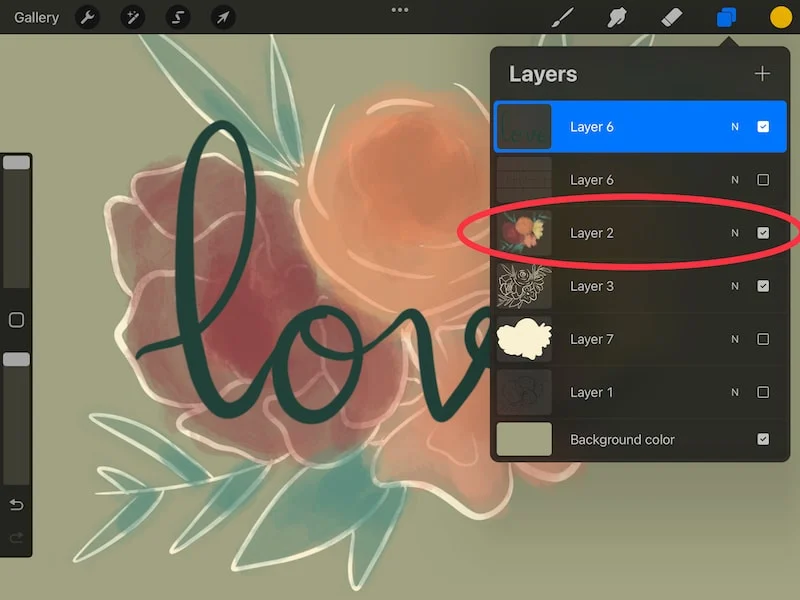
Experiment with moving your layers up and down your list of layers in your layers panel. This is a super quick and fun way to determine how you want your objects to be positioned on your canvas.
Specifically, whether they should be background objects, or the shining star start of the show in front.
When moving your layers around and deciding if you want them in front or behind each other, things can get confusing REALLY quickly.
You move an object forward so that you can work on it, but then get distracted by the objects that are behind it…but ultimately are supposed to be in front…but are behind right now…yikes.
Here’s where your layer visibility comes in. Especially if you’re working with a lot of layers, being able to turn the visibility of your layers on and off is a big help when working on crafting individual drawings and images before deciding where they’ll ultimately be placed in your composition.
I have a full article about hiding layers and creating private layers you should check out if you want to learn more about layer visibility!
Again, if you’re a traditional artist, moving objects behind and in front of each other may not be at the forefront of your mind. It’s not something we could ever even consider with traditional art!
Go ahead and play around with it so you can realize the potential of moving your layers around to influence how your objects are positioned.
Diana has been an artist for over 27 years and has training in drawing, painting, digital drawing and graphic design. Diana’s latest obsession is digitally drawing with Procreate and Procreate Dreams. Diana has experience selling her art across a number of platforms and loves helping other artists learn how to make money from their art as well.

