Whether you want to draw in grayscale, or want to see your multicolored work in grayscale, there isn’t a magic button in Procreate that will automatically turn everything into shades of gray. To use grayscale in Procreate, there are a few more steps to take.
To view your multicolored Procreate art in grayscale, add a new layer to the top of your layers list and fill it with gray. Change the blend mode to “Hue” or “Saturation” to view your work in grayscale. To draw in grayscale in Procreate, it’s best to use a grayscale color palette.
If you came to this post because your color wheel is STUCK in grayscale, that’s a different topic. Luckily though, I have a full post on what to do if your Procreate color wheel is stuck in grayscale that you can check out.
Before we get started, it’s important to differentiate between whether you actually want to CREATE your work in grayscale, or if you simply want to VIEW your work in grayscale.
Creating your work in grayscale means that you’ll only use black, white, and gray tones for your artwork. The final product will be in grayscale.

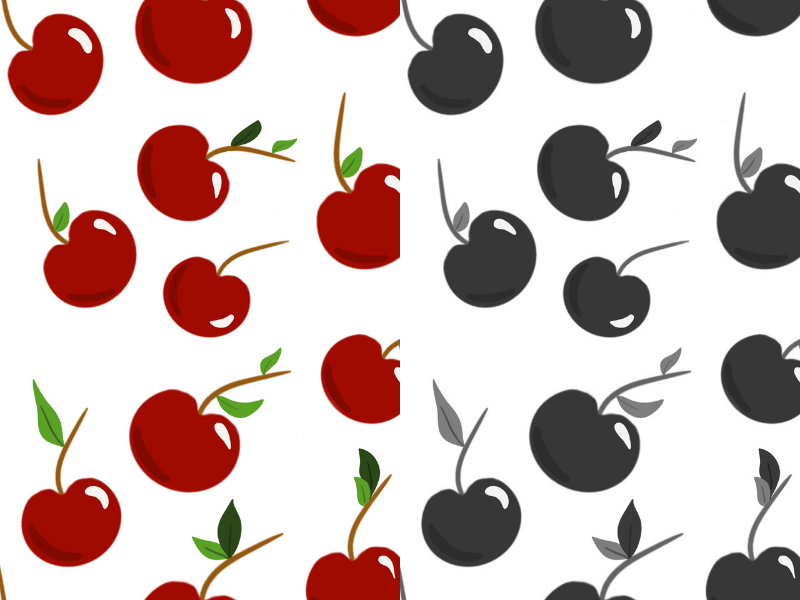
Viewing your work in grayscale means that you’ll create a multicolored piece of artwork in Procreate. Then, you’ll manipulate it so that you can view it in grayscale. You can decide to keep your work in grayscale, but the original will be multicolor.
Of course, the method you choose will make a huge difference to your art – a final piece of art in grayscale vs. multicolor. So, have a good grasp on what you want to do before moving forward.
To begin with, we’re going to talk about how to view your multicolored Procreate art in grayscale. Then, we’ll talk about how to create your Procreate work in grayscale from the outset.
This post may contain affiliate links, which means I may earn a commission if you decide to purchase through my links.
How to View Your Procreate Work in Grayscale
The easiest way to view your multicolored Procreate art in grayscale is to utilize layers and blend modes. Create a new layer at the top of your layers list. Fill this layer with a gray color. Change the blend mode for this layer to “Hue” or “Saturation” to view everything below it in grayscale.
What I love about this method is that it can be easily toggled on and off. Even though Procreate doesn’t have a magic grayscale button, this is the closest we can get to replicating one.
Once you have everything setup correctly, you can quickly switch between your original multicolor piece of art and your grayscale version.
Alright, so here are the steps to viewing your multicolored Procreate work in grayscale:
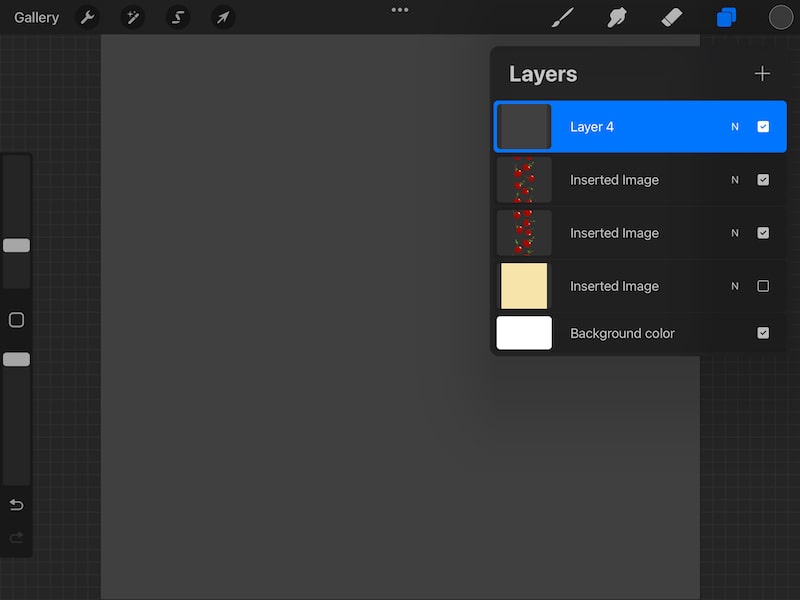
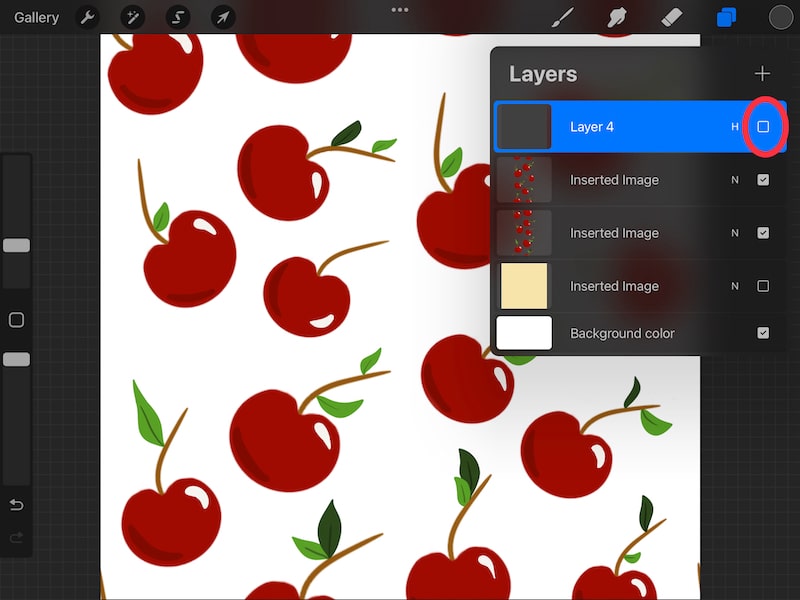
1. Create a new layer at the top of your layers panel
If you want to view your entire piece of artwork in grayscale, make sure that your new layer is at the top of your layers panel, above all of your other layers.
If you only want to view part of your artwork in grayscale, put your new layer above any layers you want to view in grayscale. Basically, anything below this layer will be in grayscale, while anything above it will stay multicolored.

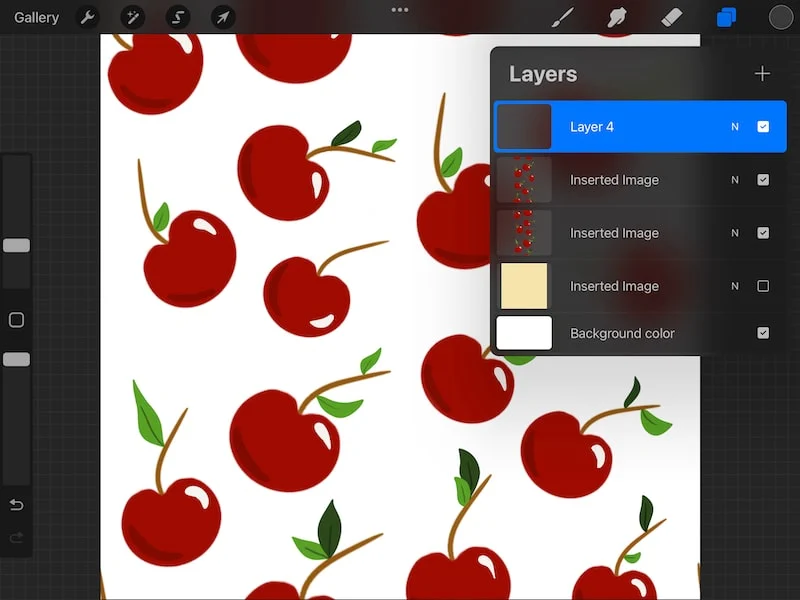
2. Fill your new layer with a gray color.
Choose any shade of gray in your color wheel. Drag and drop this gray color into your new layer to fill it with gray.

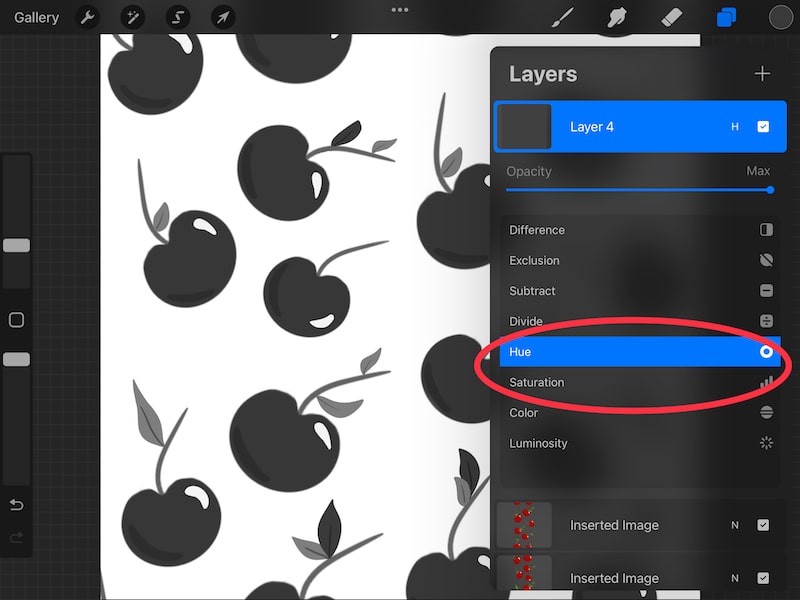
3. Change your layer’s blend mode to “Hue” or “Saturation.”
Open the blend modes for the layer you just filled with gray. You can access the blend modes by clicking on the little “N” icon on the layer. That “N” stands for “Normal,” which just means that your layer is currently using the default, “Normal” blend mode.
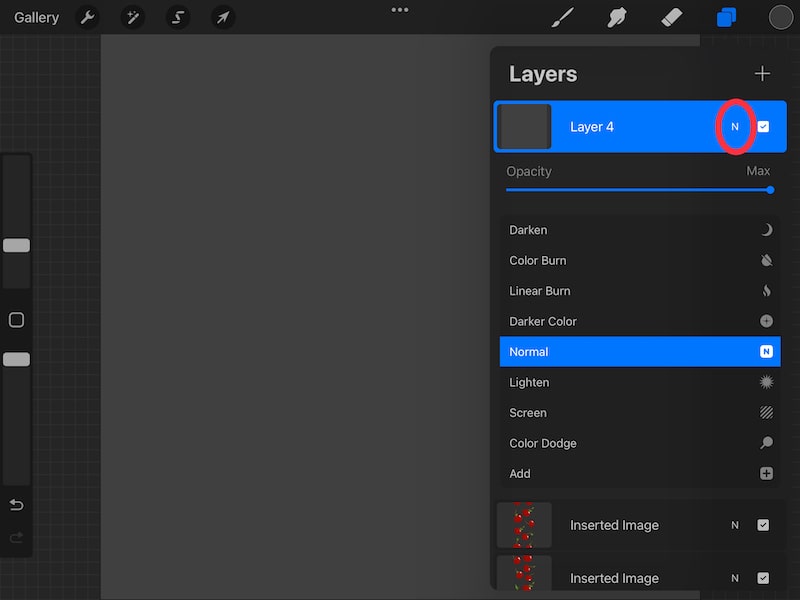

When you click on the “N,” you’ll see the other blend mode options appear. Scroll through the blend modes until you land on either “Hue” or “Saturation” for your active blend mode.

4. Toggle your gray layer one or off to view your art as multicolor or grayscale.
Here’s where the fun comes in. If you set up your gray layer correctly, once you set the blend mode to either “Hue” or “Saturation,” everything below it will turn to grayscale.
Now, if you want to toggle between multicolor and grayscale, simply turn the layer off and on by tapping on the checkmark on the right hand side of the layer.
If you decide you want to keep your artwork in grayscale, simply keep the gray layer active.

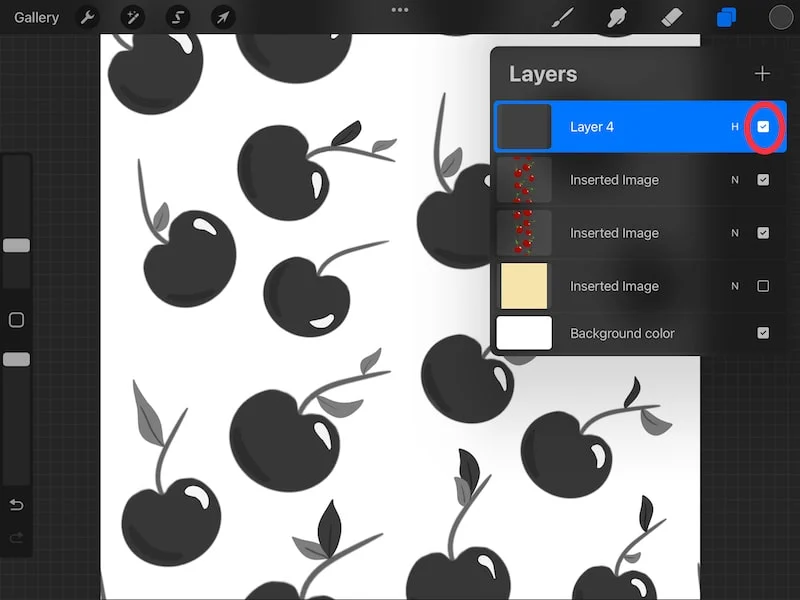
If you decide you want to have art in its original, multicolored form, simply deactivate your gray layer.

There are other ways to view your work in grayscale, like changing the accessibility settings of your iPad. Personally though, I prefer the method we just talked about because it’s quick and easy.
It also lets you quickly toggle between your original multicolored work and your grayscale version.
Alright, so now that we’ve talked about viewing your multicolored work in grayscale, let’s talk about creating your work in grayscale from the outset.
How to Draw in Grayscale in Procreate
The best way to draw in grayscale in Procreate is to use a color palette that’s dedicated to gray tones. There are a number of pre-created swatches you can import into Procreate to get you started. You can also create a custom color palette with your own gray tones.
Remember that drawing your work in grayscale is similar to drawing in any other color. You’re simply drawing in gray tones instead of other colors..
Be 100% sure you want to create your work in grayscale before you get started. Once you lay down all of your grays, there will be manual work involved to switch everything to multicolor if you change your mind down the line.
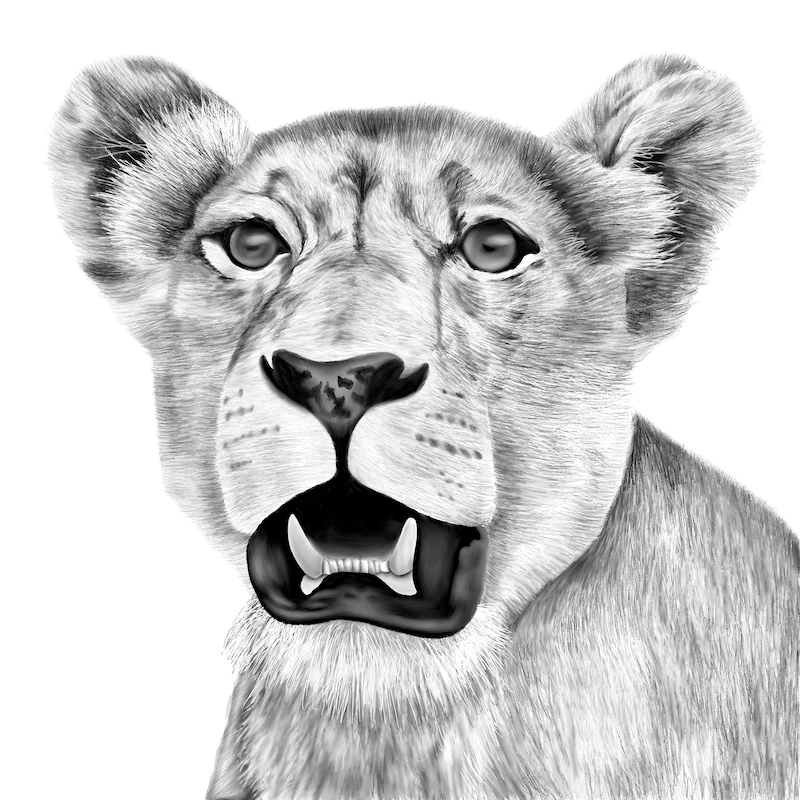
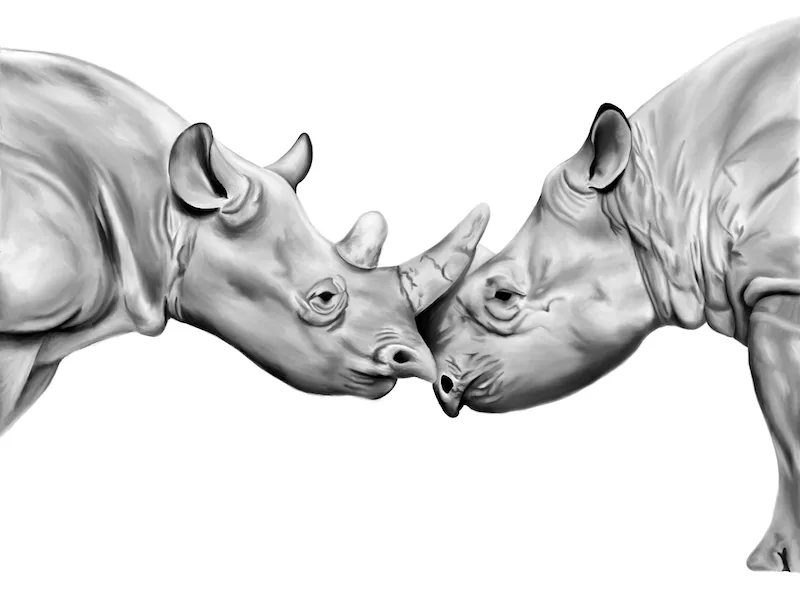
For example, I drew the piece of art below in gray. If I wanted to add other colors to it, that would be a long process.

As we talked about in the previous section, it’s pretty easy to draw everything in multicolor and then switch it to grayscale. If you actually draw everything in grayscale though, it takes some work to redo everything in color.
Once you’re sure you want to create your Procreate art in grayscale, how should you go about it?
Personally, I suggest using grayscale-specific color palettes. There are a few ways to do this, which we’ll review below. I have a full guide on creating Procreate color palettes that dives deeper into each of these methods, if you want to explore them more.
1. Import grayscale-specific color palettes into Procreate
There are a number of pre-created color palettes you can import into Procreate that are dedicated to shades of gray.
Here are a few to check out:
Grayscale Color Palette for Procreate and Adobe
Procreate Color Palettes, Grayscale
Ghosting Procreate Color Palette
What I love about importing pre-created color palettes into Procreate is that I have a great foundation to work from. I can edit or adjust the palette as needed, or I can leave it as is.
As long as I choose a palette that meets my needs, there’s little, if any, adjustments I need to make before I can start using the palette.
2. Create a grayscale color palette based on a grayscale image
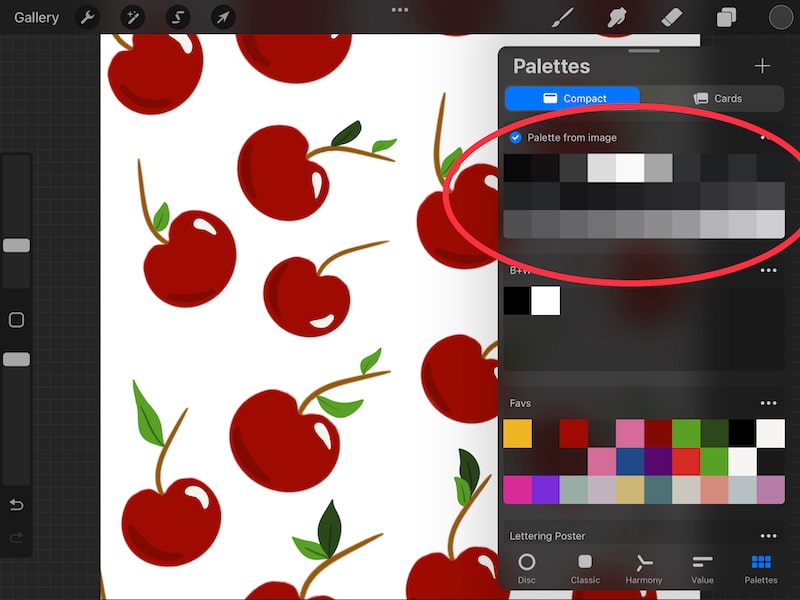
Another option for creating a grayscale color palette is to have Procreate automatically create one based on a grayscale image.
Whenever I create a color palette from an image, there is almost always some editing I need to do to the palette. That said, as long as you’re ok with making adjustments, this method can be a great way for establishing a great foundation of gray colors to work with.
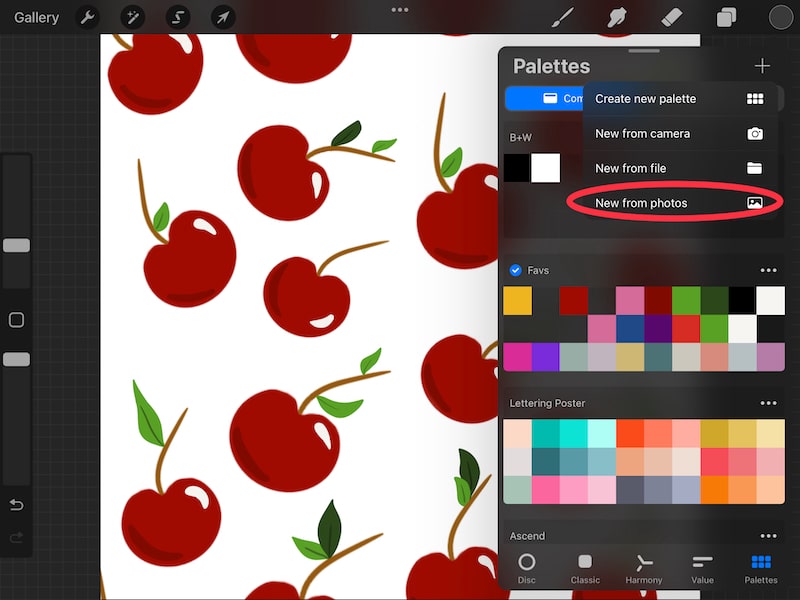
Start by finding a grayscale image. To get the widest range of grays to work with in your color palette, try to choose an image that has a lot of shades of gray in it. Procreate will be pulling colors from the image itself, so keep that in mind when choosing an image.
If you choose a really washed out grayscale image, for example, you may not get the deep grays you’re looking for in your color palette. On the other hand, if you choose a really dark grayscale image, you may not get the light grays you’re looking for in your color palette.
Once you’ve chosen your grayscale image, make sure it’s in your iPad’s camera roll.
Then, click on the + button in your Palettes panel and choose the “New from photos” option. Select your grayscale image.
You’ll see a new color palette appear based on the image you selected. If you need to delete any of the colors, long hold on it to trigger the delete button.

3. Create a grayscale color palette from scratch
Finally, it’s possible to create a grayscale color palette from scratch. This is a great option if you want full control over your color palette and have the freedom to choose every single shade of gray individually.
Click on the + button in your Palettes panel and choose the “Create new palette” option.
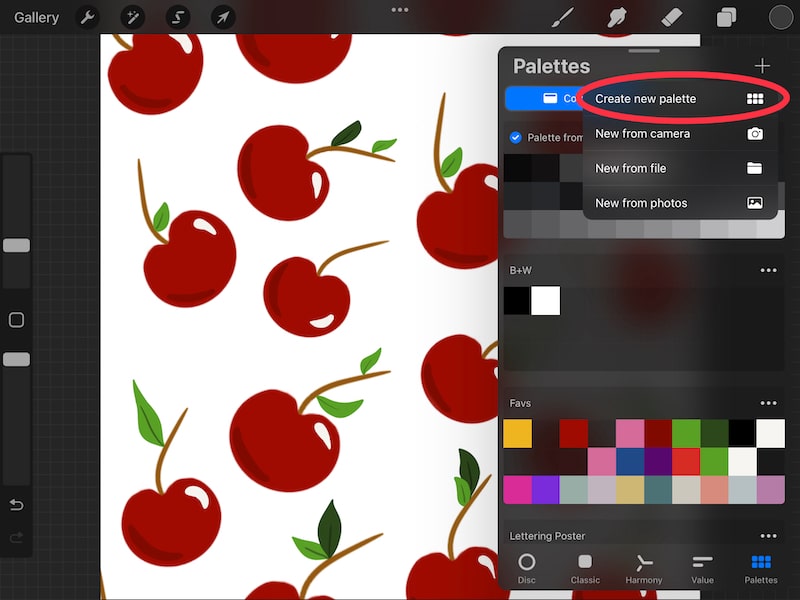

Use your color wheel to select different shades of gray. Whenever you find a shade of gray you want to save, tap on an empty slot in your new color palette to add it.
Continue adding grays to your palette until you have all of the grays that you need.
While this is the most manual and time consuming method, it’s also the method that gives you the most control over your grayscale color palette.
Before we finish up, it’s important to talk about a method for drawing in grayscale in Procreate that I DON’T suggest using.
I wrote a post explaining what to do if the Procreate color wheel gets stuck in grayscale and why it happens.
In theory, if you reverse engineer this problem, it could be seen as a way to force Procreate into grayscale mode and create everything in grayscale. Basically, when Procreate’s color wheel “gets stuck” in grayscale, it’s often because it’s been triggered to use a grayscale color profile for that canvas.
I DON’T suggest this though.
Once you choose a color profile in Procreate, it can be challenging to change it, especially with the gray color profile. Once you choose the gray color profile, you have to keep it that way.
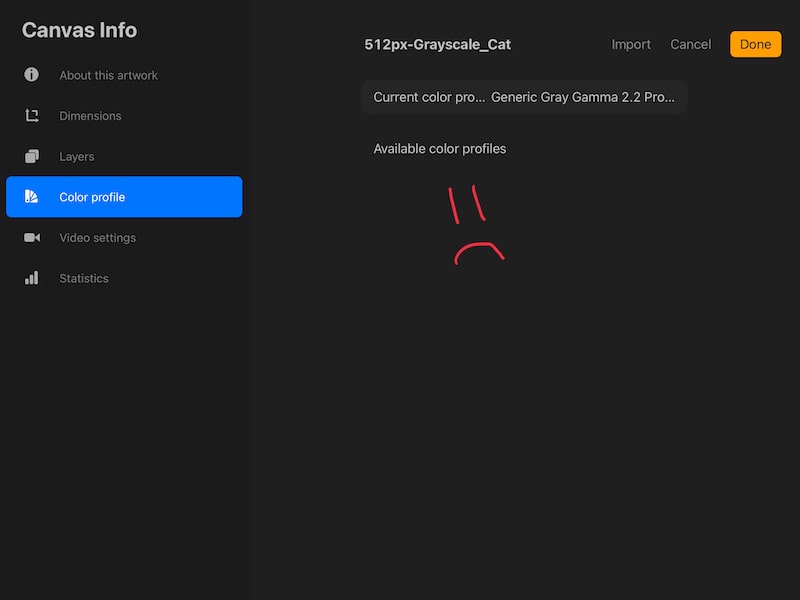

This means, if you change your mind and want to use a different color profile instead, you’ll have to start over with a new canvas.
That’s why I suggest using one of the other methods we talked about above to work in grayscale and NOT forcing Procreate to use a gray color profile.
Viewing or creating your work in grayscale in Procreate can be fun to do. Once you get familiar with the methods that work best for your needs and your art, you’ll be able to frolic in a rainbow of gray colors.


Diana has been an artist for over 27 years and has training in drawing, painting, digital drawing and graphic design. Diana’s latest obsession is digitally drawing with Procreate and Procreate Dreams. Diana has experience selling her art across a number of platforms and loves helping other artists learn how to make money from their art as well.