In my experience using Procreate, blend modes are one of those awesome features that I’m always forgetting about and rediscovering. Blend modes have a lot of potential to make your art pop, yet it’s SO easy to get into an art flow and simply forget to use them.
Well, let’s change that!
In today’s tutorial, we’re going to dive into all of the fabulous things that blend modes can do so that they’re top of mind the next time you open Procreate.
Before we dive into the specifics of each of Procreate’s blend modes, let’s talk about what they are in the first place and how to access them.
What are Procreate’s Blend Modes?
Procreate’s blend modes impact how the colors of different layers collaborate with one another.
This brings up two important points:
1. Layers need to overlap
It’s important to note that the elements on these layers have to be on top of each other or overlapping in some way.
Remember that these are called BLEND modes. The purpose is to uniquely BLEND layers together.
If you’re trying to use a blend mode on a layer that has nothing underneath it, you won’t be using this feature as intended. You might see some interesting results, depending on the blend mode you choose, but it won’t have the intended effect.
So, as a prerequisite for using blend modes, make sure that the layer you’re choosing the blend mode of is on top of another layer in your layers panel.

In the photo above, notice that the blue flower layer is on top of the green and orange flower layers. The blue flower layer is the one we’ll be adjusting the blend mode of, which is why it’s important that its overlapping with the layers below it.
2. The colors of the elements on your layers will impact how your blend modes look
Given that blend modes will “blend” your overlapping layers together, the colors you use on your layers will impact your results.
For example, changing the blend mode of layers with lighter colors may look differently than layers with darker colors.
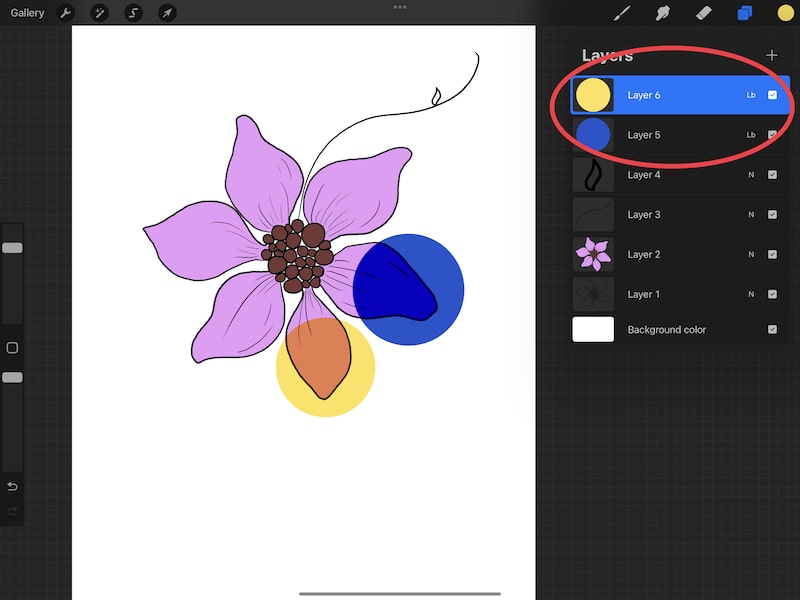

Take a look at the picture above. I drew two circles on different layers, and applied the same blend mode to them – linear burn. The results look vastly different given that one of the layers had a blue circle on it and the other one had a yellow circle.
Essentially, you won’t get the same results every time you change your blending mode. It will depend on your layers, colors, and elements.
This is awesome because it makes your art unique, but it also means that you’ll need to experiment with different options.
How to Access Procreate’s Blend Modes
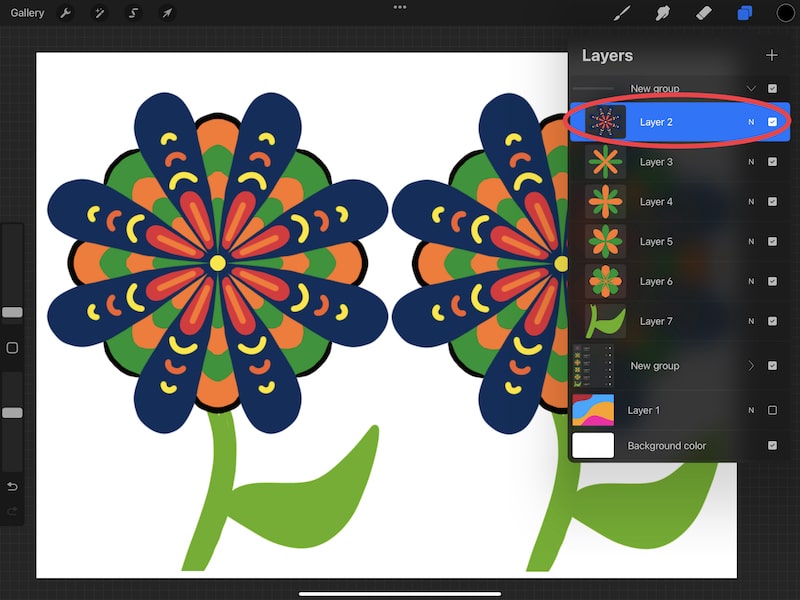
To access Procreate’s blend modes, open your layers panel and select your desired layer. Again, as a reminder, make sure this layer is on top of another layer that has overlapping elements.
On your desired layer, tap the “N” icon. The “N” stands for “Normal”, which is the default blend mode for layers. Unless you’ve already changed your blend mode, your layer will likely show an “N” for the normal blend mode.
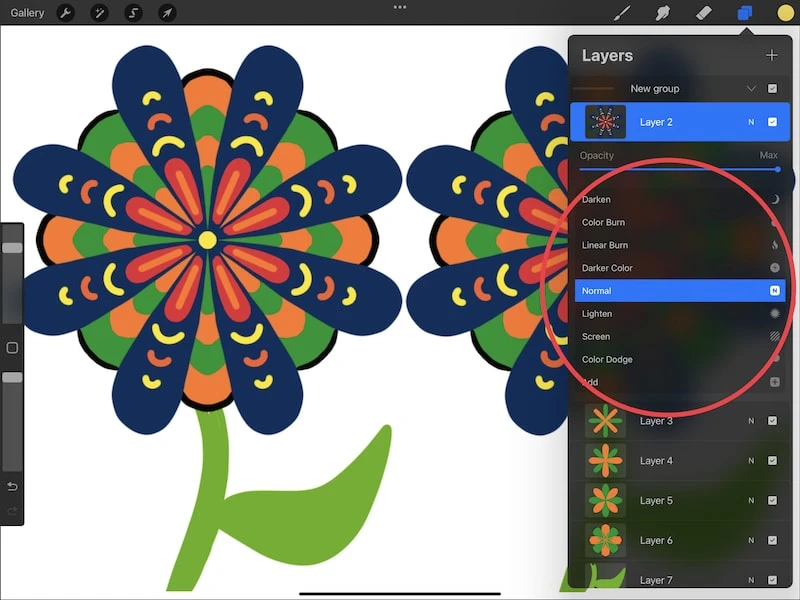
When you change the blend mode, you’ll see a different icon to represent whichever blend mode you’ve chosen.
Tap on this “N” icon, or whichever icon is selected. This will open the list of blend modes. Simply scroll to the blend mode you want to use to apply it.

Before we jump into each blend mode, let’s clear up some potential worries.
A lot of these blend modes will sound confusing. Keep in mind that they are named for what they do. This will help with sifting through the confusion and understanding what each blend mode does.
That being said, you may get to the point where you don’t pay as much attention to the specifics around what each blend mode does. Instead, you start to get a feel for how they work with different elements and different colors without mentally scanning through the technicalities of each of them.
Experimentation is key.
Generally, I scroll through all of the blend modes when trying to pick one. Even though I understand what each of them do, I like to see how they look with the piece of art that I’m working on.
So, if these blend modes get confusing, don’t stress about it. Get an understanding of the blend modes but, more importantly, embrace experimentation and finding what works uniquely for each piece of art you create.
Alright, now let’s dive into each of them individually and how they work.

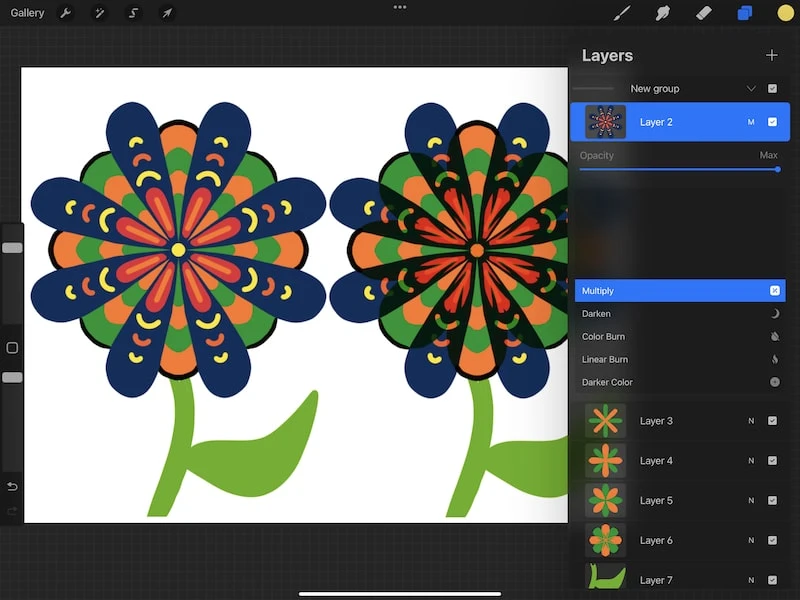
Procreate’s Multiply Blend Mode
Procreate’s multiply blend mode will increase the luminosity of the layer by, literally, multiplying your current layer and the layer below it. This will often have the effect of darkening your colors.
For these examples, I’m going to apply the blend mode to the blue flower layer on the right. I’m going to leave the one on the left unchanged (on normal blend mode) so that you can see a comparison.
With the multiply blend mode, you can see that the parts of the blue flower layer that are overlapping with the layer below it have darkened. They have also become more transparent.

Procreate’s Darken Blend Mode
Procreate’s darken blend mode will consider the layer you’re applying the blend mode to, as well as the one below it. Then, it will keep the darker one.
The important difference between the darken blend mode and the multiply blend mode is that the darken blend mode does NOT mix any pixels together, while the multiply blend mode does.
In our example with the flowers, notice that the blue flower color isn’t as dark as it was with multiply. This is because the blue pixels aren’t blended into the green and orange pixels behind it.
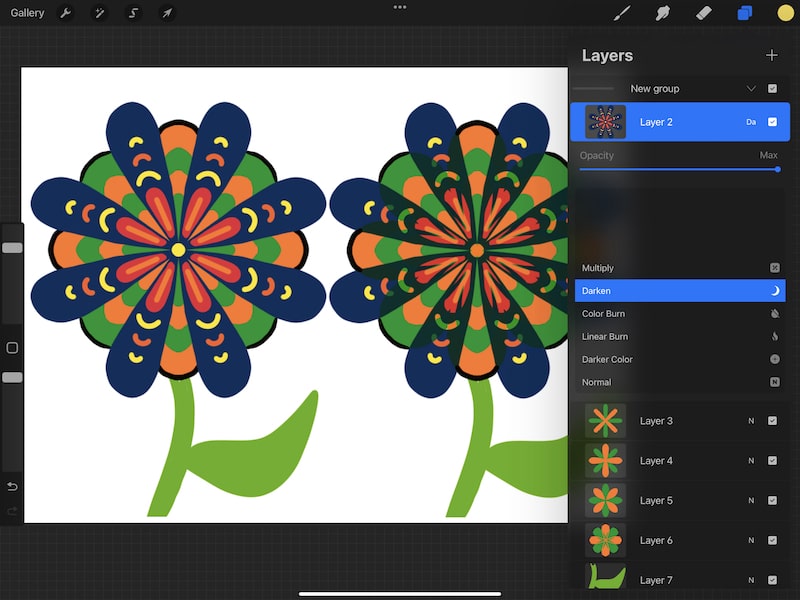
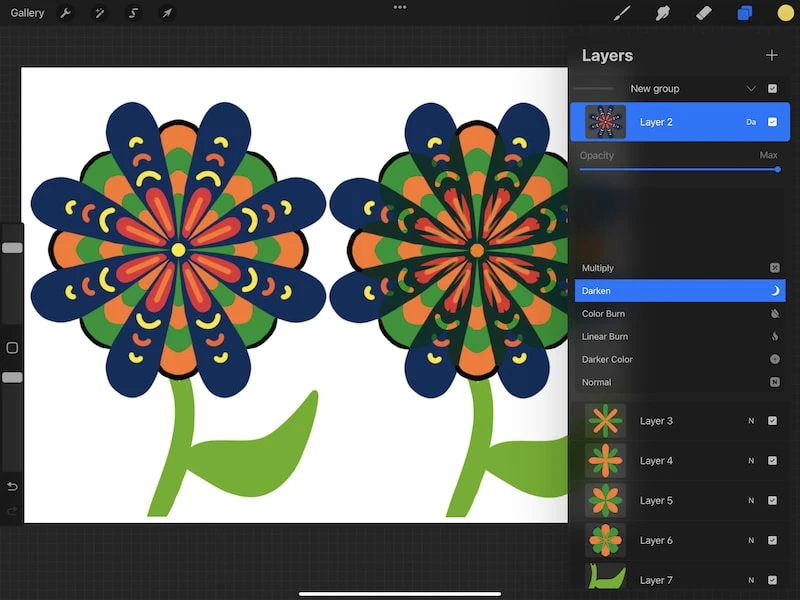
The results you get will depend on your colors, especially how dark they are in comparison to your other layers.
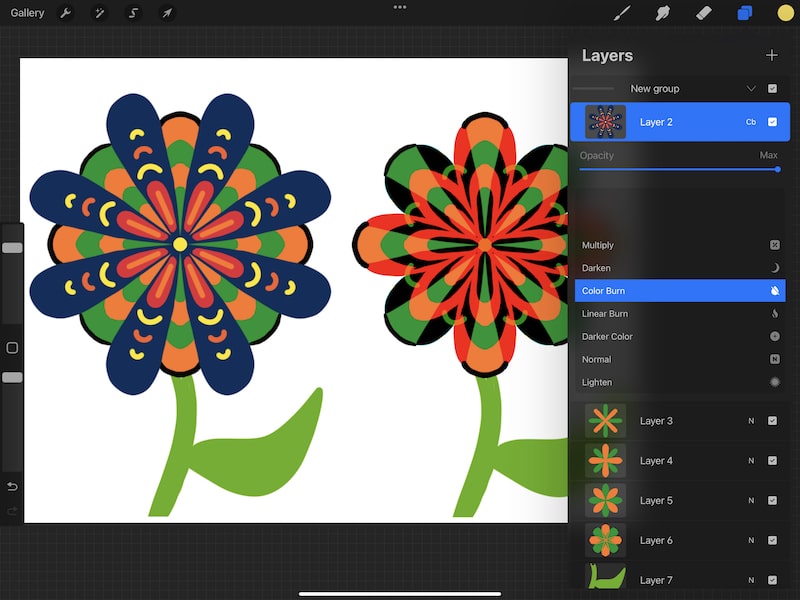
Procreate’s Color Burn Blend Mode
Procreate’s color burn blend mode will resemble the process used in traditional photography to use the burn tool to darken photos.
If you read that and said, “whaaaaat?”, you’re not alone. I get it! This is one of those blend modes that I think more about the practical results than the technicalities of what’s happening.
Practically, I tend to notice that color burn will increase the contrast in my colors. Also, notice in the flower example that any areas that aren’t overlapping with other layers become invisible.
The color burn blending mode can give you dramatic, while drastic, results!

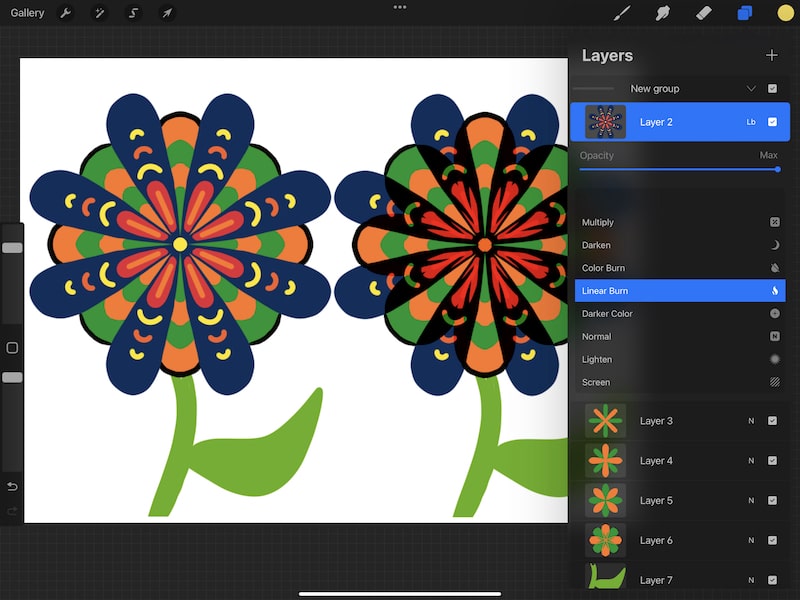
Procreate’s Linear Burn Blend Mode
Procreate’s linear burn blend mode will use the blend color (the color on the layer behind your selected layer) to lower the brightness of your selected layer (the layer you’re applying the blend mode to).
Again, this might sound confusing. Experiment with it and notice the results. Understanding what this blend mode practically does to your art is ultimately more important than understanding every technicality of the description of it.

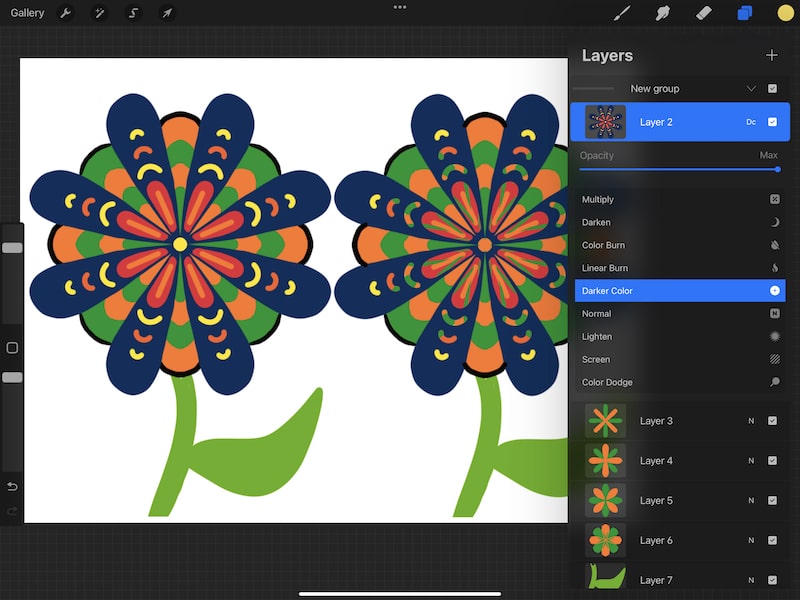
Procreate’s Darker Color Blend Mode
Procreate’s darker color blend mode will consider the RGB profile of your layer as a whole when applying the effect.
This is similar to the darken blend mode, but it looks at the entire RGB profile as a whole, while the darker color blend mode looks at every RGB channel individually when applying the effect.
As you can see in this example, it created a lighter, and more opaque, result than the darken blend mode.

The next blend mode is the Normal blend mode that Procreate defaults to. Since we’re accustomed to that one, we’ll skip down to the lighten blend mode.
Procreate’s Lighten Blend Mode
Procreate’s lighten blend mode will consider the layer you’re applying the blend mode to, as well as the one below it. Then, it will keep the lighter one.
Essentially, this is the opposite of the darken blend mode.
In our example with the flowers, notice that the blue layer practically disappears. This is because the blend mode has prioritized the lighter layer, which is the green and orange layer behind it.


Procreate’s Screen Blend Mode
Procreate’s screen blend mode will brighten your layer according to the luminosity of your blend layer (the layer behind the layer you’re applying the blend mode to).
As you can see in our example with the flowers, the blue layer has created light areas where it overlaps with the layer behind it. It has also disappeared in any areas where it doesn’t overlap with the layer behind it.


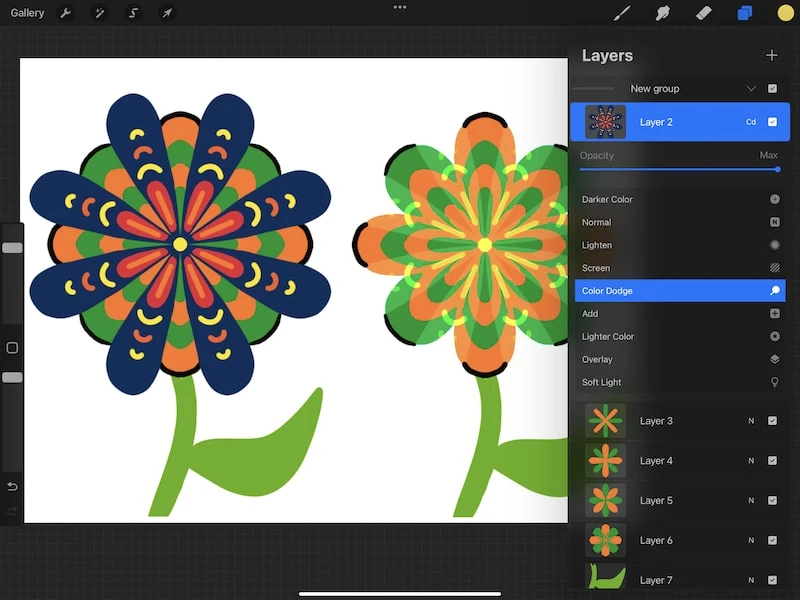
Procreate’s Color Dodge Blend Mode
Procreate’s color dodge blend mode will resemble the process used in traditional photography to brighten pictures by decreasing the contrast between your layers.
As you can see in our flower example, the impacted area is the same as in our screen blend mode example, but the colors pop a lot more.

Procreate’s Add Blend Mode
Procreate’s add blend mode will lighten up the color of the layer you’re applying the blend mode to.
Looking at our flower, you can see that everywhere that the blue flower layer has overlapped with the layer beneath it is brighter. Notice that this blend mode brightens the layer the most out of the past few brightening blending modes we’ve used.


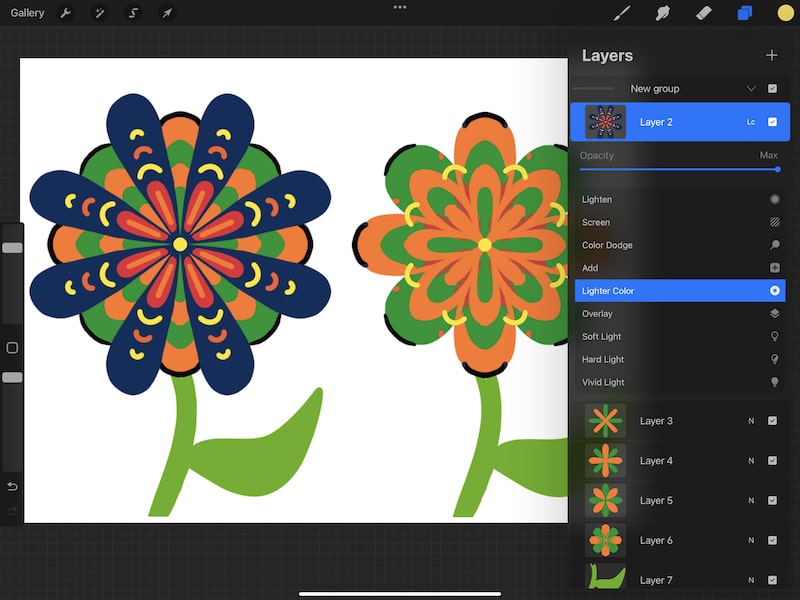
Procreate’s Lighter Color Blend Mode
Procreate’s lighter color blend mode will consider the RGB profile of your layer as a whole when applying the effect.
This is similar to the lighten blend mode, but it looks at the entire RGB profile as a whole, while the lighten color blend mode looks at every RGB channel individually when applying the effect.
Notice in our flower example that the effect is darker than with the lighten blend mode.

Procreate’s Overlay Blend Mode
Procreate’s overlay blend mode will make your darker colors darker and your lighter colors lighter as your primary layer blends with the layer beneath it.
What I like about this blend mode with our flower example is that you have to stare at it for a bit to see what’s happening. Yes, the areas where the darker blue overlaps with the layer beneath it is darker than the areas where it doesn’t.
That’s not glaringly obvious though. Instead, it looks like an awesome and unique pattern. Personally, I think the overlay blend mode is really fun given the creative results it can produce.


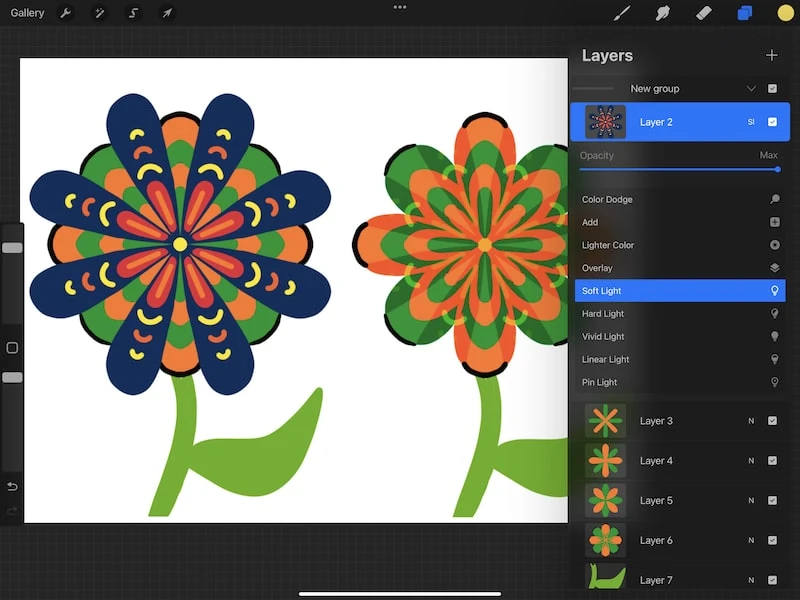
Procreate’s Soft Light Blend Mode
Procreate’s soft light blend mode will make your darker colors darker and your lighter colors lighter as your primary layer blends with the layer beneath it in the same way that the overlay blend mode does. BUT, it doesn’t impact your colors as dramatically as the overlay blend mode does.

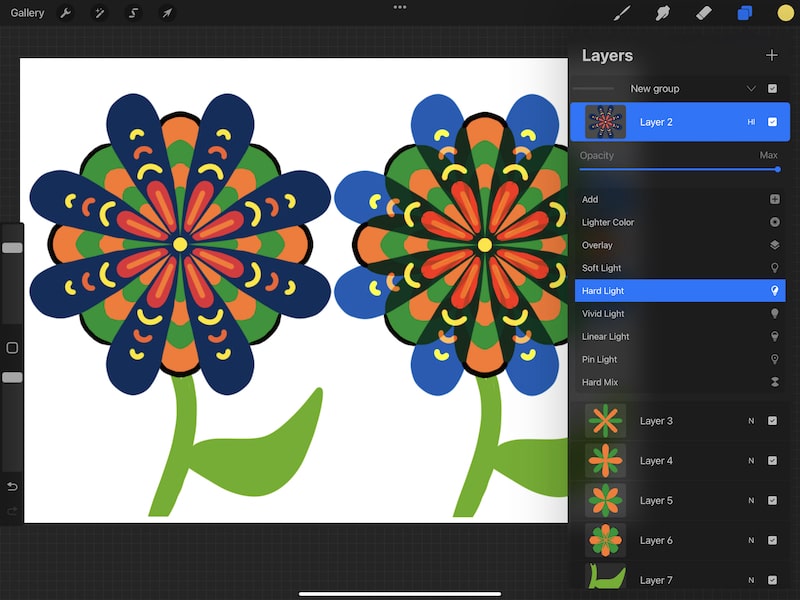
Procreate’s Hard Light Blend Mode
Procreate’s hard light blend mode boosts the brightness and luminosity of your layer in a way that functions as if you combined the screen color mode and multiply color mode.
Looking at our flower example, I love how the hard light blend mode simultaneously boosts the vibrancy of the colors, while also giving the blue flower a slightly transparent look.

Procreate’s Vivid Light Blend Mode
Procreate’s vivid light blend mode will darken any colors that are more than 50% gray, while lightening colors that are less than 50% gray.
While this creates extreme results in our flower drawing, I adore it! Look how vibrant and funky those colors are!!


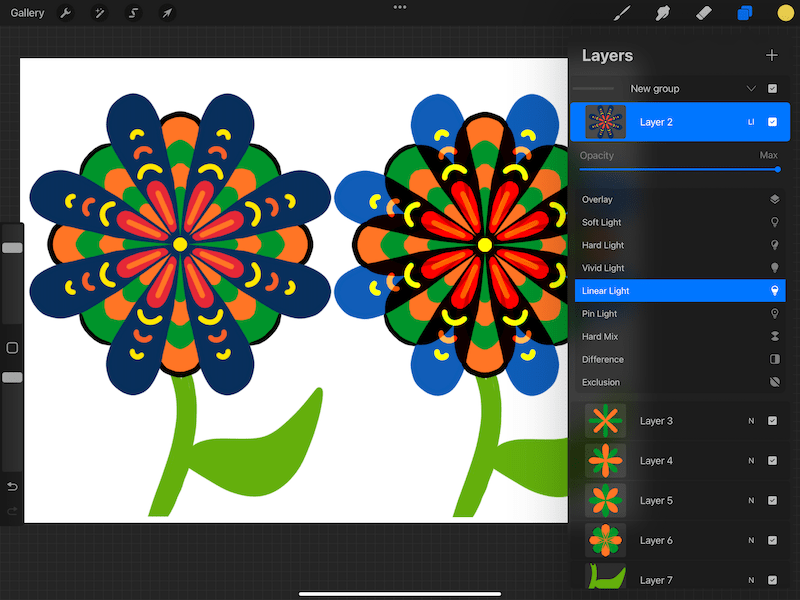
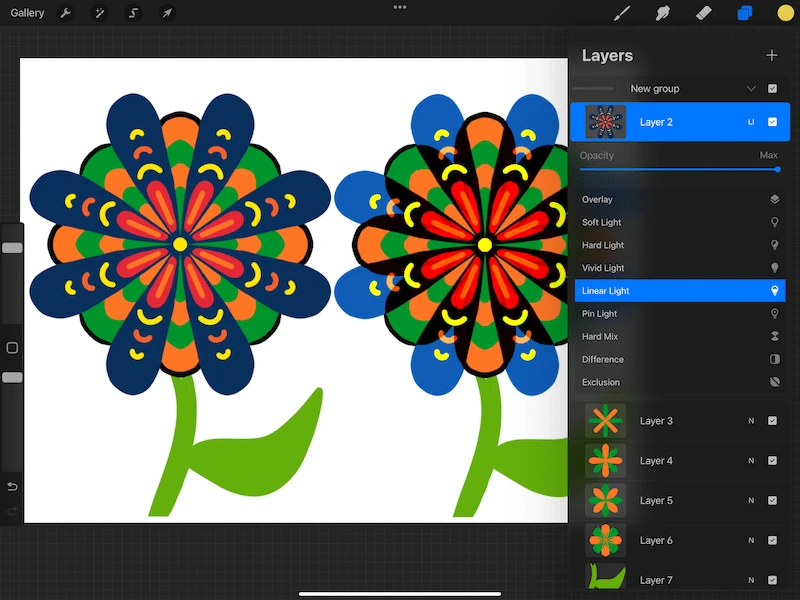
Procreate’s Linear Light Blend Mode
Procreate’s linear light blend mode will lighten bright colors and darken dark colors in your layer. When lightening your light colors, it will use the same effects as the color dodge blend mode does. When darkening your dark colors, it will use the same effects as the color burn blend mode does.
With our flower example, I love how this blend mode creates such intense colors, especially with the dark blue tones.
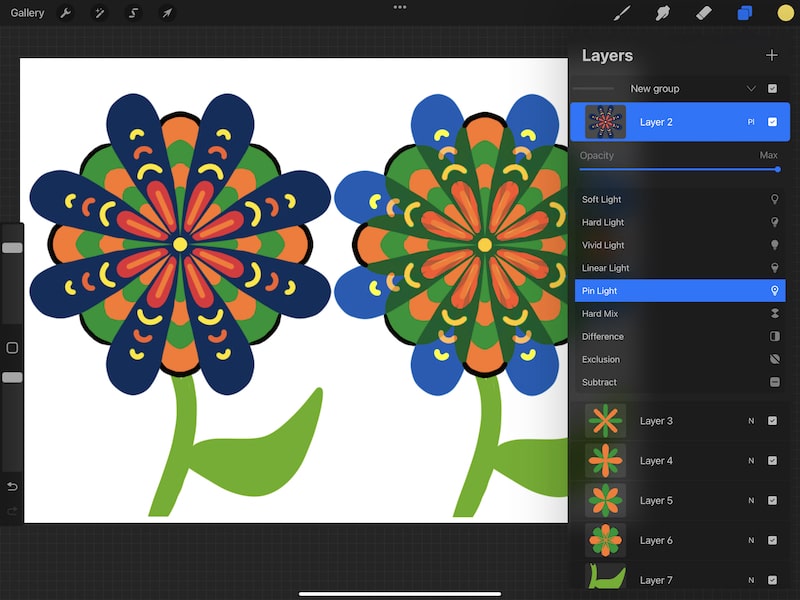
Procreate’s Pin Light Blend Mode
Procreate’s pin light blend mode will combine the lighten and darken blend modes.
Looking at our flower example, notice that combining these two extreme blend modes has the result of softening the colors.

Procreate’s Hard Mix Blend Mode
Procreate’s hard mix blend mode will flatten out your layers while also eliminating some of its colors, depending on the colors you’ve used. In this blending mode, it will only use black, white, and the primary colors.
I think that this blend mode is SO cool! In our flower drawing, I think it’s so fun how it creates such vibrant and extreme color effects. Naturally, the impact will vary depending on your layers, elements, and colors. So, have fun and experiment with it!


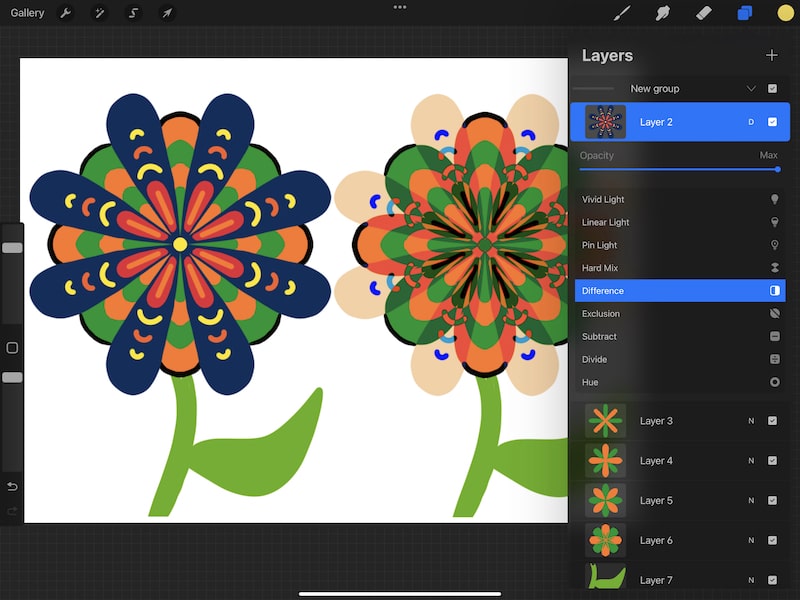
Procreate’s Difference Blend Mode
Procreate’s difference blend mode will use the difference of your layers to create a blend. The colors for white pixels will be inverted, gray pixels will darken, and black pixels won’t change.
This description can sound very confusing. This is definitely one of those blend modes that you’ll want to experiment with and get a feel for. As you can see from the flower example, it can lead to neat results depending on your colors.

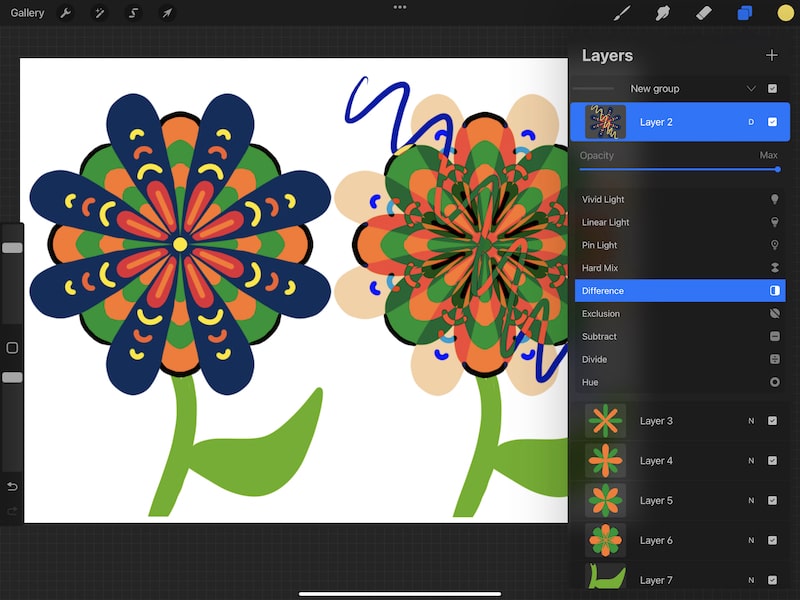
Also, as with all of these blend modes, it’s important to keep your colors in mind. This is especially true for this blend mode, and the ones following. Take a look at what happens when I draw a yellow line through my layer. It appears blue given how this blend mode impacts colors.

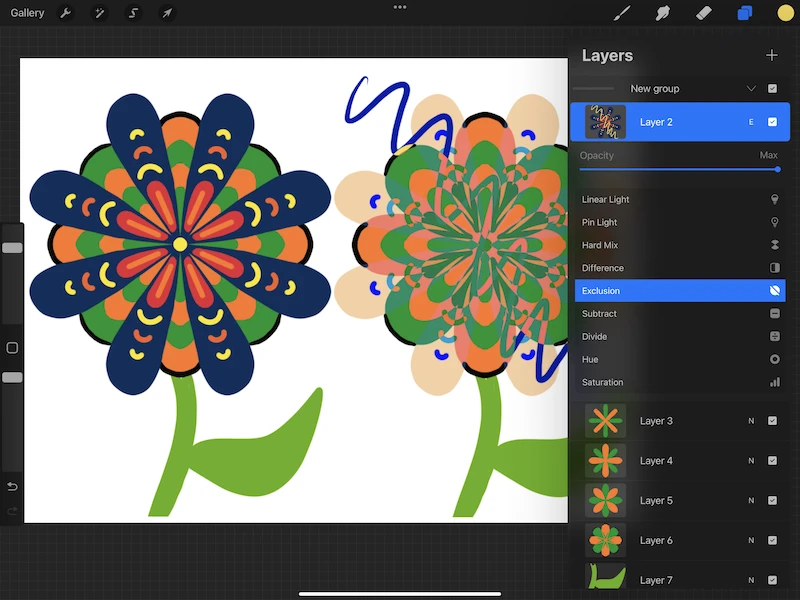
Procreate’s Exclusion Blend Mode
Procreate’s exclusion blend mode functions the same as the difference blend mode for black and white colors, but it doesn’t have an effect on gray colors.
In the flower drawing, you can see that some of the colors are more muted than they were with the difference blend mode above. I’ve left the yellow line that turns blue with the blend mode applied so that you can see the impact on the colors.

Procreate’s Subtract Blend Mode
Procreate’s subtract blend mode will literally “subtract” brightness from your colors by subtracting the brightness from the areas where the layer overlaps with the layer below it.
I think the best example of this in our flower drawing is to see how much darker the line becomes when it’s overlapping with the layer below it than it is when it’s by itself.


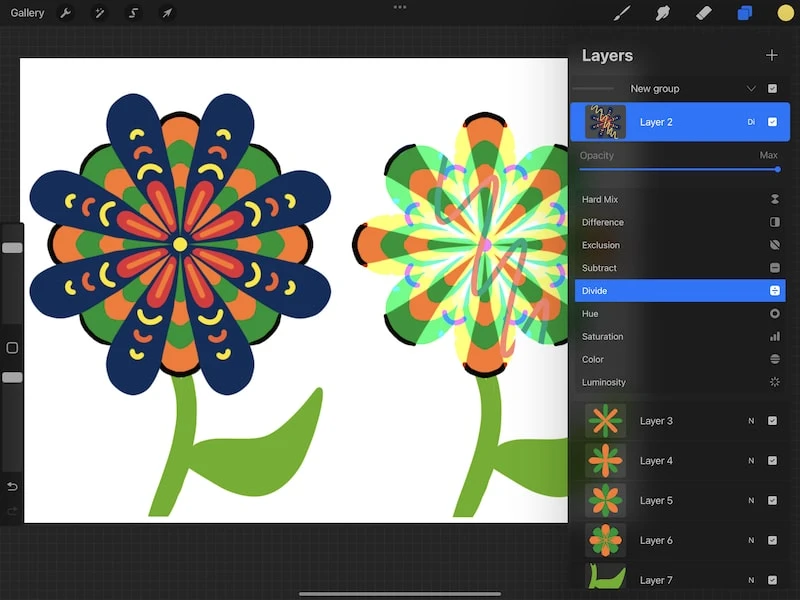
Procreate’s Divide Blend Mode
Procreate’s divide blend mode is essentially the opposite of subtract, which means that it will brighten your dark colors.
Notice how our blue flower layer in our flower example becomes brighter, while the yellow line becomes darker.

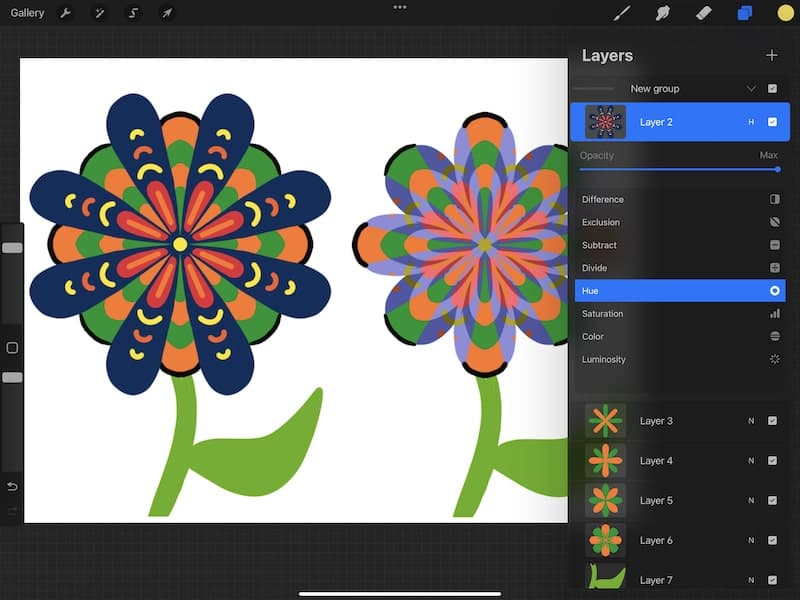
Procreate’s Hue Blend Mode
Procreate’s hue blend mode will solely change the hues of the colors in your layer. It will not adjust the tones, tints, luminosity, shades, or saturation. It will only impact the hues.
This is a really neat way to quickly play around with different colors in your art.
Looking at our flower drawing, see how the blue changed to a beautiful purple color.

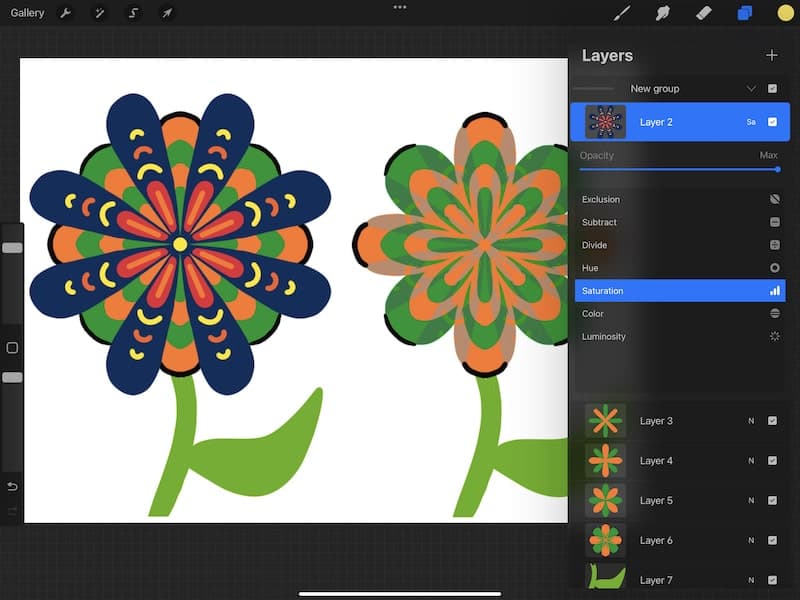
Procreate’s Saturation Blend Mode
Procreate’s saturation blend mode will solely change the saturation of the colors in your layer. It will not adjust the tones, tints, luminosity, shades, or hues.
As you can see in our flower example, the blue flower layer has lost saturation to the point of being dull. It creates a neat, subtle effect over the orange and green layers below it.

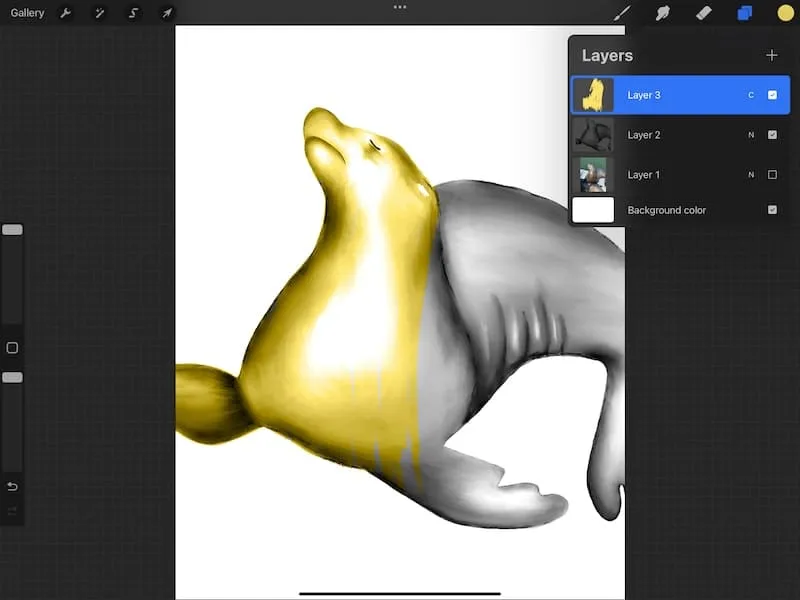
Procreate’s Color Blend Mode
Procreate’s color blend mode will pull in the hue and saturation from the layer underneath, while maintaining the luminosity of your original layer.


The flower example is above, but I wanted to show a different type of example using this blend mode as well.
Here’s a black and white shaded drawing. I put a layer over it with the color blend mode activated. This allows me to color the image, leaving the shading intact. It will only impact the darker areas. Neat, right?!

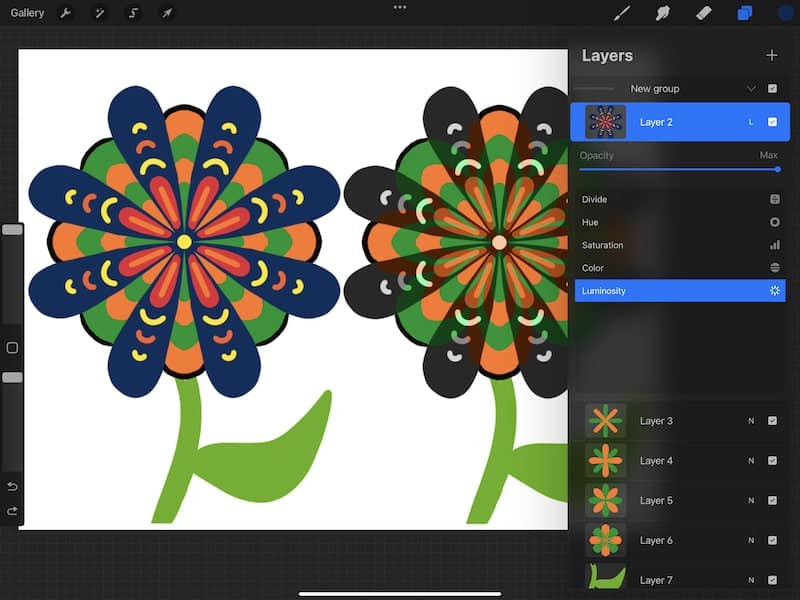
Procreate’s Luminosity Blend Mode
Procreate’s luminosity blend mode will impact the luminosity of your layer, while keeping the hue and saturation the same.
With our blue flower layer, this creates a more gray effect.

Phew, we did it! I hope you’ve enjoyed this exploration of Procreate’s blend modes. If you’re feeling overwhelmed, give yourself time to get used to everything these blend modes can do.
Since there are SO many wonderful blend modes, a common question that pops up is how to use multiple blend modes at the same time. Specifically, how to merge two Procreate layers that use different blend modes. Check out the blog post to find out!
Experiment with them, find your favorites, and get a feel for everything they can do. Make sure to have fun along the way!


Diana has been an artist for over 27 years and has training in drawing, painting, digital drawing and graphic design. Diana’s latest obsession is digitally drawing with Procreate and Procreate Dreams. Diana has experience selling her art across a number of platforms and loves helping other artists learn how to make money from their art as well.