Shading and blending are hard art skills to master, whether you’re using traditional materials or a digital drawing program like Procreate or Procreate Pocket. Luckily, with Procreate, there are some tricks you can use to make your shading life easier.
To shade and blend on Procreate, the best tool to use is the smudge tool paired with one of the airbrushes. By adjusting the size of the smudge brush, it’s possible to achieve the best shading for both small and precise areas, as well as large and sweeping areas.
Despite how challenging and frustrating it can be, shading and blending with Procreate has become one of my favorite things to do when I’m creating art. Believe me; once you get the hang of it, it’s SO much fun.
We’re diving into ways that I shade and blend with Procreate when creating my own work. These shading techniques will make you feel confident about your own shading and fall in love with it, like I have.
Let’s dig in!

How to Use the Smudge Tool to Shade on Procreate
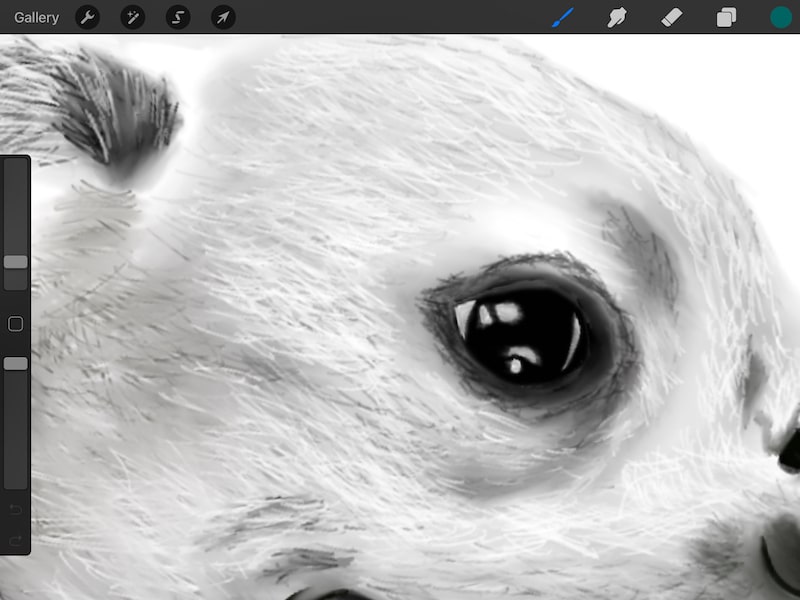
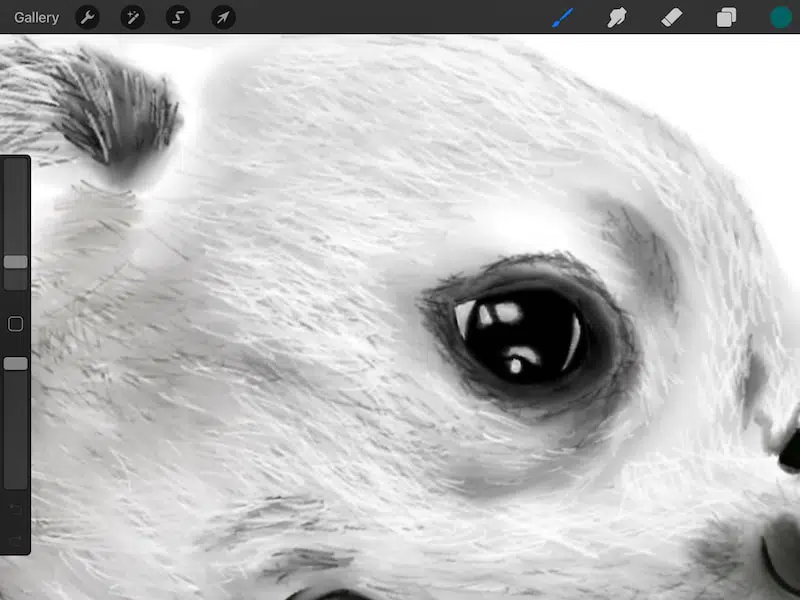
The smudge tool is a great resource when shading and blending on Procreate. While any brush can be paired with the smudge tool, a brush from the airbrushing collection is a great choice given how delicate and airy it is when using it for fading and shadows.
What I love about shading and blending with the smudge tool is that it gives you a lot of freedom both in Procreate and Procreate Pocket.
You can pair it with any brush you need, you can change its opacity so that it’s more subtle or intense, and you can change the size of it for more sweeping or detailed work.


To set up the smudge tool, all you need to do is click on it to open its brush panel. If the smudge tool isn’t already selected, click on it once to select it and then click on it again to open the brush panel.


From there, pick the brush you would like to use with the smudge tool.
Picking a Brush to Use with the Smudge Tool
You can use ANY brush with the smudge tool. But, that doesn’t mean you SHOULD.
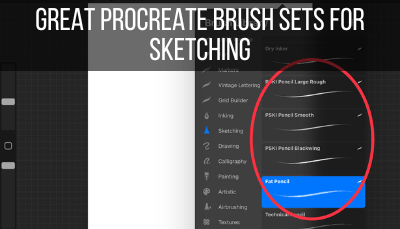
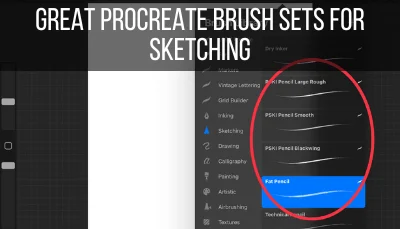
There are brushes that are very well suited for shading. I have a whole guide about Procreate shading brushes and Procreate blending brushes you can check out.
Procreate’s standard brushes can work really well with the smudge tool as well.
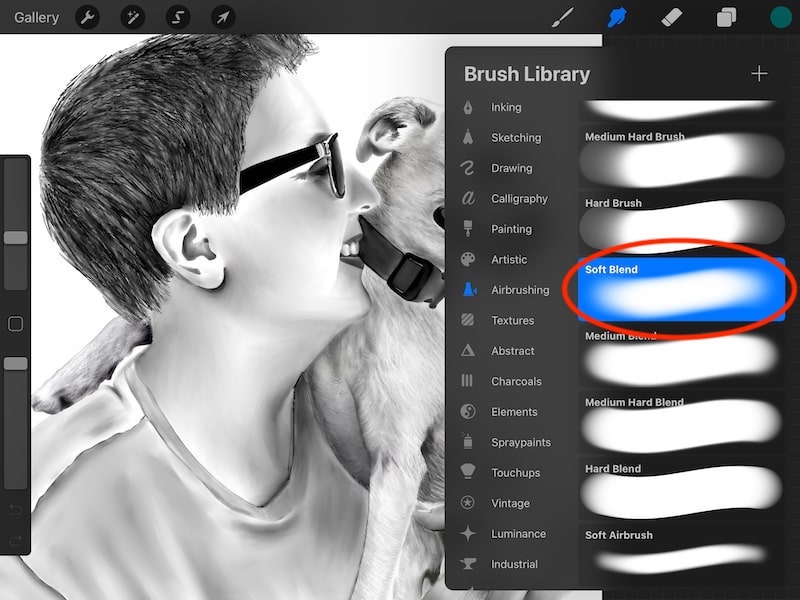
Personally, my favorite brush to use when shading with the smudge tool is the Soft Blend brush in the Airbrushing collection. In general, I feel like this brush does a really great job of creating soft and seamless shading, blending, and fading.

That said, the brush you choose really depends on the project you’re working on and the effect you’re going for. Given that you have SO many options to choose from, it’s great to experiment and learn how each of the brushes works with the smudge tool.

Tips for Using the Smudge Tool for Shading in Procreate
Once you experiment with the smudge tool and get used to it, you’ll develop your unique ways of using it. That said, there are some universal tips that can help you get started right out of the gate.
1. Use a clipping mask when shading
It’s best practice to use your layers when creating art in Procreate. If you put everything on one layer, it’s tricky to make changes later.
Of course, this is one of those habits that we all know we should do, but struggle to remember. Drawing is more fun than creating layers!
It is important though.
For shading, you want to create new layers that have clipping masks applied to them.
Clipping masks let you apply your shading to your shapes on a new layer instead of permanently impacting your art or shape. This is a great perk that lets you quickly change or undo any shading you’ve done.
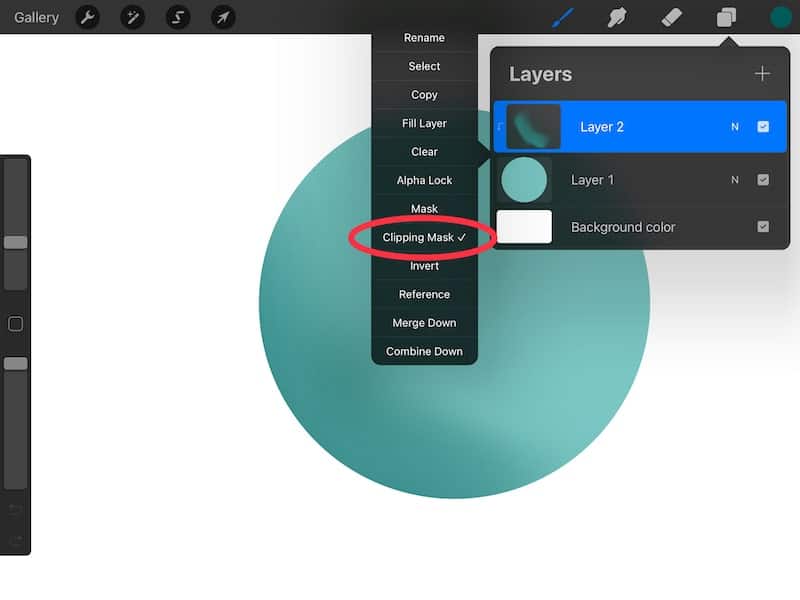
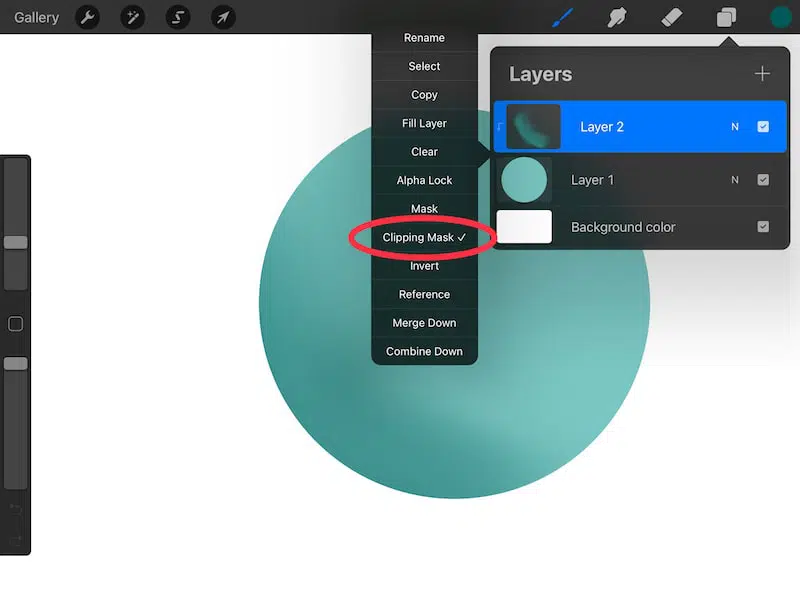
To use a clipping mask, create a new layer above the layer that the shape you want to shade is on.
Click on the layer settings and choose “Clipping Mask.”
Important tip: the clipping mask will only let you color on brush strokes that are already created. It will NOT color on blank canvas.
This is why, even though it’s a great feature, I don’t use it all of the time. A great workaround is to use the Color Drop feature to fill your canvas with white, or whatever your background color is. That way, there is technically color on your canvas already.
I have a full guide on Procreate’s clipping masks that dives into the awesome tool even more.
I also have a guide on how clipping masks differ from alpha lock, which can be confusing when you’re just getting started, so that is helpful to read as well.
2. Pair your smudging brush with the medium you’re using
Different Procreate “mediums” will interact with different smudging brushes in different ways. For example, smudging a watercolor stroke will be different than smudging a pencil stroke.
For example, I pair the Studio Ink brush with the Soft Airbrush a lot. I really like how the airbrush makes the ink balloon and flow in controlled ways. For me and my art, it’s a great pair!
Find your own great brush and smudge pairs.

3. Generally, pull your shadows out from their darkest points into the lightest points around them
This tip will depend on your brush-smudge pair. For my ink-airbrush pair, this tip is VERY accurate. For others, it might be more subtle.
In general, I tend to find that, wherever you start, you will pull that color with you (even white if your canvas is blank in that spot).
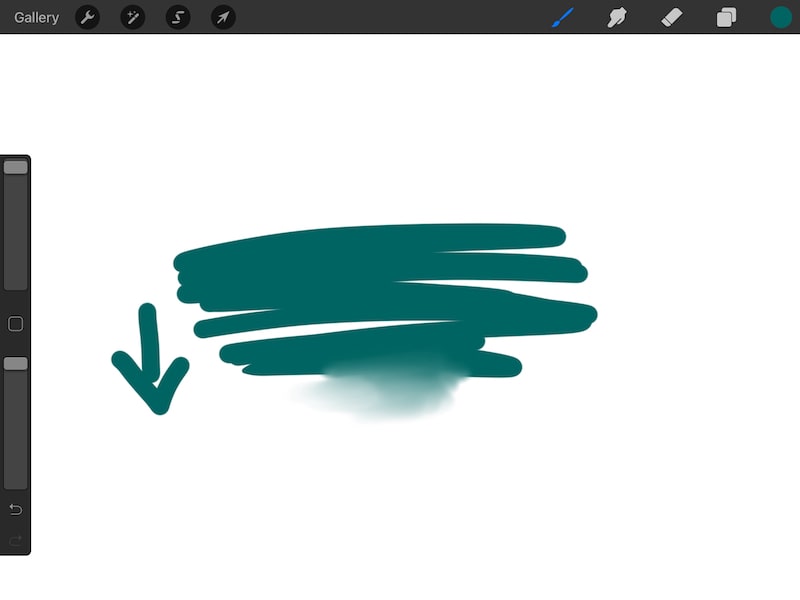
For example, if I start smudging in a solid black line and pull it out into my blank canvas, I will pull that black color with me. On the other hand, if I pull from my blank canvas into my solid black line, I will dilute the black and pull the blank canvas with me.
Usually, I pull from my darks into my lights to get my shading started. If the shading becomes too intense, I reverse it and pull my blank canvas into my shadow to dilute it.
Play with it back and forth until you get the shading effect you’re looking for.
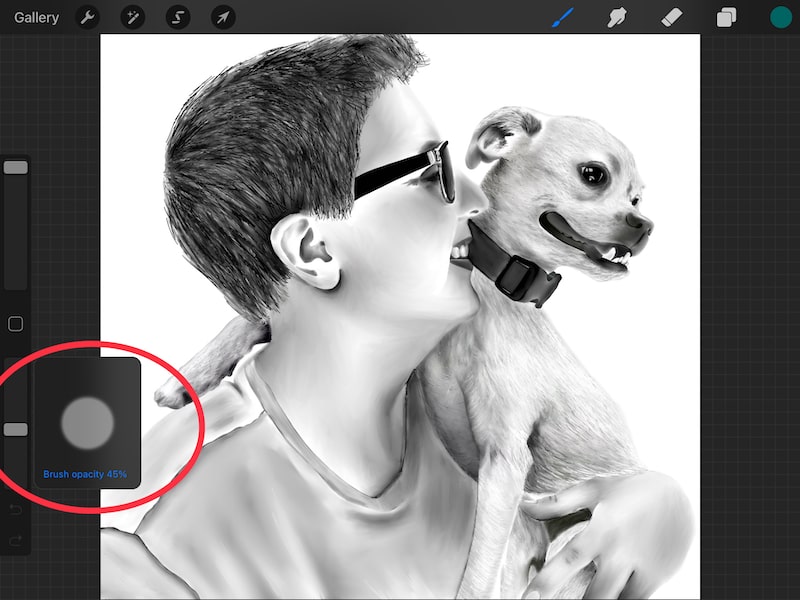
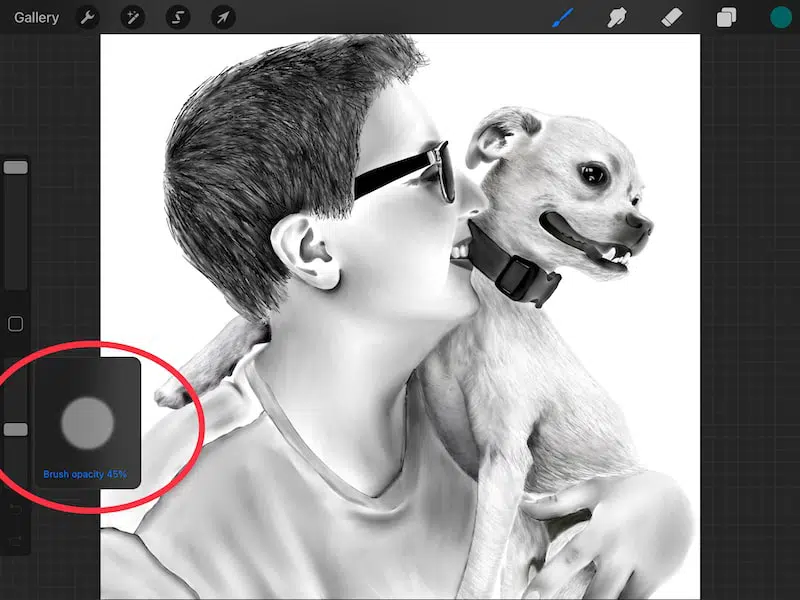
4. Lower the opacity of the smudge brush for more subtle effects
If you want to keep the smudge brush at a larger size, yet lower its intensity, lower its opacity.
Just like drawing brushes, you can lower the opacity of smudge brushes to achieve a lighter touch. This can be really nice for shading because it allows you to smudge a larger surface area without making drastic changes.
Shading is all about creating subtle gradations, which can be hard if your smudge brush is too intense.
5. For really precise work, lower the size of smudge brush and zoom in a lot
If you’re shading a small area, it can be tricky to keep a light and touch and a gradual gradation. To overcome this, zoom in a LOT. Really focus in on the area you want to shade.
This will give you more space to work with on your iPad screen and allow you to make more precise movements that you wouldn’t be able to if you were working with your art at the regular size.
Being able to Zoom is one of Procreate’s superpowers. Use it!
Using the smudge tool is my go-to way to shade. It’s also a great way to create fades in Procreate!
How to Fade in Procreate
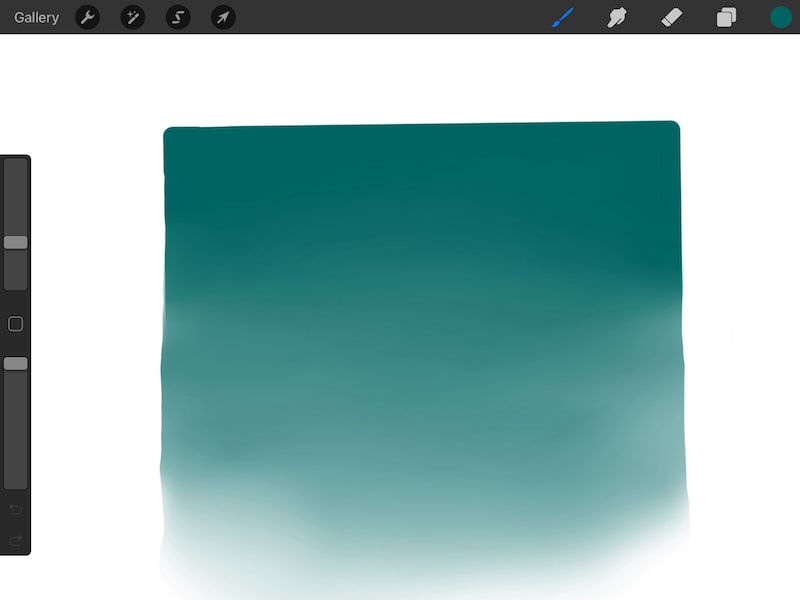
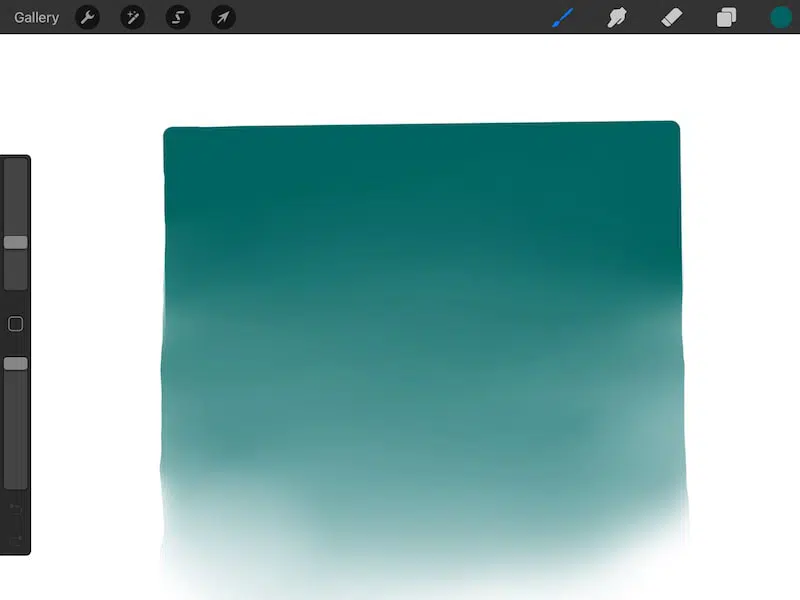
To fade in Procreate, use the smudge tool paired with one of the airbrushes. Make large, sweeping strokes across your shape, slowly moving towards the direction of your fade. Continue to pull your color down into your fade until you achieve the fade you’re looking for.
Fading in Procreate seems like it would feel tedious, but it’s surprisingly fun and meditative.
That said, just like shading, there is a learning curve to it. You will need to develop a feel for how the airbrush works and how it pulls your specific medium across your canvas.
Don’t stress. If you don’t get the hang of it right away, just use two fingers to tap your screen and activate the undo feature and start over.
Fading in Procreate uses the same principles of shading that we talked about above. It’s just that it covers a larger area. Because of that, you want to make larger, more sweeping strokes and have your airbrush at a larger setting.
Shading and fading and Procreate is really fun once you get the hang of it. While it does take some practice, you’ll be happy with the results.


Diana has been an artist for over 27 years and has training in drawing, painting, digital drawing and graphic design. Diana’s latest obsession is digitally drawing with Procreate and Procreate Dreams. Diana has experience selling her art across a number of platforms and loves helping other artists learn how to make money from their art as well.