This is part two of my overview of Procreate Dreams keyframes. If you haven’t done so yet, check out my tutorial on using motion keyframes in Procreate Dreams. To round out the series, check out my tutorial on splitting content with the edit feature too!
In this tutorial, we’ll continue learning how to use keyframes, focusing on the filter keyframes
How to Add Your First Filter Keyframe
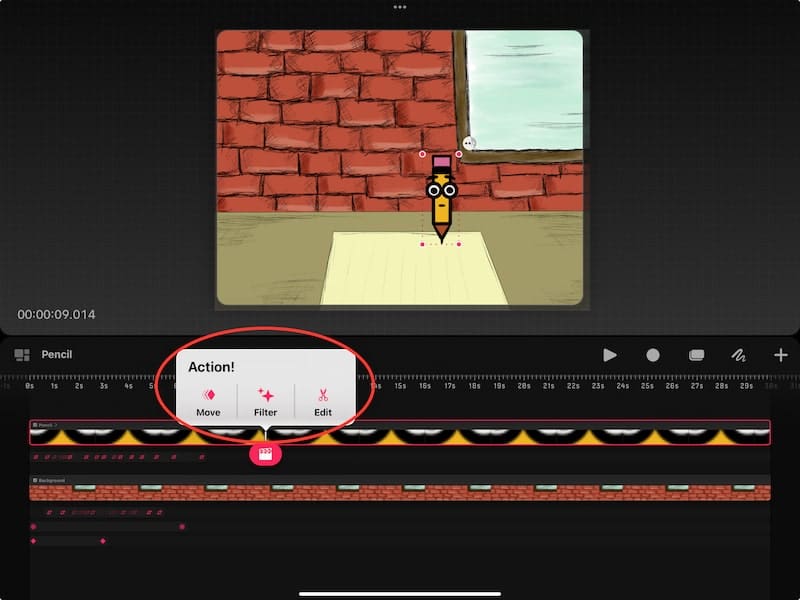
Tap anywhere on the content you want to add your keyframe to.
So, if I want to add a keyframe to my pencil character, I would tap anywhere on the track that contains my pencil content. This will activate the playhead, which is displayed with a clapperboard icon.
Drag this clapperboard around until you find the exact location where you want your keyframe to be. Once you add your keyframe, you can’t move it, so do your best to find the correct location.
If you make a mistake, tap two fingers on your screen to undo it. You can also delete unneeded keyframes later.
Once you have the clapperboard positioned, tap on it. Here you will see all of your keyframe options. We’ll talk about all of the keyframe options soon!

When you add keyframes, you’ll see them appear in a separate keyframe track. This will appear below your content track in your Procreate Dreams timeline.

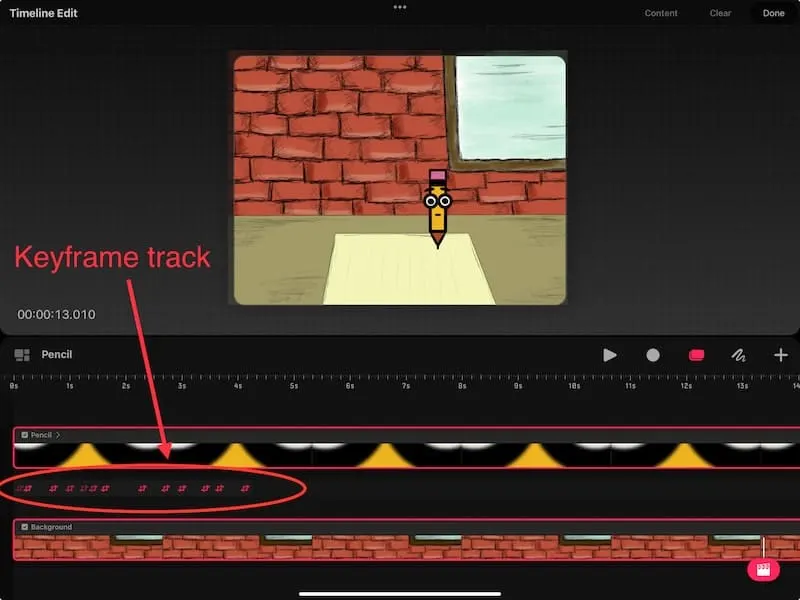
Each of these symbols represents a keyframe.
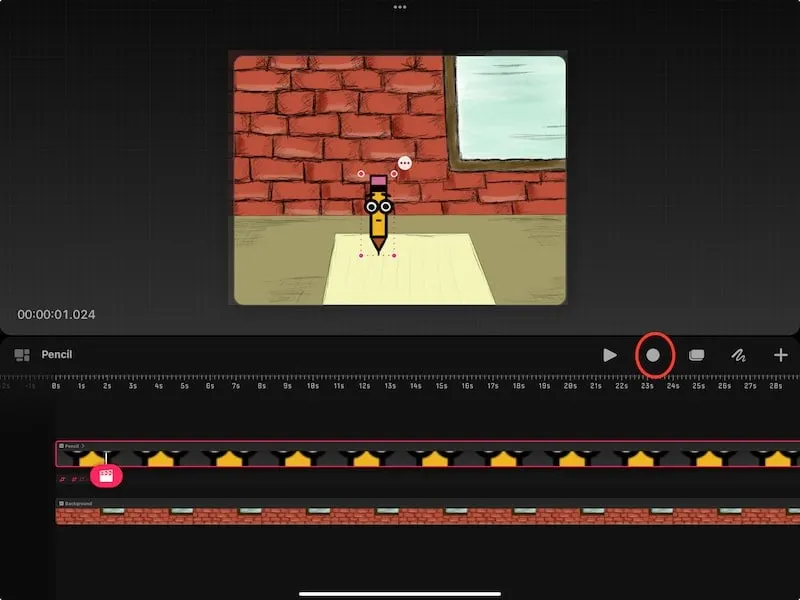
You can manually add keyframes to your Procreate Dreams timeline with the playhead.
You can also use perform mode to add filter keyframes. To do this, tap on the circle icon on the right of your screen to activate perform mode.

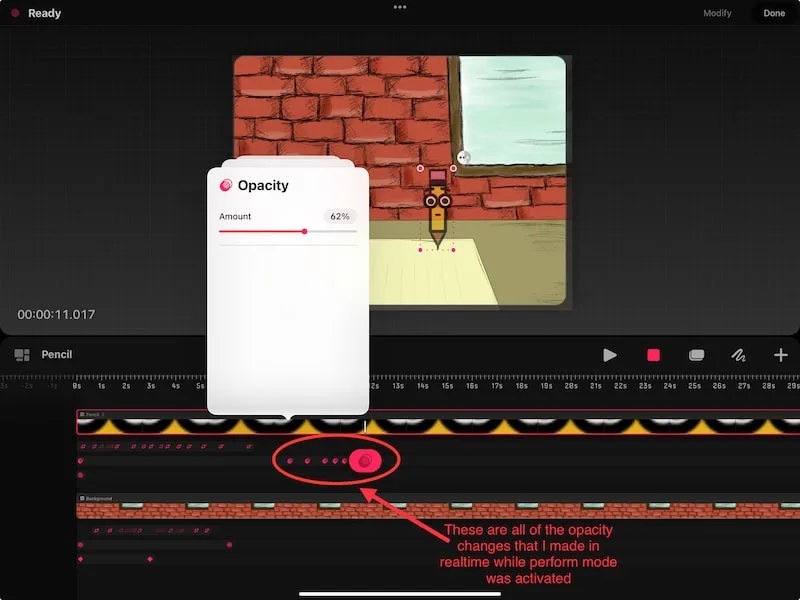
Then, tap on your content to activate the playhead where you want your filter to begin. Choose the filter you want to use.
As you drag the slider for your filter, your animation will play. This will apply the filter to your animation in real time as you make changes to your filter.

To disable perform mode, tap on the square icon on the right side of your screen.
I have a tutorial on the perform mode in Procreate Dreams you can check out for more info!
Changing Your Filter Keyframes
Before we get started, let’s understand an important note about all of these filter keyframes.
Important note: your effects will impact your animation starting at the location where you establish the keyframe.
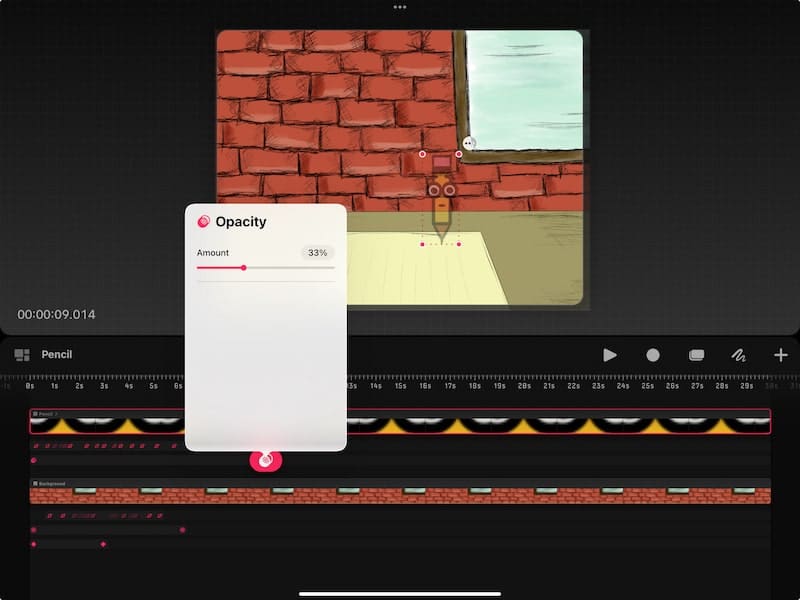
For example, let’s say that I put an opacity filter on my animation at 33%. This increases the transparency of my character.
This 33% opacity will stay with my character throughout the entire animation unless I do one of the things below:

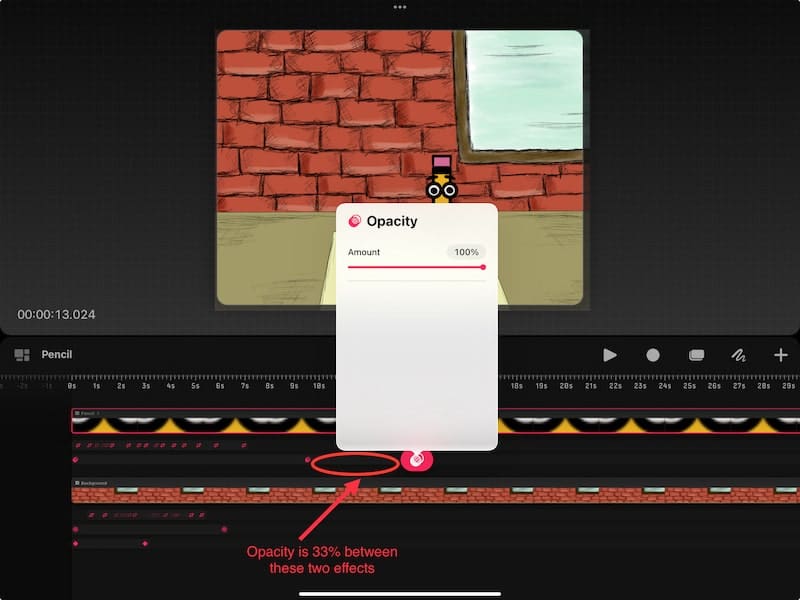
Option 1: Add another opacity effect: if I want to change the opacity of my character, I can lay down another filter keyframe. This will set up a new effect. As you can see below, I restored my opacity back to 100%.
This means that the 33% opacity will only apply in the space between my two opacity keyframes.

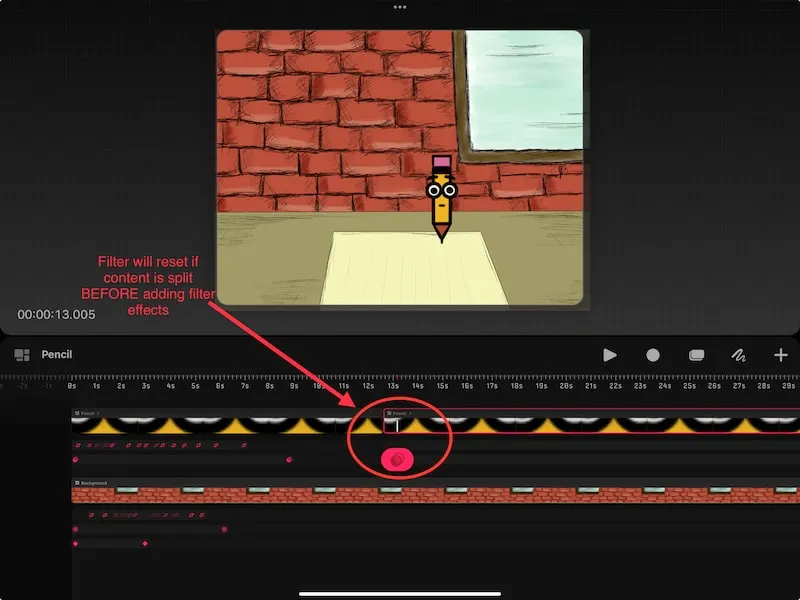
Option 2: Split my content BEFORE ADDING EFFECTS: if I split my content, each chunk of content acts independently of each other. This means that if I split my content before I lay down any filters, the filters will only apply to the chunk of content it is currently located in. It will stop once it reaches a new content chunk.
But, realize that I said that you need to split your content before laying down any filters. If you lay down your filter first, before splitting your content, the filter effects will still be there when you split your content later on.

My personal preference is option 1 because it gives you more flexibility if you need to change anything. I don’t always know how I want to apply my keyframes ahead of time. So, if I try to split my content from the get go, it can be confusing.
If I need to change the location of a filter keyframe, it’s easier to change these keyframes individually than to undo all of my split content.
Now that we understand how the filter keyframes work, let’s walk through each of them.
Opacity Filter
When you choose the opacity filter keyframe, you can adjust the transparency of your characters. This is a neat feature if you want your character to fade in or out of your animation.
Here you can see my pencil character fading into the background.
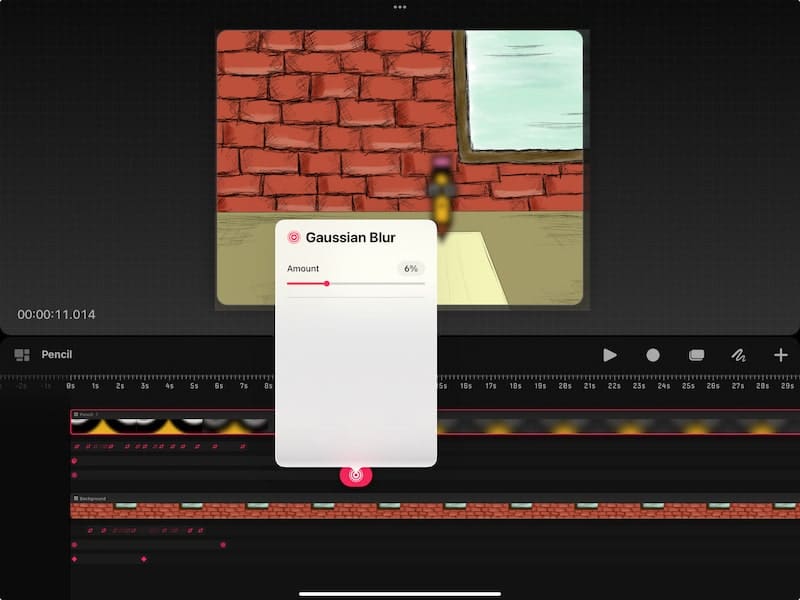
Gaussian Blur Filter
When you choose the gaussian blur filter keyframe, you can blur your characters.
Notice that the blur starts before the placement of your keyframe. This is because the blur will start gradually and build up. Once it reaches the location of your keyframe, it will be at the blur percentage you’ve designated.

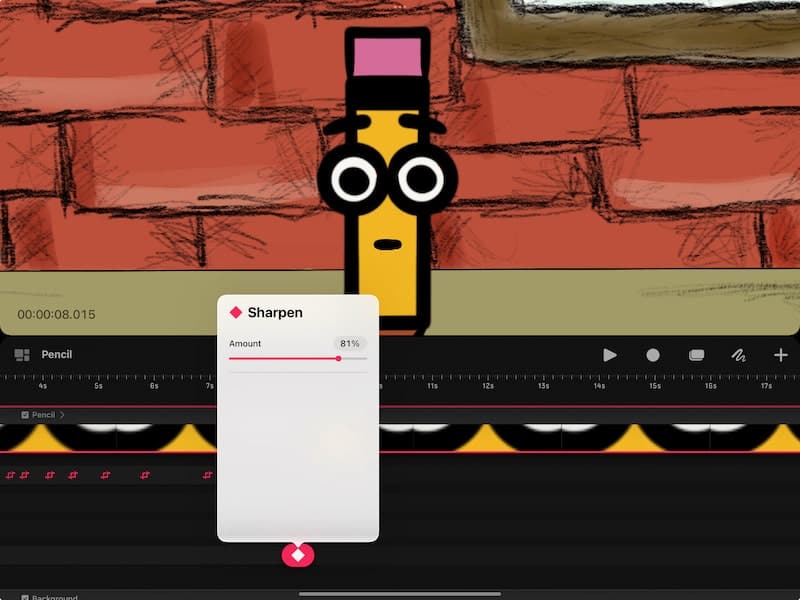
Sharpen Filter
When you choose the sharpen filter keyframe, you can decrease how soft the edges of your content are.
Depending on your design, this may be subtle. For example, it doesn’t have much impact on my pencil character below. That said, it’s a good setting to keep in mind if you need it!

Noise Filter
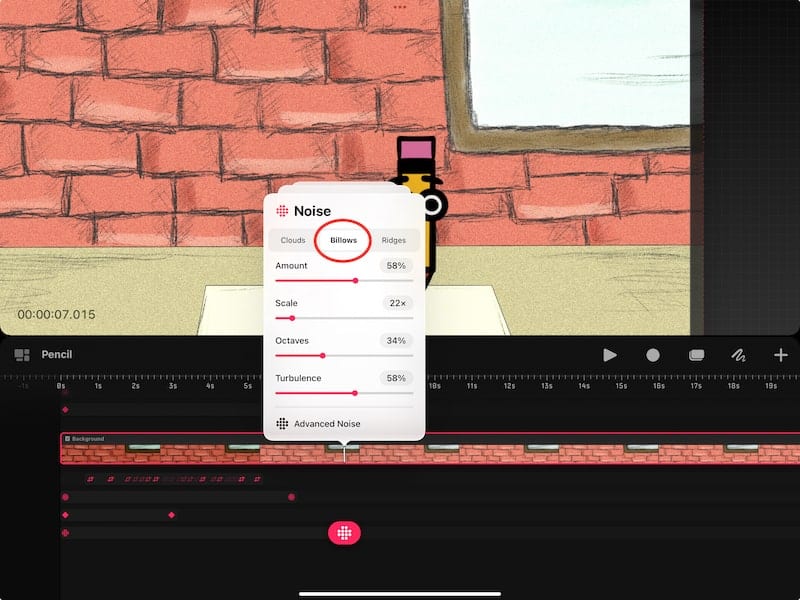
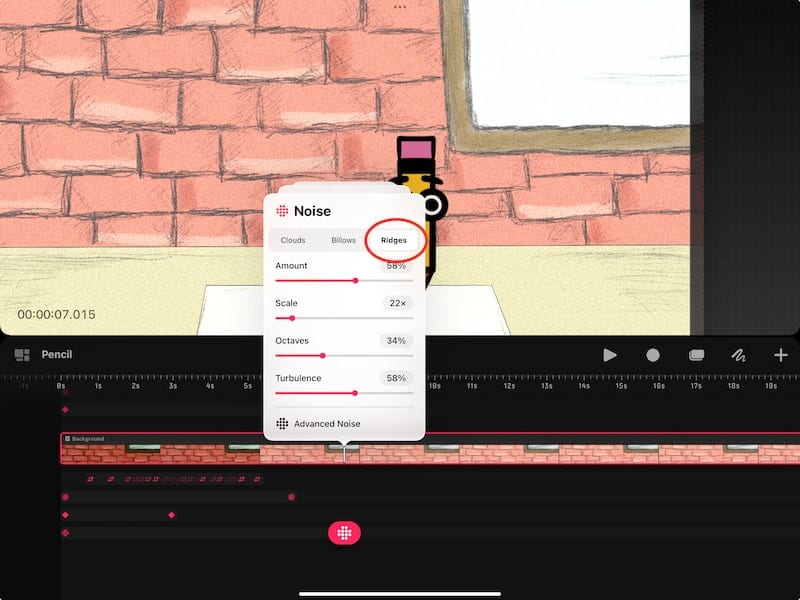
When you choose the noise filter, you can add various effects to your content that add texture to your work.
There are three choices to choose from – clouds, billows and ridges. For each of these options you can adjust the amount, scale, octaves, and turbulence of the effect to give you the unique look you’re trying to achieve.
I applied the noise filter keyframe to the background of my animation. I had so much fun with this!
Here is what the cloud setting looked like:


Here is what the billows setting looked like:

Here is what the ridges setting looked like:

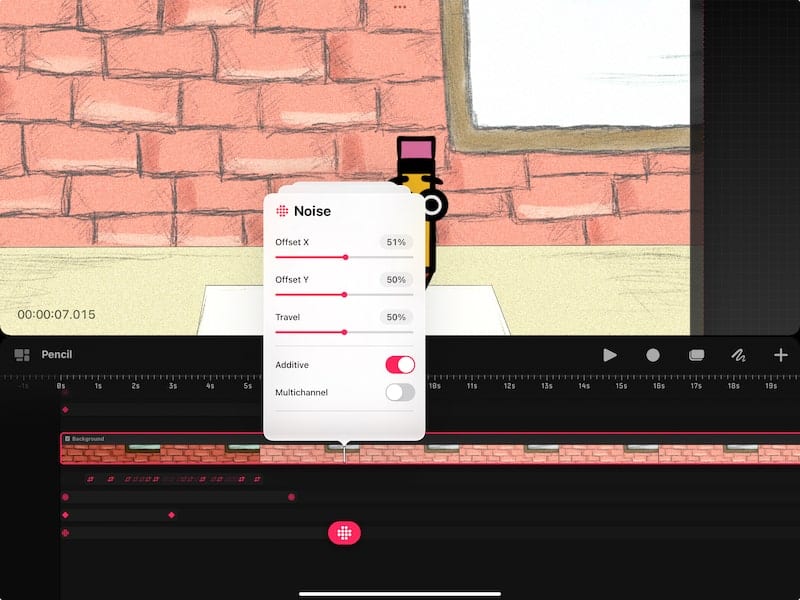
Once you’ve chosen your setting, you can make custom adjustments to it using the Advanced Noise settings. Here you can adjust the positioning and appearance of your effect!

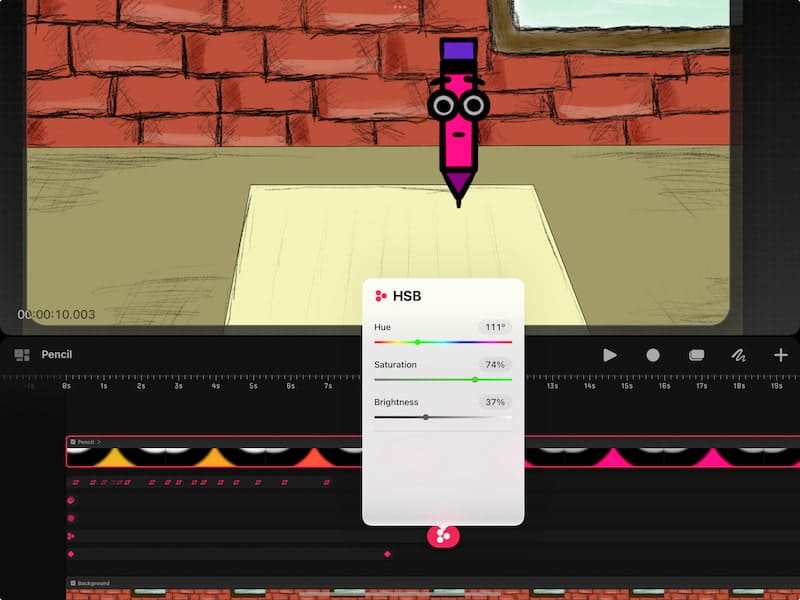
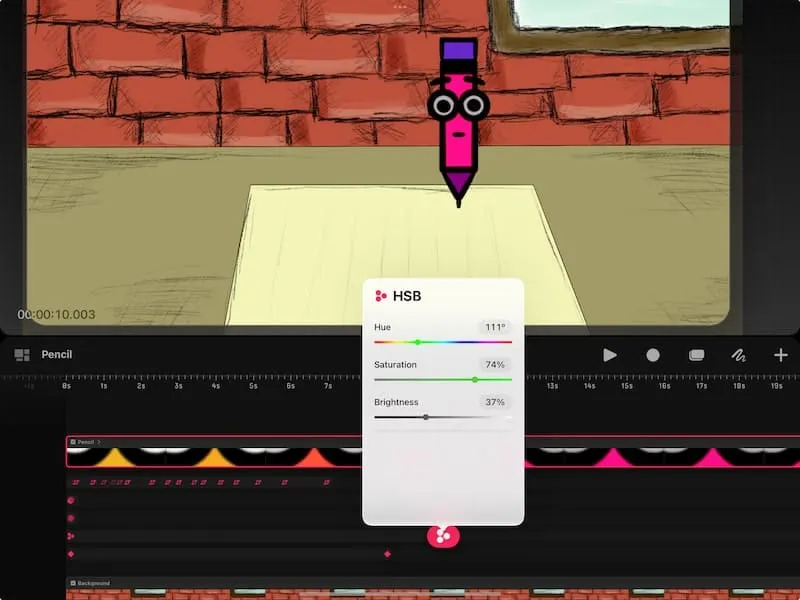
HSB Filter
HSB stands for hue, saturation, and brightness. I had SO much fun with this filter keyframe! By adjusting the sliders for hue, saturation, and brightness, you can change the color of your content without having to do it manually.
As you can see below, I transformed my pencil character into a beautiful pink and purple ensemble.
How to Delete a Keyframe
If you need to remove one of your keyframes, simply long press on it. This will activate an option of settings, one of those being the delete button.
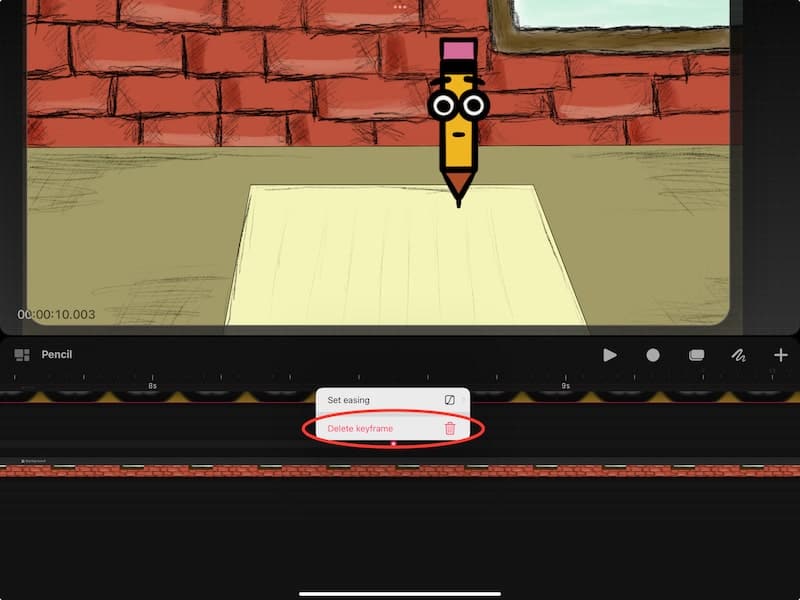

You may also notice the easing button. What does that do? Let’s talk about it!
Easing
Once you’ve established your filter keyframes, you can make adjustments to their timing and speed. This way, you can make sure that your keyframe is fitting into the overall flow and pace of your animation.
This is one of those things that I understood much better after some trial and error, largely because it is so dependent on your unique animation and the filters you’re working with. So, jump in there and give it a try!
Here’s an overview of what to expect.
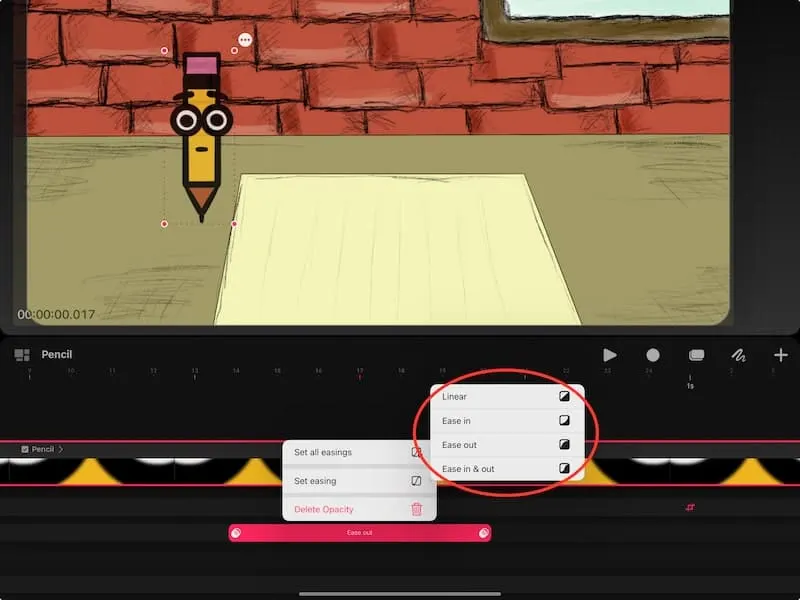
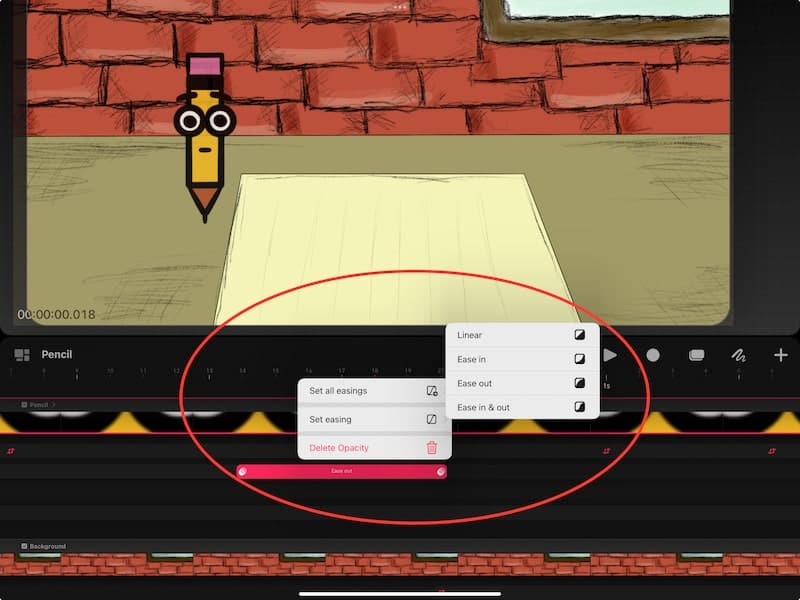
There are 4 easing options – linear, ease in, ease out, and ease in & out.

Linear will give your animation and consistent speed.
Ease in will have your animation start off slowly. Overtime, it will increase in pace.
Ease out will do the opposite of ease in. With ease out, your animation will start off quickly, while slowing down overtime.
Ease in & out will, as the name implies, combine the ease in and ease out settings. Your animation will start slowly, increase in pace, settle at a consistent speed, and then slow down.
To actually use the easing settings, you need to apply it in between two different keyframes.
Here’s what I mean.
As you can see in my animation, I have two opacity filter keyframes. In between the two keyframes I will do a long hold to activate the settings. Once I do this, I can choose my easing option. I can also see what type of easing is currently being applied. If I want to set all of my easings within my keyframe track to the same settings, I can do that here too.

Again, make sure to play around with this to understand how it works for the unique animation you’re creating.
You may also need to use a combination of different easing types to get your animation to move in the way you want it to.
While it may seem tedious, it gives you a neat ability to customize and control your animation.
Filter keyframes are such a fun way to add personality to your animations. Make sure to check out the rest of my Procreate Dreams tutorials for more ways to learn this awesome program!


Diana has been an artist for over 27 years and has training in drawing, painting, digital drawing and graphic design. Diana’s latest obsession is digitally drawing with Procreate and Procreate Dreams. Diana has experience selling her art across a number of platforms and loves helping other artists learn how to make money from their art as well.