Perform mode lets you animate your drawings in real time. Personally, I find it to be one of the most useful and awesome features in Procreate Dreams. Instead of manually adding every single keyframe, I can turn on perform mode and create those keyframes much more quickly.
So, how does this amazing perform mode feature work? Let’s dig into all of the details!
How to Set Up Your Animation for Perform Mode
Before jumping into performing with your characters, it’s important to set them up properly.
Think of it like an actual performance. You want to make sure the sets are ready, everyone is in the right position, and you know what the choreography is.
Now, this doesn’t mean that everything has to be 100% perfect before you start performing. You can make changes to the keyframes you make in perform mode. You can also change your backgrounds, drawings, etc.
It can be easier to have all of this figured out ahead of time because you’ll save time making changes down the road. You don’t have to have it all figured out.
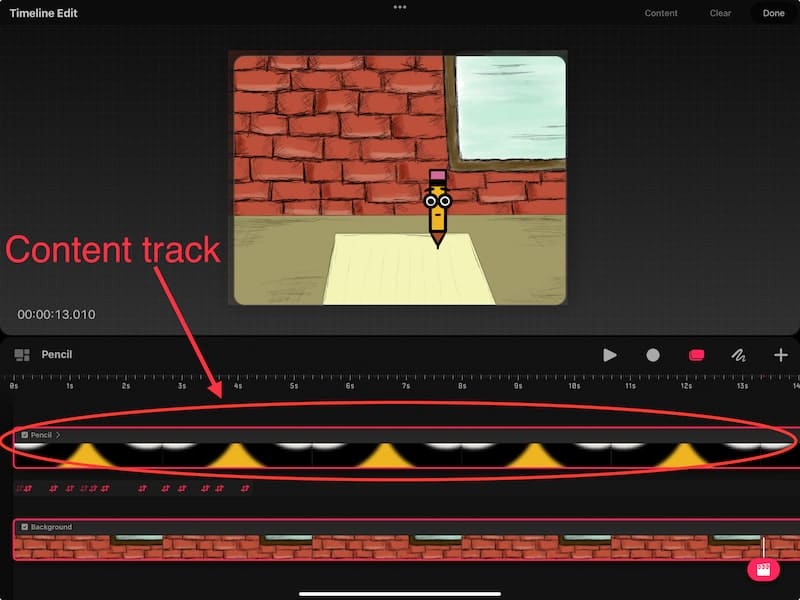
That said, you do need to have the character you’ll be performing with in the right position. For example, let’s say I want to perform with my pencil character. Firstly, I need to make sure I have his content track selected in my Procreate Dreams timeline.

Next, I decided that I want him to walk into the left side of my canvas from backstage.
If you don’t know what the backstage is, check out my post on the Procreate Dreams workspace!
So, before I start perform mode, I move my pencil character to the backstage on the left hand side of my screen.
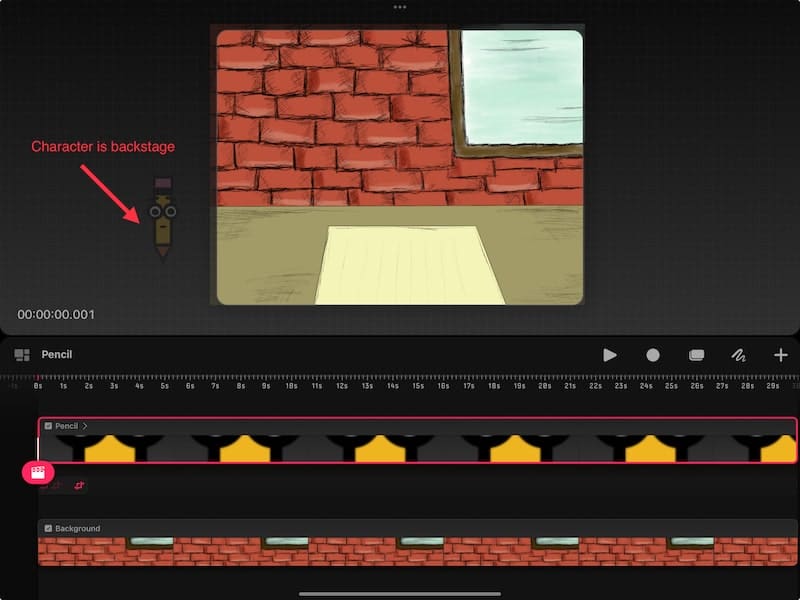

Once I start perform mode, all of my movements will be recorded as keyframes, so it’s really important that I have my pencil character where I want him to be before I start perform mode.
How to Activate Perform Mode
Once your content is selected in your timeline and you’ve moved your character to where you want it to be, you can start performing.
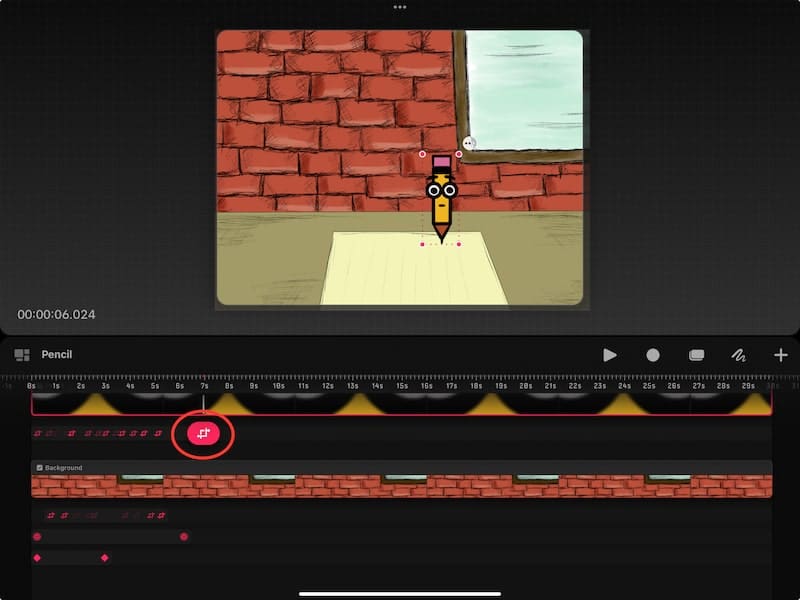
To activate perform mode, tap on the circle icon on the right hand side of your screen.

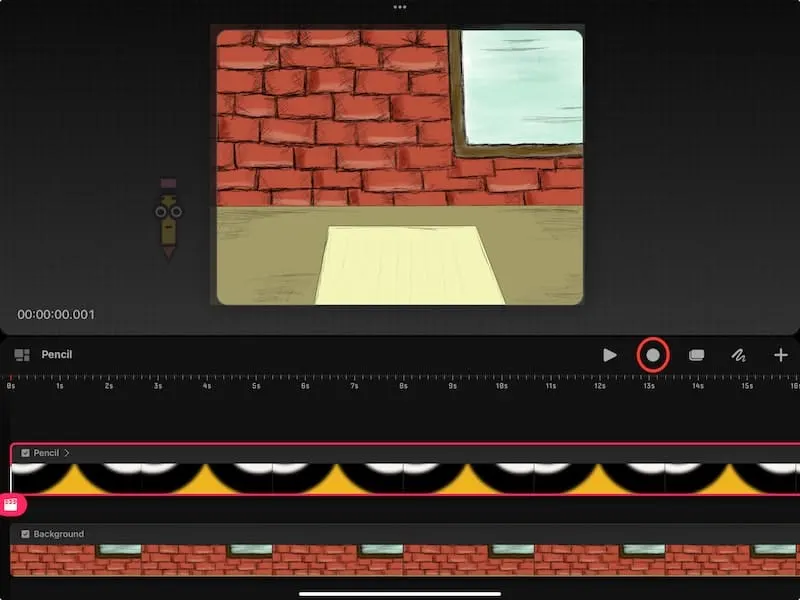
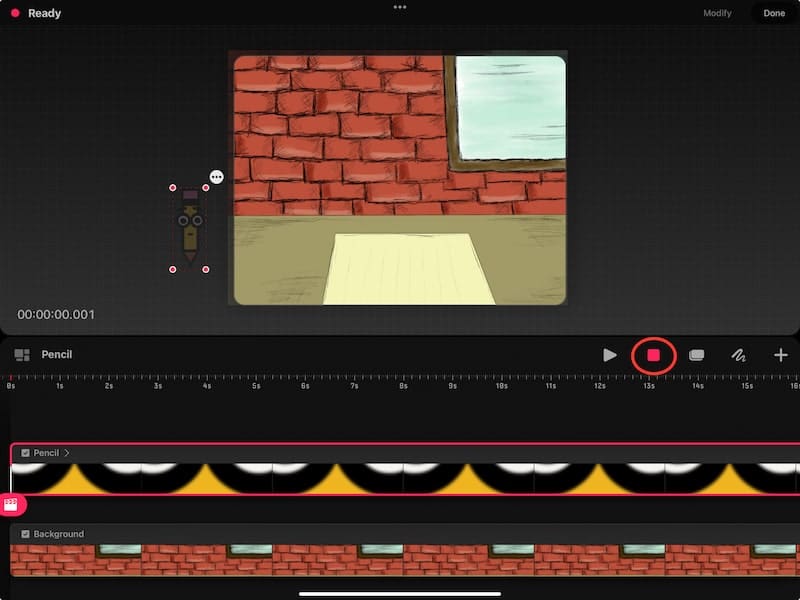
You’ll see this circle turn into a square. This means that perform mode is active!

If you’re new to perform mode, I suggest having fun with it at first. That’s what I did when I first learned Procreate Dreams, and I enjoyed it SO much!
Before I dove into the technicalities of how it worked, I just let myself revel in the wonder of it. This is one of the coolest standalone features I’ve ever encountered in my digital art creation. I was blown away the first time I used it, and really liked having the time to enjoy it. Take that time.
After you’ve had some fun performing with your characters, jump into the next section where we’ll dive into the technicalities of how perform mode works.
Using the Perform Feature to Create Motion Keyframes
To create motion keyframes while in perform mode, all you have to do is activate perform mode and move your character around your stage.
Here’s what that looks like:
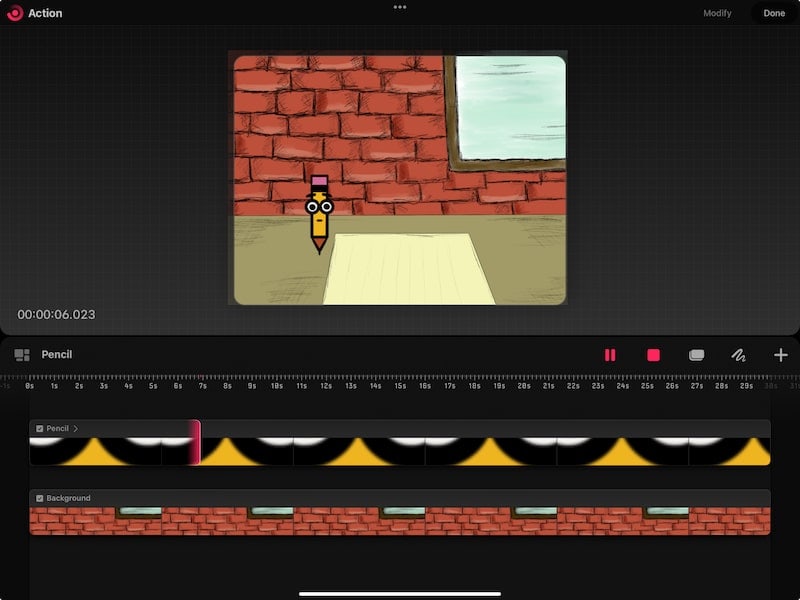
1. Activate perform mode. Make sure your character is in the right position beforehand.
2. Use your Apple Pencil to drag your character around your stage. Every motion you make with your character will be recorded, so move carefully.
3. Every time you lift up your Apple Pencil, the perform feature will pause and stop recording. You’ll also see a motion keyframe appear below your content in your timeline.

Each type of keyframe has its own type of track. Your content sits in a content track. A motion keyframe will sit in a keyframe track below it. And so on and so forth for the other keyframes. My article on the Procreate Dreams timeline goes into more detail about tracks!
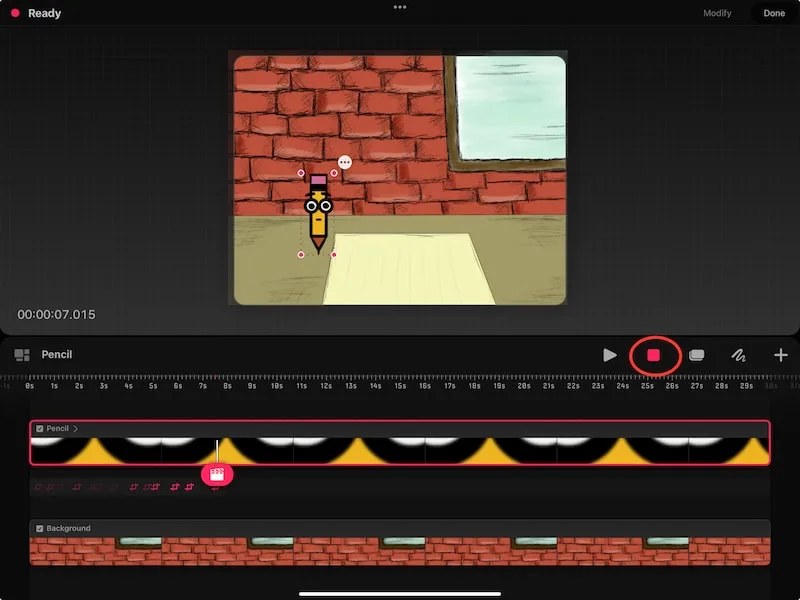
4. When you start moving your character again, perform mode will kick back in and start recording your movements again.

5. Continue moving your character around your screen until you are done performing. Deactivate perform mode by tapping on the square icon once you’re done.

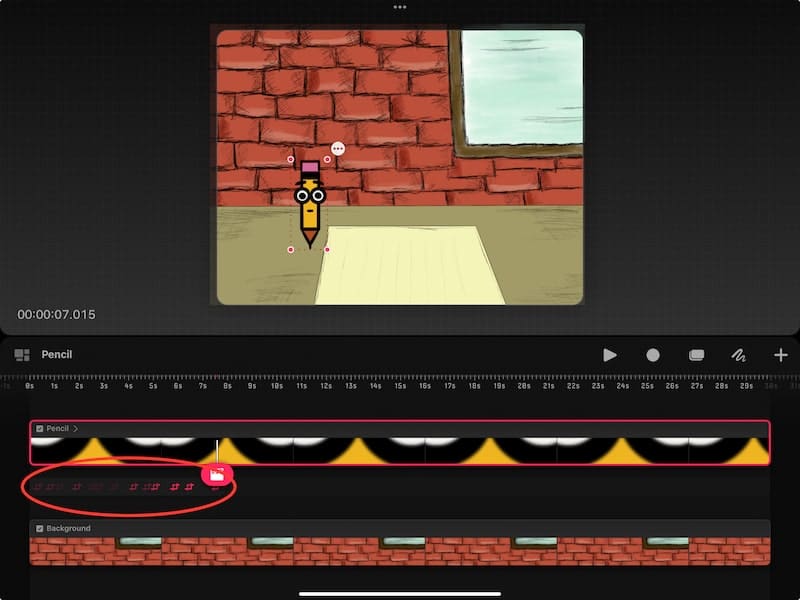
As I mentioned, each time you lift up your Apple Pencil while in perform mode, you will create a new motion keyframe. You can move them, adjust them, delete them, and customize them to your needs.

I have a tutorial on using motion keyframes in Procreate Dreams that digs into all of the details!
If you experimented with the perform feature, you probably created motion keyframes because it’s the easiest to play around with.
Using the Perform Feature to Create Filter Keyframes
Even though using the perform feature is the most intuitive for creating motion keyframes, it can be used for creating other keyframes as well!
Here’s what you need to do:
1. Tap on your content track where you want the filter effect to begin. This will activate the playhead.
2. Turn on perform mode.
3. Tap on the playhead and choose the filter effect you want to use.
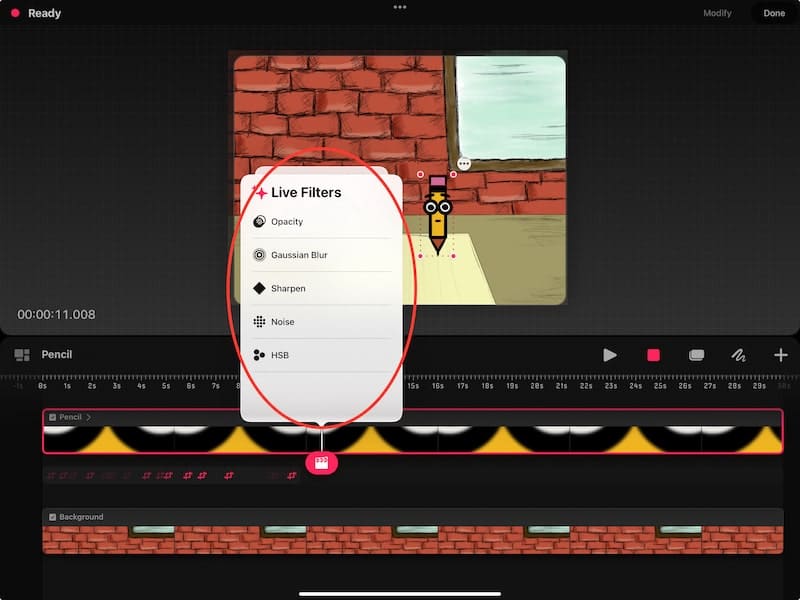

4. Adjust your filter effect. For example, if I chose the opacity effect, I would move the opacity slider. As I move the slider, these keyframes will be recorded. Just like with motion keyframes, you can stop adjusting your effect at any time to pause the perform feature.
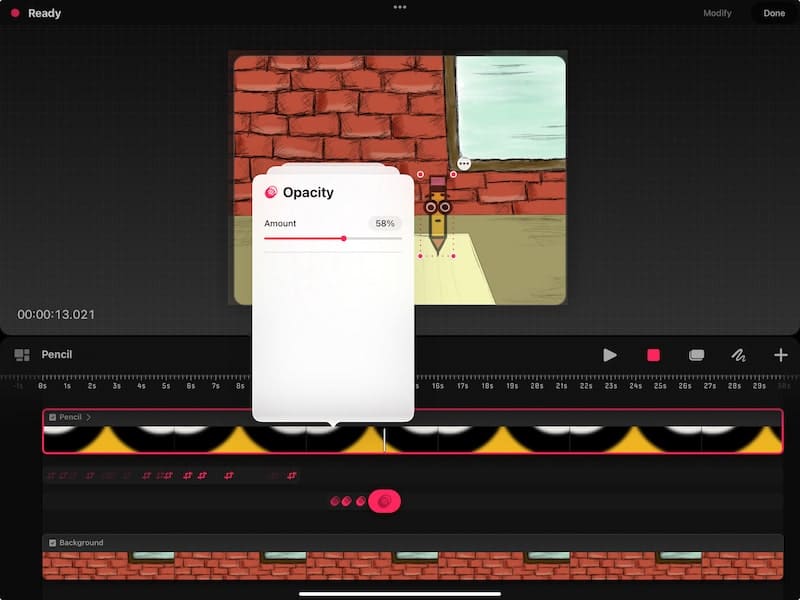

5. Once you’re done, deactivate the perform feature. You’ll see the filter keyframes appear in their own track – separate track per filter effect.
You can move them, adjust them, delete them, and customize them to your needs.
I have a tutorial on Procreate Dreams filter keyframes if you want to dive into the specifics of what these awesome keyframes do!
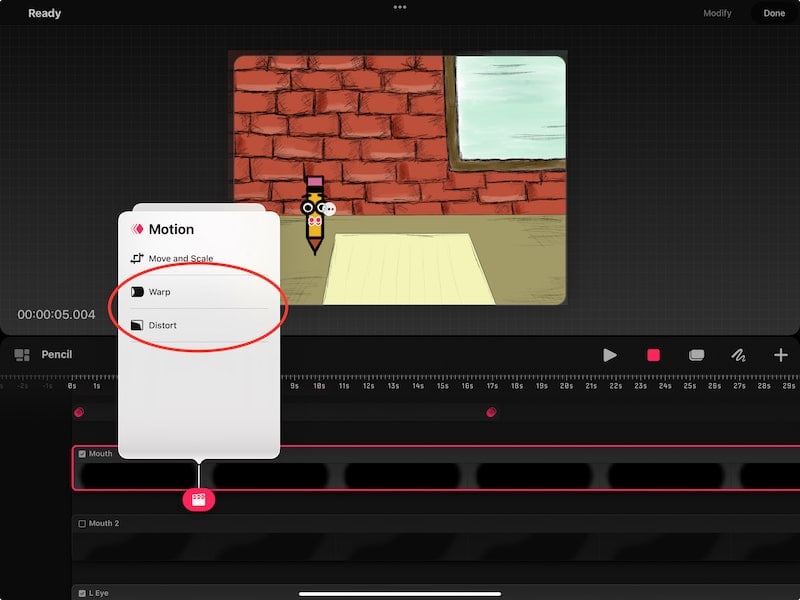
Using the Perform Feature to Create Warp and Distort Keyframes
Warp and distort keyframes are found within the motion keyframe section. They function differently than typical move keyframes though, so they deserve their own section.
Important note: warp and distort keyframes can only be applied to single layers. They cannot be applied to groups.
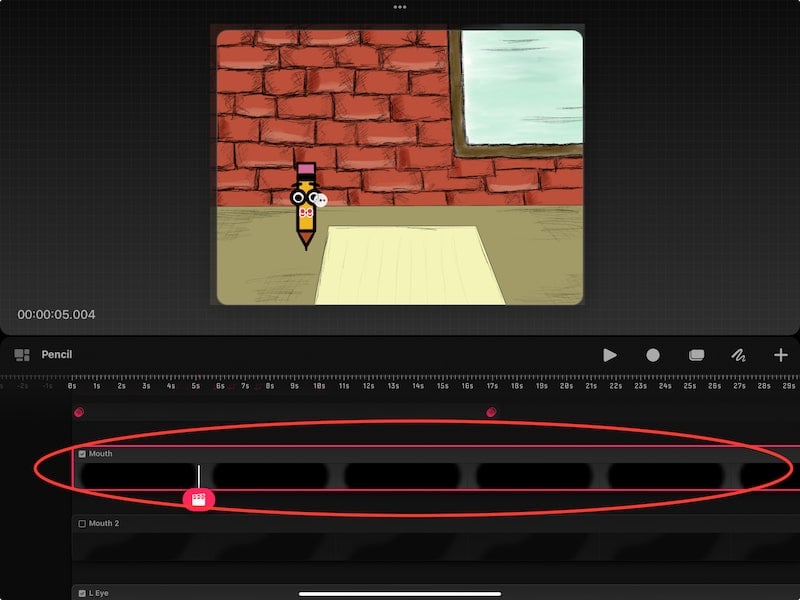
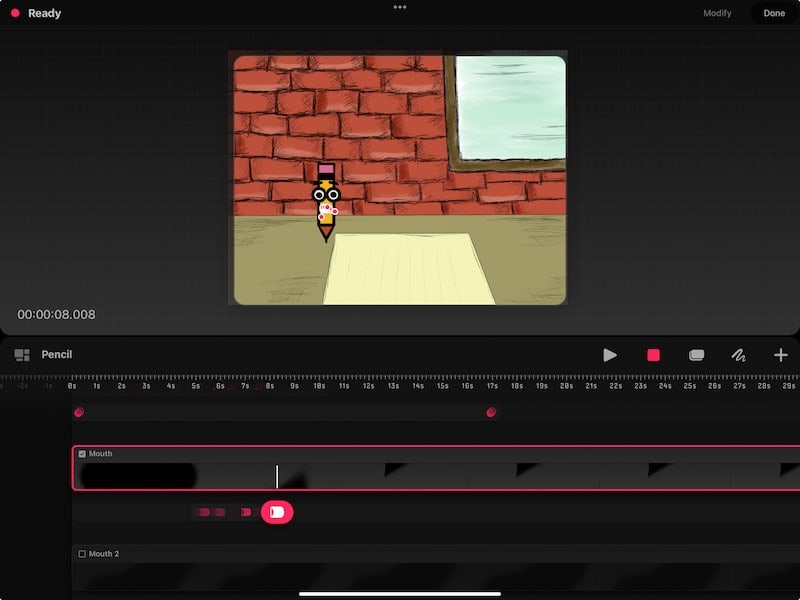
I personally love to use warp and distort if I have small changes I want to make to my characters without drawing them manually. Mouths are a great example!
Here’s what you need to do:
1. Make sure you have your single content layer selected.

2. Tap on your content track where you want your warp or distort effect to begin. This will activate the playhead.
3. Turn on perform mode.
4. Tap on the playhead and choose the warp or distort effect you want to use.

5. Warp or distort your drawing. For example, if I want to change the shape of my pencil character’s mouth using warp keyframes, I can make real time adjustments while the perform feature records my keyframes.

5. Once you’re done, deactivate the perform feature. You’ll see the warp or distort keyframes appear in their own track – separate track for warp and separate track for distort.
You can move them, adjust them, delete them, and customize them to your needs.
If you want to dig deeper into warp and distort keyframes, check out my tutorial on Procreate Dreams motion keyframes.
I have so much fun using perform mode. It’s allowed me to animate my artwork more quickly, without as much manual drawing and adjustments. Have so much fun using it to create your own animations!


Diana has been an artist for over 27 years and has training in drawing, painting, digital drawing and graphic design. Diana’s latest obsession is digitally drawing with Procreate and Procreate Dreams. Diana has experience selling her art across a number of platforms and loves helping other artists learn how to make money from their art as well.