If you’re familiar with drawing on Procreate, seeing the timeline in Procreate Dreams might have been a shock. It was for me, at least!
With my years of Procreate knowledge, seeing the new Procreate Dreams timeline was like looking at a new roller coaster – something that was bound to be awesome, thrilling, and a little stomach dropping.
If you were feeling like I did when you first saw the Procreate Dreams timeline, you’ve come to the right place. Overtime, I’ve grown to LOVE the timeline and everything it can do. It’s a wild ride that’s totally worth it.
Timeline Tracks
In Procreate Dreams, the rows are called “tracks”. This is where you’ll lay out your content, keyframes, and all of the exciting stuff that goes into your animation.

You can add a new track by tapping on the plus button on the right hand side of your screen, and choosing the track option.
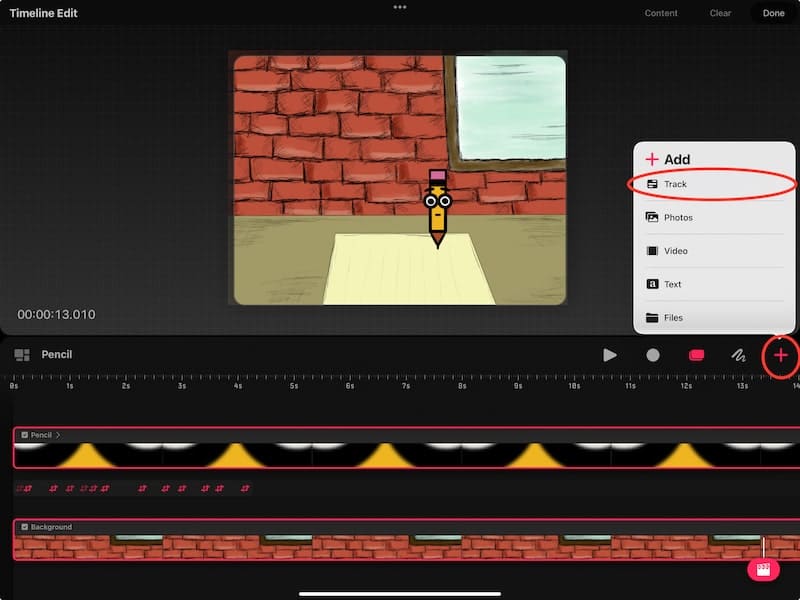
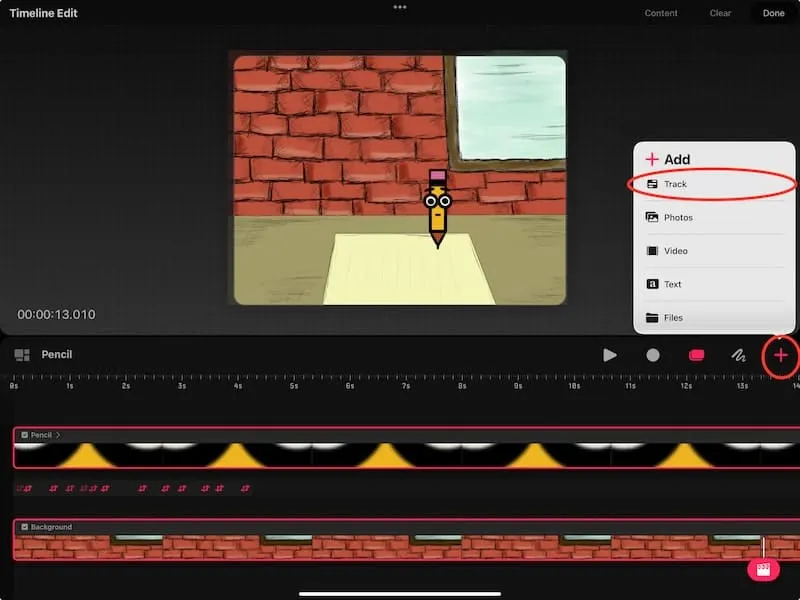
If you want to know what the other buttons do within the Add menu, as well as the other menus, check out my post about the Procreate Dreams workspace.
Content vs. Keyframe Tracks
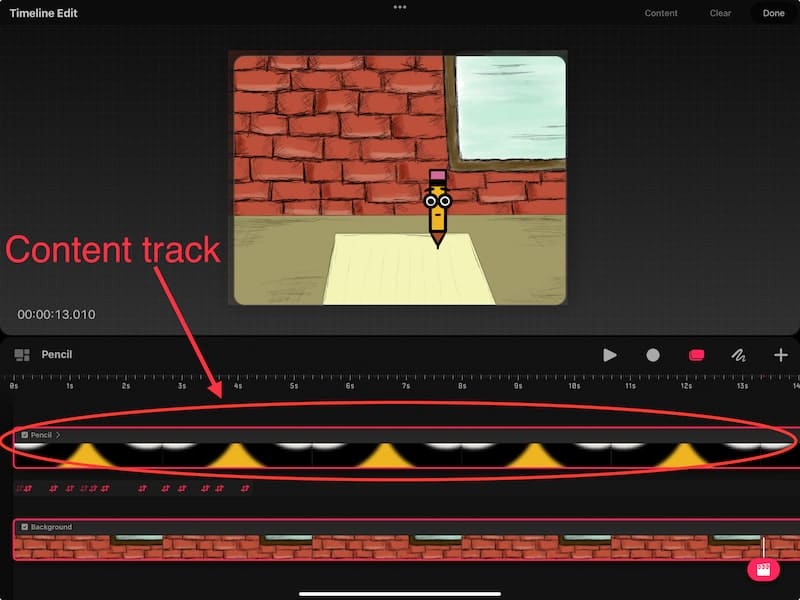
Once you have your tracks, you need to add stuff to them to create your animation – this can either be content or keyframes.
Content consists of your drawings. Your characters, backgrounds, all of that good stuff. Everything you draw is your content.

Keyframes are the effects you apply to your content. The movements, splits, all of that good stuff. Think of your keyframes as the magic that turns your drawings into animations.
Check out my post on move keyframes, my post on filter keyframes, or my post on the edit feature to learn more!

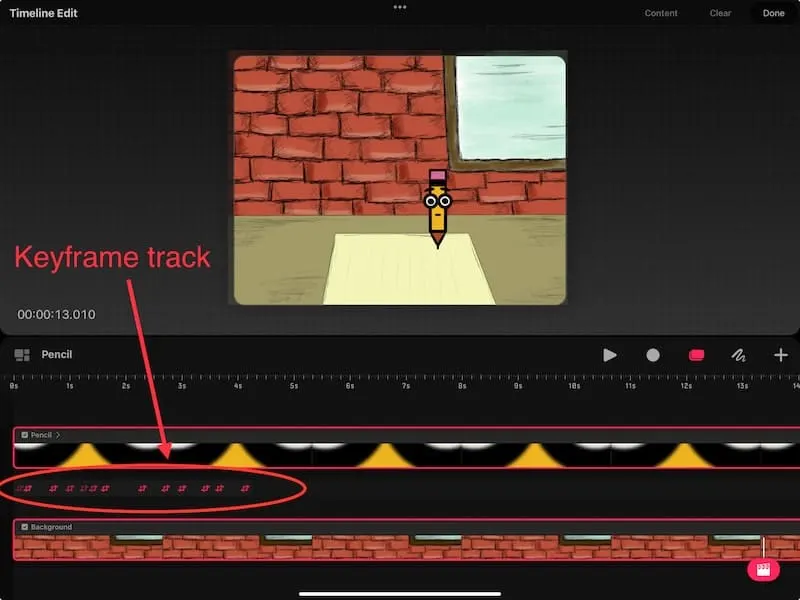
Your content and your keyframes will be separated into different tracks. This is why we call them content tracks and keyframe tracks. You can have multiple content tracks and keyframe tracks to keep your work organized.
Moving Content and Keyframes
Once you have your content and keyframes on your tracks, you can easily move them around.
You can do this with either your finger or your stylus. I personally find it much easier to use my finger to move things around my timeline, but do what feels comfortable for you.
If you drag your content or keyframe, you can move it to a different spot on the same track. If you hold down on your content or keyframe, it will pop out of your track, which will allow you to move it to a different track.
Any keyframes that are associated with your content will be moved with your content.


If you drag the edge of your content, you can make your content shorter or longer. Simply stretch it to the length you want it to be.
If you drag within your timeline, but not within a specific content or keyframe, you’ll see your timeline move as a whole. This lets you see other parts of your animation, which is especially helpful if you’re zoomed in.
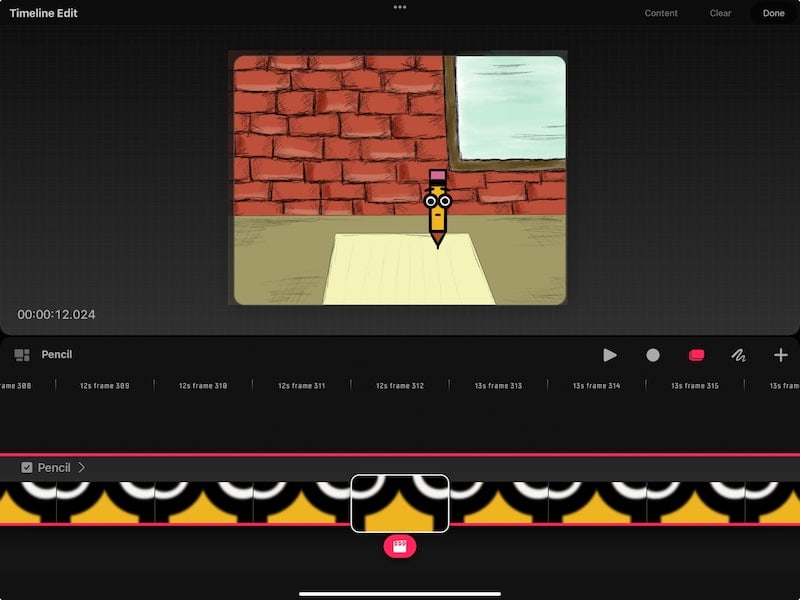
Zooming In and Out of Your Timeline
There are two ways to zoom into your timeline. The first way is to pinch, which is my personal favorite given my background in Procreate. Simply start with your fingers together and pinch outwards until you’ve zoomed as far in as you need to.
You can also zoom in by double tapping on a frame. This is a great option if you need to zoom in on a specific frame. Continue to double tap on the frame until you’re where you need to be.
What’s neat about this way of zooming in is that it will show you the frame number. You will not see the frame number if you zoom in by pinching.

To zoom out again, simply pinch in the other direction. Start with your fingers out and move them in towards each other.
When you zoom in or out, you’ll notice that your ruler changes. It will become more granular and specific as you zoom in, and more general as you zoom out.
You’ll also notice that your playback mode will adjust to your zooming. For example, if I zoom in really far, when I play it back, it will only play the portion that I’ve zoomed in to. Basically, it will only play what is currently visible on your timeline.
I use this feature a lot for nailing down the specifics of an animation. If there’s a particular part I’m working on, I’ll zoom in really far and replay that portion over and over again until I achieve the effects I’m looking for.
Toggle the Visibility of Content
If you want to hide content, tap on the checkmark in the left hand corner of your content track. You’ll see the checkmark disappear, as well as your content. If you want it to appear again, tap to reinstate the checkmark.

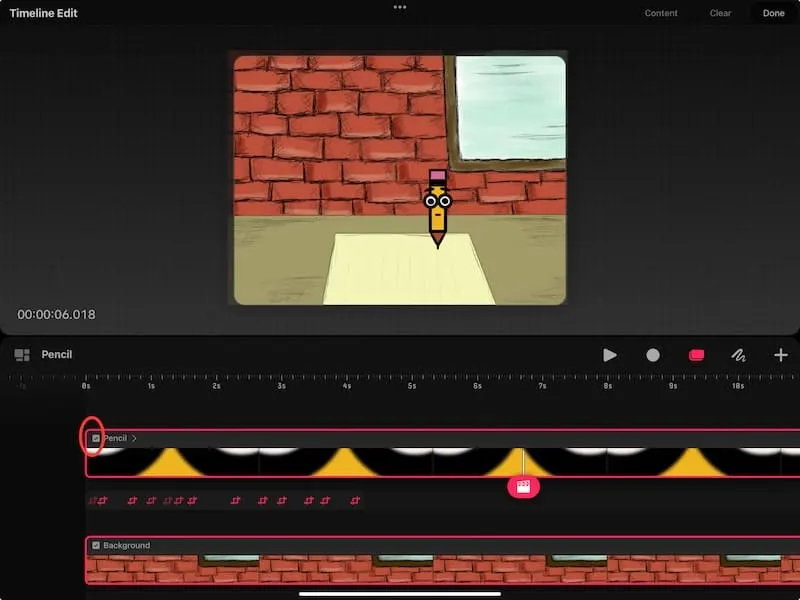
If you’re familiar with Procreate, this is similar to toggling the visibility of your layers on and off.
I personally use this visibility feature a lot when I’m trying to focus on a specific element of my animation. It helps me reduce the clutter and see what I’m doing more clearly.
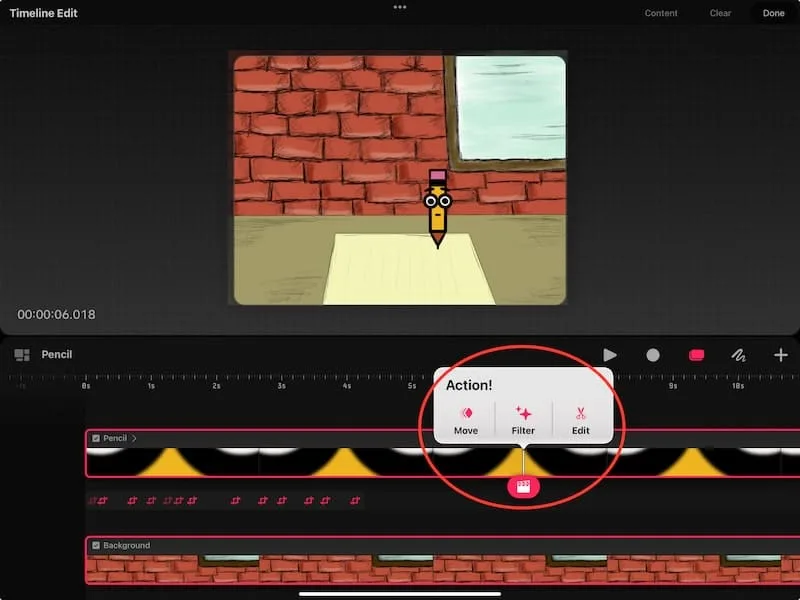
Timeline Playhead
Tap on your content track and you’ll see a movie clapperboard appear in the place where you tapped.
In Procreate Dreams, this clapperboard is called the Playhead.
Drag the Playhead back and forth to view your animation. I use this feature a lot when I want to see my animation at my own speed and pace. That way, I can easily stop, rewind, make granular edits to my animation, and focus on the details.
If you want to play your animation using the Playhead, flick the icon to the left of your screen. This will activate the play button.
In my experience, this takes a little practice, but it’s handy when you get the hang of it. Your animation will play in a loop unless you’ve deactivated that feature in your Procreate Dreams project settings.
Another awesome thing about the Playhead is that it gives you access to keyframes you can use for your animation. Once you’ve enabled the Playhead, tap on it. Here you will see a number of different options for animating your work and bringing it to life.

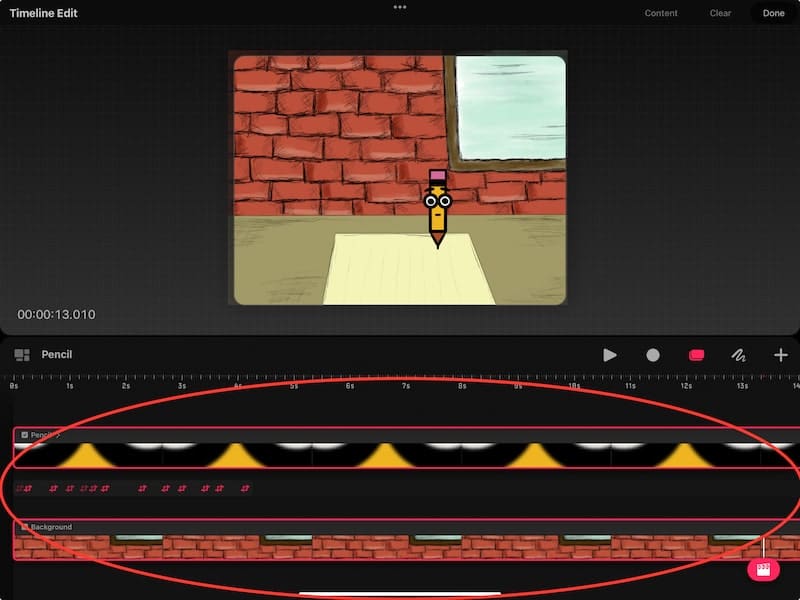
Selecting Multiple Tracks
If you want to select multiple pieces of your content in your animation, there’s a neat way to do this. I personally have SO much fun doing this!
Start by activating the timeline edit button. This is the icon with the two overlapping rectangles.
Then, make sure that content is selected at the top of your screen.
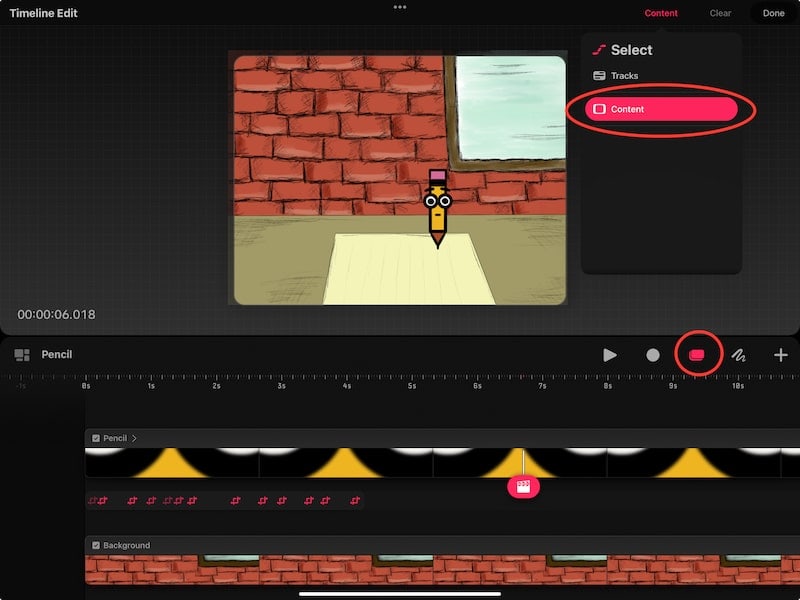

From there, you can start selecting and deselecting multiple tracks. My favorite way to select multiple tracks at once is to draw a circle around them.
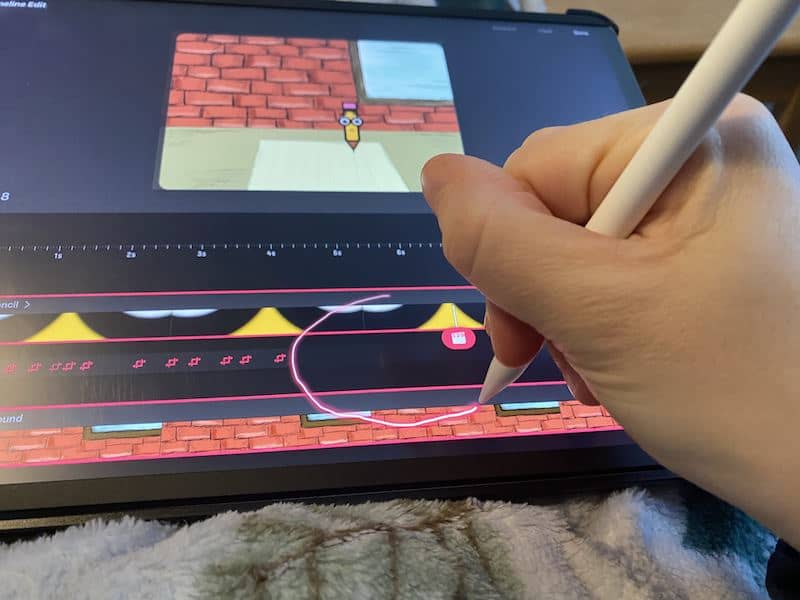
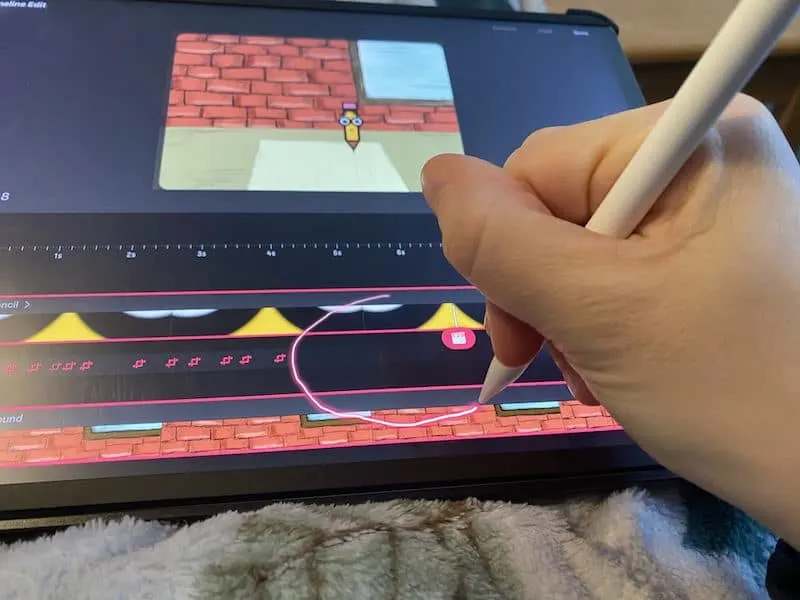
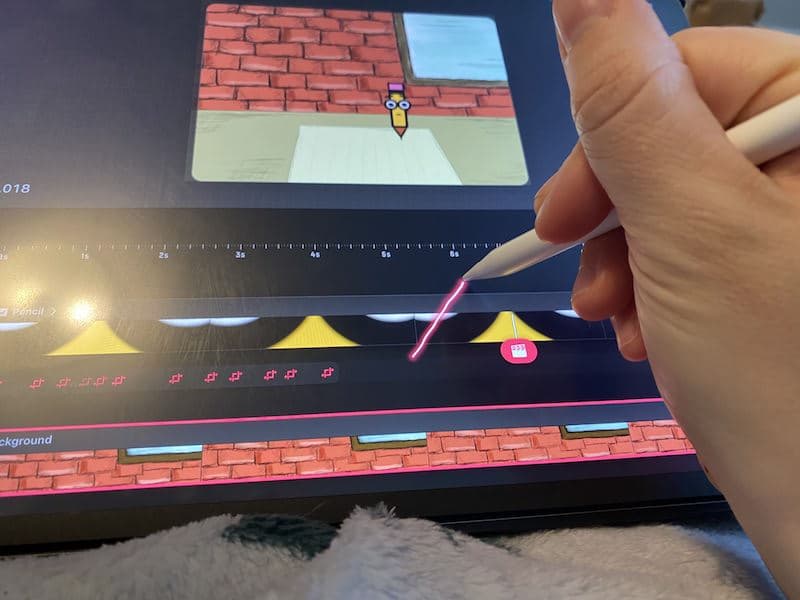
After you’ve selected multiple tracks, you can remove them from the selection. I usually draw a line through them.

You can add tracks to your selection in the same way.
The timeline is where the magic of turning a drawing into an animation comes to life. Have fun exploring everything it can do!


Diana has been an artist for over 27 years and has training in drawing, painting, digital drawing and graphic design. Diana’s latest obsession is digitally drawing with Procreate and Procreate Dreams. Diana has experience selling her art across a number of platforms and loves helping other artists learn how to make money from their art as well.