The Flipbook in Procreate Dreams lets you focus on each individual frame and drawing of your animation.
If you’re an OG Procreate user like me, the Flipbook will make you feel like you’re drawing away in Procreate…sort of. I love activating the Flipbook, focusing on drawing one of my frames, and seeing it come to life.
Unlike Procreate, these drawings will become frames in your animation, not static images. That said, I personally enjoy being able to hide the timeline and dive into my drawing for a bit.
So, how does the Flipbook work?
How to Activate the Procreate Dreams Flipbook
Important note: before getting started with the Flipbook, make sure you only have one layer selected. The Flipbook does not work with layer groups. Choose one layer.
Which layer should you choose? Well, the Flipbook is useful for making adjustments to your frames that you draw by hand.
In this example, I chose the mouth layer for my pencil character to work on in Flipbook mode. This can be fun because I can draw slight adjustments to the mouth to make it look like my character is talking, smiling, etc.
I also like making mouth adjustments using Perform mode in Procreate Dreams.
But, if I want to manually draw the mouth shapes of my pencil character, this is when I’ll use the Flipbook.
Once you’ve chosen your layer, to activate the Flipbook in Procreate Dreams, turn on Draw & Paint mode. This can be found on the right hand side of your Procreate Dreams workspace.
I have a tutorial on Draw & Paint mode if you want to learn more!

Then, grab the small line at the top middle of your Procreate Dreams timeline.
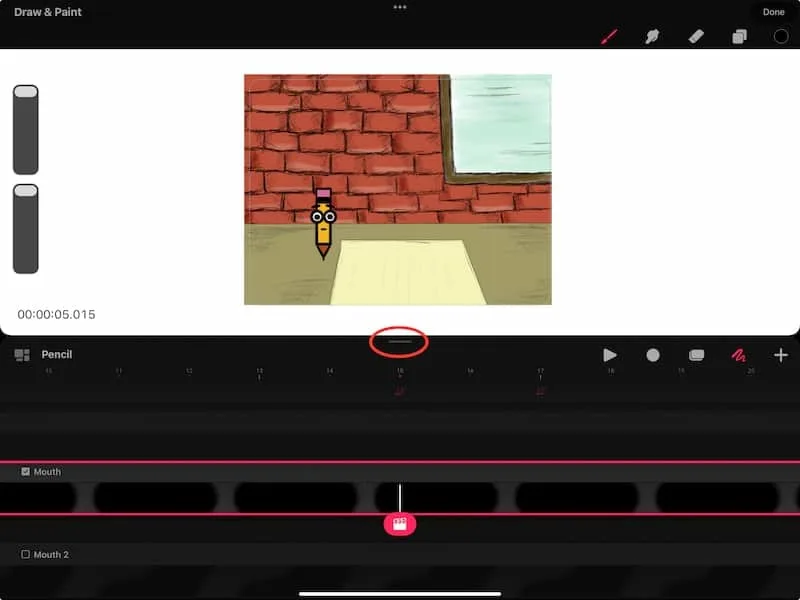
Drag the timeline down to the bottom of your screen. I think of it as “wiping away” my timeline.
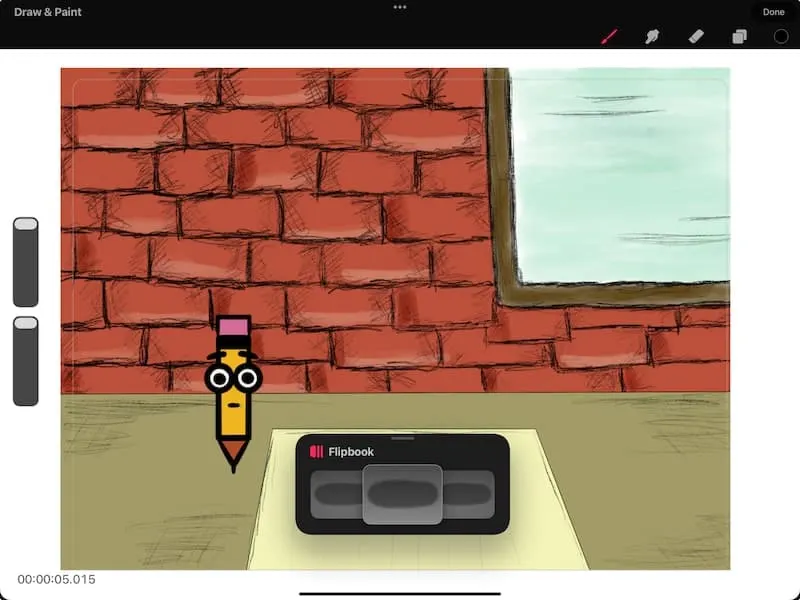
Once you do this, your timeline will fall away, and your drawing canvas will cover your screen. This is why I said it reminds me of drawing in Procreate.
You’ll also notice a rectangle pop up that shows your frames. This is your Flipbook.
How to Use the Procreate Dreams Flipbook
Once you’ve activated the Flipbook, it’s time to use it!
Let’s start by understanding the basic structure of the Flipbook. Start “flipping” through your frames. As you do, you’ll see the time in the bottom left corner of your screen change.
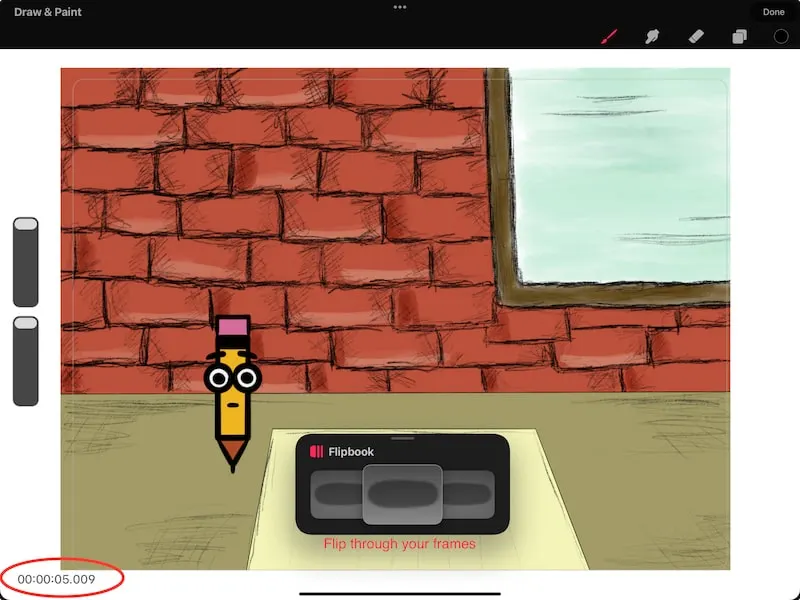
Even though your timeline is hidden, everything you do is still influenced by the timeline. In addition, any changes you make will change your timeline moving forward.
The time at the bottom left corner of your screen shows you the timestamp in your animation where your active frame takes place. Your active frame is whichever frame is at the front of your Flipbook.
Now, let’s say I want to start manually drawing the mouth of my pencil character. Here are some scenarios.
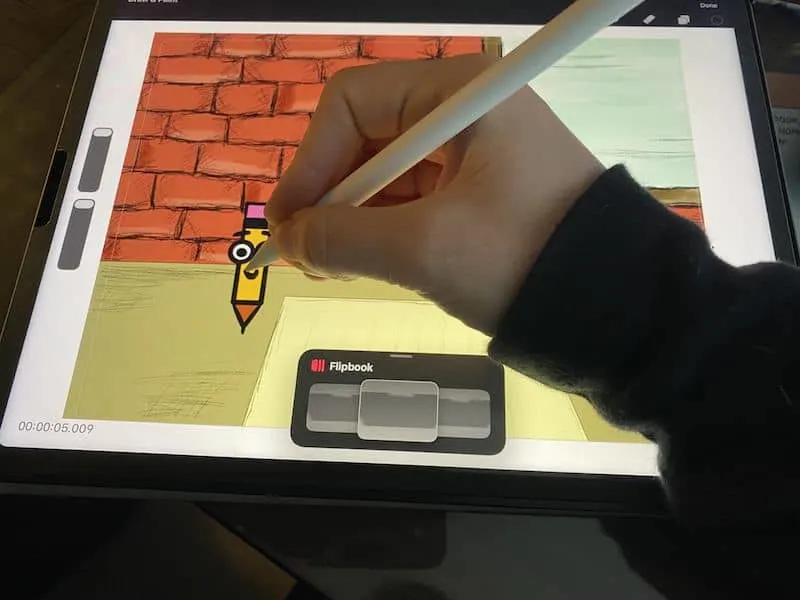
If I begin drawing over my current drawing, my entire mouth layer will change to whatever I draw. Draw on your actual canvas, not within the Flipbook.
As you can see in the example below, my entire mouth turned into a smile.
What if I want to keep my original mouth shape, but also add a smile later on in the animation? That’s where the next option comes in.
If I want to keep my original mouth drawing, but slowly change it overcharge by manually drawing new mouth shapes, begin by making sure you are at the correct location of your animation.
Then, tap on your active frame to find the plus button. Tap on the plus button to add a new frame.
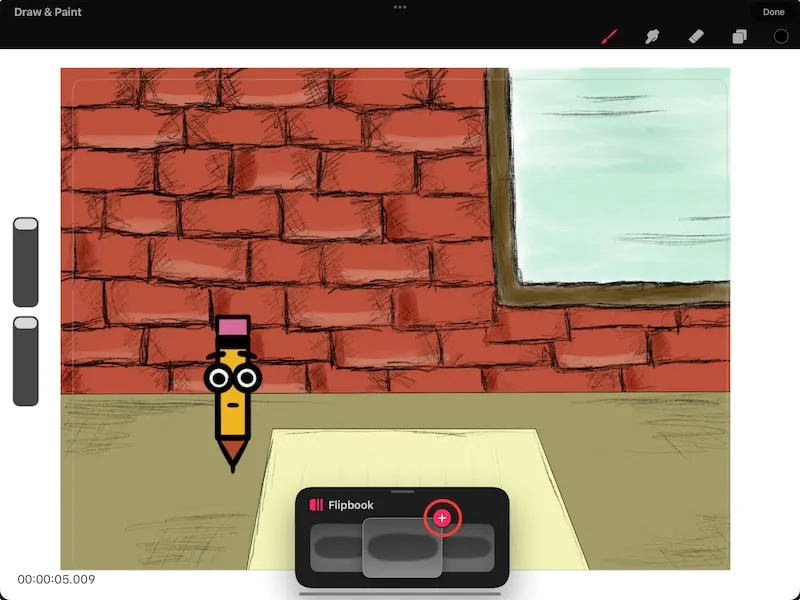
Important note: once you add a new frame, your original drawing will be wiped from your timeline from that point forward. That’s why it’s important to choose the correct location prior to getting started. If you didn’t choose the correct location from the get-go, tap two fingers to undo things and try again.

From there, you can begin drawing, frame-by-frame. Remember, draw on your actual canvas, not within the Flipbook.
Once you’re done with one frame, slide it to the left and start drawing your next frame.
Continue on until you’ve drawn all of your frames!

Turn on Onion Skins
When drawing in Flipbook mode, I highly suggest turning on onion skins. This will allow you to see your previous frames and future frames within your animation so that you have a better sense of what you need to draw in the next frame to build upon it.
As you can see in my example below, I can see a faint version of my character’s mouth from the previous frames, and the ones ahead of it. This is SO helpful for me as I draw my next frame.

To activate the onion skins, tap on the timestamp in the bottom left corner of your screen. Here you will see options to enable your onion skins, as well as adjust the color of them.

When choosing a color, in my personal experience, it’s best to choose something that stands out from the background and will not blend in with the color you’re drawing with.
You can choose different colors for the onion skins of previous frames vs. future frames, their opacity, as well as how many frames you want onion skins for.

Additional Procreate Dreams Flipbook Settings
Hold down on your active frame in your Flipbook to activate the settings menu. Here you can cut your frame, copy it, or duplicate it. You can also clear your frame if you want to start fresh.

Deactivating the Procreate Dreams Flipbook
Once you’re done using the Flipbook, there are two ways to deactivate it.
One option is to tap on your Flipbook. Make sure to tap on the outer gray area and not any of the frames. You’ll see an x appear in the right corner of your Flipbook. Tap on it to deactivate Flipbook mode and return to your timeline.

The next option is one that I think is fun. Grab your Flipbook anywhere aside from your frames. Quickly drag your Flipbook to the bottom of your screen. This will deactivate your Flipbook and bring you back to your timeline.

When you’re back in your timeline, you can make adjustments to the frames you just created and make sure everything is lining up how you want it to. Personally, I like to go in and out of Flipbook mode so that I can draw, make adjustments, draw, make adjustments, etc. Find a flow that works for you and, have fun!

Diana has been an artist for over 27 years and has training in drawing, painting, digital drawing and graphic design. Diana’s latest obsession is digitally drawing with Procreate and Procreate Dreams. Diana has experience selling her art across a number of platforms and loves helping other artists learn how to make money from their art as well.
