You have a Redbubble store and you’re excited about the designs you’re offering your customers. What’s next? Collections! If you’ve been wondering how to take your Redbubble store to the next level, it’s time to learn how to make collections of your Redbubble designs.
To make collections on Redbubble, select the designs you want to add to your collection and click on the “Collections” button. Choose one of your existing collections from the dropdown menu, or create a new collection. You can also add a design to a collection within a design’s listing page.
Getting started with Redbubble collections is the biggest hurdle. Once you have them set up and they’re integrated into your listing creation process, it will just become another thing you do when uploading your designs to Redbubble.
Let’s start off with a step-by-step guide about setting up your collections.
1. Click on the “Manage Portfolio” button.
I usually access this button by hovering over my store icon and triggering the drop-down menu of options. Near the bottom, you’ll see the “Manage Portfolio” button.
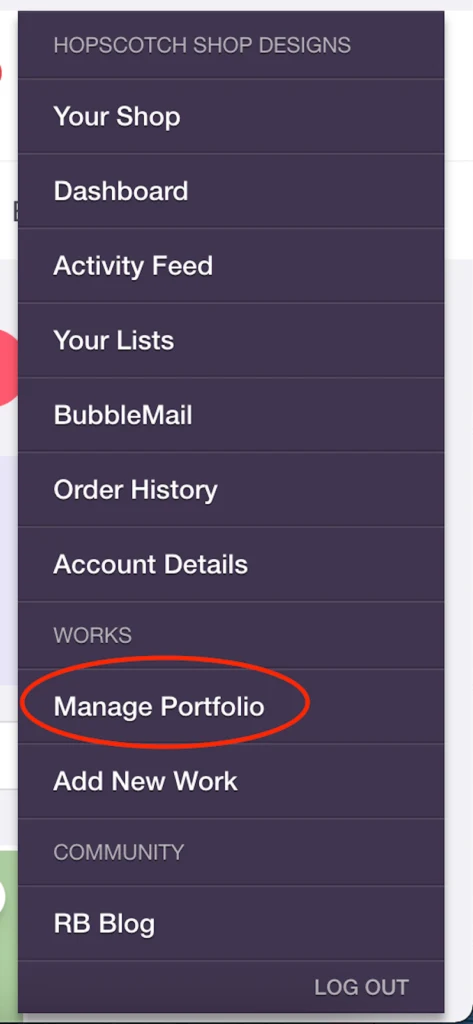
2. Start on page 1 and choose any designs you want to add to your collection.
To select a design, click on the checkbox in the left-hand corner of it. Continuing selecting any designs you want to add to your collection that are on the first page.
Don’t navigate to a different page. If you go to a different page, all of your current selections will be erased. You need to do this process one page at a time.
3. Click the “Collections” button.
Once you’ve selected all of the designs you need on your page, scroll back up to the top of your portfolio. Now that you have designs selected, you’ll see a new toolbar pop up right above your designs.
You’ll see a “Collections” button. Click on it.
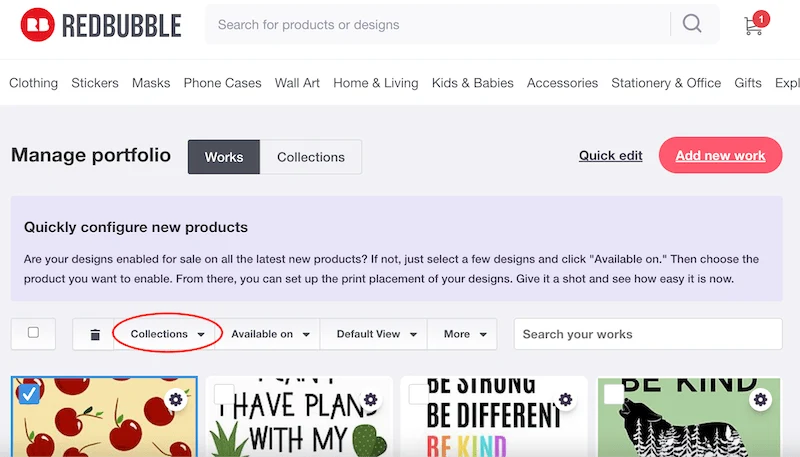
4. Choose a collection or create a new one.
Once you click on the “Collections” button, a drop down will appear with all of your current collections in it. If you already have some collections, choose the one you need.
If you don’t have any collections yet, or you need to create a new one, enter the name of it in the “New collection” box and click the plus button to add it.
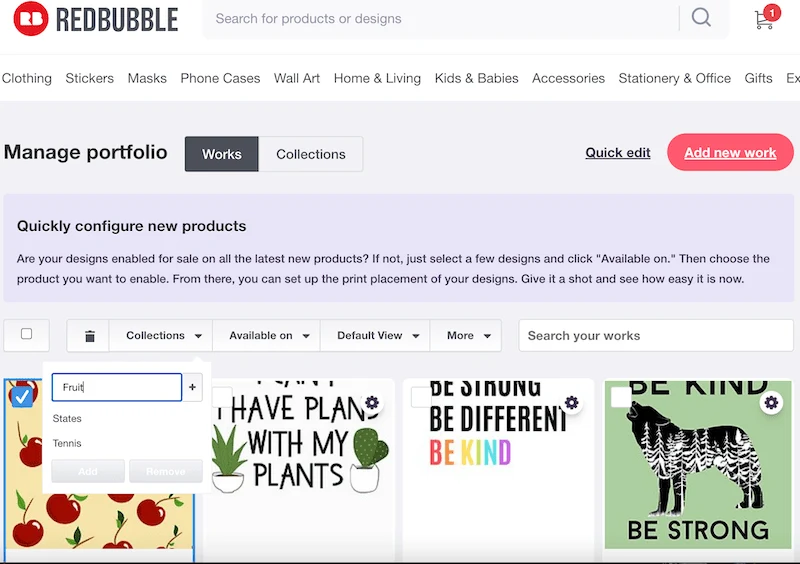
This method is great for creating collections quickly for pre-existing designs. If you’re like me and have been slacking on your collections game, this can help you get organized more quickly.
That said, a best practice is to add each of your designs to a collection as you create your listing.
Once you have collections created, you’ll see them appear at the bottom of your listing creation pages. They’re tucked right in between the “Media” options and the “Default product in your shop” option.
You’ll only be able to see collections that have already been created. If you need to create a new collection, go ahead and publish your listing and then follow the steps we outlined above.
How to Edit Your Redbubble Collections
To edit a Redbubble collection, click on the “Collections” tab within your “Manage Portfolio page. Click on the gear to access the ‘Edit” button for the collection you want to change. From there, you can change your designs, add a description, and change your cover picture and title.
Editing your collections is an important part of making sure that your Redbubble designs are properly organized. Change your titles, swap out designs, scrape a collection altogether – being able to make these changes to your Redbubble collections is essential.
Two other very important things you can do when you edit your Redbubble collections is add a description and choose your collection cover. Your collection cover is a chosen design that you want to be the highlighted design of your collection – your cover design.
Let’s walk through the steps of editing your Redbubble collections:
1. Click on the “Manage Portfolio” button.
Again, I usually access this button by hovering over my store icon and triggering the drop-down menu of options. Near the bottom, you’ll see the “Manage Portfolio” button.

2. Click on the “Collections” button.
Next to the “Manage Portfolio” label you’ll see a “Collections” button.

3. Click on the gear icon for the collection you want to edit and click the “Edit” button.
Each collection will have a little gear icon in the top right corner of it. Click on this gear icon so that a dropdown of options appears. Click the “Edit” button.
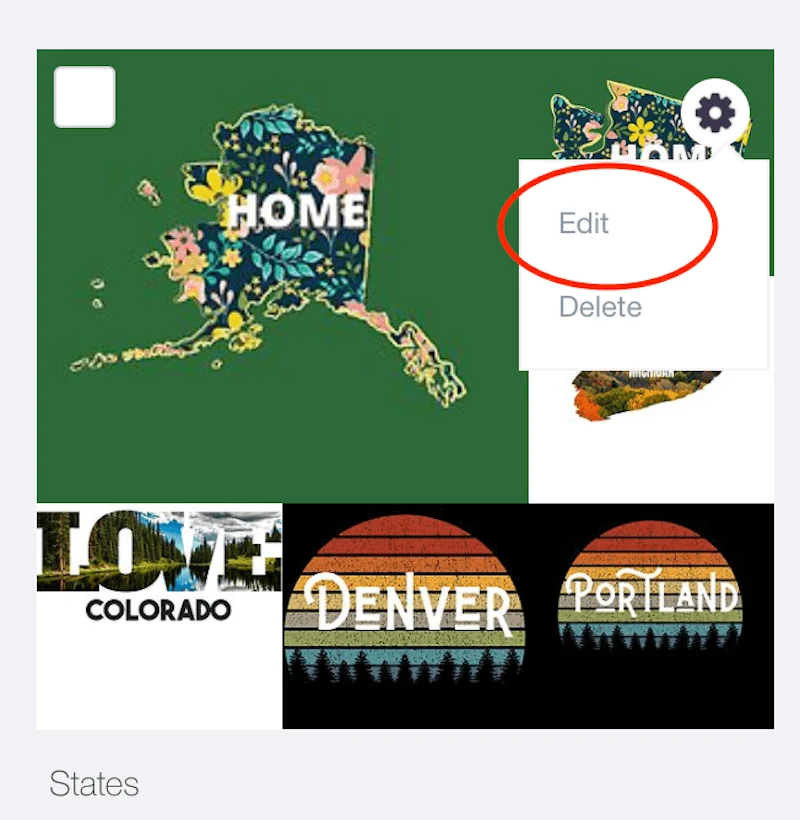
4. Edit your collection as needed.
At this point, you’ll be able to edit your collection to your preferences. Change the designs that are in it, adjust the title, add a description, and choose a cover design.
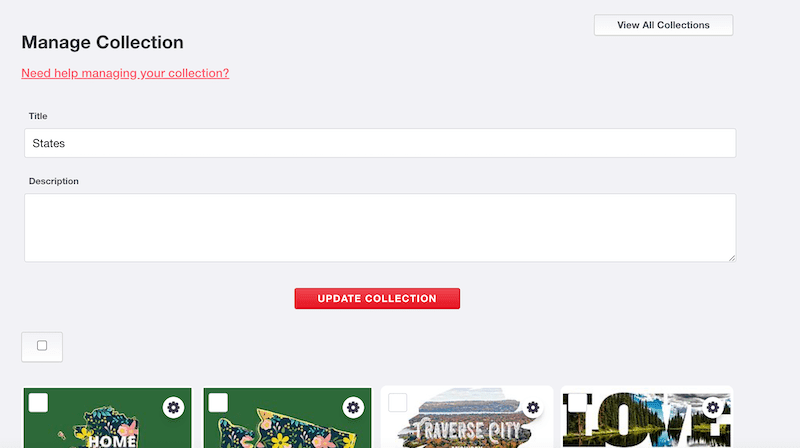
You can do almost anything within the collection editing page. Except one thing – featuring a collection. Let’s talk about how to do that next.
How to Make a Featured Collection in Redbubble
To make a featured collection in Redbubble, navigate to your “Shop Settings” and find the “Featured Collection” setting. Choose the collection you want to feature within the dropdown menu and click “Save Settings” to establish your featured collection.
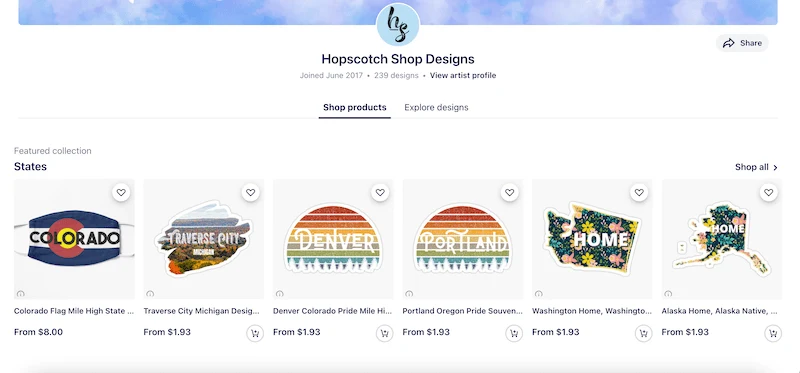
Featuring one of your Redbubble collections will help showcase those designs within your Redbubble shop.
For example, when I chose to feature my States collection, my state-related designs appeared at the top of my shop. Pretty neat!
Here’s how to feature a collection in Redbubble:
1. Click on the “Dashboard” button.
You can find the “Dashboard” button by hovering over your store icon.
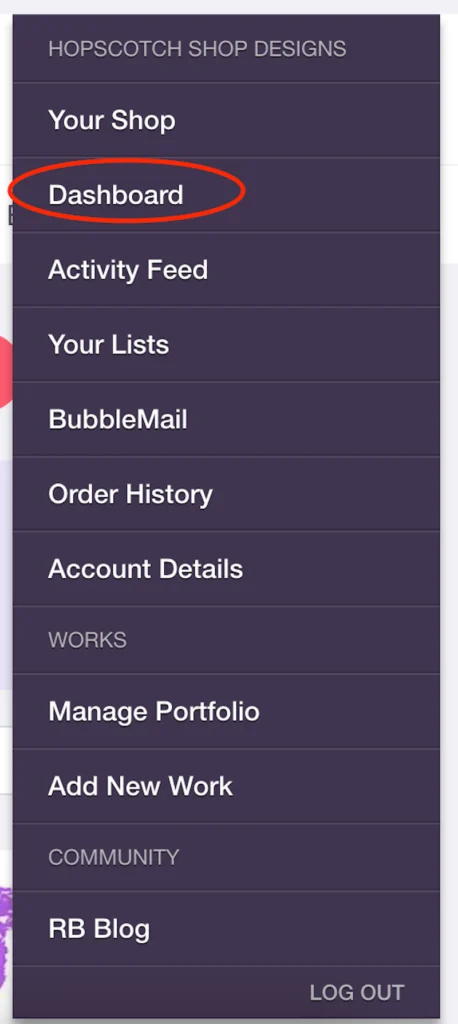
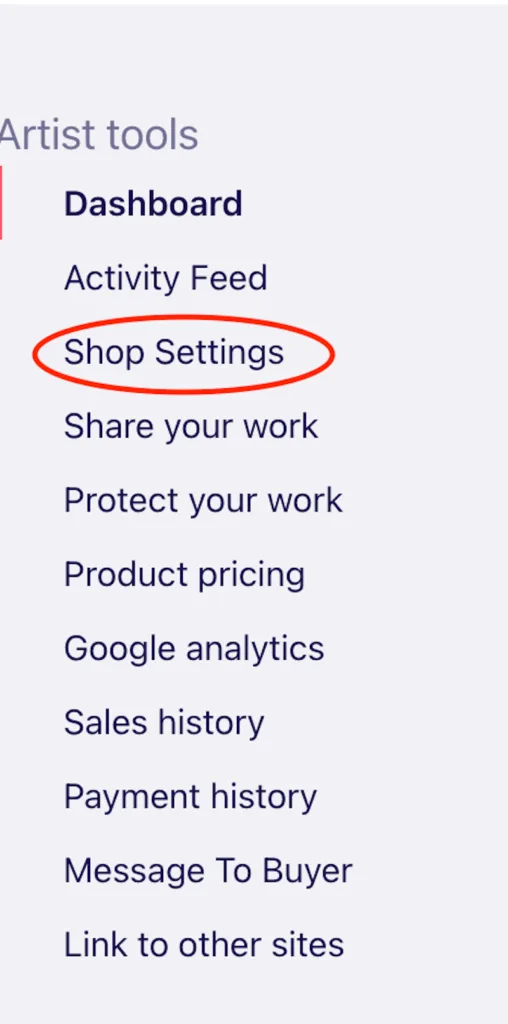
2. Click on the “Shop Settings” button.
Within your dashboard, you can find the “Shop Settings” button in the navigation bar on the left-hand side of your screen. This navigation menu is where you can also edit your prices for your Redbubble products, check your store activity, and more.
3. Choose a collection to feature in the “Featured Collection” setting.
Within the “Featured Collection” section of your settings, you’ll have access to all of the collections you’ve created. Choose one to feature and click the “Save Settings” button to lock it in.
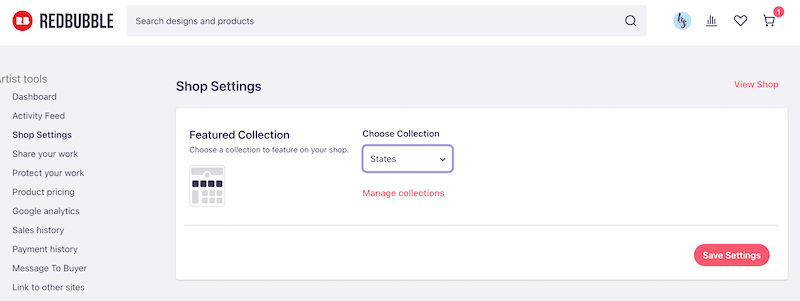
There you have it! Navigate to your shop to see how your featured collection looks.
Creating collections in Redbubble is a really great way to organize your designs and make them easier for customers to find. Take some time to establish your collections and maintain them over time. It may not be the most glamorous part of designing on Redbubble, but the collections are an important part of having a polished store.

Diana has been an artist for over 27 years and has training in drawing, painting, digital drawing and graphic design. Diana’s latest obsession is digitally drawing with Procreate and Procreate Dreams. Diana has experience selling her art across a number of platforms and loves helping other artists learn how to make money from their art as well.

