One of the really neat things about Procreate Dreams is that it plays nicely with Procreate. Given that they were created by the same company, this was what we were hoping for!
If you have static art in Procreate, you can drop it into Procreate Dreams and bring it to life as an animation. And, yes, I literally mean “drop” it. It’s a simple drag and drop that will import your Procreate art into Procreate Dreams so that you can start animating it.
Let’s walk through the steps of how this works.
1. Open Procreate and Procreate Dreams in split screen.
Our goal with this first step is to open Procreate and Procreate Dreams at the same time, placing them side-by-side. This can be done with the iPad’s split screen feature.
To activate this feature, start with either Procreate or Procreate Dreams open on your screen.
Then, tap on the three dots at the top of your screen, which will open a menu of options. If you don’t see the three dots, tap near the top of your screen to make them appear.
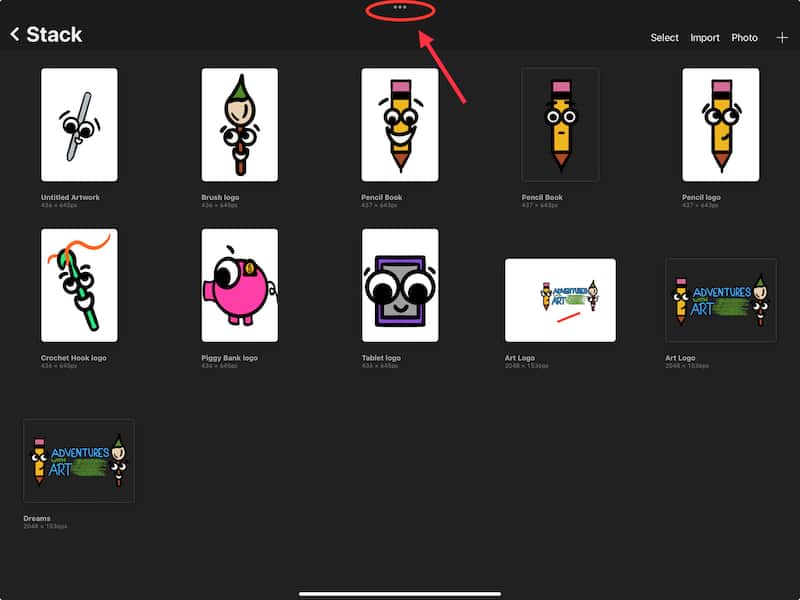

Choose the Split View option.
Once you pick Split View, it will navigate you to your iPad’s home screen. Tap on either Procreate or Procreate Dreams (whichever app you didn’t have open previously).
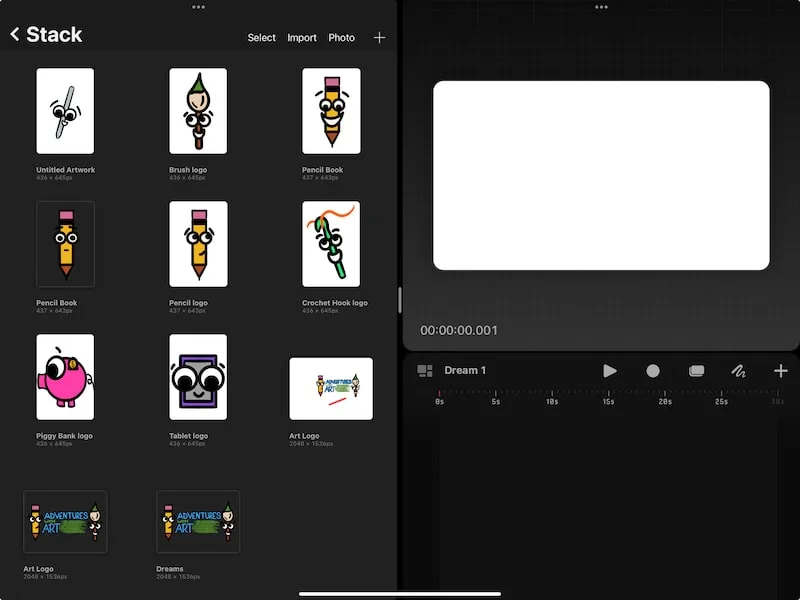
Both apps will open together, sitting side-by-side. You can use and navigate each app as you normally would.

I have an entire guide on split screen if you want an in depth look into the feature. This guide discusses a second method for activating split screen if you’re interested in having an alternative option.
2. Navigate to your projects in Procreate and Procreate Dreams.
Now we want to get set up for the transfer.
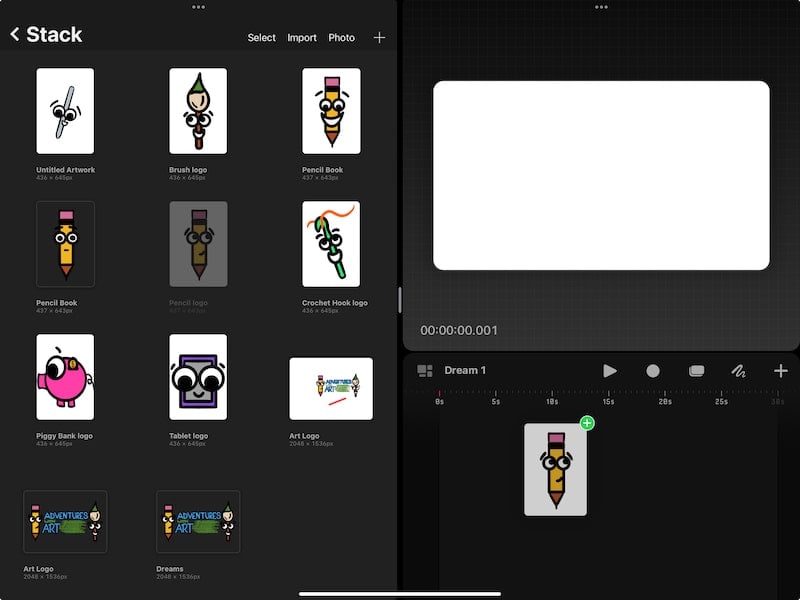
Within Procreate, open your Gallery and find the piece of art you want to import into Procreate Dreams. Do not open the piece of art, just identify it in your Gallery.
Within Procreate Dreams, open the project that you want your art imported into. If this is a new project, make sure to create it. I have a guide on creating new projects in Procreate Dreams you can check out if you want more info on that!
Make sure that both apps are still side-by-side in split screen.
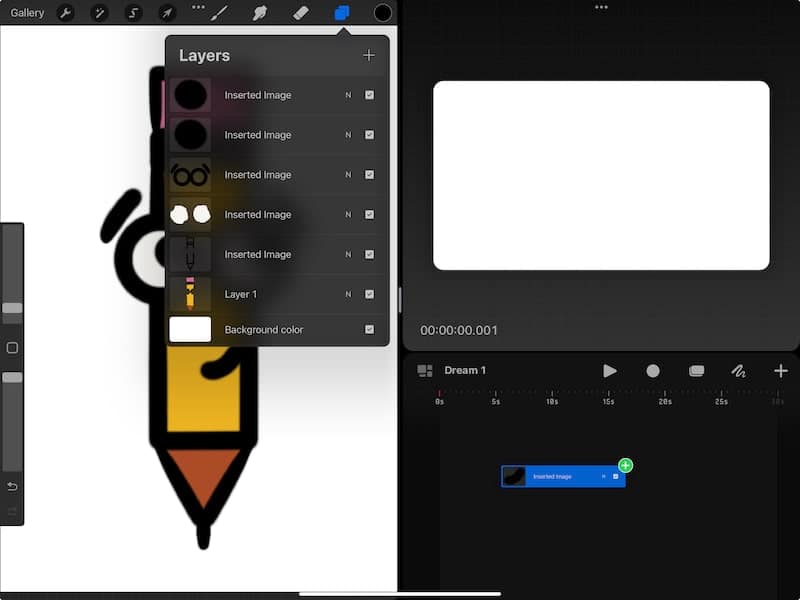
3. Clean up your layers in Procreate (maybe make a copy before doing so).
Before you import your Procreate art into Procreate Dreams, you may want to go through your layers and clean them up.
Depending on the clean up and changes you make to your layers, I would suggest making a copy of your Procreate art first. That way, you can make changes to it without altering your original piece of art.
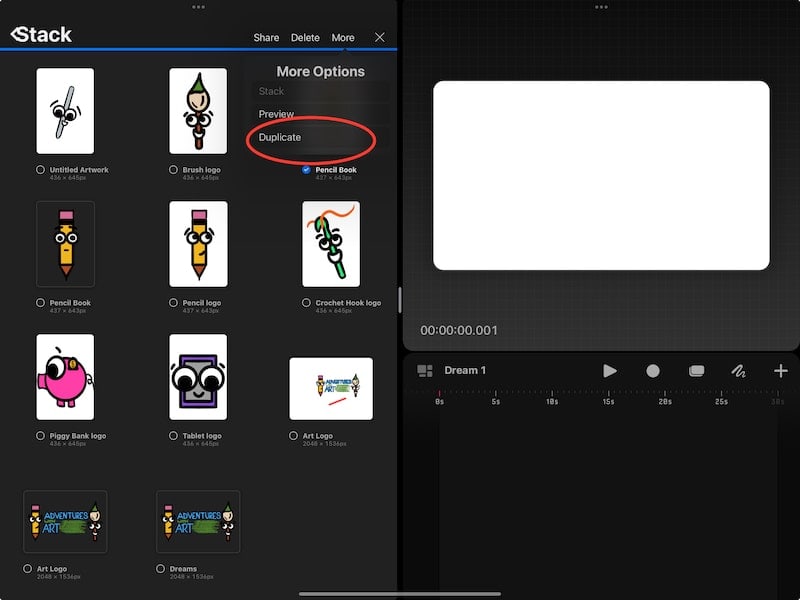
To make a copy of your art, tap on the Select button, then tap on the art you want to make a copy of, and then press Duplicate. If you’re in split view, you’ll need to tap on the More button to find the Duplicate button.

Why are we doing this in the first place? Well, every layer you have in your Procreate art will become a separate track in Procreate Dreams. This means that if you have 50 layers in your Procreate art, you’ll have 50 tracks in Procreate Dreams.
While layers are easy to tuck away in the Layers panel in Procreate, they’re more obvious and cumbersome once they become tracks in Procreate Dreams.
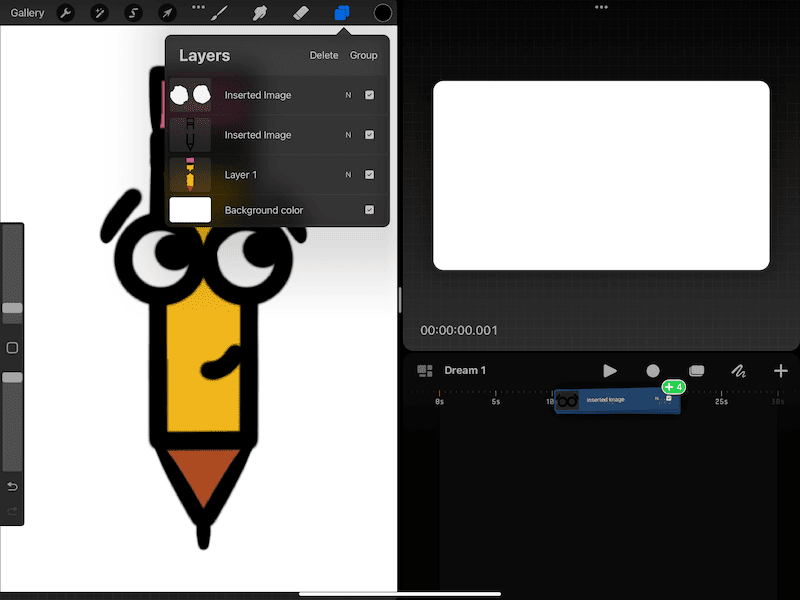
This doesn’t mean that you should merge all of your layers and have as few layers as possible. That would defeat the purpose of having layers.
Instead, it means that you should be mindful of your layers. If there are some layers you can merge without jeopardizing your art, consider doing that. Also think about deleting any unnecessary layers. I don’t know about you, but my Procreate projects can become a chaotic mess of layers, some that I don’t even need.

So, go through your Procreate art and think about the possibility of all of your layers becoming Procreate Dreams tracks. Do any clean up or arrangement that this thinking leads you to.
4. Drag and drop your Procreate art into Procreate Dreams.
Once you’re done cleaning up your layers, navigate back to your Gallery in Procreate.
Hold down on your Procreate art until it begins to float. Then, drag it into your Procreate Dreams project.
Once your art is in the realm of Procreate Dreams, you should see a green plus button appear in the corner of your art. This means that it’s ready to import. Simply let go of your art and drop it into your Procreate Dreams project.

Important note: it doesn’t matter if the background of your Procreate art is turned on or not. The background of your Procreate art will not import into Procreate Dreams whether you have it checked on or not.
This method works if you want to import the entirety of your Procreate art project into Procreate Dreams. But, what if you only want to import specific layers?
4a. Drag and drop Procreate layers into Procreate Dreams.
To import specific Procreate layers into Procreate Dreams, open your Procreate art project. Yes, instead of staying in the Gallery, you’re going to tap into the project.
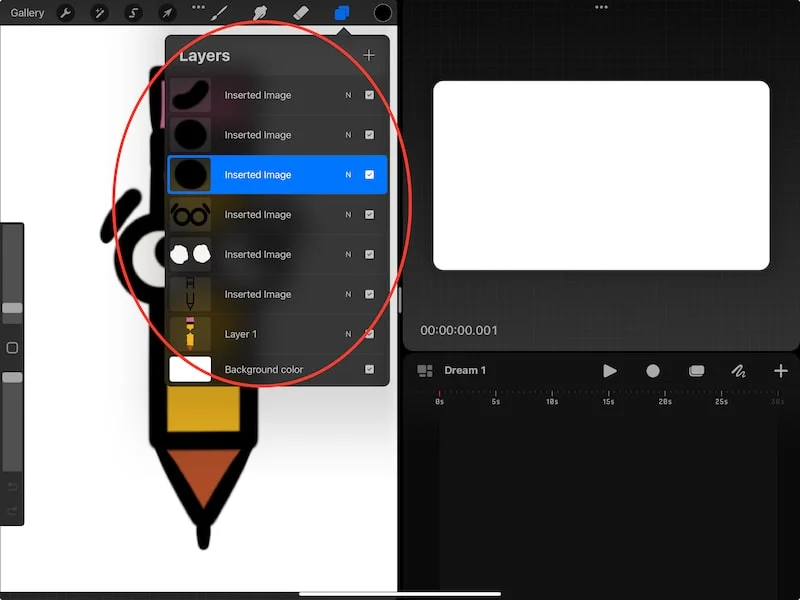
Once you’re inside of the Procreate project, open the Layers panel in the right hand corner. Hold down on the layer you need until it starts to float. Then, drop it into your Procreate Dreams project.

You can do this for individual layers, or multiple layers. To import multiple layers, swipe right on the layers you need. This will allow you to select multiple layers in Procreate.

Then, drag and drop this clump of layers as you normally would with a single layer.
Important note: if you import single layers, one at a time, they will import as different tracks in Procreate Dreams.
If you import multiple layers, in a clump, they will import on the same track. You can always rearrange your tracks, but this is something to keep in mind.
Now that we have our Procreate art imported into Procreate Dreams, let’s turn each layer into individual tracks!

5. Turn your layers into tracks.
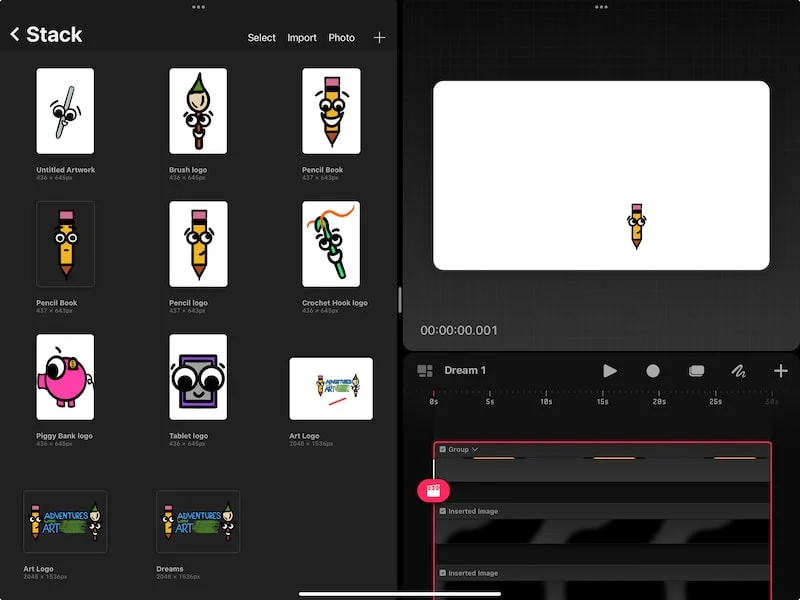
If you imported your Procreate art in its entirety into Procreate Dreams, you’ll notice that it looks like one layer. Don’t worry, it’s not!
You can separate your Procreate layers into different tracks in Procreate Dreams.
To do this, hold down on your imported art in Procreate Dreams. You’ll see a menu of options appear.
Tap on the button to convert layers to tracks.
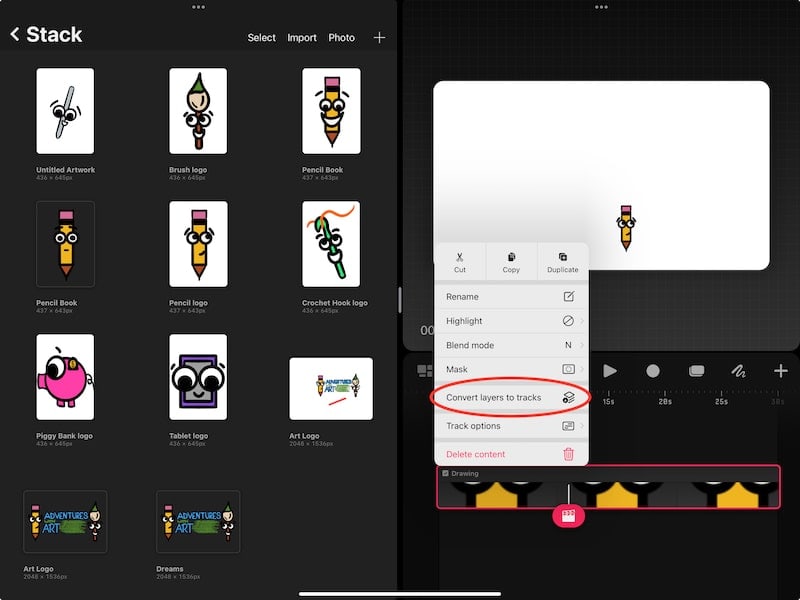

When you do this, you’ll see all of your layers separate out into different tracks. This is why I said to be mindful of how many Procreate layers you have in your art, and if you need to clean any of them up.
If you have a lot of layers, you may suddenly become overwhelmed by how many tracks you have to deal with once you convert them in Procreate Dreams!
The tracks will be contained within a group. Tap on the little arrow to expand your group and see all of your tracks.

Adding your Procreate Art as a File
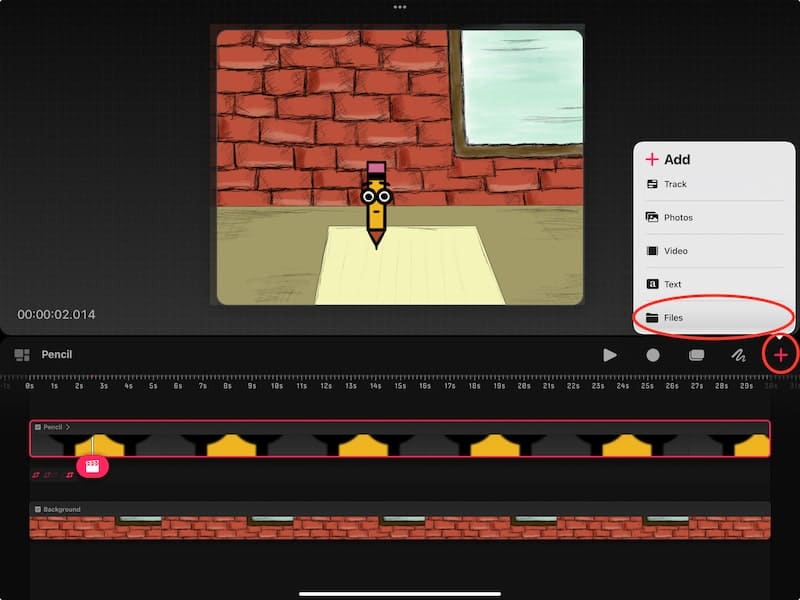
Another option for importing your Procreate art into Procreate Dreams is to add it as a file. I personally prefer the drag and drop method, but it’s always nice to know your options.
Within the Procreate Dreams workspace, tap on the Add button in the right hand corner. Then, choose the option to add a file. Find the .procreate file you want to import within your iPad files, and import it.
There we go! Now your Procreate art has been imported into Procreate Dreams and is ready to come to life as an animation!


Diana has been an artist for over 27 years and has training in drawing, painting, digital drawing and graphic design. Diana’s latest obsession is digitally drawing with Procreate and Procreate Dreams. Diana has experience selling her art across a number of platforms and loves helping other artists learn how to make money from their art as well.