One of the big benefits of using an app like Procreate for your art is having the power of technology behind you.
In this tutorial, we’ll be talking about how that power can be used to save time creating your art. How so? By optimizing your use of Procreat’s gesture controls. This lets you use Procreate’s default shortcuts, and then customize them to your own needs!
Let’s start by clearing something up. What we’re diving into in this tutorial is Procreate shortcuts. This is a general term we’re used to hearing that refers to buttons, actions, keystrokes, etc that activate a feature.
Procreate has a specific word they use instead of “shortcuts.” They use the word “gestures.” I may use the words shortcuts and gestures interchangeably since they mean the same thing.
Alright, let’s jump in!
There are a LOT of Procreate gestures, so I’ll try to run through them thoroughly, but expediently. At the end, I’ll also talk about my favorite ways of customizing my own gestures based on my experience using Procreate.
Drawing Gestures
I’ve split these gestures and shortcuts into categories based on their essential functions. To get started, we’ll look at gestures you can use while drawing with your stylus in Procreate.
Undo and Redo
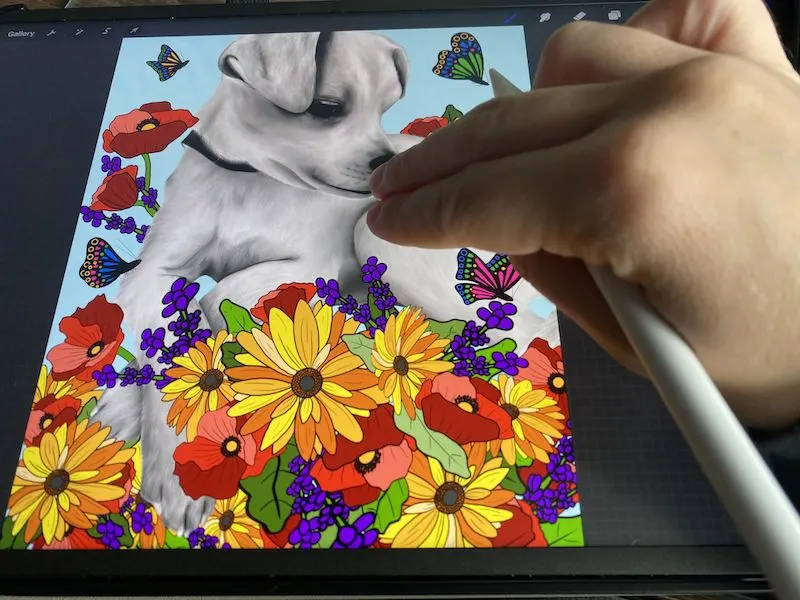
If you want to undo a brush stroke/action, or series of brush strokes/actions, use two fingers to tap on your Procreate canvas.
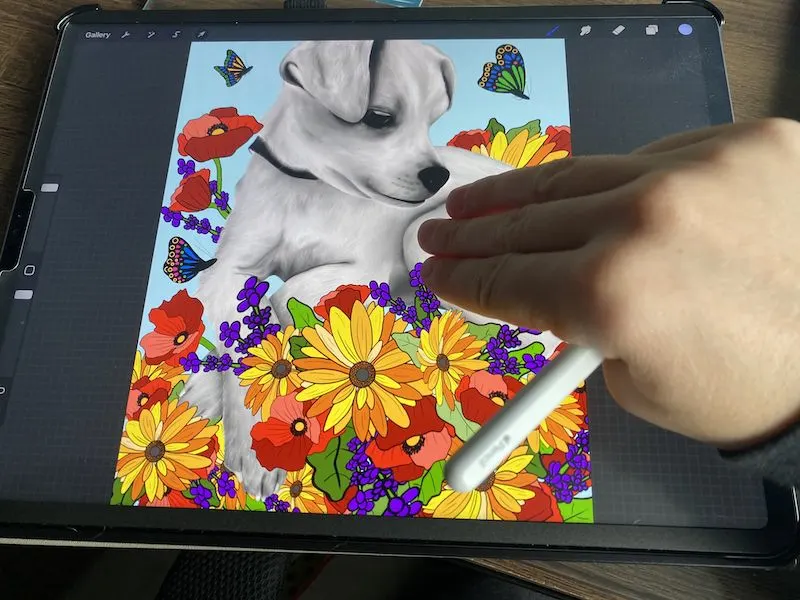
If you want to redo a brush stroke/action, or series of brush strokes/actions, use three fingers to tap on your Procreate canvas.
I have a full guide on Procreate’s undo and redo features that’s great to check out for more information on these awesome gestures.
The undo gesture is probably the Procreate gesture I use the most in my own work. Yes, I make a lot of mistakes, and love that I can undo them with a simple two finger tap!
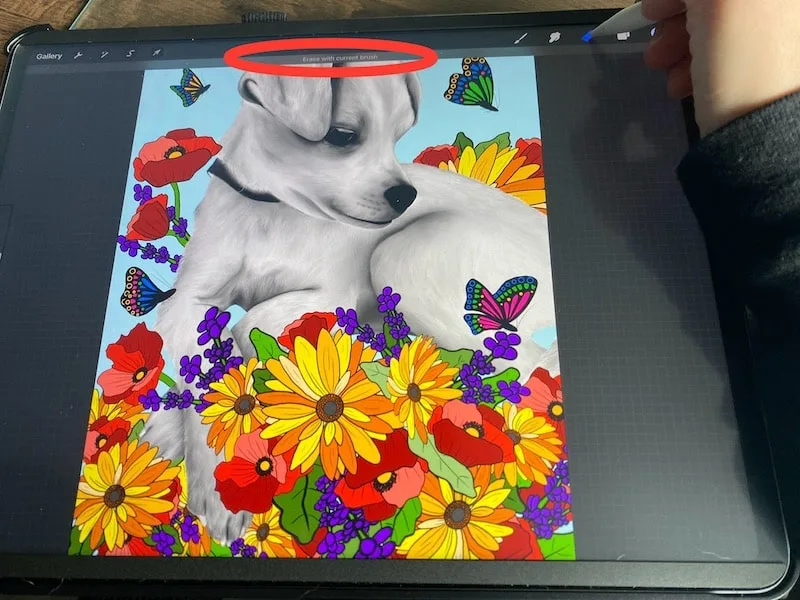
Hold the Eraser to Change it to Your Current Brush
If you’re drawing with a brush you like, you can quickly and easily switch your eraser to that brush as well by holding down on the eraser icon.
This saves you the hassle of having to scroll through your brush library to find the one you want to use for your eraser.
Hold Down on the Brush Cursor and Move Away for Better Precision
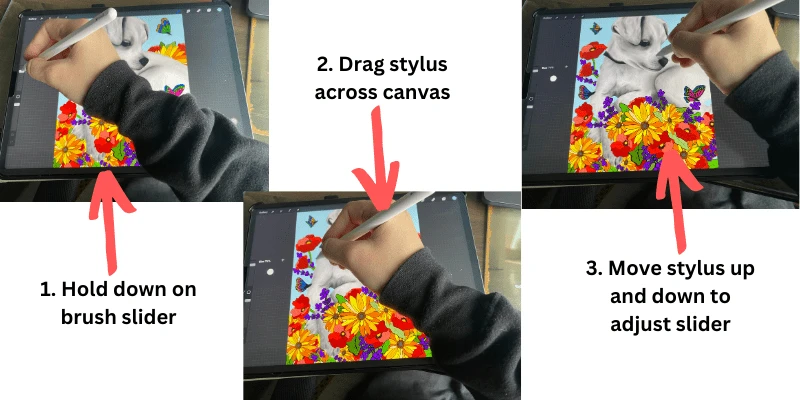
If you want to adjust your brush size more precisely, hold your stylus down on the brush size slider. Start dragging your stylus across your canvas, away from your brush size slider. Then, move your stylus up and down.
You’ll notice that the farther away your stylus is from your brush size slider, the more precisely it will adjust your brush size as you move your stylus up and down.
Hold a Shape for QuickShape
Even if you have a brush’s stabilization settings dialed in, it can be really hard to draw shapes.
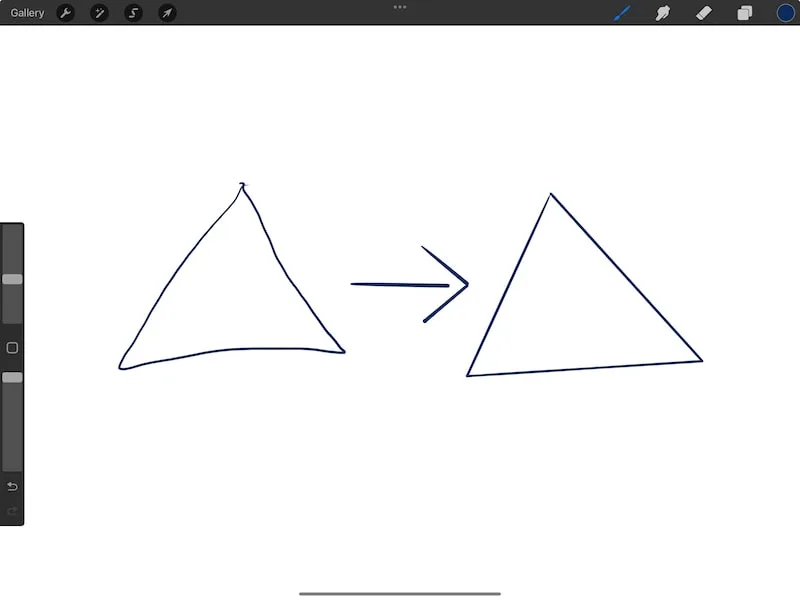
With QuickShape, just quickly draw your basic shape and hold your stylus down. Your shape will snap to a clean and crisp shape. You can then edit it from there if you need to make adjustments.
I have a full guide on QuickShape that you can dive into if you want to learn more.
Create a Perfect Shape with a Finger in QuickShape
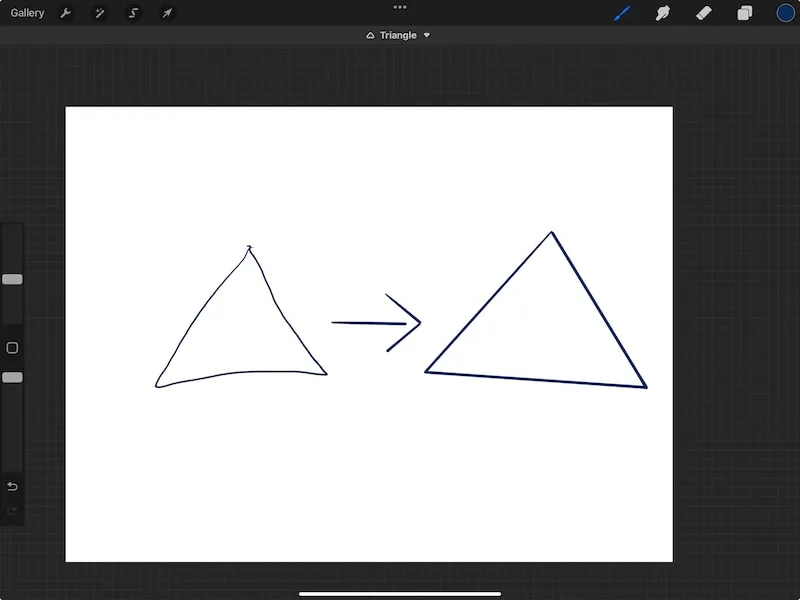
After creating your QuickShape, before lifting up your stylus, tap a finger down on your canvas. This will make your QuickShape snap to a “perfect” version of that shape.
Once you tap your finger down, hold it there. Then, move your stylus around to adjust the size and rotation of your shape.
Layer Gestures
Now we’re going to look at Procreate gestures and shortcuts relating to layers.
Clear a Layer with Three Finger Scrub
If you want to clear the contents of a layer, use three fingers to scrub your canvas (swish your fingers back and forth like you’re scrubbing away dirt).
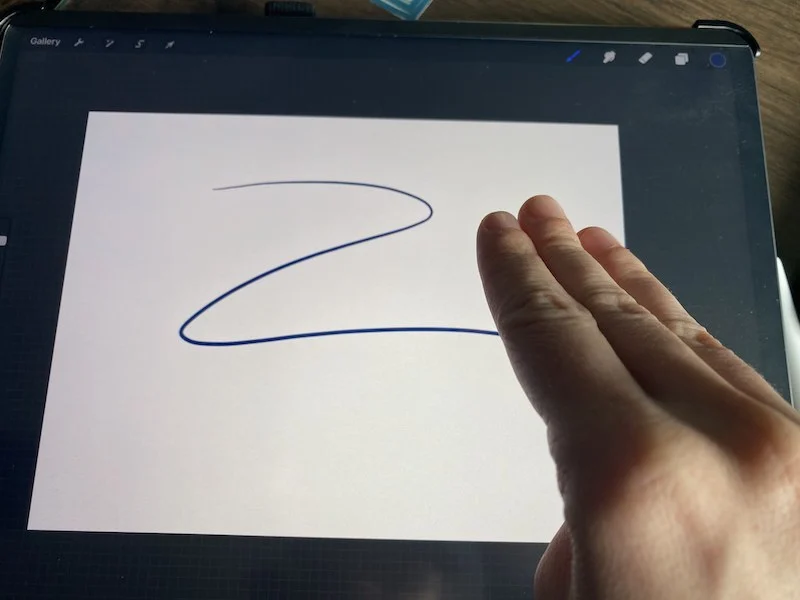
The shape you want to make with your three fingers as you scrub your canvas is similar to the one below.
This can take some practice though, especially if you have finger drawing turned on.
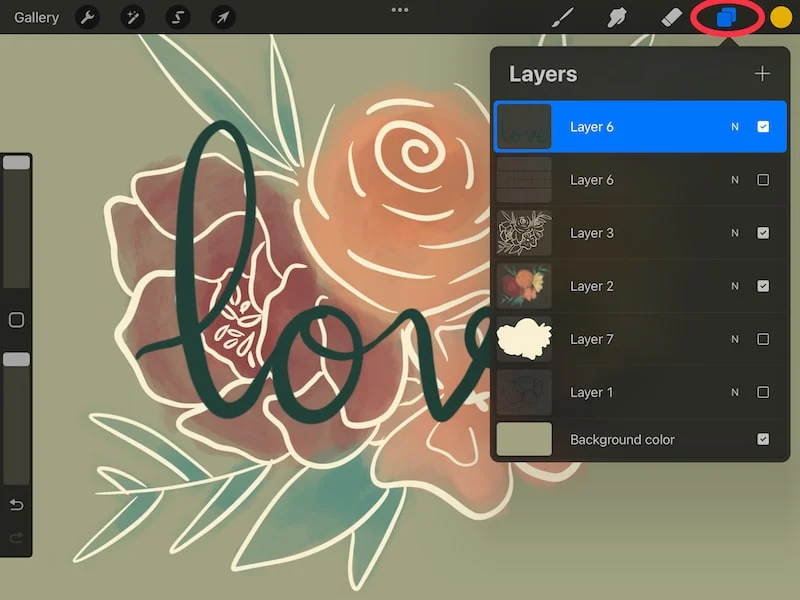
Alright, the rest of the layer gestures and shortcuts are going to be done within the layers panel. Tap on the square icon at the top of your screen to open your layers panel.
Pinch your Layers Together to Merge Them
If you want to merge your layers together, you can pinch them together.
For example, if you want to merge 4 layers together, put one finger on the first layer and your other finger on the fourth layer. Pinch these fingers together to merge these four layers.
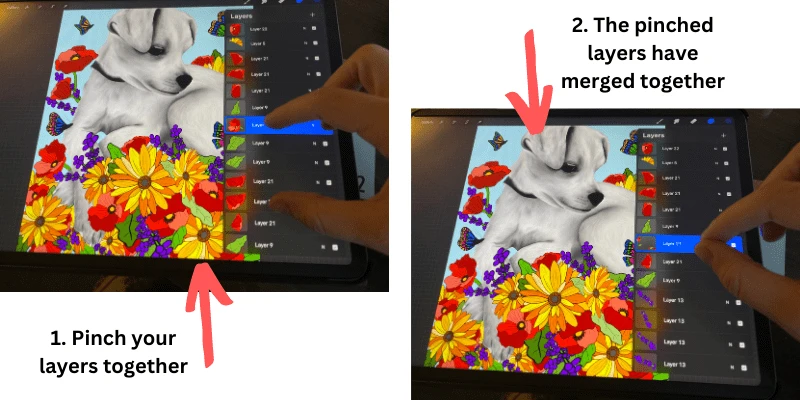
This is really efficient if you have a number of layers you want to merge together in one swoop. Otherwise, you would have to merge them manually, one-by-one.
That said, always be careful with merging your layers! All of the layers you merge together will become one layer. While that’s the point of merging, think carefully about the potential issues of having your elements on a single layer.
If this is going to be an issue, you may want to combine your layers instead of merging them.
Two Finger Swipe to the Right on a Layer to Activate Alpha Lock
If you want to activate alpha lock for a layer, use two fingers to swipe right on it. Swipe right on this layer again to turn alpha lock off.
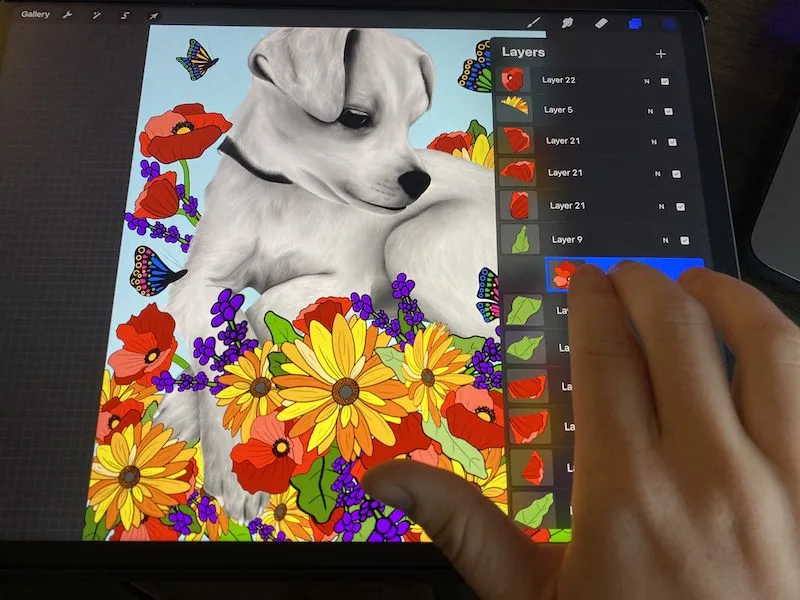
When you use alpha lock, you’ll be drawing directly on your layer, so this is something to be mindful of. If you don’t want to make changes directly on your layer, consider using a clipping mask.
I have a guide comparing alpha lock and clipping masks if you want to learn more.
Hold Two Fingers on a Layer to Select the Elements on that Layer
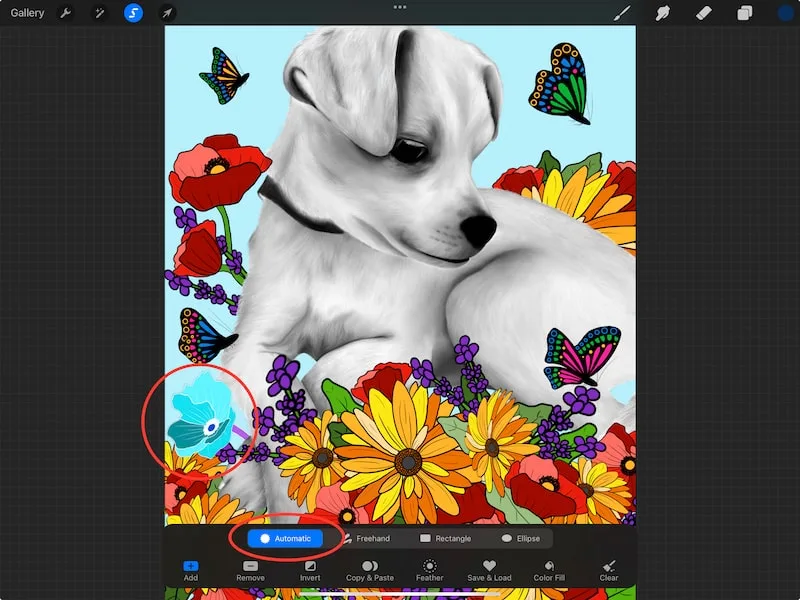
If you hold two fingers down on a layer, this will activate the elements on that layer.
This applies the automatic setting within the selection tool. I have a full guide on Procreate’s selection tool if you want to learn more about everything it can do.
Tap Two Fingers on a Layer to Activate Opacity Slider
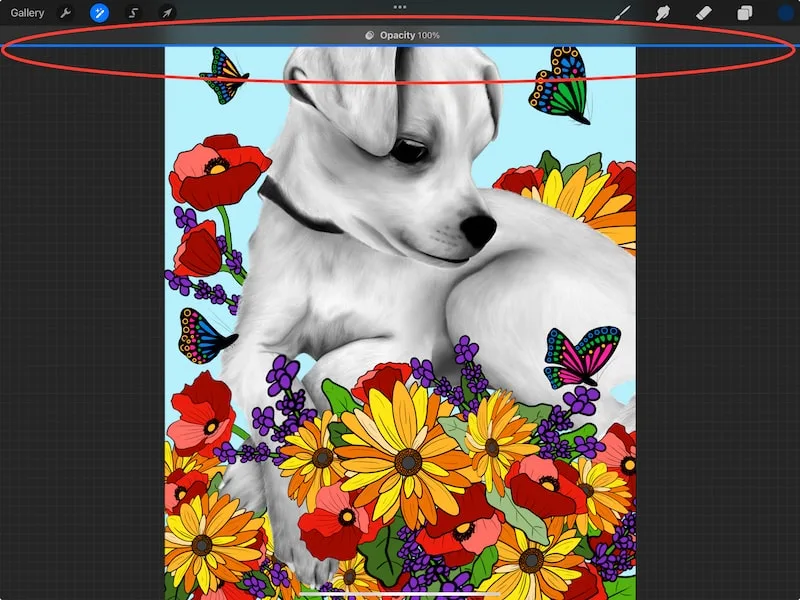
To activate the opacity slider for a layer, use two fingers to tap on it.You should see an opacity slider appear at the top of your canvas.
Canvas Gestures
These Procreate gestures and shortcuts apply to your canvas.
There’s an important one that you can add that we’ll talk about in the last section about customizing your gestures, so be sure to read until the end.
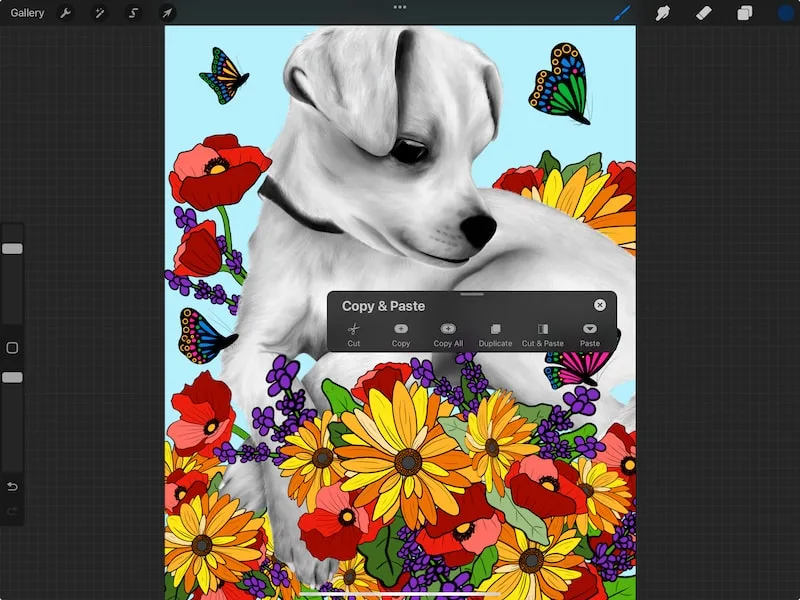
Open Copy and Paste Menu with Three Finger Swipe Down
Use three fingers to swipe down on your canvas. You’ll see a menu appear that gives you quick access to cut, copy, copy all, duplicate, cut & paste, and paste.
This can be SO helpful if you don’t want to continually open the Actions panel to find these buttons.
I have a guide on copying and pasting in Procreate if you want to learn more about these features.
Quick Pinch for Full Screen
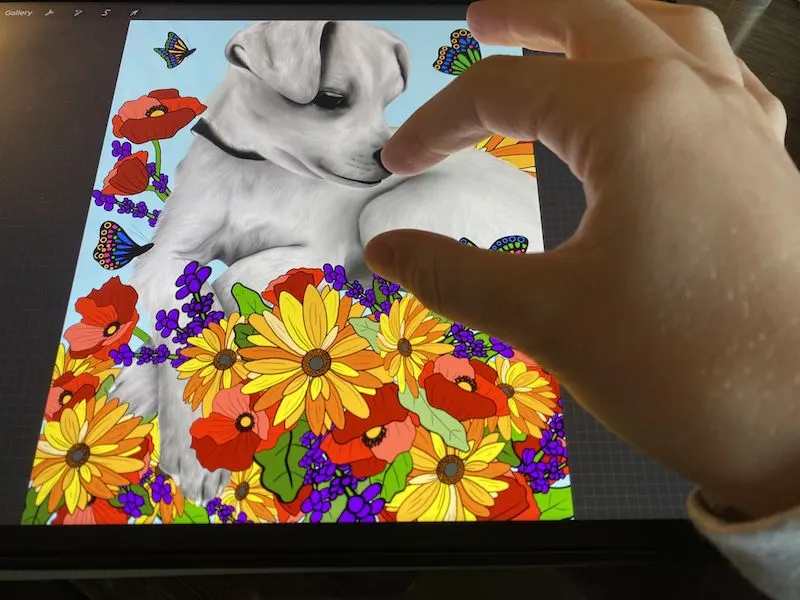
If you’ve done a lot of zooming in and out with your canvas, and want to return it to full screen size, do a quick pinch in and out on your canvas.
This can take a little practice!
Four Fingers to See Fullscreen
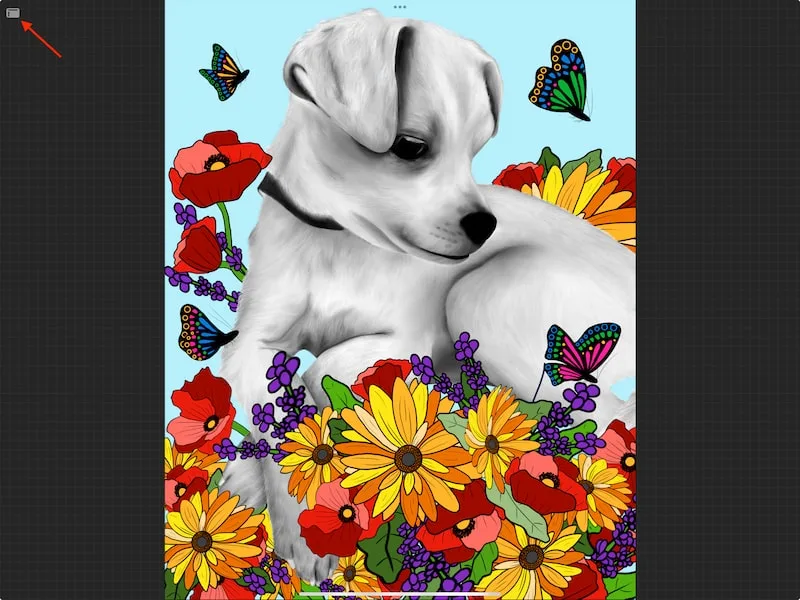
If you want to see your art without the Procreate navigation bars and sliders, use four fingers to tap on your screen. To undo this, tap four fingers on your screen again, or tap on the little square icon in the top left corner of your screen.
Color Gestures
These Procreate gestures and shortcuts relate to finding colors and using your color wheel.
Hold a Finger on Your Canvas to Activate Eyedropper
If you want to select an existing color on your canvas, hold a finger down on your canvas to activate the eyedropper tool.
Once activated, you can drag the eyedropper around your canvas until you find the color that you want. When you let go and lift your finger up from your canvas, whichever color you’ve selected will become your active color in your color wheel.
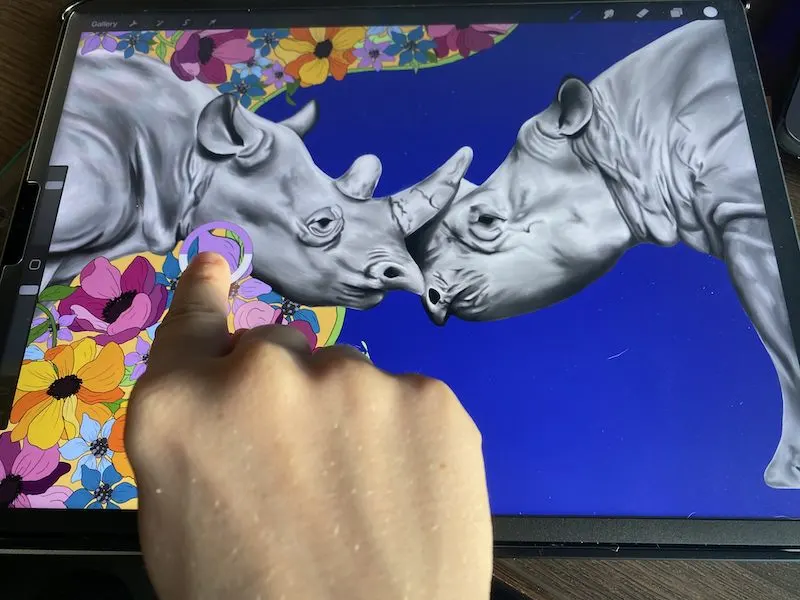
This is a Procreate gesture that I use a LOT! No matter how careful I try to be with saving colors in my color palettes for later use, there are times I forget. The eyedropper is a quick and easy way to find those colors again.
I have a guide about Procreate’s eyedropper if you want to learn more about this tool!
Double Tap on a Color to Get its Pure Color
If you use one finger to double tap in your color wheel, it will snap to the pure color of whatever color you tapped the nearest to.
I do a lot of black and white drawings. There are times when I select black in my color wheel, but it has the tiniest hint of gray in it.
For consistency, I want to make sure I’m using the same black color every time. So, I use this Procreate shortcut and double tap in my color wheel in the area of the black color. This will allow it to snap to the color I need.
Use a Pinch to Expand the Color Wheel
The color wheel is designed to have a rainbow color slider on the outside that allows you to pick a general color. Once you do, the inner circle gives you a gradient of that color so that you can pick the exact color that you want.
Once you pick the general color that you want in the outside slider, pinch outwards on the inner color circle. This will expand it so that you have a bigger color circle to work with as you’re honing in on your color.
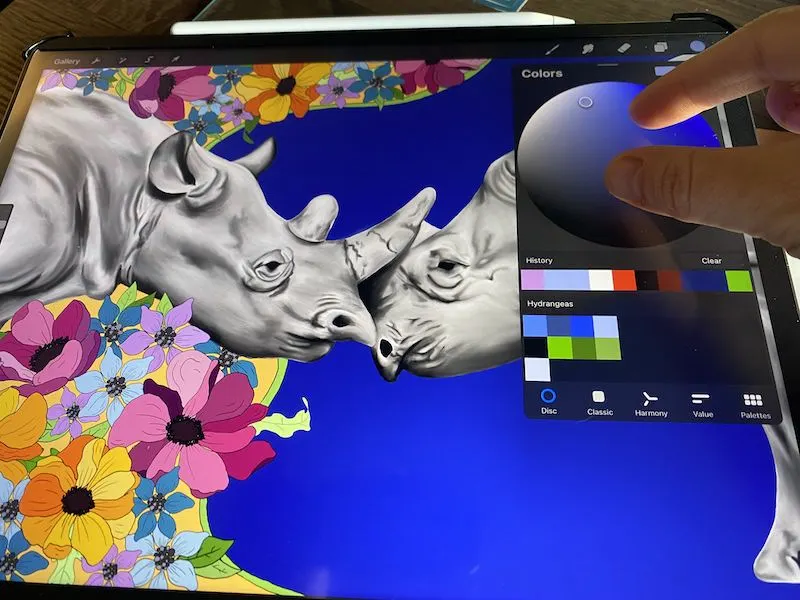
Simply pinch inwards on the circle again to return to the default color wheel.
This Procreate shortcut is really helpful if you have a precise color you’re looking for, and need a bigger area to work with in order to find it.
Customizing Gestures
Procreate’s gestures can be customized! This is hugely helpful because it means that you can adapt everything to work for you.
In the next section, we’ll talk about some of my favorite ways to customize my gestures when I’m using Procreate myself.
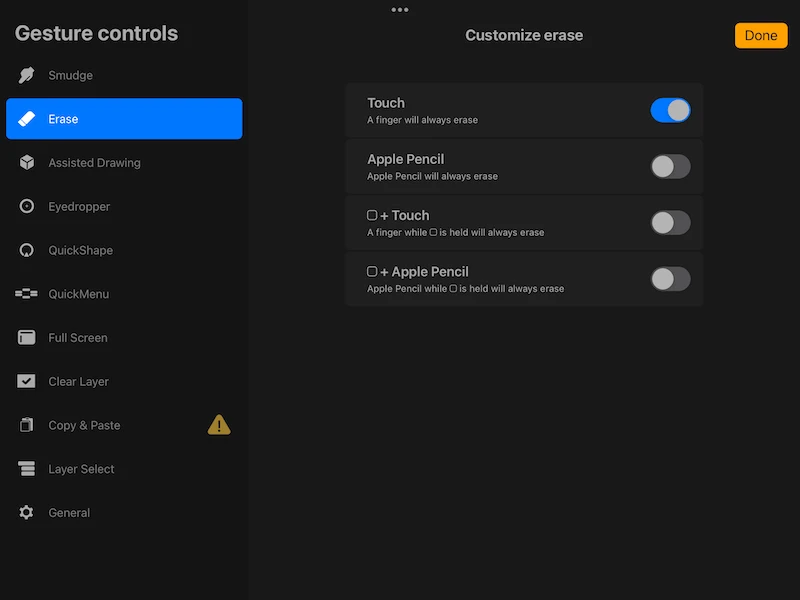
To get started though, let’s figure out how to customize gestures in the first place. To begin customizing your gestures, you’ll want to open the gesture controls menu.
Here’s how to access it.
Tap on the Actions menu in your top navigation bar. Then, tap on the Prefs submenu and the Gesture controls button.
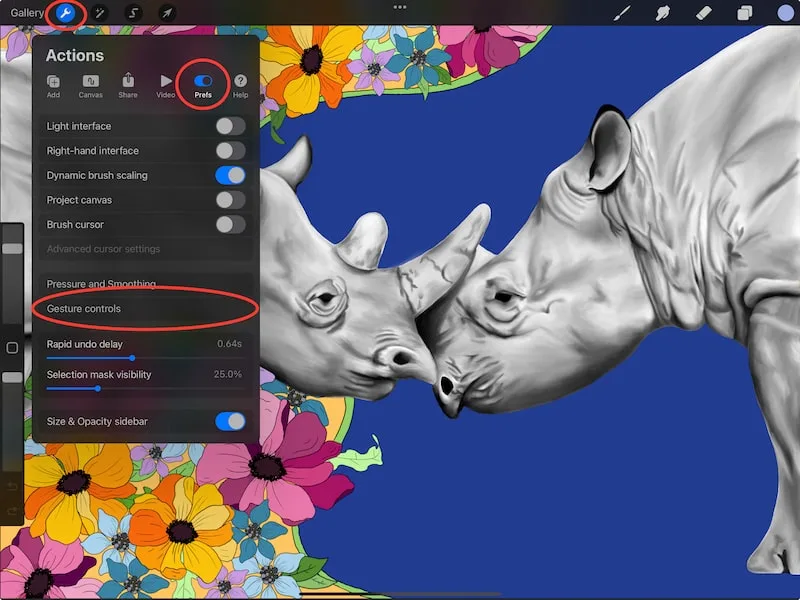
This will open up a large array of options for customizing your gestures.
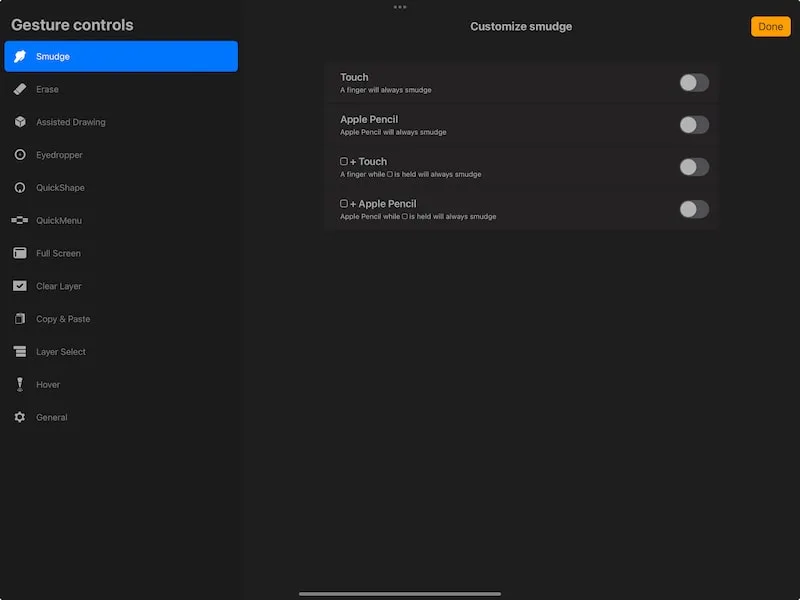
Experiment and play around with them to find what you like.
As a note, if you ever assign the same action to two different gestures, you’ll see a little hazard sign appear.
Personally, I like a lot of the default gestures that Procreate comes with. That said, there are a few customizations and additions that I love and think you should know about!
My Favorite Ways to Customize My Procreate Gestures
Customizing your gesture controls is such a big way to personalize Procreate to your needs, and make sure that your workflow is efficient. Even though it takes some trial and error, it can be worth it to take the time needed to set everything up how you want it!
If you want a few tips from someone who has been using Procreate for a while now, here are some of my favorite gesture control customizations.
QuickMenu
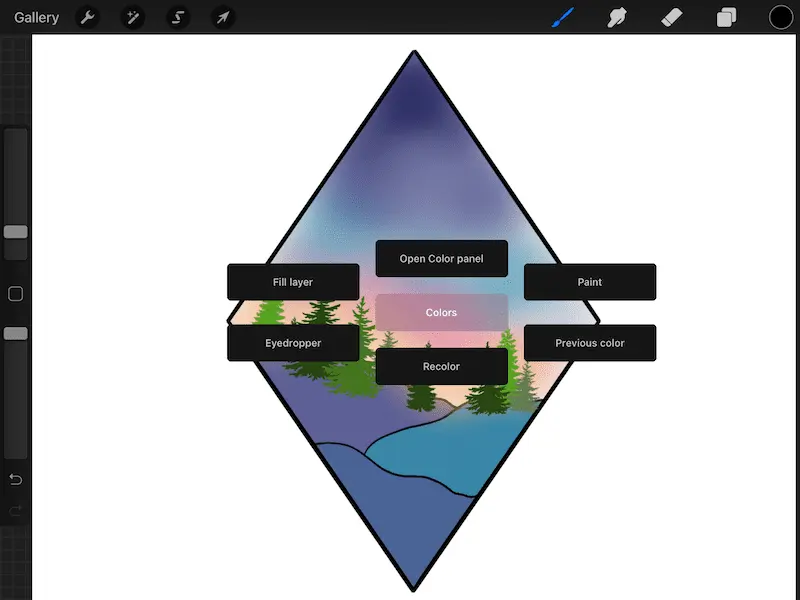
The QuickMenu is SO cool! It gives you the ability to use a shortcut to access more shortcuts!
My favorite way to access the QuickMenu is holding the square icon and touching my finger to the canvas. For me, this is quick and easy to activate, but not something I would often do by accident.
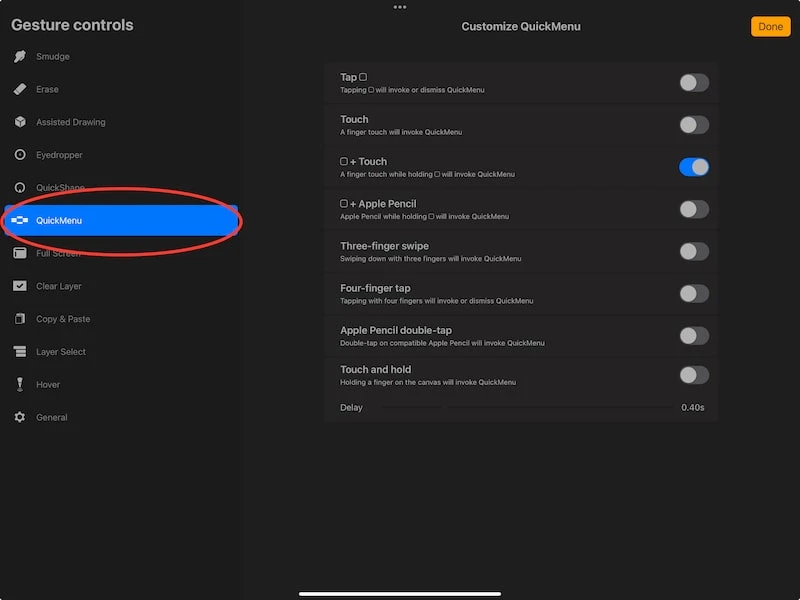
Once you’ve chosen a way to activate your QuickMenu gesture, I have a guide on setting up and customizing your QuickMenu.
Turn Off Finger Painting
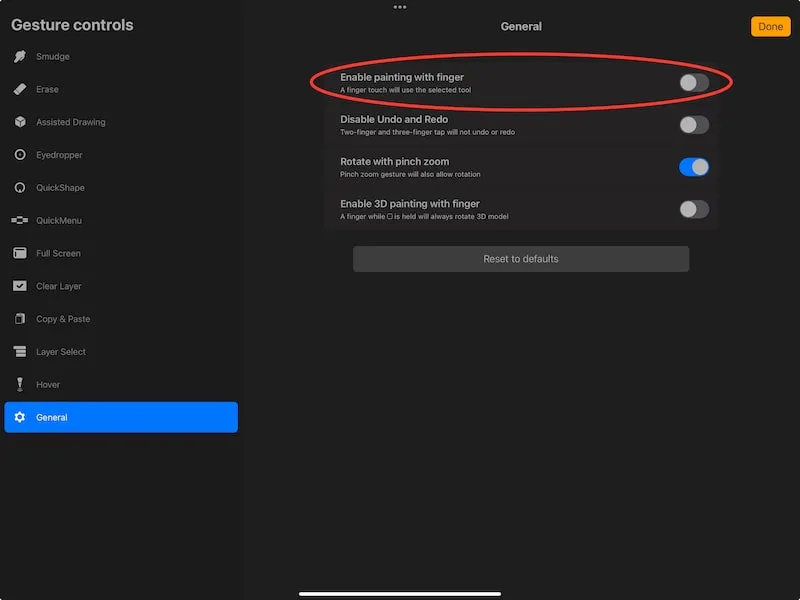
For my own Procreate work, I don’t use finger painting very often. Given that, I like to turn it off during my general work process, and only turn it on when I need it.
I’m always touching my canvas and get frustrated when I accidentally draw a line with my finger. For me, it’s too messy.
If you want to turn off finger painting as well, navigate to the General tab at the bottom of your gesture controls menu. Then, toggle off the finger painting option.
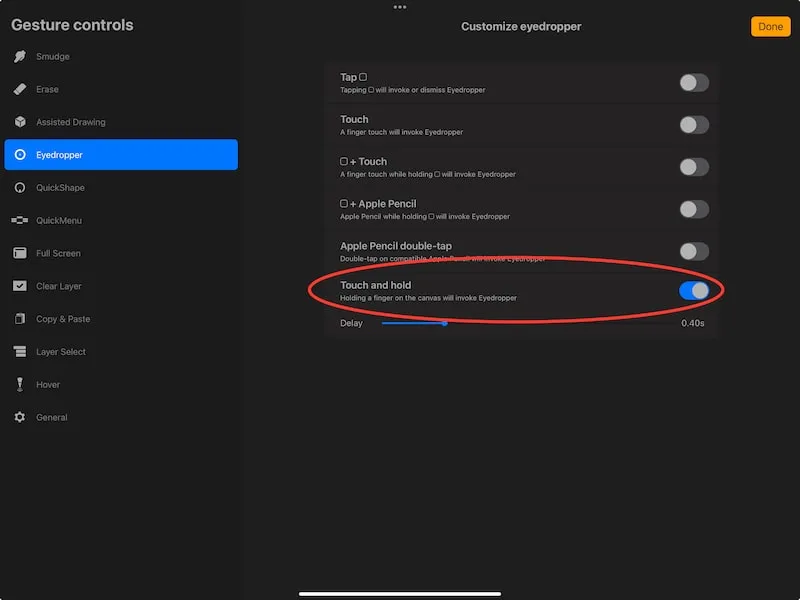
Turn Off Eyedropper Gestures
If you look at the eyedropper section of the gesture controls menu, there are a lot of options that are enabled by default.
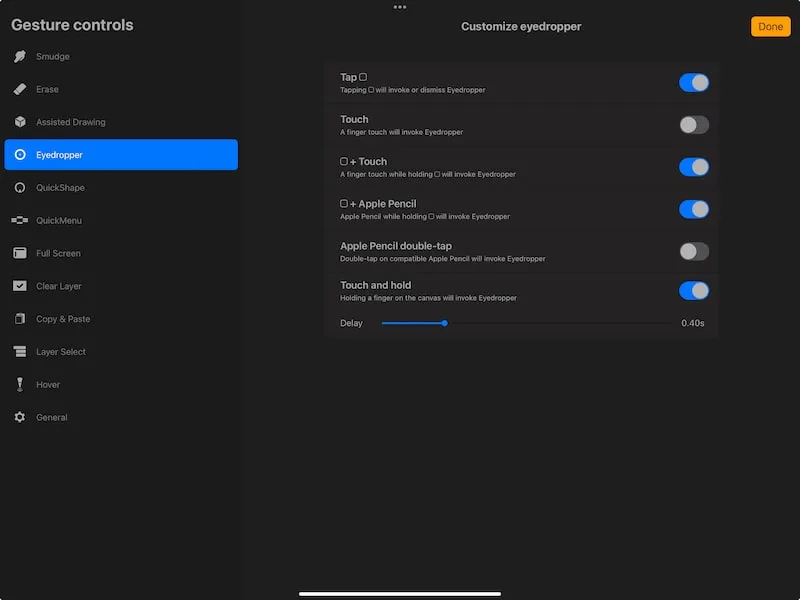
Again, this is up to your preference, but my personal preference is to solely leave the touch and hold option enabled for the eyedropper tool.
We’ve covered a lot of gestures and shortcuts that can make your work in Procreate more streamlined and efficient. Take some time to experiment with all of these gestures, get to know them, and customize them to work for you!
Diana has been an artist for over 27 years and has training in drawing, painting, digital drawing and graphic design. Diana’s latest obsession is digitally drawing with Procreate and Procreate Dreams. Diana has experience selling her art across a number of platforms and loves helping other artists learn how to make money from their art as well.
