Whether you’re tracing over your own art, tracing a photo, or using tracing as a way to learn how shapes come together in a reference photo, knowing how to trace with Procreate is such an important skill for using this amazing drawing app to its full potential.
To trace on Procreate, import your photo or art into your Procreate canvas with the “Insert an image” button located in the Actions tab. Lower the opacity of the image you imported and add a new layer on top of it. Trace over your inserted image on your new layer.
Being able to trace so easily is such a huge perk of Procreate, and digital art in general. If you haven’t tapped into the power of tracing on Procreate yet, you’re missing out…but not for long.
We’re diving into how to trace on Procreate so that you can make the most of it today!
Here are the step-by-step instructions on how to trace on procreate, the easy way:
1. Make sure the image you want to trace is in the Photos app of your iPad
If you are using a photo for your tracing, make sure that it’s in your Photos app and you know where it is.
If you are using another piece of your own Procreate art for tracing, export it and save it to your Photos app. You can do this by clicking the “Share” button within the Actions tab and choosing either JPEG or PNG.
2. Create a new canvas, or open the existing piece of art you want to trace in
Navigate to to the Procreate canvas where you want to do your tracing. This might mean creating a new digital canvas in your gallery. Or, it might mean opening an existing piece of art that you want to add to.
3. Open the Actions tab in the top toolbar and click on the “Add” button

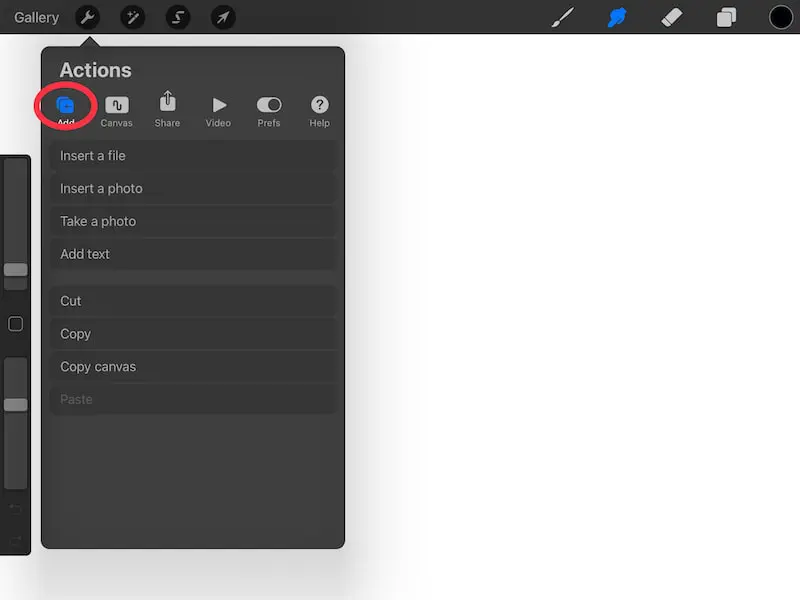
The Actions tab is the one that has a wrench for an icon. After you click on that, the “Add” button is the first option within the Action menu.
4. Click on “Insert a photo” and scroll until you find the photo you need. Click on it.

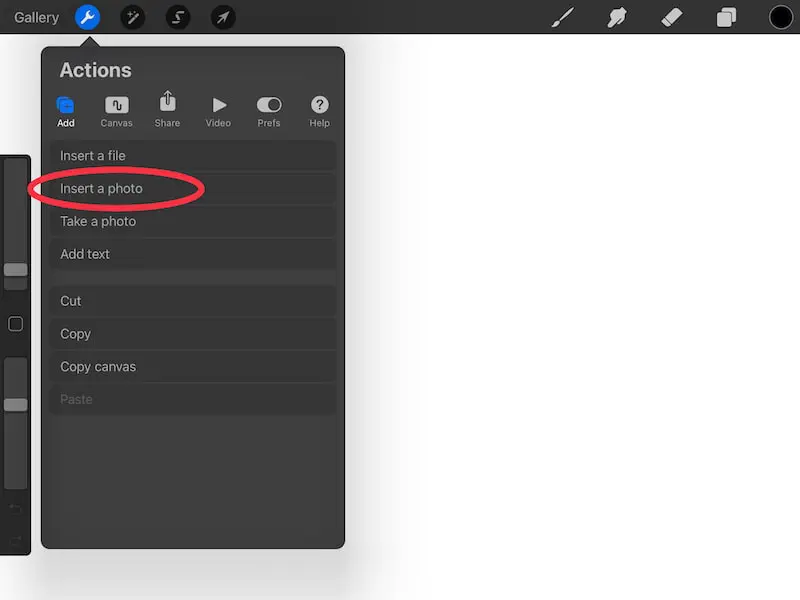
When you click on the “Insert a photo” button, it will open up your Photos app with your most recent photos shown first. If the photo you need is older, you may have to scroll quite a bit to find it.
To make things easier, make a copy of your older photo and re-add it to your Photos library so that it’s a recent photo again and shows up at the beginning of the list. That way, you won’t have to waste time searching for it.
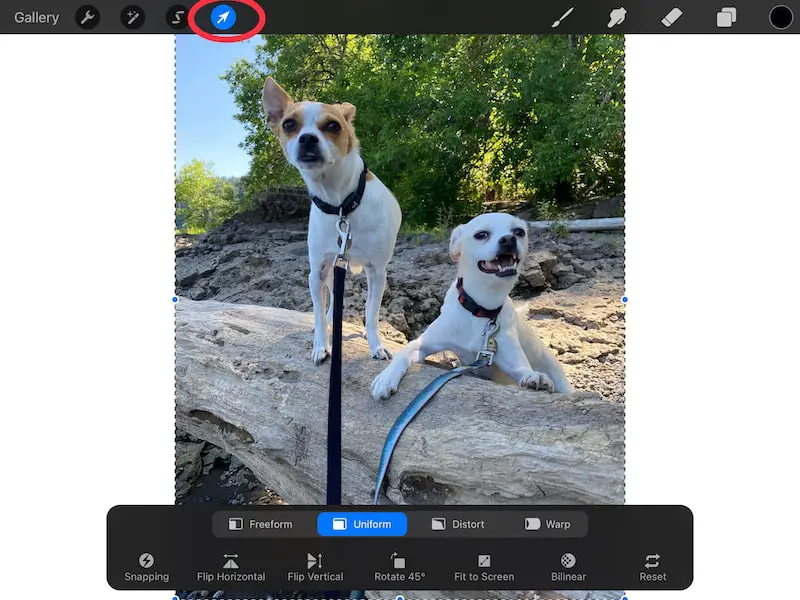
5. Use the Transform tool to resize and reposition your image

Once you’re done with your tracing, you want to limit the number of times you resize it and reposition it. The more you resize it, the more you’re prone to having your art become pixelated and suffer from quality loss.
I have full articles on that topic that you can read if you want to learn more about why that happens.
When tracing, the best way to prevent this is to make sure that the image you’re tracing is in the right spot and is sized correctly.
To adjust the image, use the Transform tool, which you can access by clicking on the arrow icon in the top toolbar.
I have a full guide on how to use the Transform tool if you want to learn more about this awesome Procreate feature.
I suggest using the “Uniform” setting within the Transform tool settings so that the image doesn’t end up squashed, stretched, or distorted.
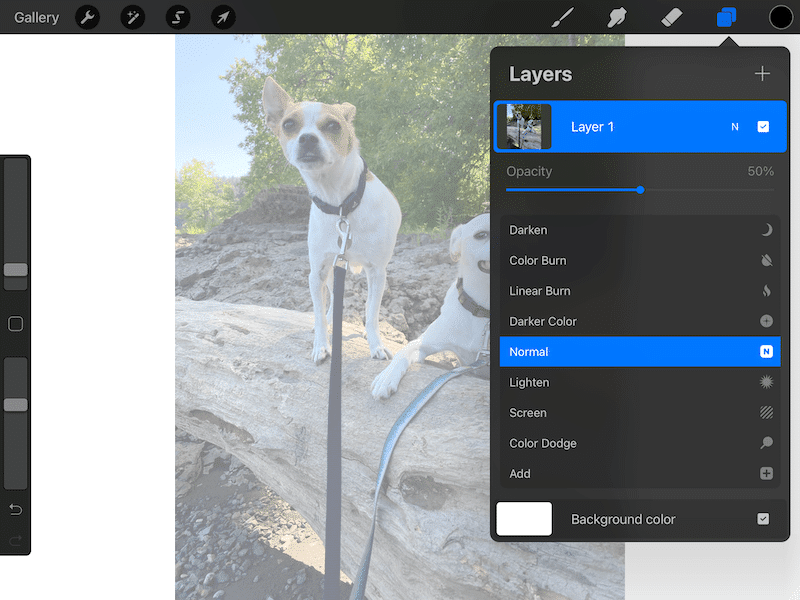
6. Lower the opacity of your imported image
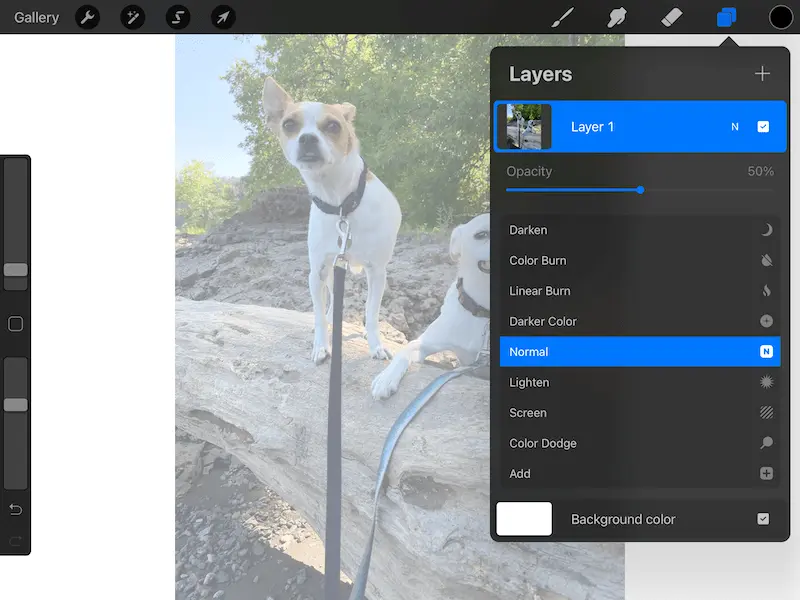
When you insert your image into your Procreate design, it will become a new layer.
In order to prep it for tracing, you need to lower the opacity of it so that you can see your tracing lines on top of it.
The quickest way to change a layer’s opacity in Procreate is to use two fingers to tap your desired layer within your Layers panel. This will trigger an opacity slider to appear on your screen. Slide your finger to the left to lower the opacity and to the right to raise it.
You can also lower the opacity in your Layer’s panel. To do this, open your Layers panel, find your image layer and click on the “N” in the right corner of it.
The “N” stands for the blend mode (Normal), but it also opens the layer’s settings.
Within the layer’s settings that open up, use the opacity slider to lower the opacity.
The amount you lower the opacity depends on the image you chose. You want to lower it enough that you can see your tracing marks on top of it. That said, you don’t want to lower it so much that you can’t see the shapes and details in the image.
Play around with it until you find the right balance.
7. Create a new layer on top of your image layer
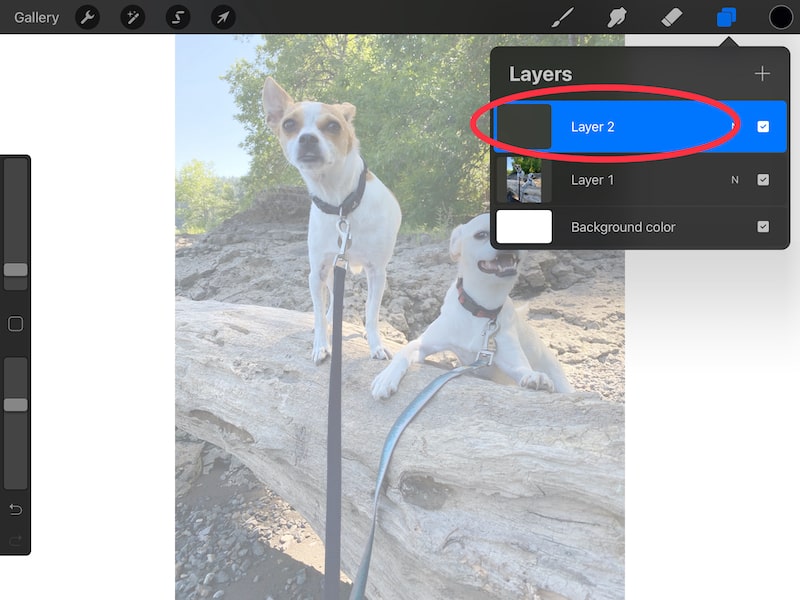
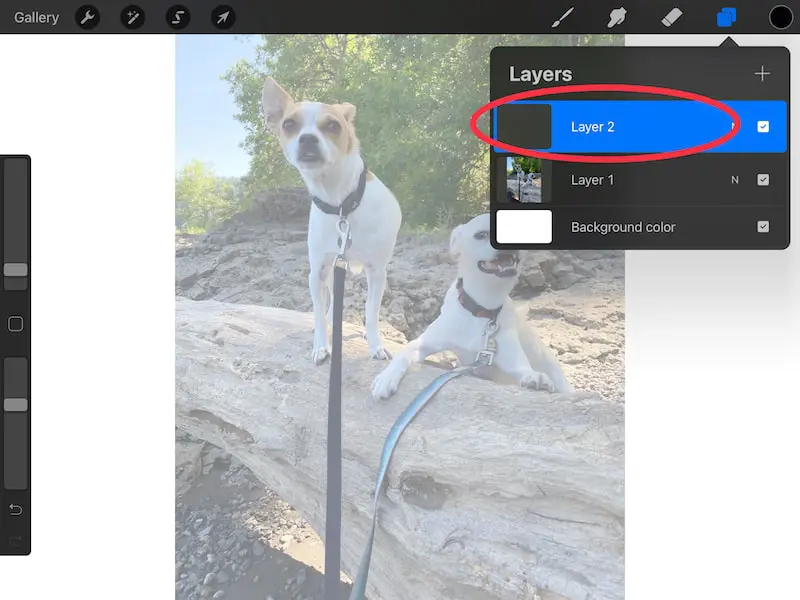
This is REALLY important. If you forget this step, you’ll have to start over, which is a big bummer.
You DO NOT want to do your tracing on your image layer. Eventually, you’ll want to delete the image that you used for tracing. If you traced directly on your image layer though, you’ll delete your tracing work along with it.
Again, this is a bummer.
Before you start tracing, every single time, triple check that you’ve created a new layer first.

8. Trace your image
Now you’re ready to trace your image! Choose your preferred Procreate brush and trace whatever you were hoping to trace.
I have a guide about the best Procreate brushes to use for tracing that can be helpful if you’re looking for suggestions.
As you can see, tracing in Procreate is pretty straightforward once you get the hang of it. That said, shouldn’t a program like Procreate be able to do this automatically?
Can Procreate Auto Trace?
Procreate does not have an auto trace feature and cannot complete tracing work for you. In order to trace objects and images in Procreate, it needs to be done manually with your stylus.
Even though Procreate has a lot of amazing features, sadly, auto tracing is not one of them.
If you want to trace anything in Procreate, you’ll need to go through the process we outlined above.
Maybe this is a feature that will be introduced in the future but, for now, we need to trace by hand when using Procreate.

Is Tracing on Procreate Cheating?
Tracing on Procreate should not be considered as cheating. Instead, it should be considered as a great learning opportunity to improve one’s drawing skills. Tracing can help you learn proportions, angles, perspective, and overall composition.
It’s important to be mindful while you’re tracing so that you get the most educational benefit out of it.
Instead of carelessly outlining the shapes, make note of how the shapes come together and how everything is formed. With mindfulness, you can come away from a tracing session with more knowledge of how to draw.
Of course, this is something you’ll need to decide for yourself. Do you want to have tracing be a main staple of your Procreate art process, or not? If you want to draw everything without tracing, that’s great! Whatever you choose depends on your own feelings and work process.
That said, don’t ever trace someone else’s original art or photograph without permission. If you are using it for your own personal learning and never plan to share it or sell it, that’s one thing. But, if you do plan to share or sell your work, you’ll be violating the original art’s copyright by tracing it.
Once you know how to trace in Procreate, you’ll open up a whole new world of opportunities for your art. Suddenly, you can better learn how to draw from images and trace over your own existing art.
Even though everyone has different opinions about tracing, it can be used for so many different purposes that ultimately benefit your ability to level up as an artist. After you learn how to trace on Procreate, you can make your own decisions about how you’d like to use the technique for your own work.


Diana has been an artist for over 27 years and has training in drawing, painting, digital drawing and graphic design. Diana’s latest obsession is digitally drawing with Procreate and Procreate Dreams. Diana has experience selling her art across a number of platforms and loves helping other artists learn how to make money from their art as well.